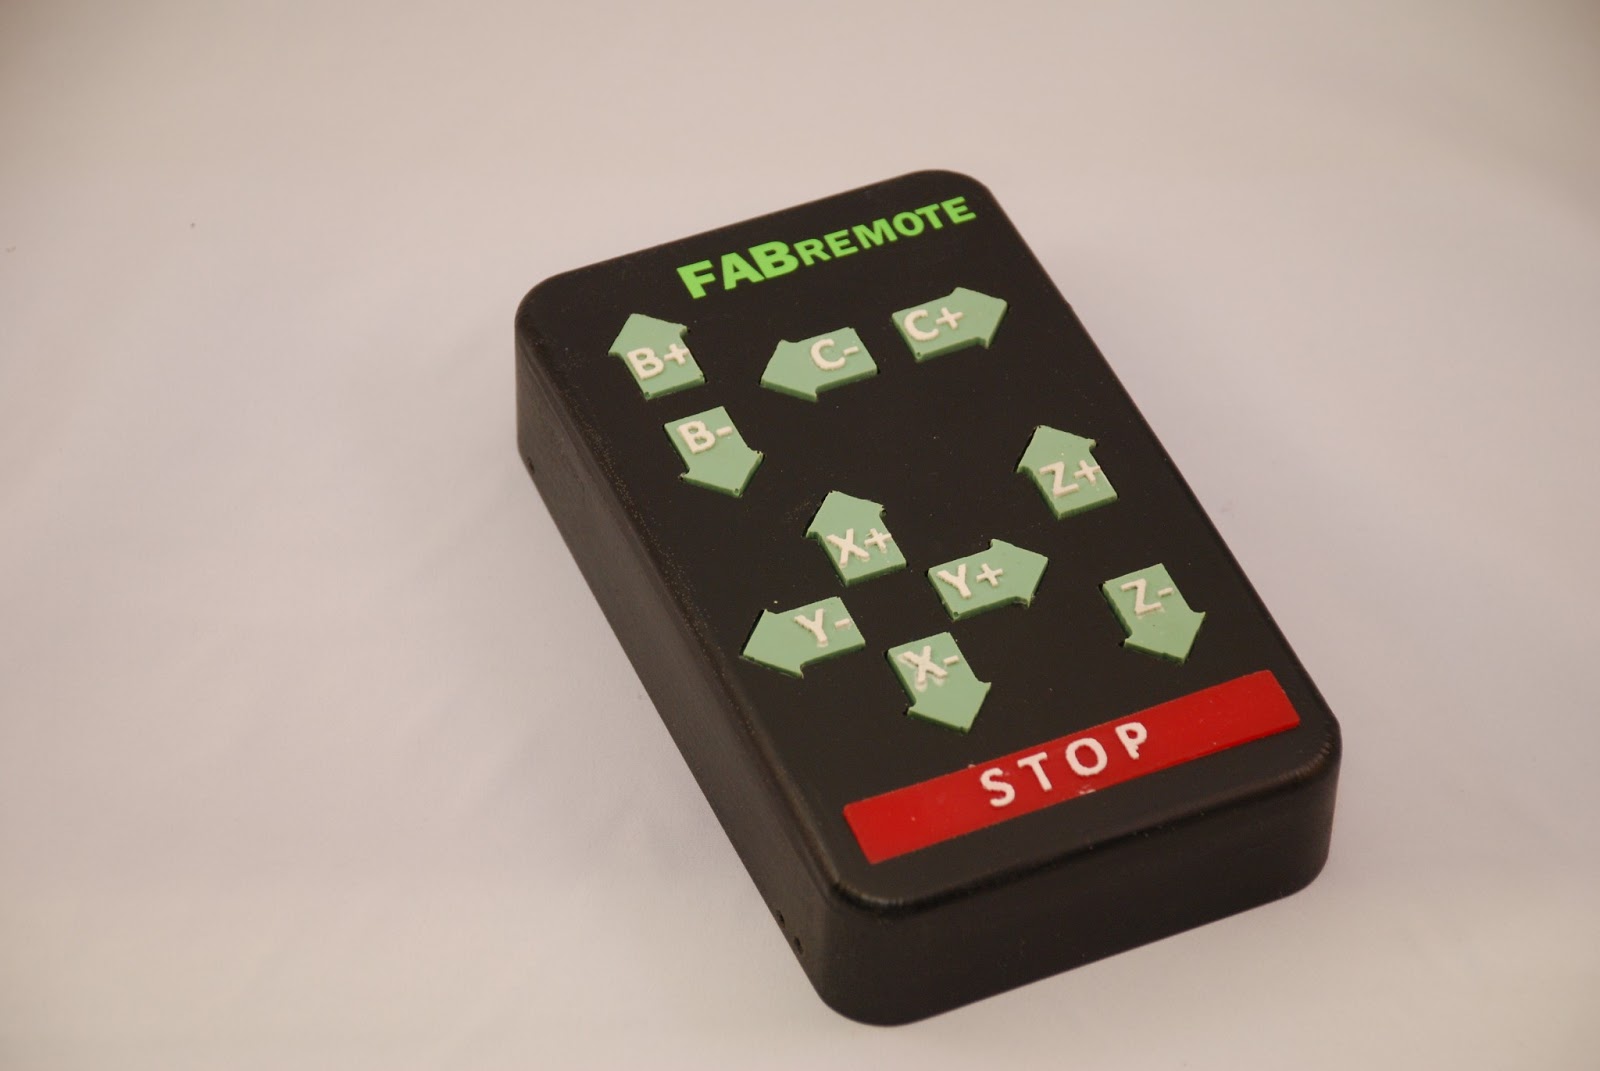


For this week, I felt the best example I could come up with for molding and casting was for what I did for a previous project where I made an enclosure for a CNC jog remote. This project required me to fabricate a wide variety molds and parts utilizing a wide range of techniques.
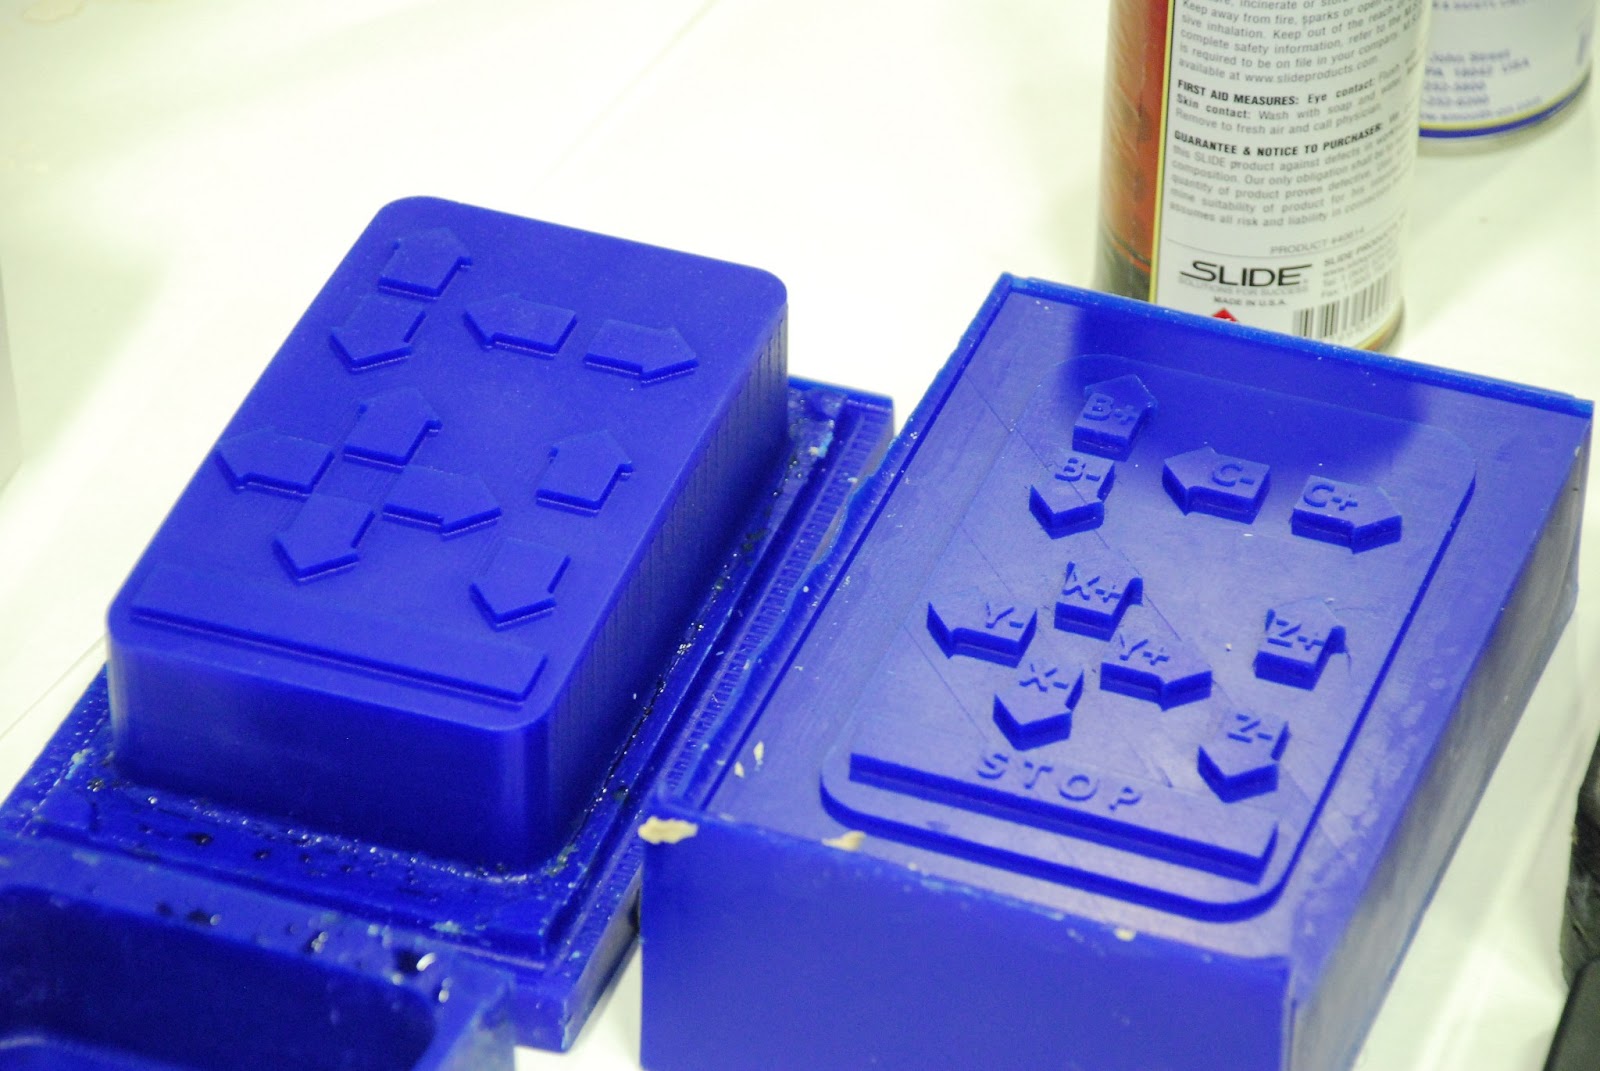
Molds- Today I tried to make a two part mold of what will eventually become a jog remote for CNC machines (allows operator to jog axes without needing to be in front of controller). I choose machinable wax to use for the mold. The first time I tried, I got poor mold wall finish due to the tool path generation from PartWorks 3D (due to the chatter from the bits) so the second round of molds I generated tool paths from MasterCam and, after some minor finishing by hand, got much better molds with a much better surface finish. Machining took several hours due to the fine details and parts were held to the table using hot glue. At one point, I was running the ShopBot Desktop and ShopBot PRS 5'X10' at the same time.
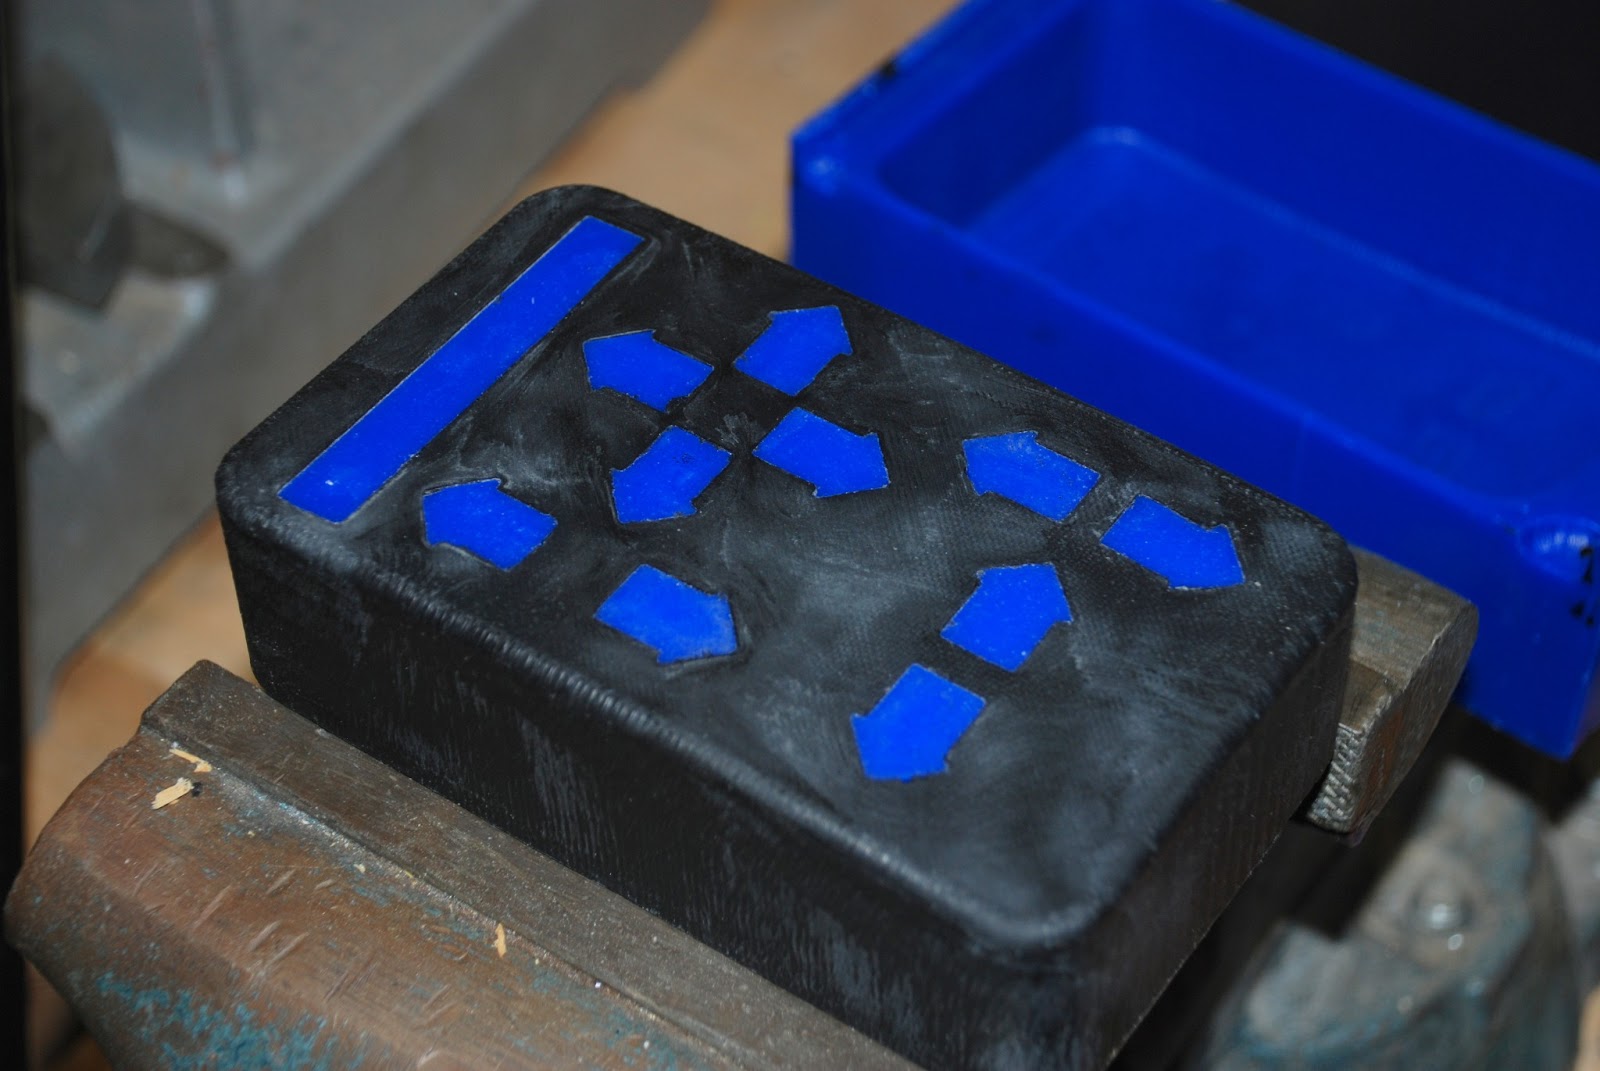
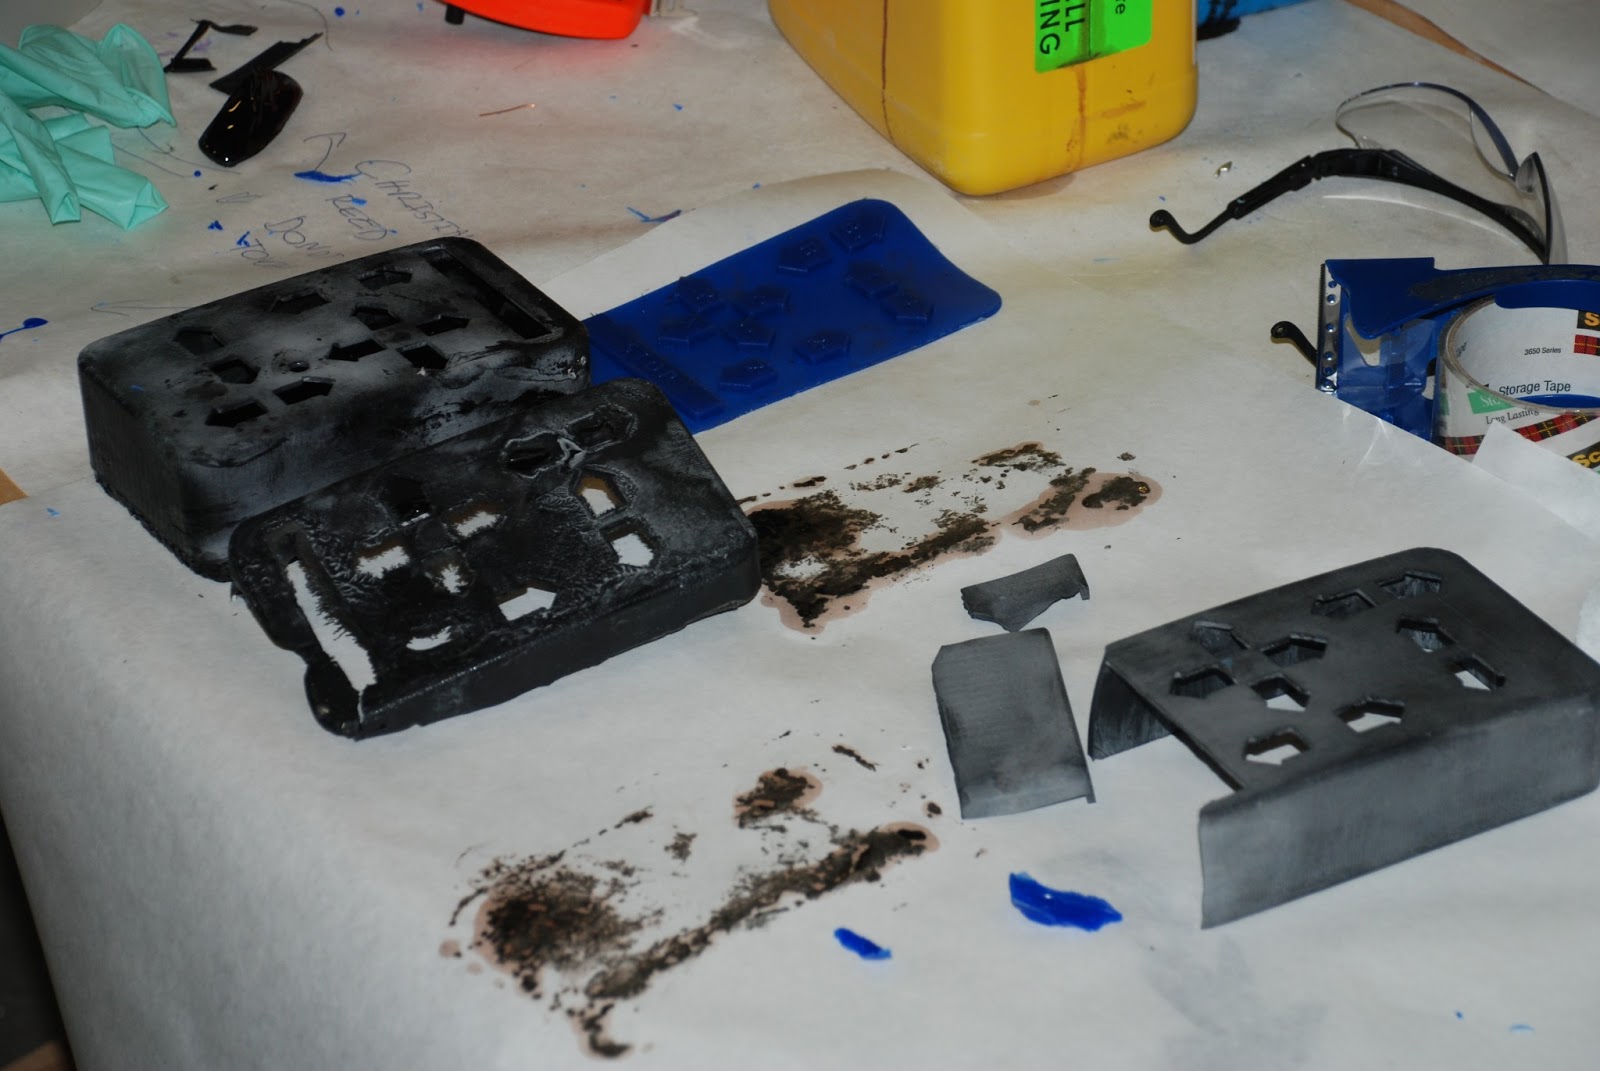
Casting - After making the first two molds out of machinable wax, I cast a few cases to try out some different casting agents from Smooth on. The first few casts came with varied results and highlighted problems with my mold design and finishes on it so I was sure to correct them when I made the molds for a second time. The pictures show some of the surface problems with the mold surface finish which were all addressed in the second round of casting.
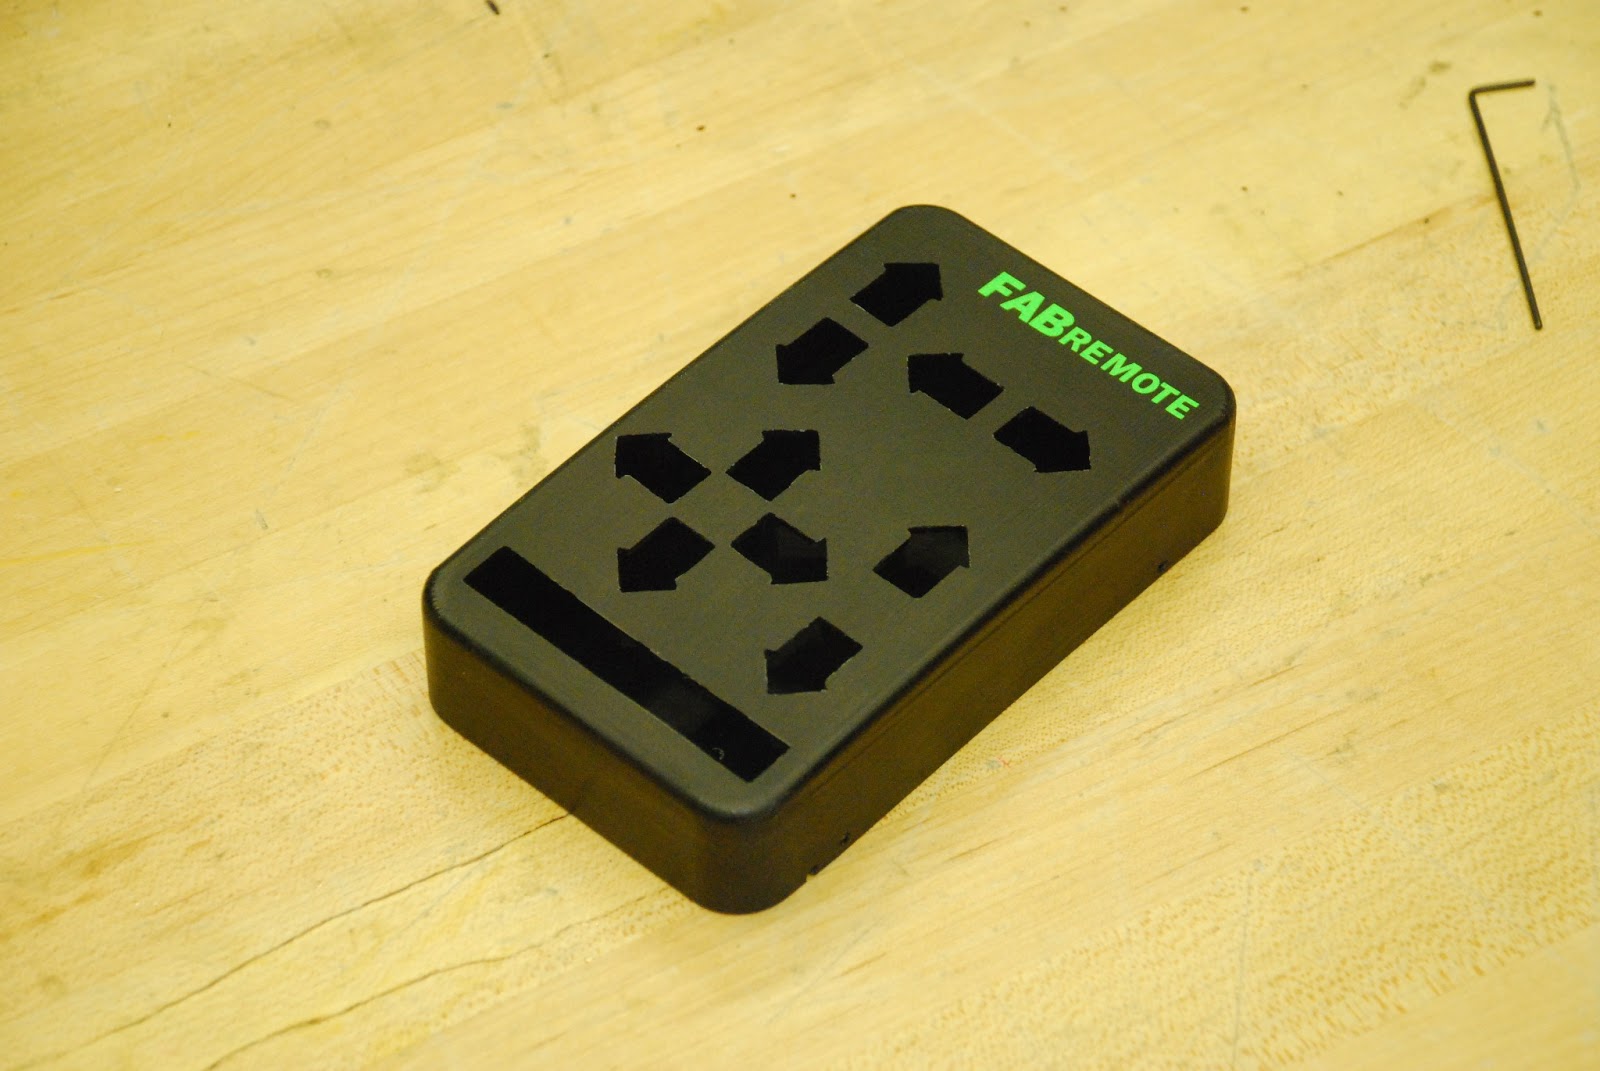
Multi Colored Casting - Finally completed both the keypad and the controller case. The keypad was a very interesting mold. I began by milling the negative but it was very hard to make a good mold using due to tooling constraints. I realized making a positive of the keypad created a much better surface finish so made one out of machinable wax. I cast a silicone mold from the positive wax mold. One I had this, negative, silicone mold, I tried a new technique of using three different colored resins. I used a syringe to inject the white resin into the letters channels. I then made a temporary wall between the red and green sections and let them merge once they were both poured. This was all done within 20 minutes to ensure that proper blending and adhesion occurred I was very happy with the results and it produced a very high quality keypad. The case came out nicely and I added some vinyl stickers to it.
Future Plans - Insert molding (laser cut acrylic and then place in mold to be casted) to explorte possible options for side pulls.