.jpg)
WEEK06 - MOLDING & CASTING
This week the assignment was about milling a machinable wax mold, cast a flexible (silicone) mold and finally a rigid component into that.
1- Idea + Design
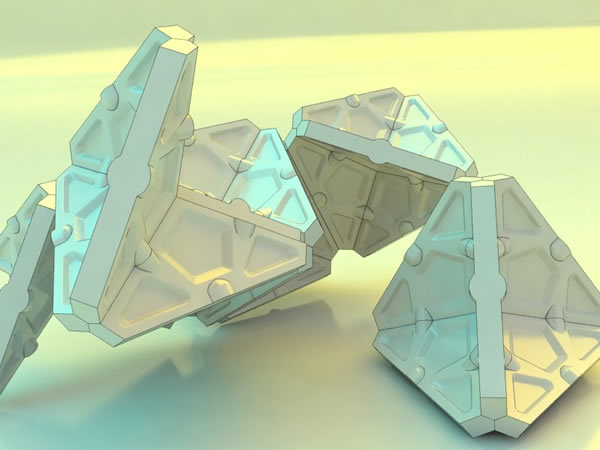
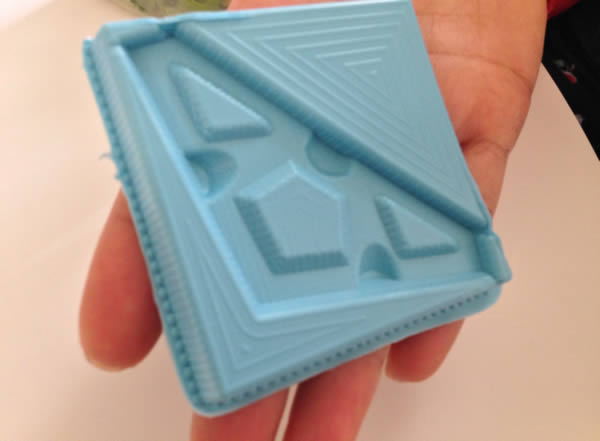
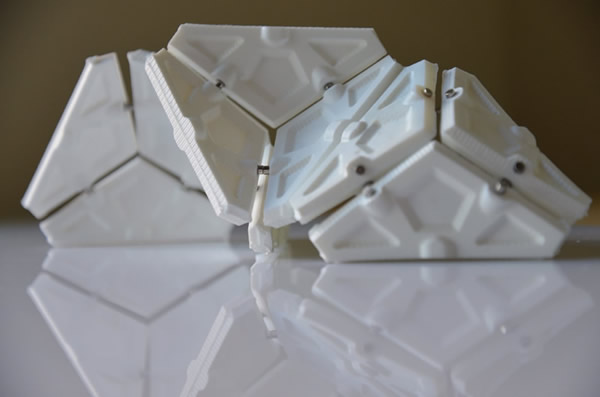
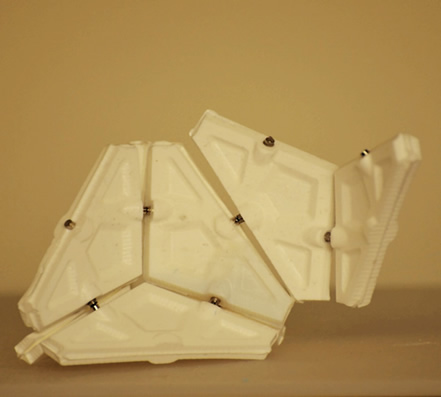
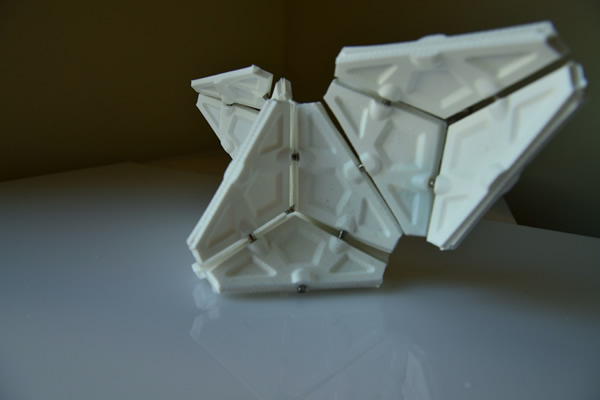
My idea - because of time limitations (time to design ,mill, and cast 2 times- was designing an aggregation system to make something complex that will allow me to find some interesting configurations by combining pieces and playing with some kind of 'folding'operations.
Playing with geometry i used a tetrahedron as a base geometry and decomposed it into a smaller unique part. I produced a initial parametric model in Rhino /GH and did some test in CATIA (just for fun and to remember how to use powercopy feature and some old recursive aggregations scripts).
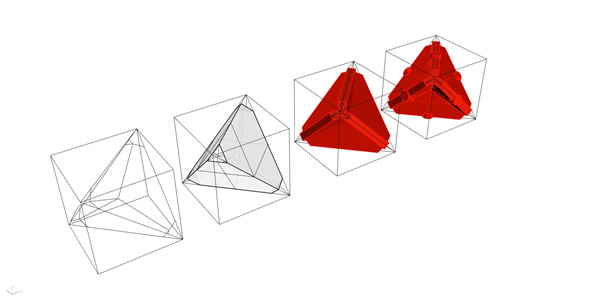
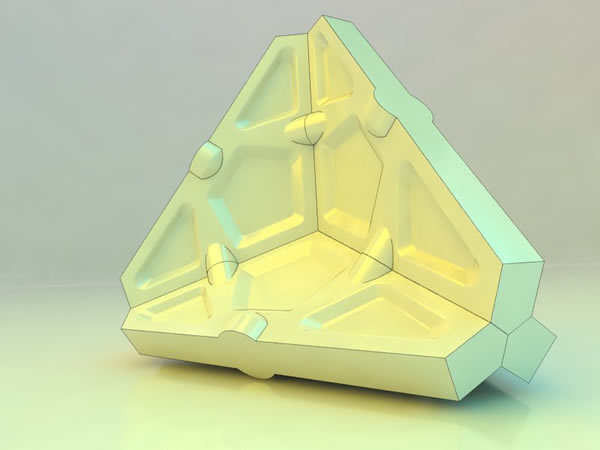
Component and final Geometry
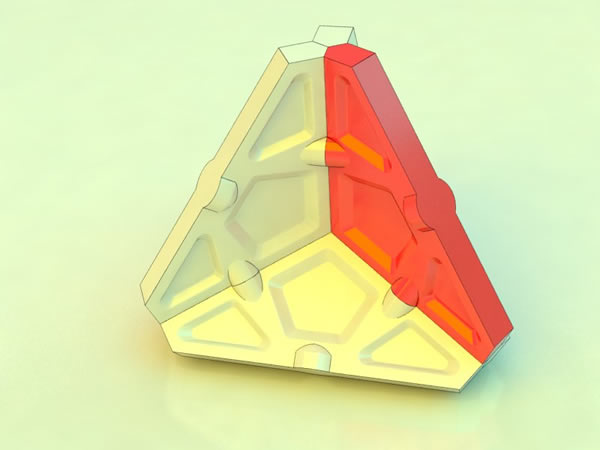
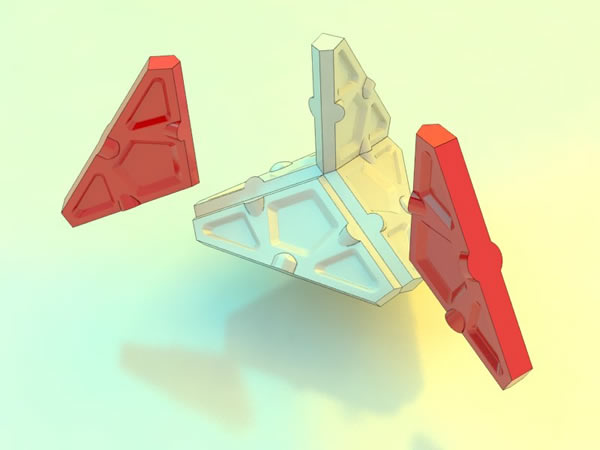
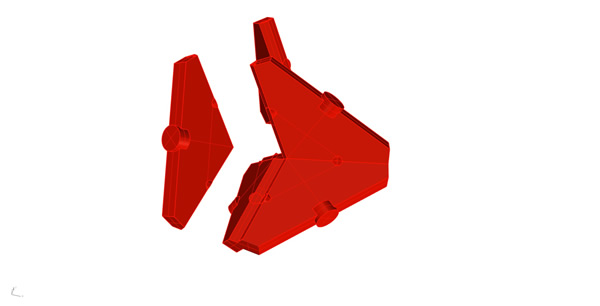
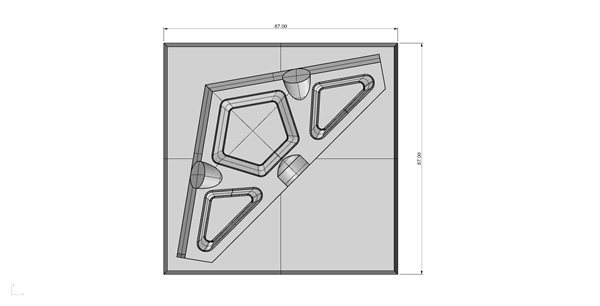
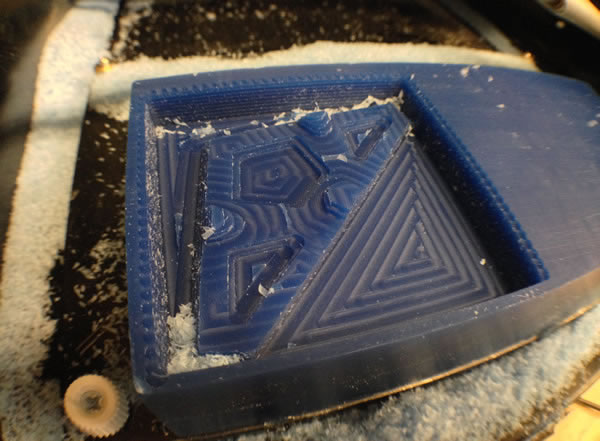
I splitted the component into 2 and produced the final geometry for the milling process.
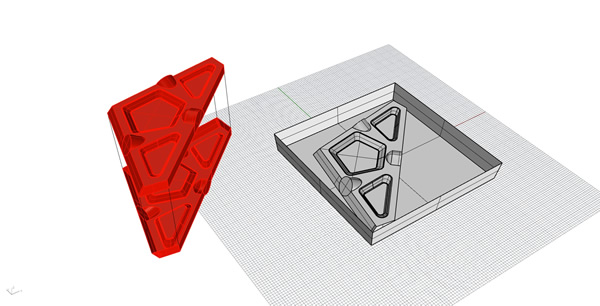
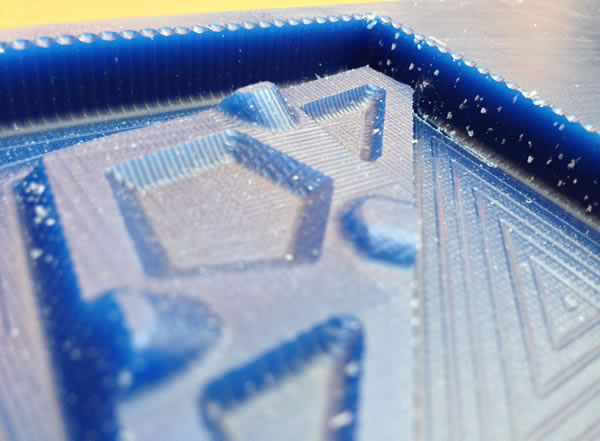
2- Milling the mold.
Using the fab modules, the process was almost the same as milling the circuit.
step 1- fix the block of wax to the table (hot glue gun).
step 2 - Adjust the endmill to the desired origin X,Y and also the z position (i used 1/8 inch ball mill for better results... some people may say it doesn't make a difference but it does!).
step 3 - import stl model > create png > roughing wax 1/8> make rpl and send!
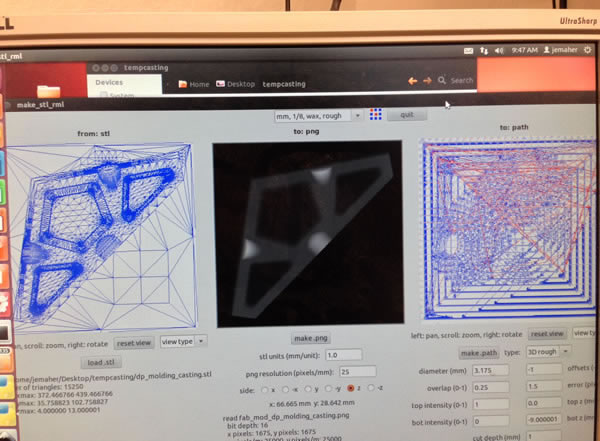
after 20 - 25 minutes, the roughing was done.
Back to fab modules: finishing > ball 1/8 with a overlap of .75 (in most software for milling this is called stepover and the lower the value , better the resolution).
sadly the fab modules only allow parallel finishing, it would be nice to have other options like spiral machining or the at least do a parallel with an angle parameter. after adjusting all the parameters, make rpl and send it!.
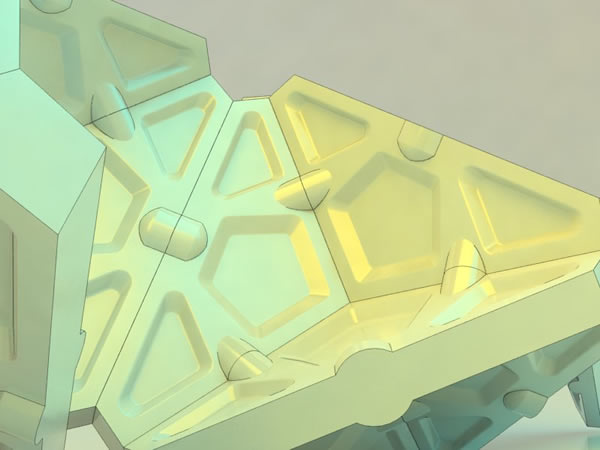
.jpg)
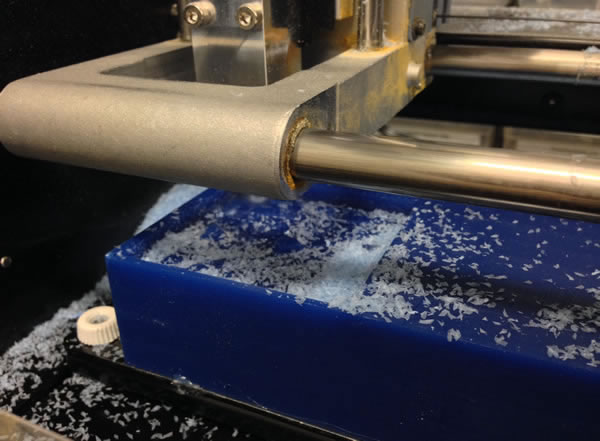
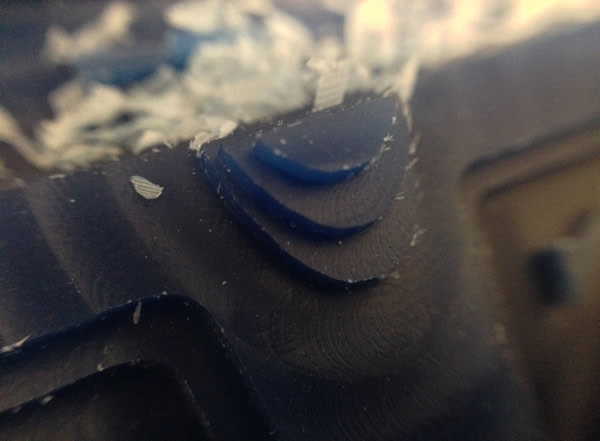
I did a first finishing with the flat endmill. i didn't like the result so i did a second finishing process with better stepover with the ball mill... it makes a HUGE difference for details!.
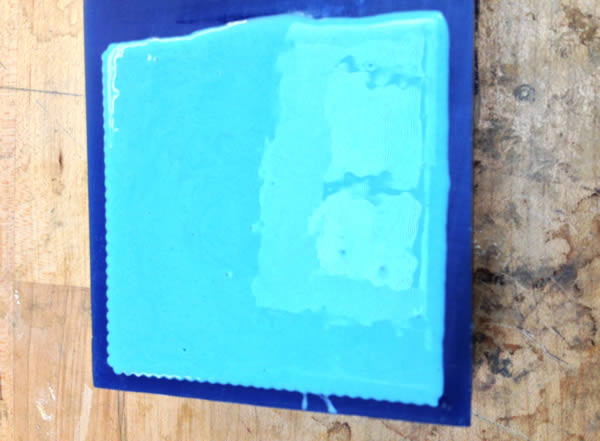
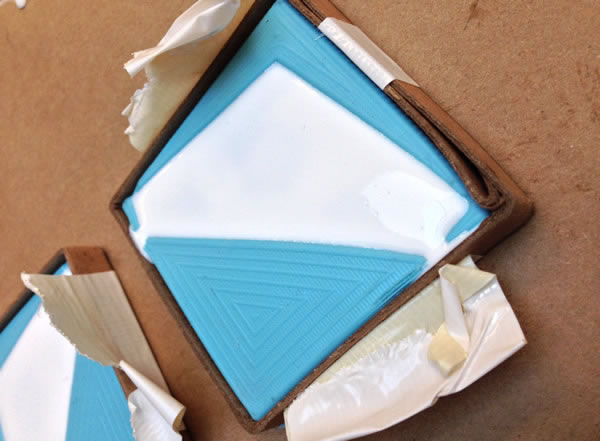
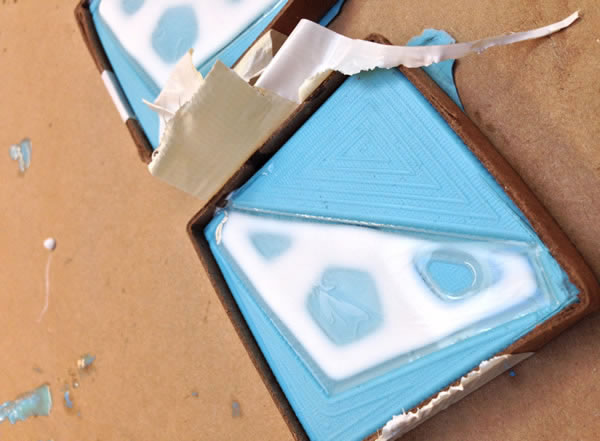
3- Casting.
I did two molds, one flexible and one rigid. i wated to try different materials. i used smooth on and omoo.
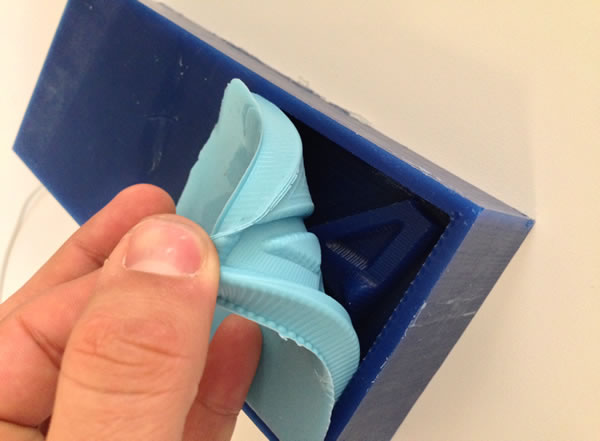
after approx. 3 hours, rigid mold was ready.
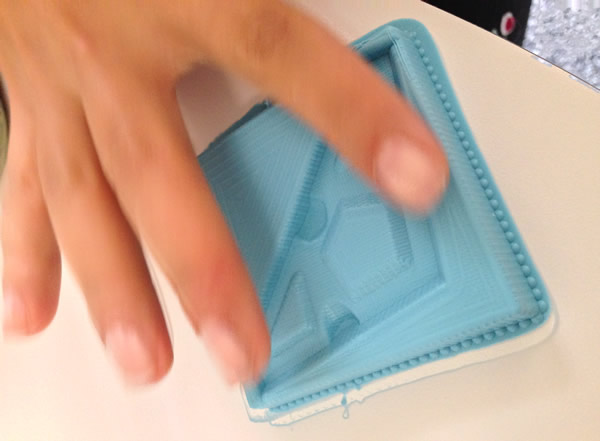
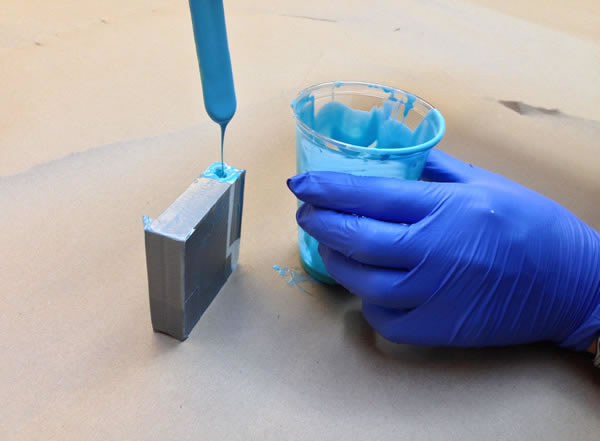
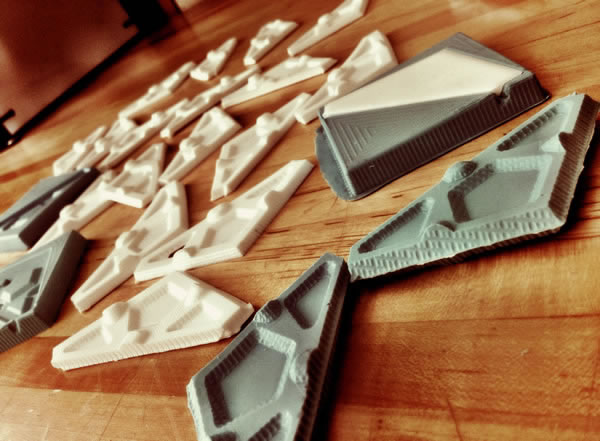
Casting the final piece: because my project needs a lot of pieces, and time was an important factor, i decided to use Smooth - Cast 300.
Pieces production was super fast, almost 4 minutes p/piece.
I produced two rigid molds (smooth - cast 300) to produce flexible pieces.
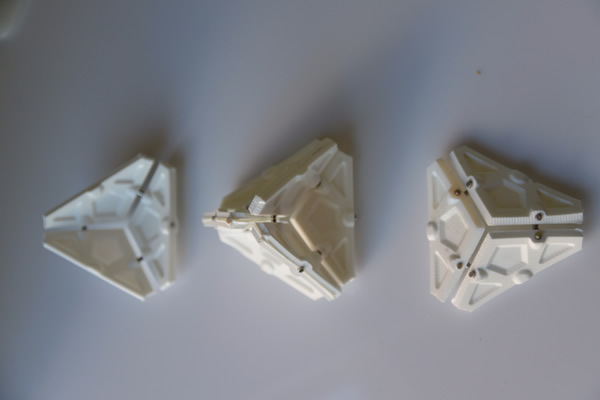
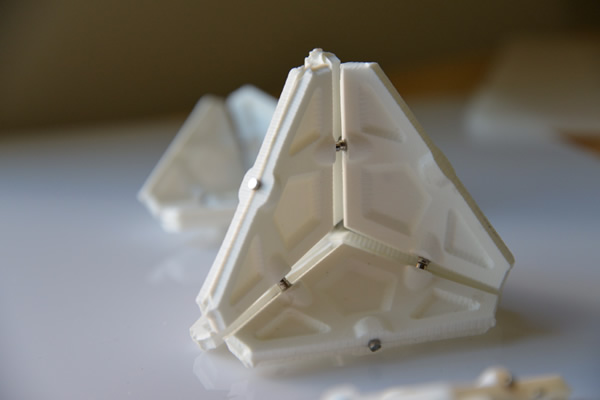
4- Final steps.
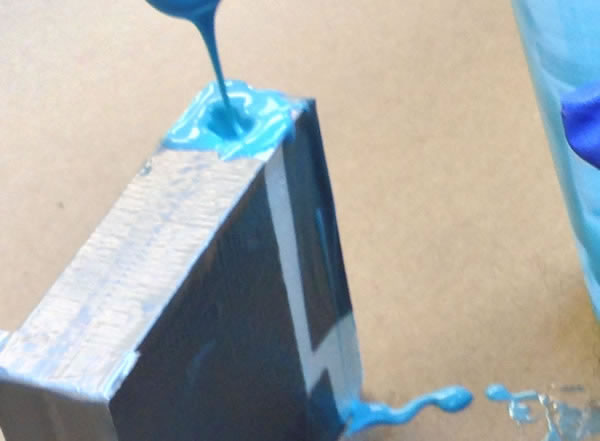
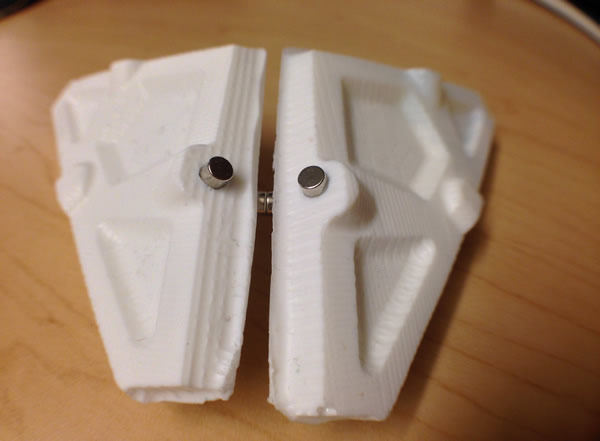
One thing that failed and had to be re-designed was the magnet joint between pieces. it was impossible to cast the pieces with the magnets , they ware too strong so keeping them in position was impossible.
I casted the pieces and drill holes to put the neodimyum magnets (1/8).
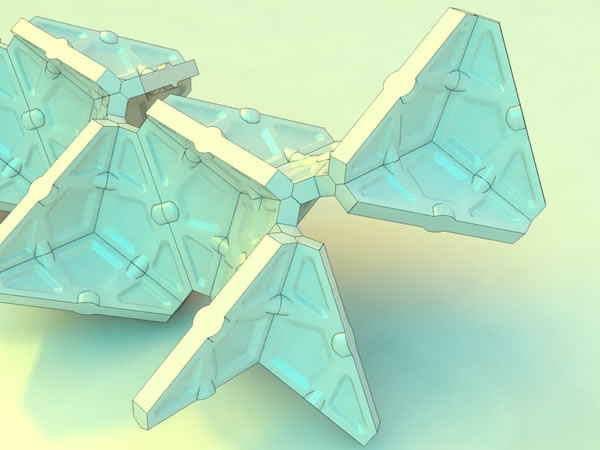
.jpg)
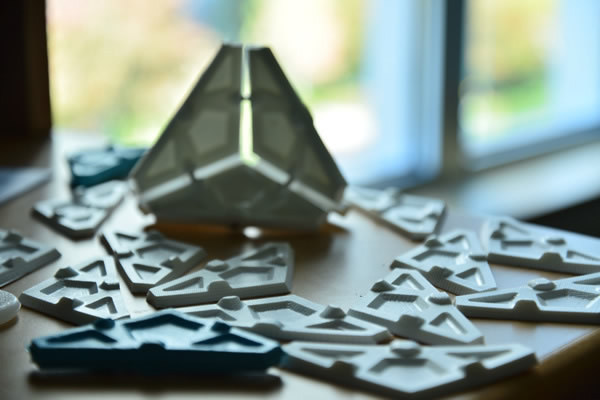
Final model.
.jpg)