Final Project: Boxcat
Even MIT students need inanimate objects to sympathize with themThe idea for this final project, quite honestly, came out of a lot of stress and agonizing over what to do for a final project - and then realizing "hey, maybe I should make a pet I can complain to, instead of annoying everyone else sitting in a 10-meter radius." Hence, Boxcat.
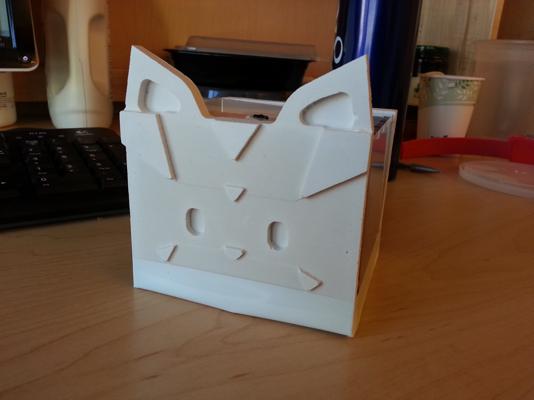
Boxcat is a boxy cat critter that listens to you talk to it, yell, complain, etc., and responds with either sympathetic or amused beeping, because cats really don't care that much about your human problems. (But in a pinch, it can substitute for a roommate to yell at.) It contains a microphone, amplified to receive sounds at a decent range, an LED to display when sounds are being received, and a MOSFET speaker which produces sounds in response to microphone input. An on/off switch is hooked up so you can keep Boxcat quiet when you're just not in the mood for sympathetic buzzer noises.
Designing and Building Boxcat
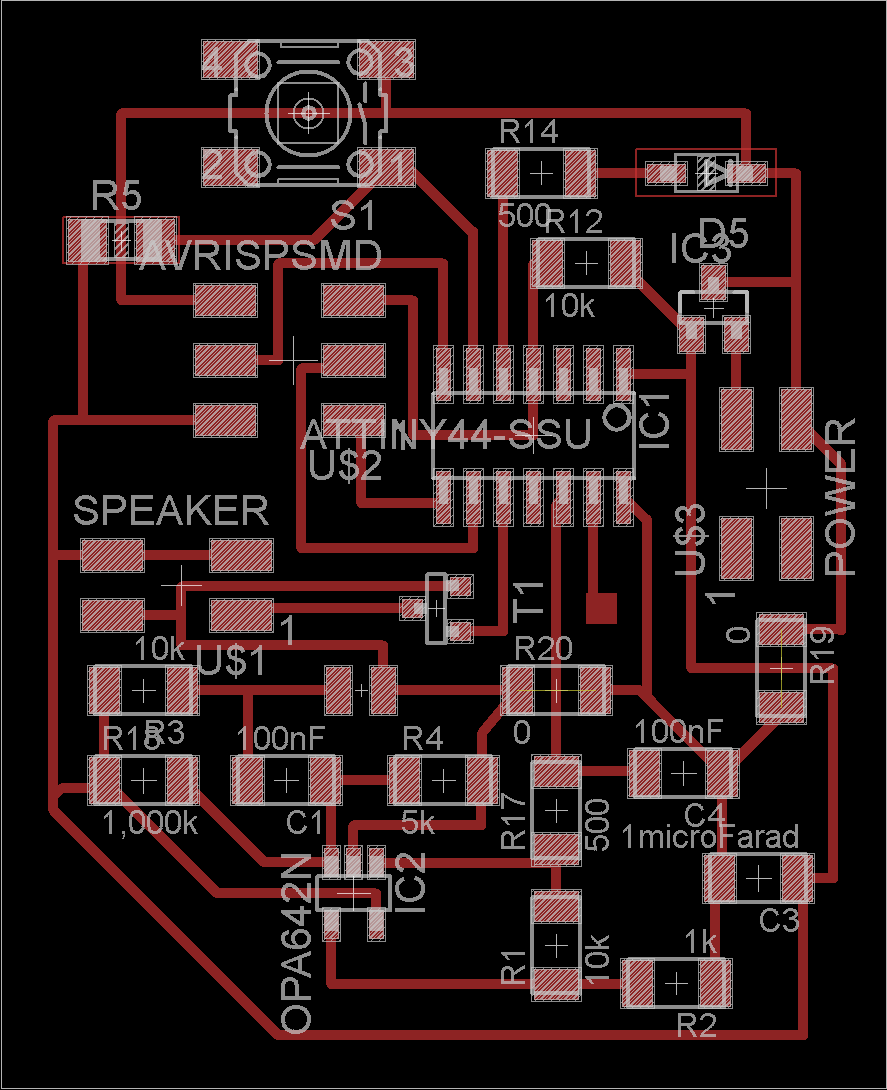
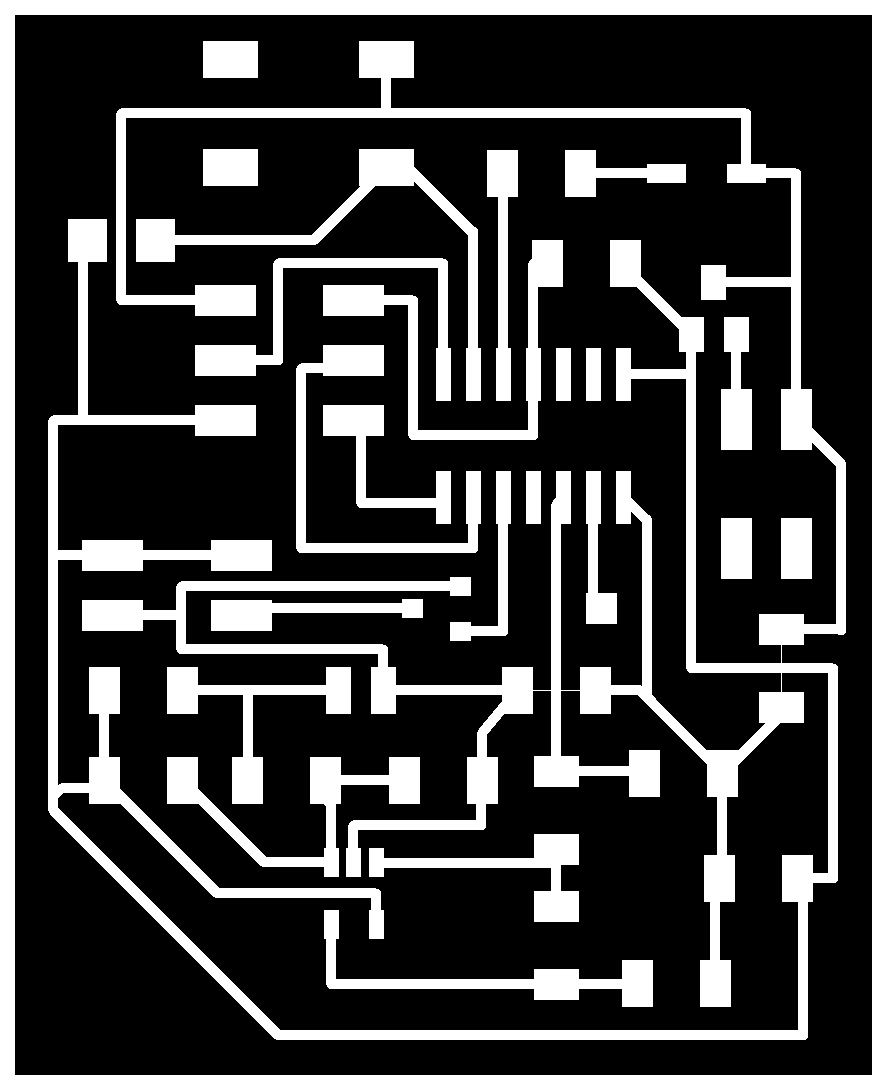
I built the various components of Boxcat from scratch, but in terms of circuitry, relied heavily on examples and inspiration from other classmates. Below I'll describe each component and document any issues I ran into during the process.
3D Molded Face + Tail
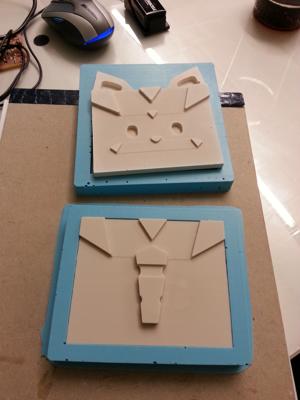
I built these in FreeCAD, milled them with the shopbot, and cast them in Hydrostone using Oomoo molds. More details on the molding itself can be found on myMolding and Casting page. While the construction of these parts was pretty successful, I believe I could have made them more effectively, as described below.
One issue I discovered not during molding, but during assembly, was that hydrostone physically can't be "glued". Because hydrostone is basically plaster, any attempts at attaching adhesives to it ends up with a thin layer of plaster peeling off uselessly. This meant there were very few ways of attaching the cat's face and tail to the rest of its (acrylic) body, short of rubber-banding the whole thing together. I accomplished this by covering the bottom surface of Boxcat with a sheet of white vinyl and looping it around the entire box, simulating the cat's belly while at the same time holding the hydrostone blocks together.
If I had more time, I would have used the Dimension printer to 3D print a plastic version of the face and tail, which would both be sturdier than hydrostone (less shatter-prone) and actually be easily attachable to the body.
2D Body
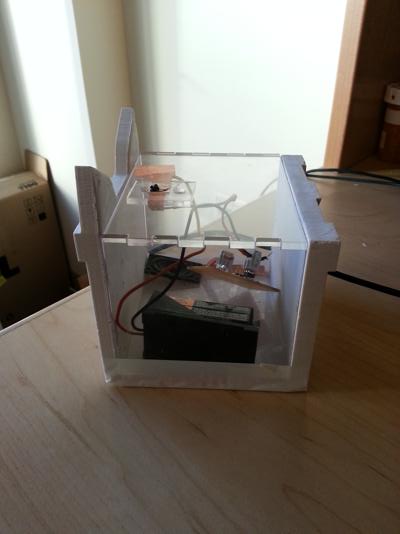
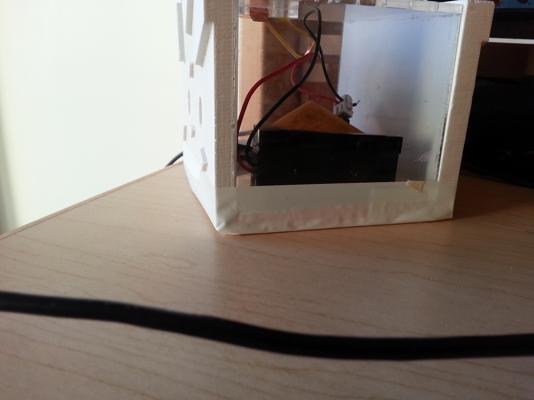
I laser-cut acrylic panels to form the transparent body, and used a sawteeth design for the edges to fit them together.
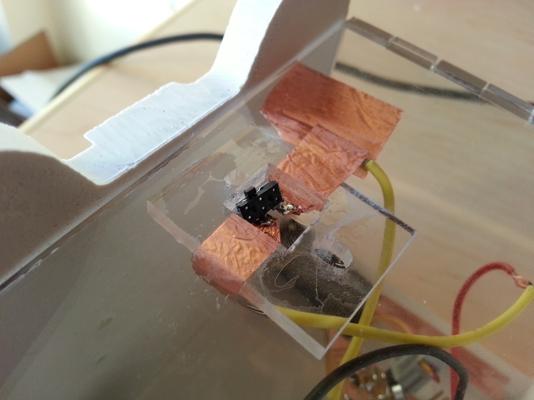
Although the acrylic I used seemed to be 1/8in, the saw teeth I used for the edges ended up being too large, so the body wouldn't stick together purely through press-fit. Furthermore, neither rubber cement, Gorilla Glue, or super glue seemed to work on acrylic pieces. The solution I finally decided on involved copper tape; for some reason, super glue bonds copper tape to acrylic very well, so I simply covered the saw teeth in copper tape and then super glued them together.
Copper tape at the joint
Input/Output
I had a... heckuva time with this part of the project.
On the input side, it took me nearly ages to figure out why my microphone board refused to respond to any inputs whatsoever, despite programming fine. Mohit Kansal finally demonstrated to me that the microphone board design in hello.mic was too weak to output visible signal on its own, and needed an op-amp to boost its detection. Incorporating Mohit's op-amp design finally gave me a microphone board that responded to sounds well.
On the speaker side, I had an equally frustrating time figuring out why my speaker board, functionally identical to hello.speaker, wasn't outputting any sound whatsoever. It turned out that the Arduino-attiny core included in the hi-low tutorial did not support Arduino's tone() function, so I searched around and found one that did: arduino-tiny. Following the readme.txt included in the download, I was able to get arduino-tiny's boards to show up in my Arduino IDE, and building code using arduino-tiny's boards allows me to use the tone() function.
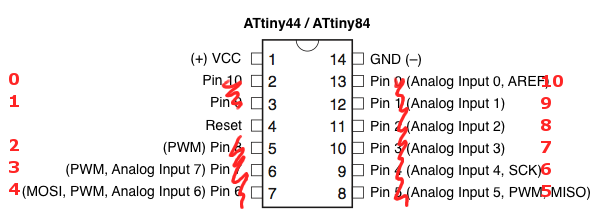
HOWEVER: arduino-tiny differs from the hi-low tutorial attiny core in one important way, especially for attiny44s: its digital pin->physical pin mappings are reversed, going from 0 at PB0 to 10 at PA0, instead of 10 at PA0 to 0 at PB0. This is shown in the below diagram.
After figuring out the tone() issue, I moved the speaker part of the circuit onto the microphone board itself, since I didn't necessarily need logic from a second microcontroller.
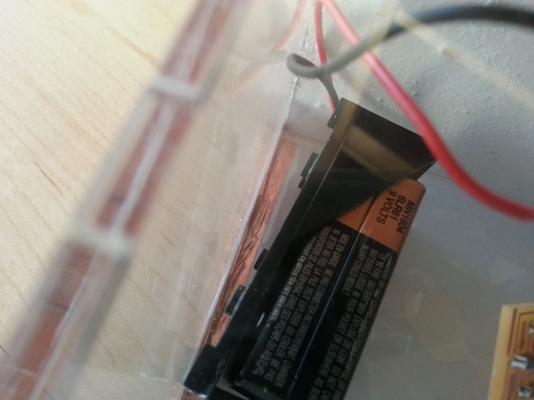
Finally, I added a switch (the above board has a button, but it's obsolete) whose main function was to turn the circuit on and off, by sitting directly in the path of VCC. Since this switch had to be accessible from outside the Boxcat, while the board, speaker, and battery were all inside, I cut a hole in the top surface of the cat's body, used copper tape to both hold the switch in place in the hole and provide conductive space to attach wires, and finally anchored the switch by gluing a second piece of acrylic underneath it.
Programming
I wrote the Boxcat's responses using the Arduino IDE and the above-mentioned arduino-tiny core. I also took advantage of Arduino's included pitches.h file for note frequencies. The full code used to program the cat is included.
I wanted to write a call-and-respond function more than a "make sounds when the microphone detects anything at all" script. However, the very limited memory size of the attiny44 meant I didn't have very much room to write a more complex sound-making function after importing pitches.h. So at the moment, the cat either beeps one note (if the input received was short) or two notes (if slightly longer). I'd like to include at least one instance of a melody, once I can shrink the memory down (perhaps by removing unneded notes and not using the import statement).
Other Reflections
All materials were taken from the basic inventory in the IDC Hobby Shop. I think the most expensive single object might actually have to be the Oomoo used to mold the cat's face and tail, but in general this design shouldn't take more than $10.