Serial Interfacing with Computers
I am a code monkey and know not of this "hardware failure" you speak ofThis week's assignment was to code up a user interface on a computer that could be used to interact with an input or output board, via a serial port. I tried to divide this project into several different sections; some were more successful than others.
Java to Serial Port
Java was my most familiar and recently-used language, so I decided to build the framework for my UI and serial communication in it. This decision was helped by the Arduino Interfacing with Java guide, which both provided sample code and links to the relevant libraries (as well as installation instructions for various OSes). I used the Eclipse IDE on Windows for simplicity's sake, and describe below my steps for building the Java code and any errors I ran into.
Setting up the project in Eclipse:
- Create a new Java Project and name it SerialTest. Hit Finish.
- In the Project Explorer, expand SerialTest.
- Right-click on the SerialTest/src folder and select New Class; name this SerialTest as well. Ignore the other checkboxes.
- Open the newly created SerialTest.java file, and copy-paste the entire code sample from the Interfacing with Java guide. You should see a few errors indicated by red lines, the first of which are under the "import gnu.io....." statements. We'll fix those in the next steps.
Imports and required libraries:
The project is currently missing RXTXcomm.jar (which contains the gnu.io.* imports, which handle actual serial communication) and rxtxserial.dll (which RXTXcomm.jar needs to run). You can download both from the below links.
Make sure you get the right version for your machine AND Eclipse installation; 32-bit code won't run if you have 64-bit Java and Eclipse installed.
Once you've downloaded and extracted the folder somewhere, you should find RXTXcomm.jar and rxtxserial.dll somewhere in the folder. The Interfacing with Java tutorial recommends adding them to your PATH, but that's not necessary in Eclipse if you're going to continue building upon SerialTest.java. Instructions for adding them into the SerialTest project are below.
- Right-click on SerialTest, select Properties->Java Build Path->Libraries.
- Click "Add External JARs" and navigate to the folder you unzipped your files to. Select RXTXcomm.jar.
- RXTXcomm.jar should appear in the list of libraries. Expand it and right-click on "Native library location", which should be empty.
- Browse again to the folder where rxtxserial.dll is, and select that folder. Native library location should now be filled in.
- Hit OK to save your library changes. The red errors around the gnu.io.... imports should disappear.
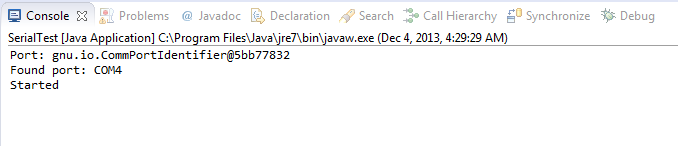
You can now try to debug your new project by running it (F11). If you don't have a serial-capable board attached, however, no ports will show up. You can add print statements to the initialize() method to have the program print out the name of your port, as below:
	//First, Find an instance of serial port as set in PORT_NAMES.
	while (portEnum.hasMoreElements()) {
		CommPortIdentifier currPortId = (CommPortIdentifier) portEnum.nextElement();
		System.out.println("Port: " + currPortId);
		for (String portName : PORT_NAMES) {
			if (currPortId.getName().equals(portName)) {
				System.out.println("Found port: " + portName);
				portId = currPortId;
				break;
			}
		}
	}
Once you know what ports you're using, there's one last thing you have to change: replace the name of the port in the below code (the entry that corresponds to your OS) with whatever your port is named.
	private static final String PORT_NAMES[] = {
			"/dev/tty.usbserial-A9007UX1", // Mac OS X
			"/dev/ttyUSB0", // Linux
			"COM4", // Windows
	};
Common errors
- java.lang.UnsatisfiedLinkError: no rxtxSerial in java.library.path thrown while loading gnu.io.RXTXCommDriver
- This occurs when you forget to update "Native library location" in RXTXcomm.jar. Go over the above import steps again.
- java.lang.UnsatisifedLinkError: Can't load IA 32-bit .dll on a AMD 64-bit platform
- This occurs if you downloaded the wrong version of the rxtx libraries for your OS or Eclipse version.
The Unbearable Lightness of SoftwareSerial
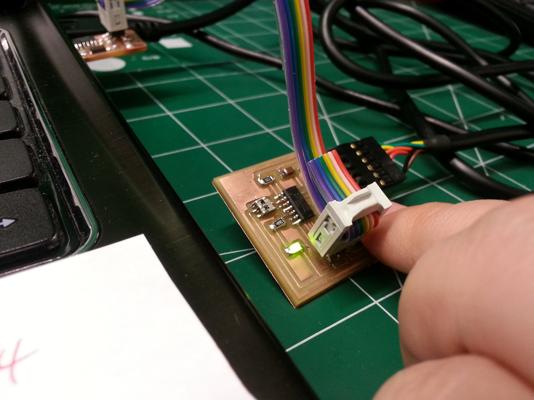
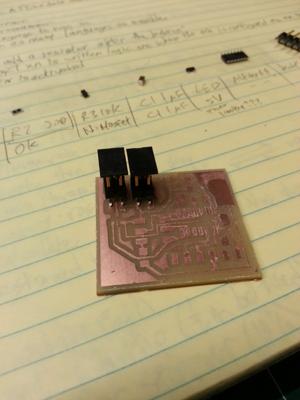
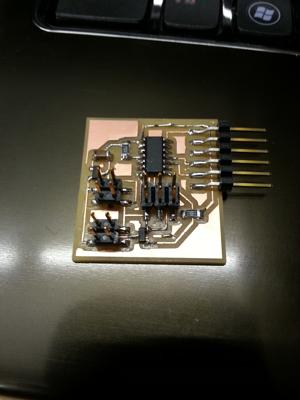
Here is where I started running into problems with serial communication. I decided to use the board I made for Embedded Programming (which had an FTDI cable and rx/tx pin connectors) to test serial input and output with the Arduino IDE's SoftwareSerial class, before moving onto a more complex board. However, *regardless* of what I sent to output, or even which rx/tx pins I used, nothing showed up on the Serial Monitor.
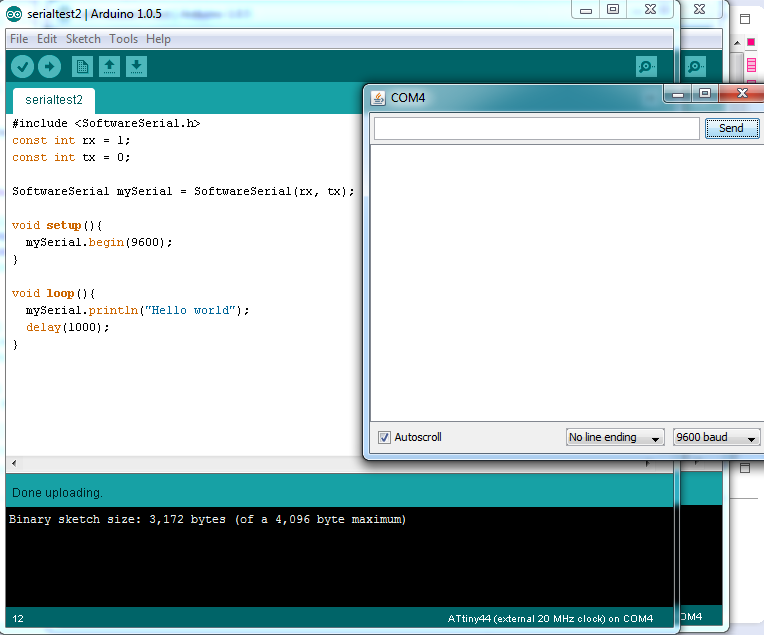
I made modified Button code to see if user input would do anything, as below:
#include
const int rx = 1;
const int tx = 0;

const int buttonPin = 3;     // the number of the pushbutton pin
const int ledPin = 8;      // the number of the LED pin
int buttonState = 0;         // variable for reading the pushbutton status

SoftwareSerial mySerial = SoftwareSerial(rx, tx);

void setup()
{
  mySerial.begin(9600);
  mySerial.println("Hello world");

  // initialize the LED pin as an output:
  pinMode(ledPin, OUTPUT);
  // initialize the pushbutton pin as an input:
  pinMode(buttonPin, INPUT);
}

// Print the state of the LED
void loop() {
  // read the state of the pushbutton value:
  buttonState = digitalRead(buttonPin);

  // check if the pushbutton is pressed.
  // if it is, the buttonState is HIGH:
  if (buttonState == LOW) {
	// turn LED on:
	digitalWrite(ledPin, HIGH);
	mySerial.println('High');
  }
  else {
	// turn LED off:
	digitalWrite(ledPin, LOW);
	mySerial.println('Low');
  }
}
... but mySerial continued to refuse to output anything, even though the button-led worked perfectly.
Because I was functionally unable to get any response from the board, I wouldn't be able to debug any UIs I ended up building (using Java Swing and etc.), so I set that aside for the moment and tried instead to design another FTDI-serial-capable board which *would* respond.
Not with a Bang but a Whimper
So in my haste to make a functional speaker board (which I'd be able to use with a keyboard-UI) I made two terrible mistakes in design.
The pins for attaching the speaker and the battery pack were far too close to each other, making it impossible to put both on at the same time - which negates the whole purpose of a speaker board.
I tried again, but this time managed to put the power plug too close to the *programmer* instead - so now the board couldn't be programmed, and any attempts made at squishing all the plugs into the same space ended in failure. As this board took up the last 2x3 header in the lab, I decided to stop here before I fell asleep with a soldering iron in hand. Next week/final project will be occupied primarily with getting a *working* speaker board.