Making Big Things
You don't notice how polished wood furniture is until you've tried to use OSB
Bsically: I made a minitable.
My dorm room has limited space, and I'll be moving out of it in less than a year; anything too large and complex would have ended up immediately in the trash bin, or cluttering the IDC shop. I also wanted a separate desk I could work on my laptop from, instead of having to shove my desktop out of the way every time I needed to use my laptop in my room. The table above looked quite pretty and had an interesting pattern in the legs I wanted to emulate, so I decided to make a mini-laptop-table by replicating its design as much as possible, without using other forms of adhesive or nails.
I almost immediately ran into the issue that the material I wanted to use - OSB (OR SO I THOUGHT) - was only about 7/16th of an inch wide. The table above had very thick wood panels for its face and "feet", and the legs were obviously carved from larger blocks. I thought about trying to emulate the thickness by layering the material, but gave up on that after realizing it would just make the table even heavier to carry back.
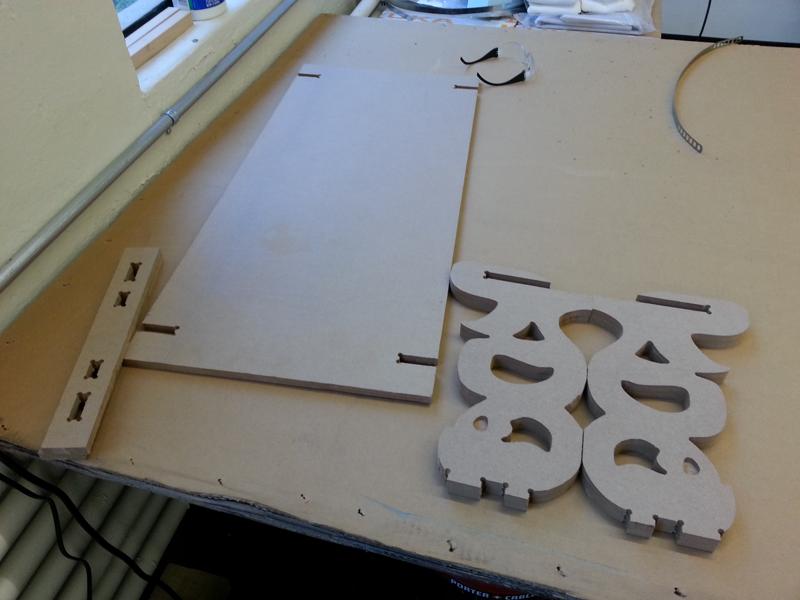
To account for the thinness of the table face, I modified the top of the legs, where they attached to the face, to slot into the face from the side instead of from the bottom. There would be two symmetric legs on each side, which once slotted into the table face, would be locked together by the table "feet" and their bottom tabs. The schematic, drawn in Inkscape, is shown below.
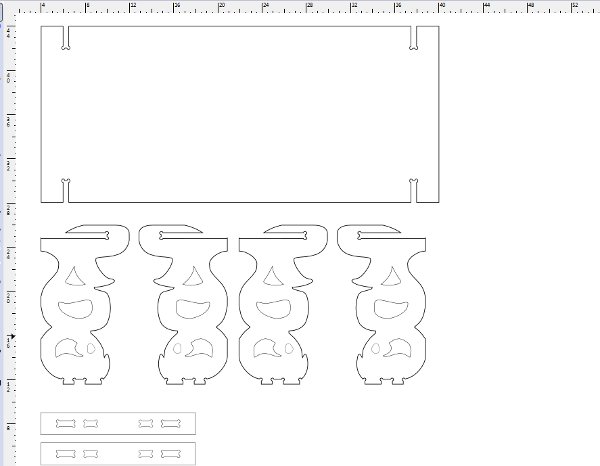
But when I went into the shop to cut this design on Sunday, I realized what Oriented Strand Board (OSB) actually was and how terrible of an idea it would have been to make a tabletop out of it (splinters everywhere). I ended up requesting a sheet of MDF, from which I cut out the above design.
I did the cutting in four stages, outlined below.
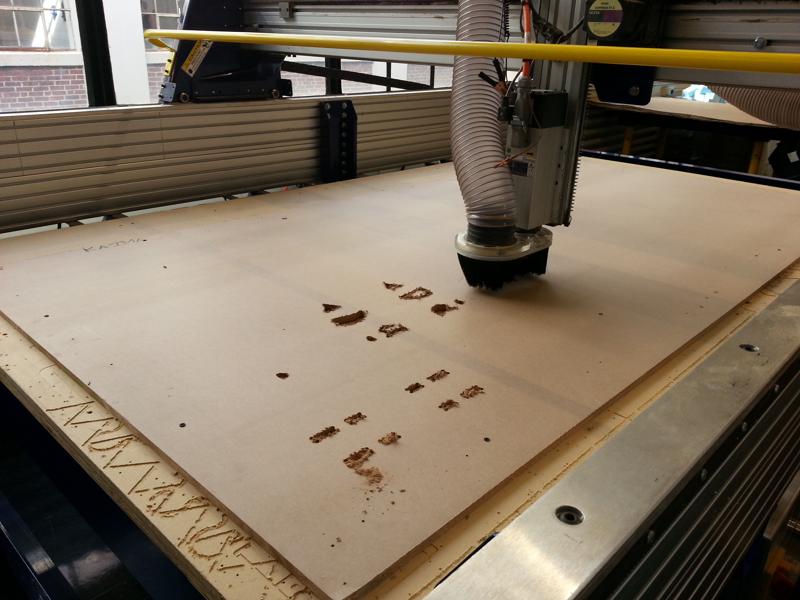
- Add tiny drill-paths such that the shopbot would drill holes into the material around its borders. This let me accurately position the screws needed to fasten to the material to the sacrificial layer below, without risk of the shopbot's drill bit running into them. This step was done using a 1/8in drill bit instead of the 1/4in endmills the next three steps would use.
- This stage suffered some setbacks when I forgot to start spinning the drill head, resulting in the shopbot shoving the (unmoving) drill bit straight through the material, where it got stuck. Thankfully nothing broke, and the rest of cutting continued as usual.
- Make a pocket cut path which cuts out only a little of the surface of the board, for decorating the legs. I fastened the board to the sacrificial layer beforehand and zeroed the shopbot, and did not change zero settings for the rest of cutting.
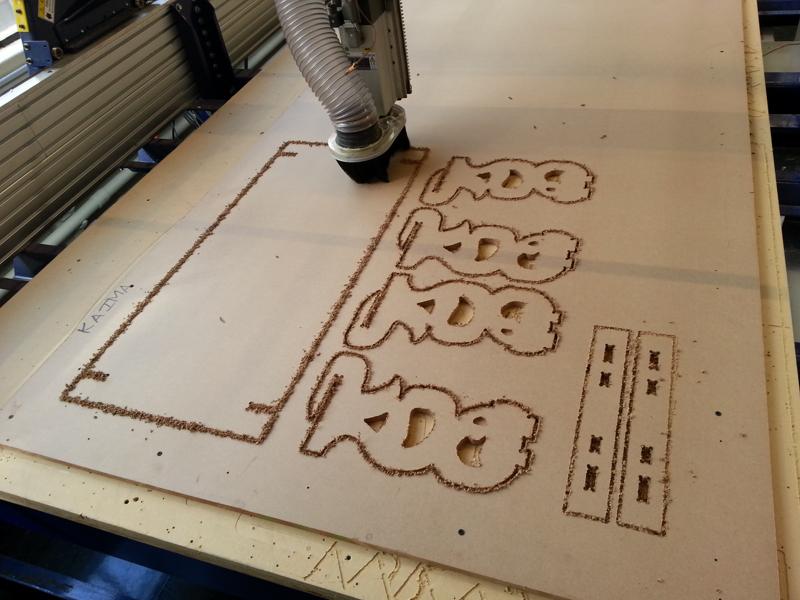
- Make an interior-cut path which cuts decorative holes through the table legs, and slots into the table feet where the legs would fit. Some of the cut-out pieces went flying, thankfully into the attached vacuum. I see now why tabs are useful for large pieces.
- Make an exterior-cut path which cuts out the face of the table, the legs, and the feet. I attached tabs to the sides of each of the pieces to make sure they wouldn't fall out. Here, I made a mistake in cutting by setting the cut depth to exactly the height of the material (.5in), which led to some parts not being cut through fully. Next time I'll go a little over.
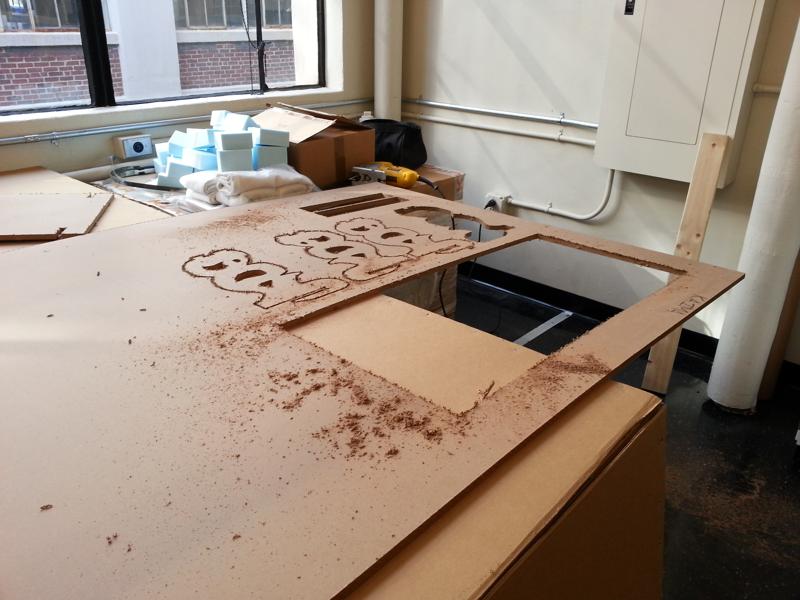
Finally, after the cutting finished, I had to actually cut through the tabs and remove the pieces from the rest of the material using a jigsaw. An in-progress picture below shows how absurdly messy this process is, and why the IDC shop's regular members might have gotten understandably angry with us. (shopvacs are our friends) Also, someone came by later and pointed out the disposable mouth guards they had in the shop; I have enough sawdust in my lungs now that I'd most likely use one the next time I had to use a jigsaw to cut anything.
The result, after a good amount of sanding, was actually pretty clean and smooth - but when I tried to put the pieces together, I realized that I'd overestimated how wide a slot would need to be to fit a .5in piece of MDF. Using .51in wide slots, the legs wobbled noticeably and the foot pieces wouldn't stay on if the table were held in the air. If there is a next time for table-building, I'll err on the side of smaller slots instead of larger ones; I can always sand smaller slots, but there's not much you can do with too-large slots. Still, the resulting table fits well into my dorm room and I look forward to using it.