
This week we are tasked with communicating. We are assigned with the task of designing microcontroller boards that talk to each other in a networked fashion
Some ideas for this week are
I read once that the key to a long and happy life is unfinished projects. At this rate I'll live to be three hundred and forty.
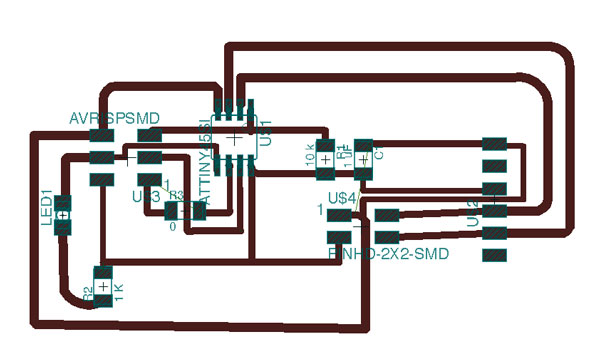
My bridge components in board view in Eagle
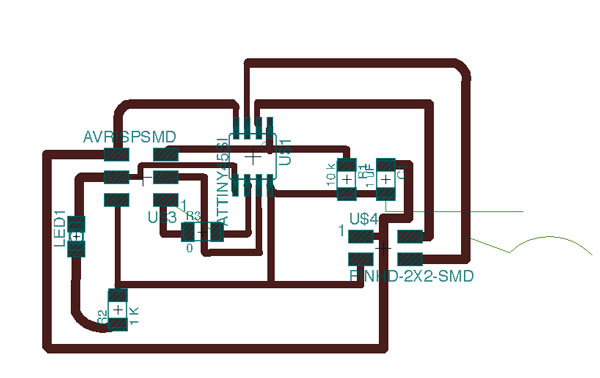
My node components in board view in Eagle
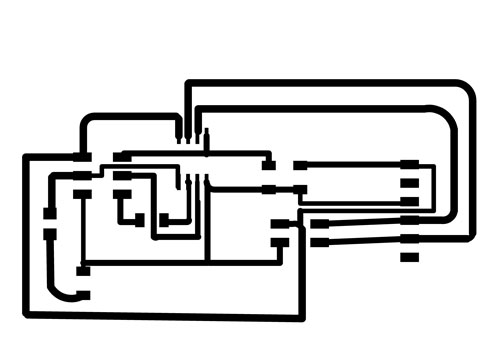
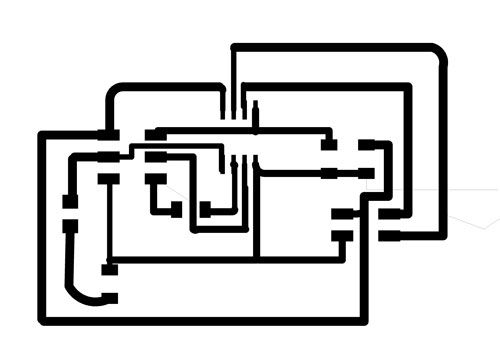
The pngs
This week I used Neil's example to design the asyncrhonous communication example. I increased the width of the traces by a ton, moved components farther apart and added a ) ohm resistor so I would have fewer traces runing under my microcontroller.
Loaded up my png in fab modules and adjusted the settings slightly. A force of 49 and a speed of 2.5 with a pen force on the machine dialed at 1 worked well. I also adjusted the tool diameter to a lower setting to get traces spaced farther apart.
It is easier to weed if your cutter has actually cut all of the way through
I gathered my parts and placed them on the double sided sticky tape with a label.
I wanted to use lead free solder for my circuit so I found some lead free solder in the bin, turned my soldering up to 825 and soldered away. It was not much worse than regular solder! This part was a bit tricky with the vinyl cut traces. I guess the adhesive on the copper is really sensitive to heat so whenever I'd heat the traces to solder them they'd move and squirm around. This was very frustrating. Also flooding a component with solder and then sooaking it up with the copper braid didn't work well AT ALL because the traces moved all around when I was soaking things up and melded together. The connections to my microcontroller look very messy and hideous. Mounting directly onto glass worked much better for soldering but was not without it's headaches. Need to practivce soldering more to actually get my microcontrollers solder without the use of copper braid
With lots of help I tried to program the board adn kept getting errors that my connections were bad... so....
I checked all of the connections with a voltmeter and added solder or removed solder where needed
I worked to debug the baod, resoldering traces, checking all connections and retrying to no avail. Many things broke in the process need to start again? with a new board :(
Copyright 2013 Kathy Sinclair