003: Electronics Production
I've no background in electronics, so this week's assignment came to me as terribly daunting. I had lots of soldering and programming tips and help from a friend named Noah (THANKS, NOAH!).
Milling the PCB
I made four attempts to mill the PCB, and was only successful on the last try.
Attempt (or Epic Failure) 1:

My endmill did not touch my board, and I ended up milling air, which would have been an awesome experiment, if air could condense into something solid.
Attempt 2:

My board was only partially cut at a Z of -0.12, as initially suggested by the TA, so I made a modification, and changed the Z in the mill traces (1/64) menu from -0.12 to -0.20.
Attempt 3:
Because curiosity killed the cat, and I might have been feline in spirit, I decided to cut the outer frame first. Needless to say, it was a horrible idea, and the cutout came off the stage without
my having milled any of the traces (see photo from Attempt 2).
Attempt 4:
Success! And I made another for good measure.

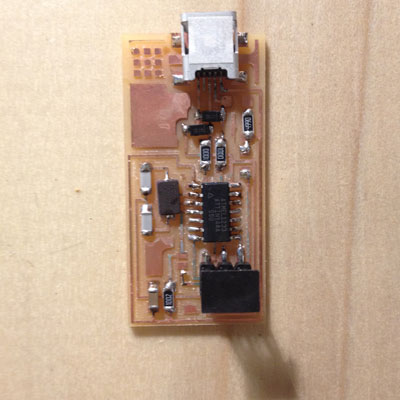
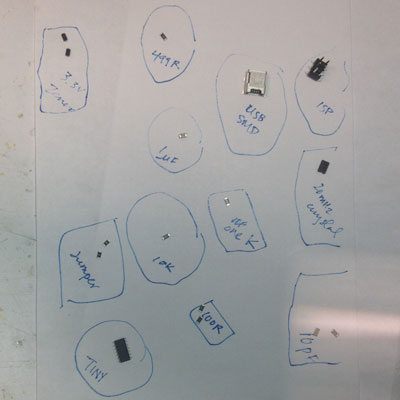
Stuffing the board
I laid out all the components on a sheet of paper and milled the smallest pieces first. The USB port was probably the most difficult to solder, considering the proximity of the parts to each other.
Here it is in all its complete glory:

Smoke test and powering the board
Plugging the FabISP into the computer. AND NO ERROR MESSAGES! W00T!

This is the green light on my borrowed programmer (thanks, Will!).

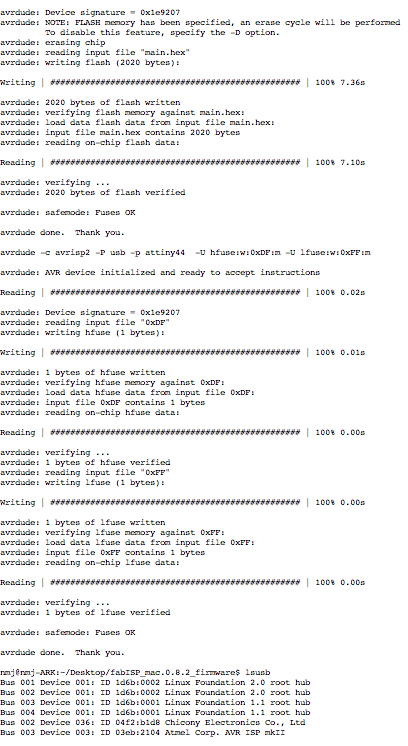
AVR programming
Here's a snippet from my terminal output.
0 Ohm resistor removal
Tah-dah!