Welcome to Mohit's first dig at making REAL stuff
Week 6: Designing a 3D mould, machine it, and make parts from it
For the sixth week, we had to create a 3D mould, machine it, and also make parts from it
This was a good week for me to practice my SolidWorks skills. Leigh was awesome as usual and ran an intermediate level SolidWorks
tutorial for us. The tutorial was very helpful in learning tips and tricks of SolidWorks and I feel a little more
comfortable with the tool now.
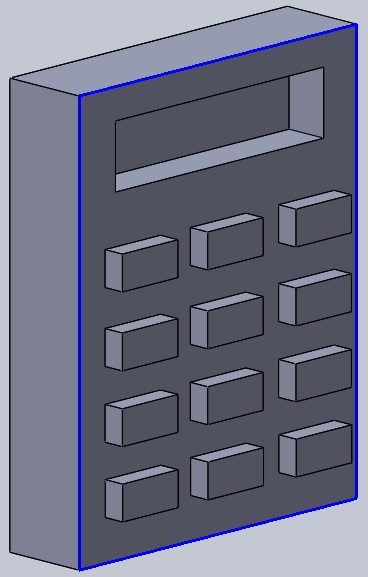
I decided to create a simple calculator in SolidWorks (below). For some reason it took me a while to separate sketches
for the LCD screen and the buttons (one is extruded the other is protruded).
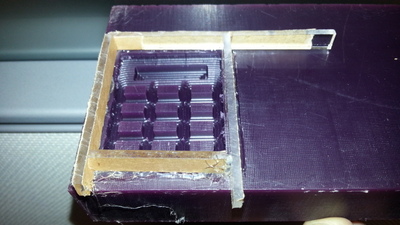
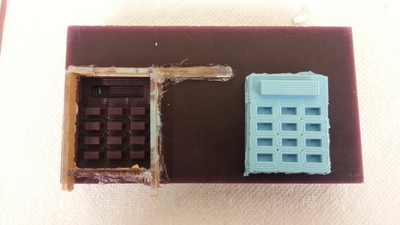
Next step was to mill the structure on wax. Unfortunately I could not figure out an easy to way to create a border around my
calculator to get a nice well defined boundary when I milled the structure. Due to lack of time I decided to go ahead with the
milling anyway. To create a boundary around my calculator I had to fix pieces on sides to create artficial boundaries before moulding.
I made the mould with OOMO, which was the recommended material for the week. The process was straightforward as given in the tutorial.
The slightly tricky part was to get rid of all bubbles (that kept popping up until 5 minutes after pouring)
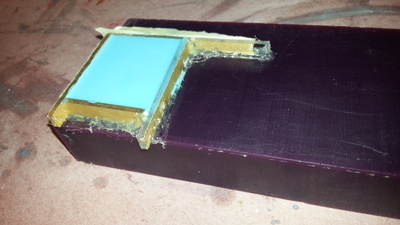
Since my boundaries were artificial, there were multiple leakages in it. I tried it by pouring water into the structure and it kept leaking from multiple spots.
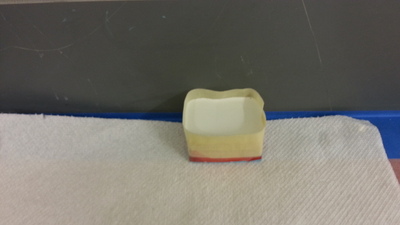
The only way to stop this from happening was by using glue and tape. I filled up all the holes by using glue and taped up edges to double seal the whole structure.
This is it looked like:
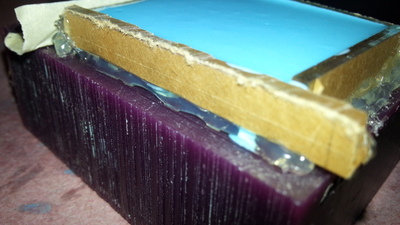
I gave it around 2.5 hrs to dry up. It was easy to pull it off from the wax without breaking it. I had to cut around the edges with a knife (again due to some
seepage through my artifical edges - in retrospect I should have tried to fix my design!)
The last step was to create a cast using this newly created 3D mould. Again I faced the problem of having no edges. This
time creating edges was a bigger challenge. The tape did not stick to the 3D mould. After multiple tries, I hacked it (not so well though!).
I wrapped a tape around it multiple times making sure it was tight and in the second wrapping the tape stuck to itself. The first wrap was
tight enough and friction did the trick.
Creating the cast was easy enough. I used dry stone mixed with water (ratio 100:20) to create the mix and poured it into my 3D mould.
This step usually takes 30 minutes for the case to dry up but I left it in the lab overnight. This is what I found in the morning
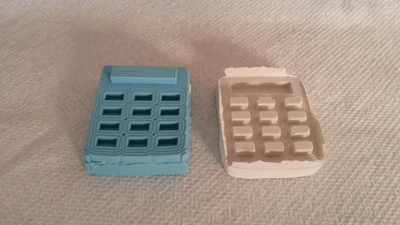
As one can see, the edges do not look great. All of this is due to the first design flaw - not having a proper border to cut through the wax to set proper edges.