Output devices
Week 10:LED array as a text output
This week, our task was to create a board that outputs something.
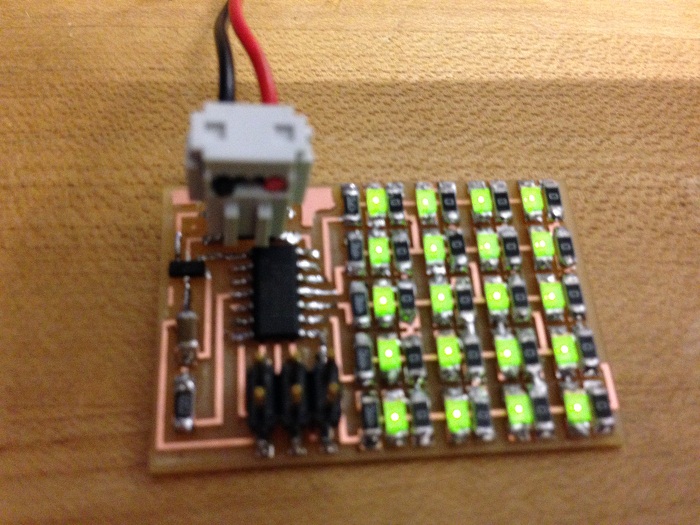
I decided to use the LED array to learn about Charlieplexing, and in preparation for my final project. To make it more fun for this week, I also wanted the 4x5 "pixel" array to output text characters.
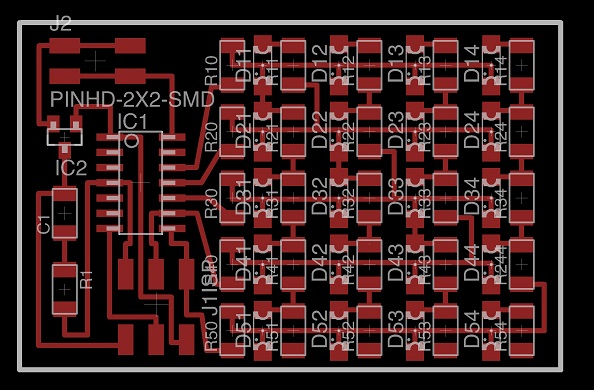
Here is the board I designed in Eagle based on Neil's example:
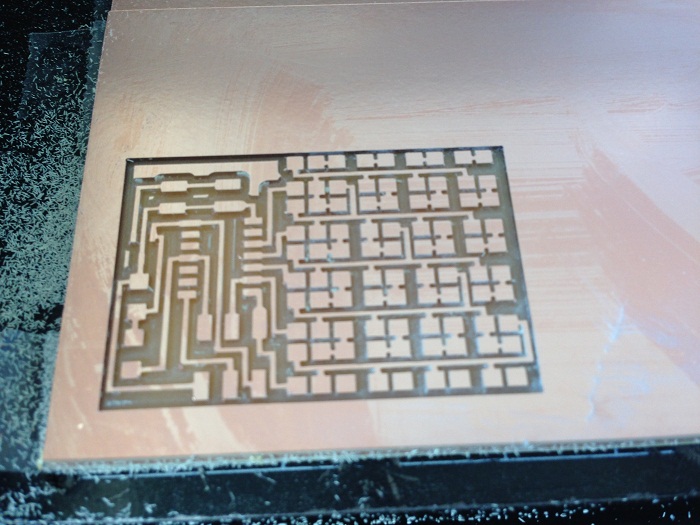
Milling the board went smoothly except for having to search for a missing screw for the collet.
I soldered the main components first followed by the array. When it came to planning the way I would do the array, I wanted to figure out an efficient process. I started doing "column" by column, putting down an initial piece of solder on one node for each component (LED or resistor). I then soldered that one part to each component, going back and soldering the second part after I had done the entire column. I felt this was a good strategy, though it took considerable time regardless and required much re-orienting of the LEDs so the array would be proportional.
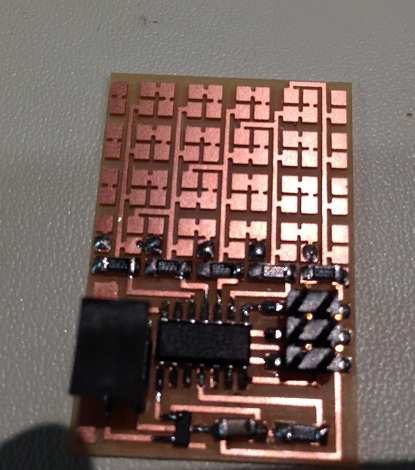
Here is the final board with the array complete (it took about 1.5 hours to solder everything). One interesting fact is that if you put the 9v battery on the wrong orientation the regulator and the 2x2 pin connector start to smoke! Even though I figured out the correct orientation first, I had an operator error and put it on wrong regardless. Lesson learned.
I then went to program the board. I used Arduino, but because there were no AVR programmers in the IDC, I used my fab ISP from week 3. On the first try it didn't work, but fortunately I figured out it was only because I had the wrong programmer selected (-30 min of my life... ooops!).
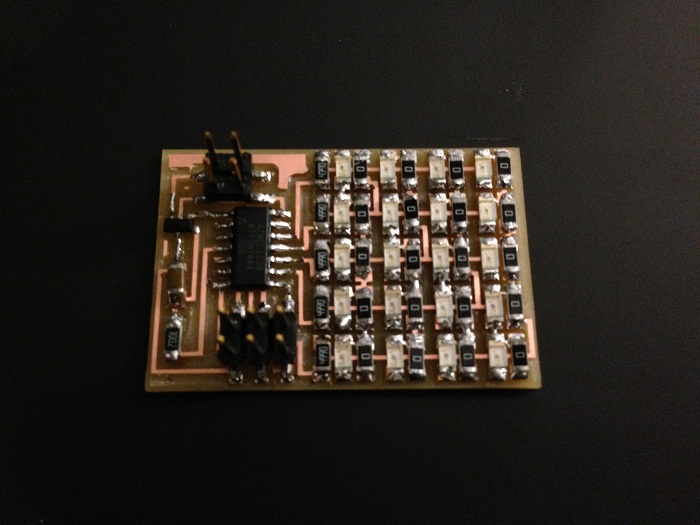
I used Neil's code to shuffle through the LEDs as a first point to test my board. Fortunately it worked. Here is the array functioning in the "all on" mode:
This is the full sequence from Neil's starter code. That code made it easy to control which LED was on and for how long.
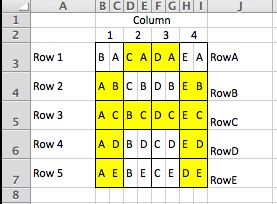
Now that I knew the board was working, I played with generating characters in the 4x5 array. I translated the A,B,C,D,E rows into the following for reference. Here is how the letter A looks, for example:
I wanted it to spell my wife's name (Adrienne) so I programmed those letters first. I created 26 referencable "letters" so I can spell anything as well. Some letters were harder than others to express in just 4x5: N, M and W and V vs. U in particular.
It was getting late at the lab so I brought everything home. It seems that during that process, the wire connecting the 9V battery broke, however, and when I got home I had to very carefully attach the wires to the 2x2 connector. It worked for a minute, but not long enough to get a video of it working properly. I will upload that video and the code for the letters after class.
UPDATE:
I got it working again, and now it spells my wife's name:
Here it is in the dark (much easier to see):
Back