3D Scanning and printing (and learning SolidWorks)
Week 3: 3D scanning and printing
This week was a fun and exciting experience understanding the possibilities (and limitations) of 3D printing and scanning!
Let's start with the scanning:
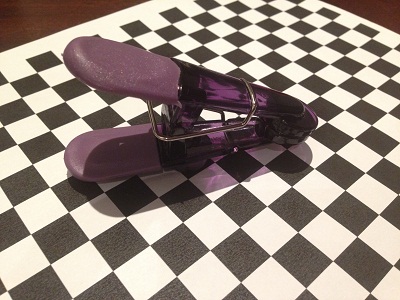
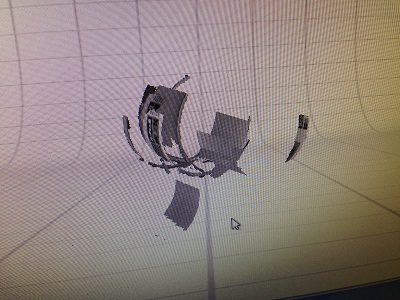
I picked an object to scan with the 123D Catch iPhone software, this purple clip. I chose it because of the hole in the middle and its moderately complex shape. After several botched attempts (and figuring out the checkered background I printed), I got a good batch of 30 photos that 123D Catch turned into this:

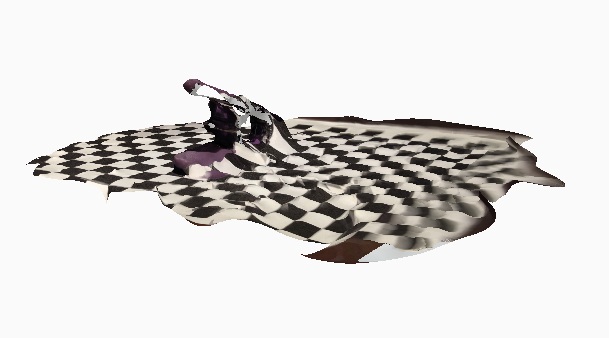
The first image looks pretty good and the model was surprisingly good on all sides except for one (see second image). Overall, however, I was very impressed with the detail and the ability to quickly capture at least the general shape of the object.
Next, I tried the NextEngine scanner in the IDC Lab.
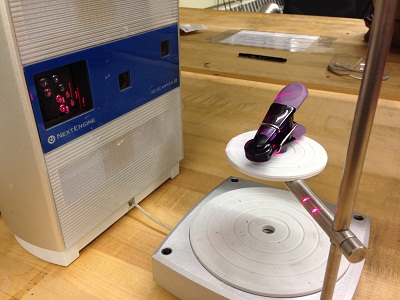
I started with the clip again for comparison purposes, but after my first scan, I realized the translucent body of the clip cannot be captured by the lasers. The final scan looked like just the rubber handle with a big gap in between (I lost the screen capture of this, unfortunately).
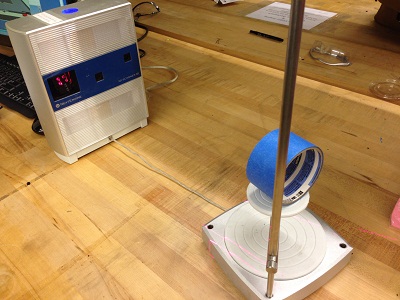
Next I grabbed a roll of masking tape to scan. This object was interesting and I learned two important things: 1) the first image / orientation to the scanner needs to convey the object's depth. When I tried the first time with just the hole facing the scanner, the result didn't work. 2)...
The further distance (there are two options) was better at capturing the object than the "macro" distance (close up).
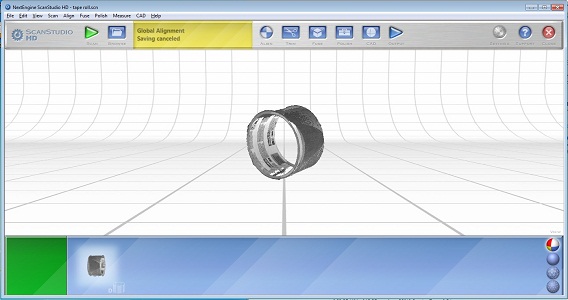
Here is what the final result looked like at the further distance and with 8 images / rotations. I had to clean up some of the base and the pole using the trim feature in the software (it worked very nicely). It was cool to see the image take shape during the scans. For instance, early on the scanner mistook the inside of the roll (with the wording) for the outside. I was pleased to see it corrected itself later on, however.
One limiation of the NextEngine is the fact that it only gets one orientation to the object; there is no way to capture the top or bottom of it.
Overall, from an image capture standpoint, I was impressed with 123D Catch and less excited about NextEngine. For the actual model it produces, however, NextEngine was more detailed in my experience (though the 123D catch one had fewer holes).
Now on to 3D printing:
Since I wasn't crazy about either scan I made, I decided to try my own design for the 3D printing. I brainsormed for an object that would be somewhat difficult to construct without supports and was inspired by this image:

Thanks to the tutorial session Leigh Christie ran this weekend, I had an introduction to SolidWorks. After my frustration with using InkScape for the laser cutting week, I am very happy to learn parametric CAD software
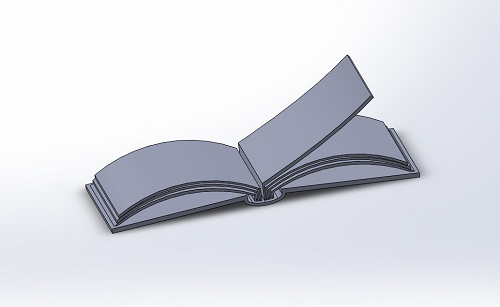
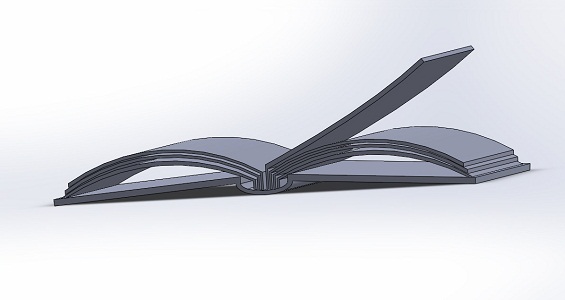
After countless hours of practice, I was able to create this stylistic representation of the book concept I had. The design had overhangs and cool closed spaces between the pages:
I wanted to try out the MakerBot printer first, realizing that this structure might not work because of its need for supports. I set up the printer to use ABS with a Raft so the object could stay in place. Exporting the file took a very long time (about 30 minutes), however, which was a bad sign.
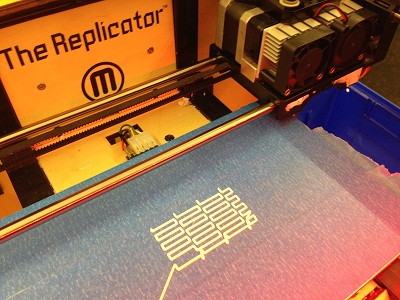
This is as far as it got (not even finished with the raft) when the head took off for the corner and started randomly spraying the ABS. Because of the time it took to fix it, and the liklihood that it woudln't work, I decided to scrap trying to print it on this one and rather wait for a high quality print on the Dimension.
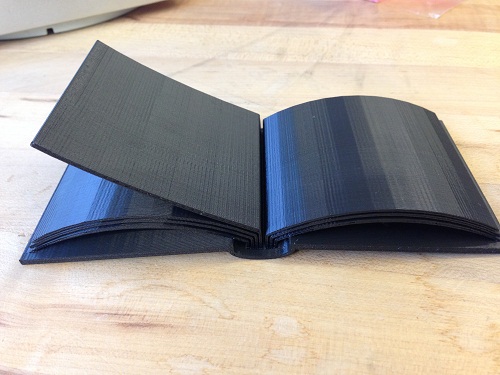
The detail is amazing and the book is relatively sturdy. See below for the "page" detail.

A few things I learned from my design: 1) when I created it, I made the scale way too big (12" long) and set the "page" thicknesses to more than a mm. When I shrunk it down to print, however, I didn't think about how thin that would make each page. Fortunately, I am printing a slightly larger verison to make sure it works. 2) there are many ways to tackle a design in SolidWorks. On my first attempt, I tried making each piece (book cover, spine, each page) individually with the thought I could assemble them later. This idea turned out to be a waste of time as I couldn't get things to properly mate. As a result, I designed a good part of it in the same "part" which worked out better. I still have a lot to learn about SolidWorks, and I am happy to get the practice!
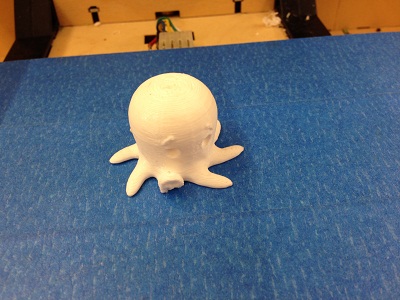

These were a couple of other things I tried printing, just to see how it worked. The left one is a squid design that Charles had and the right ones are clips I designed that can fit around cords/headphones.
Back