Week 9. Composites.
1. An instrument case. Vacuum molding around a one-piece foam core.
A. The Plan.
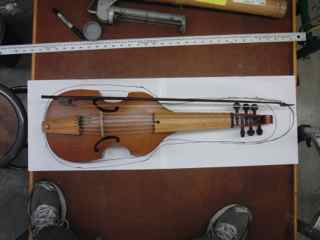
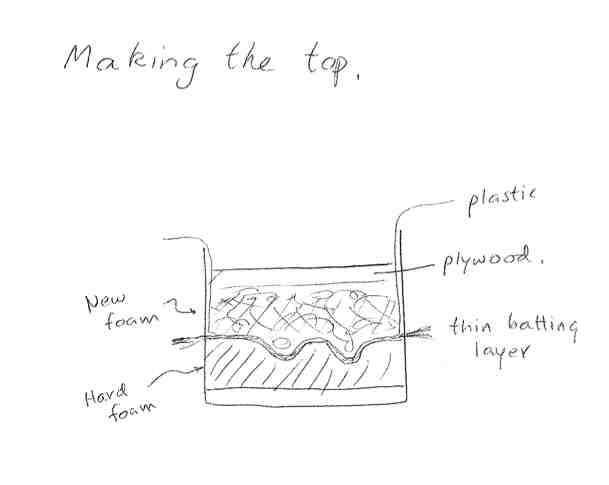
I would like to build a two-piece case for my treble viol. I'll start by making a ~ four inch deep bottom shell, then make a top that is less deep but more strongly arched.
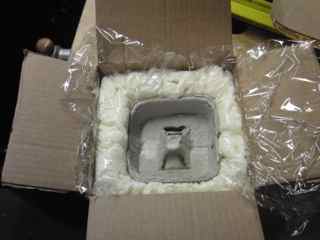
B. 3D machining a foam core.
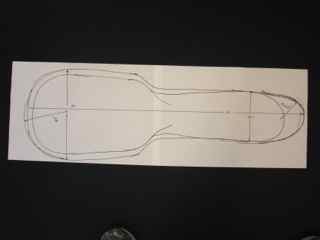
I designed a part in Solidworks that will be the foam core for the case bottom. I defined the outline, created an extrusion, added fillets to the perimeter, and used Solidworks' dome feature to make a gentle (0.5") arch in what will be the back of the case.
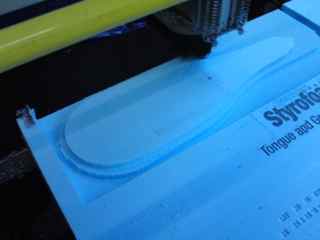
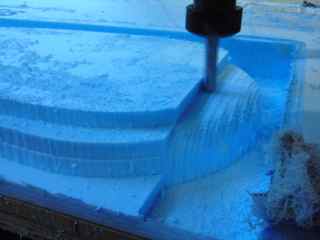
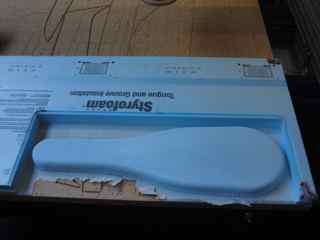
Above are pictures of the rough cut, the finish cut (0.5 diameter end mill, 15% stepover), and the finished part with some of the 0.050" support layer still hanging on. Things learned in machining this part on the shopbot using the shopbot 3D software:
- Location of origin. I spent a bit of time thinking that the origin was at the corner when it actually was at the center of the part, where I placed it in the design.
- I located tabs below the cutting region due to the fact that my stl object was thicker than the actual foam layer on the machine. As a result I got no tabs.
- I did leave 0.050" of material on the bottom, which was just enough to support the final cuts. Would have been good to leave 0.10". Easy to remove the extra material.
- The end mill did not extend far enough out of the collet to allow full cutting of the fourth pass. The collet and holder interefered with only the perimeter of the enclosure though, and not with the part itself. Something to watch.
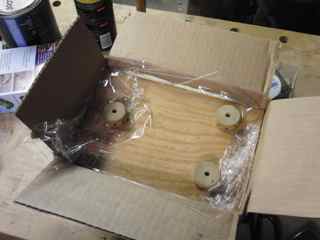
C. Assembled mold.
I cut out a straight-sided layer of the foamboard with a bandsaw and sanded to match the perimeter of the first part. The two parts will be taped or glued together to form a mold. The assembled mold was not available for photographing at the time of this writing.
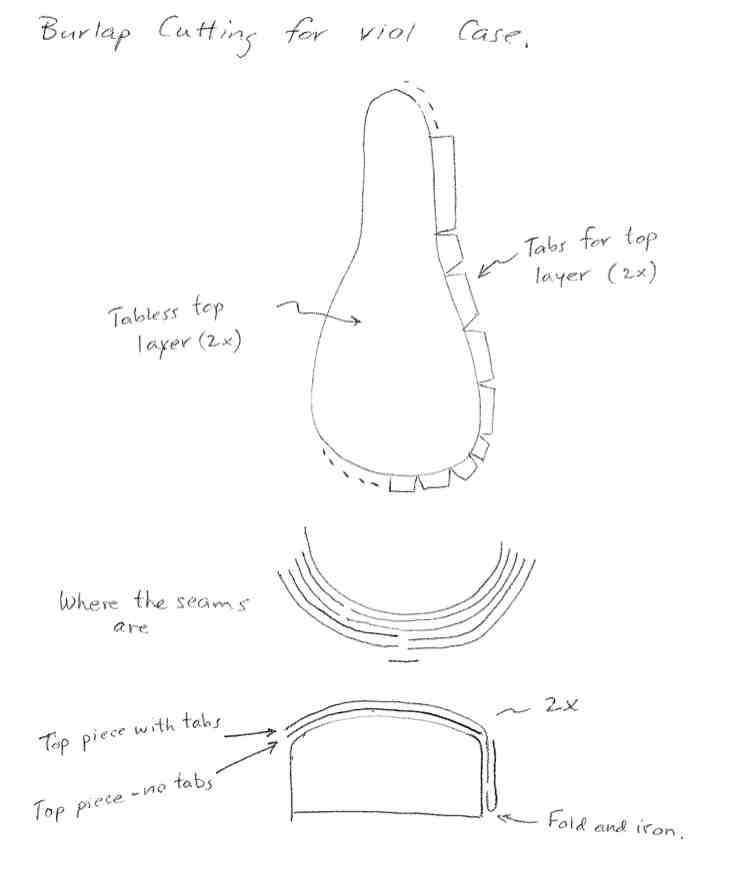
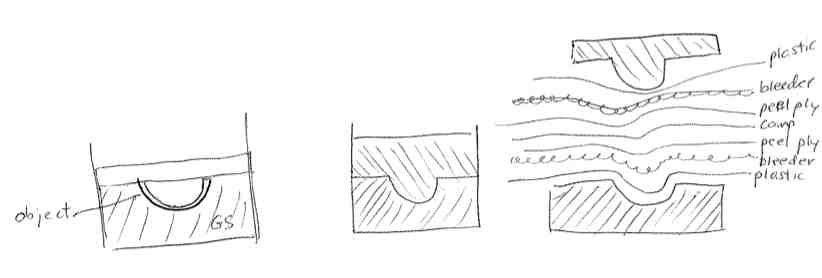
D. Plans for molding. Sketches of fabric cutting.
The sketch below shows my plan for cutting fabric to make four layers of material around the shell of the case.
I decided that I needed to get some practice with a small composite project first before tackling this rather large one. The 3D machining was valuable learning. The demonstration on composite layup inspired many thoughts on alternative ways to make molds and squeeze composite layers, one of which I will expore for a smaller project. More later on the viol case!
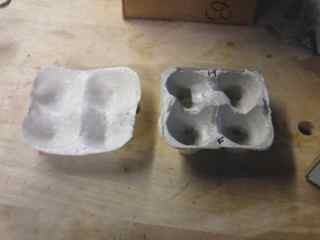
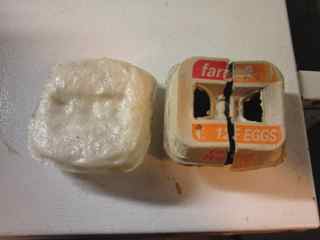
2. An egg carton. A two-piece "Great Stuff" mold.
A. The idea and the plan.
Here is a smaller project. I will make a four-egg egg carton. Since I was at home and had already spent happy hours at MIT I decided to make my composite with locally obtained materials and tools. Instead of machined foam I use "Great Stuff", a polyurethane(?) closed-cell foam used to insulate and fill cracks in houses. This foam sprays from a can, expands about 2x and cures
- The prototype and a sketch of the idea. I tape together the two sides of an egg carton to make bottom and lid for four eggs. Then use great stuff foam to make two positive molds, one for the carton bottom and one for the lid.Uuse more great stuff with plastic wrap to make negative molds, then for each mold, use the two halves to press the composite material.
- The materials.
- Polyester foam batting from the interior of a retired cat bed.
- Castable epoxy resin from Playtime, a great art supply store in Arlington, MA. Also in Arlington worth a mention: Fabric Corner for sewing supplies, Shattucks Ace hardware, Arlington Coal and Lumber for larger stock (Foam instulation board etc.), Lakota bakery for cookies. The castable resin is Easy Cast Clearcast epoxy, $25 for 16 oz. I thought about using standard adhesive-type epoxy but decided the viscosity was likely too great.
- Cheesecloth
- Great stuff, ~$4 per 12 oz can, $3 on sale. I could have done it with one can, but used two.
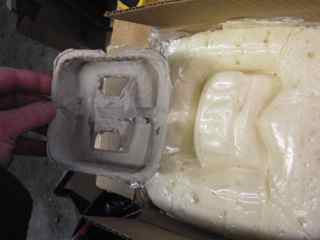
B. Making the Foam mold.
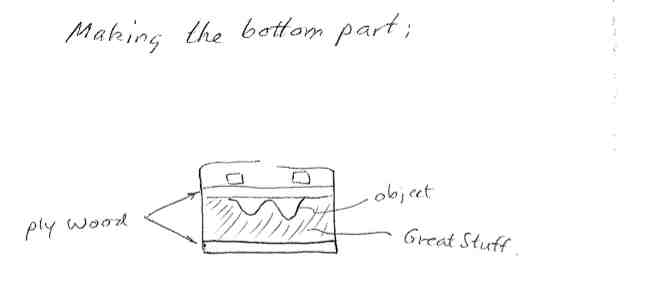
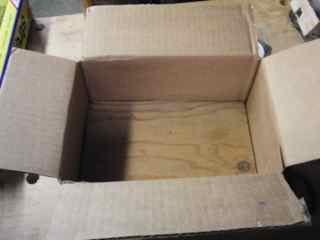
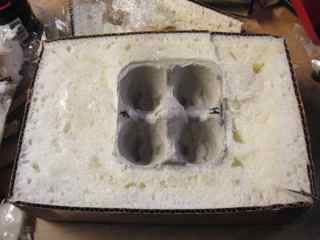
- Made the bottom mold part by laying foam in a box, covering with plastic wrap and pressing the carton into the foam. another layer of plastic wrap, a board on top, some spacers (see below) and close the box to let the foam expand onto the object.
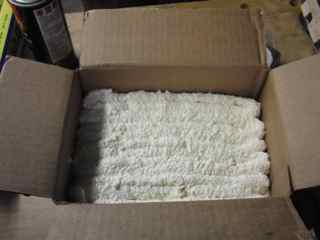
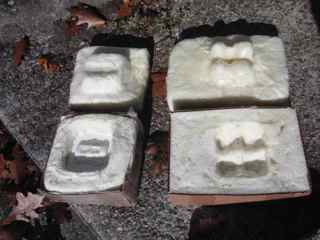
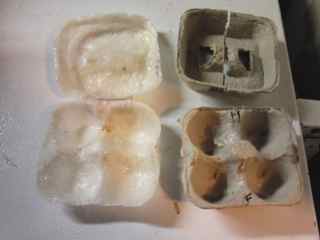
- The bottom parts, molded around the original.
- Setting up. The foam takes several hours to cure. I let it go about eight. Already seeming cheap but less cheerful.
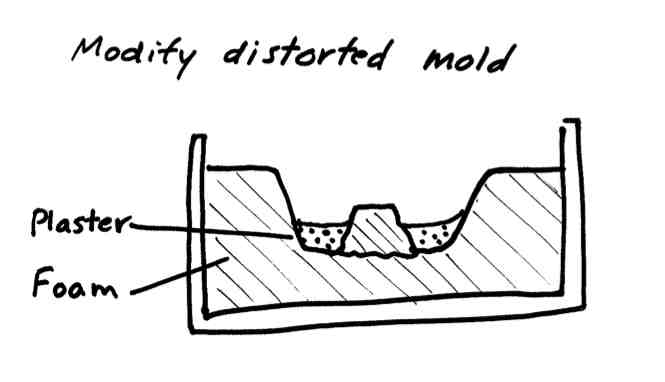
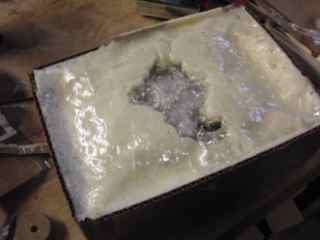
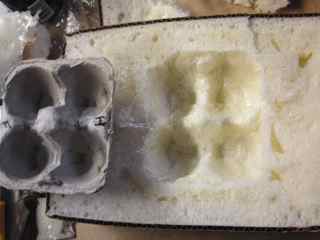
- retreiving and modifying. The foam expanded more than I expected, and deformed the lid of the egg carton. I cut the bulges away, replace the center and cast some drystone (I had a little extra from last week) to recover, more or less, the shape of the original.
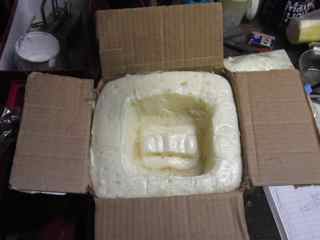
The bottom part of the carton did not distort as much. Below I show the mold after curing the foam, and the process of cutting away the excess and freeing the carton.
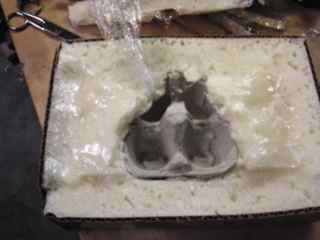
- Now use the first molds to make two negative halves. See photos below.
- Lay in a bit of polyester batting to help the plastic wrap conform to the positive mold with no bubbles. Not sure this "breather" layer is needed.
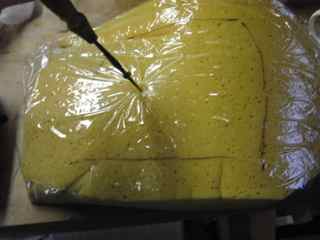
- Cover the positive with plastic wrap, leave enough material so that it can spread out to conform to the positive surface.
- Cure another several hours and take apart.
C. Molding the composite.
- Below are the two molds. The foam expansion has distorted and flattened the original, but the negatives match the positives well. The plan is to proceed with the standard two-piece mold process as in the sketch.
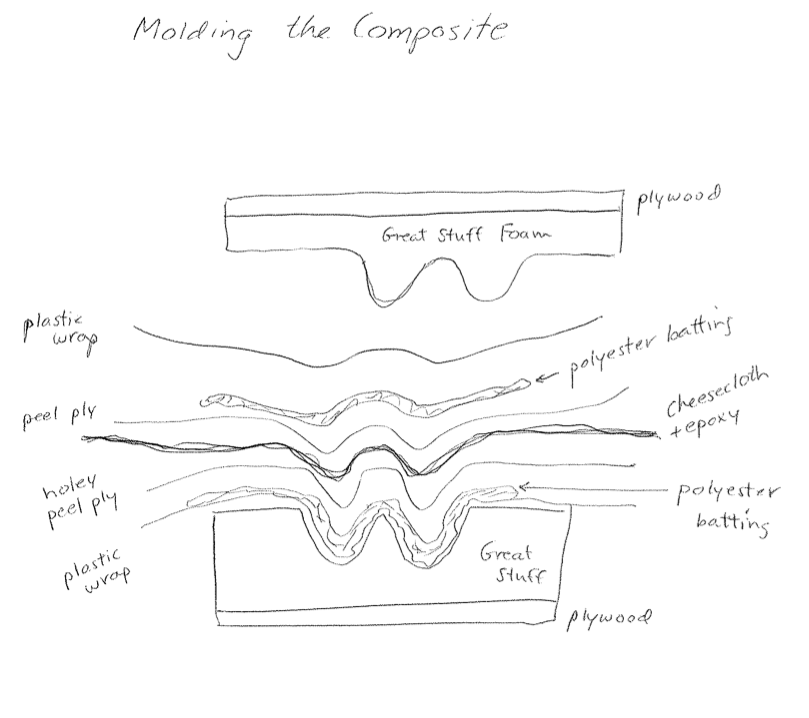
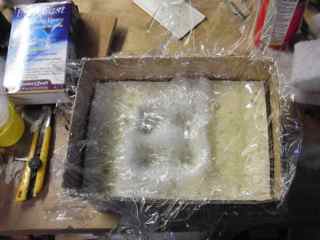
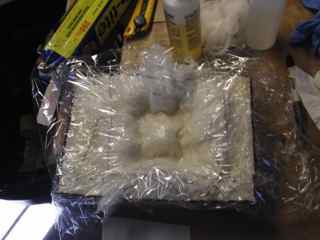
- The peel ply layer is made of plastic wrap with holes punched every 1/2" .
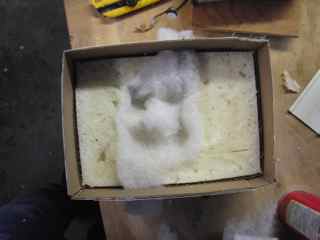
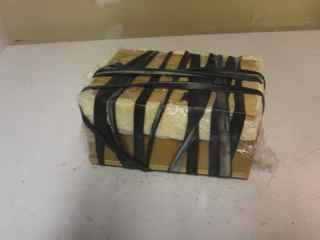
- The epoxy is brushed onto the cheesecloth so that holes are mostly covered, but resin is not dripping from the cloth. I applied approximately four layers, in strips about half the width of the part, in alternating directions. The sandwich of seven layers is made, and the whole thing clamped, either with rubber bicycle tire "rope" or clamps.
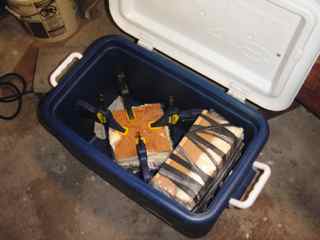
- I put all in a preheated cooler at ~120 degrees F since my work area is cool and the epoxy specs give a 24-72 hour cure time at room temperature.

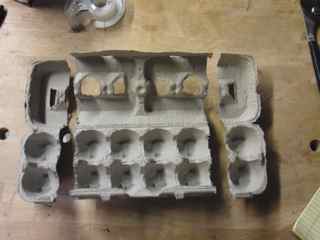
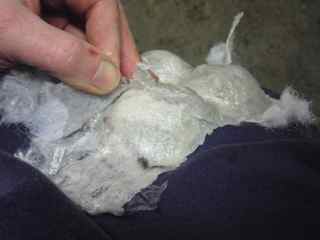
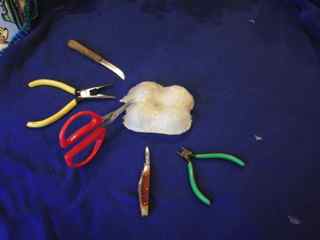
After a 24-hour cure, the sandwich comes out of the mold. The polyester batting is mostly saturated with epoxy, but not much excess has come out. The layers need to be teased apart - the hardest part is removing the peel-ply from the composite. The array of tools below do the trick, with one crack made in the bottom part of the carton (repaired with epoxy).
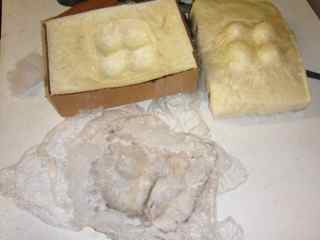
The parts and the original.
Learnings:
- This process would have worked better with rigid original parts. Might have filled carton with plaster so that it did not deform.
- Should allow for the ~2X expansion of the foam as it cures.
- Great stuff also deforms as it is clamped, flattening out the parts.
- The process takes lots of time - each step involves multi-hour curing. Maybe more heat!
- The cheesecloth/epoxy composite is light and strong. The plastice wrap adheres a bit to the material, but most of it flakes off. Probably good to use as thick a wrap as I can get.
3. Notes in class 11/5/13
Notes on composites
- Burlapfabric.com on Amazon is the vendor for burlap.
- Taylor: hydrostone/burlap composite for making a stool around a foam core.
- use smash tool in Rhino to unroll surfaces for cutting material layers.
- Kristin Zimmerman: coatrack made from a coat soked in epoxy.
- Blacken burlap before laying up instrument case?
- Use urethane as a mold.
- Matthew Carney: bicycle fender.
- Jeff Geisinger: Bicycle storage shed. Makes a nice fabricated two-part mold for fiberglass panels.
- Pauline Varley: Carbon Fibers in a light saber handle.
- Hasier: Structural beam of burlap with foam core.
- MDF coated with floor wax and mold release should work OK with no release layer.
- Will Patrick: Silworm-made composite.
- Can get clear coat epoxies for finishing.