Toks Fifo
Student. Builder.
Stand: Press-Fit Construction Kit
Overview
When shot glasses are creating a mess on your desk, the only reasonable solution is to create a shot glass stand using press fit cardboard pieces.
Deisgn
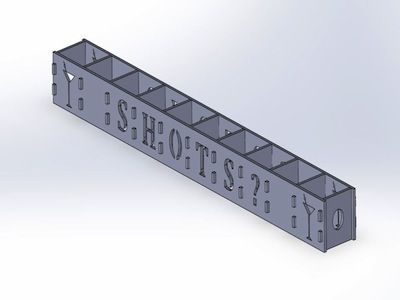
I designed the stand in SolidWorks. It consists of 2 long pieces with the text "SHOTS?" and a drawing of martini glasses. The other 11 pieces (creating 10 shot glass spaces) connect into the main long pieces.
Laser Cutting
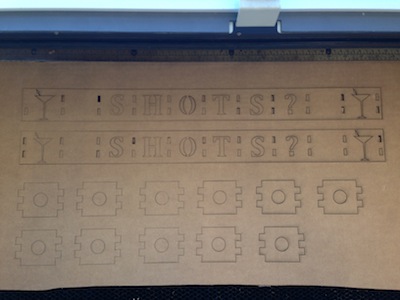
Besides cleaning the lens before virtually every cut, the laser cutter wasn't very difficult to use. I'd recommend trying out your press-fit to get the right dimensions before cutting out the whole job. I imported my .dxf files into CorelDRAW before sending them to the machine.
Laser Cutting (Cont'd)
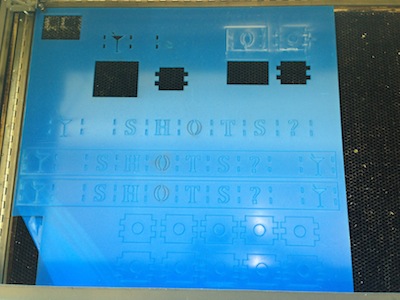
After a few test runs, I finally cut out all the parts. Interestingly, the letter "O" in "SHOTS" was initially just two round cuts, so it didn't turn out to well. I had to go back into the drawing to create supports for the center circle.
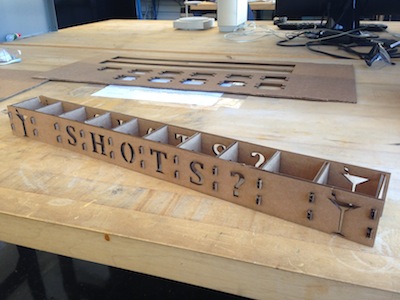
Assembly
The cardboard pieces fit nicely together and the structure was reasonable sturdy. I could afford to make the stubs a little bigger than the holes becasue the cardboard was so compressible.
Even though the project was meant to be created with cardboard, I decided to try it out in acrylic. The cardboard served as a great prototyping material for laser cutting.
Extra: Acrylic
I used 1/8" acrylic, since it was the most similar in thickness to the cardboard. I had to adjust my settings for the cutting speed, power, and frequency till I got it just right. Just when I thought it was finally okay, the pieces didn't separate from the board; the acrylic cut-outs appeared to melt back into the frame after a few minutes.
Getting the right dimensions for a good press-fit was also much harder; acrylic doesn't compress the way cardboard does.
End
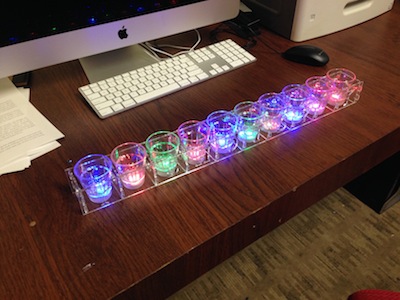
I finally got it all set up. The acrylic structure was much more shaky than the cardboard one. I put some LED shot glasses into the stand for effect and here is the result!
The text isn't very visible in the photo. Nonetheless, I was impressed with the final result and I'm excited to create more things using the laser cutter!