Will Patrick
How to make almost anything
Week 1
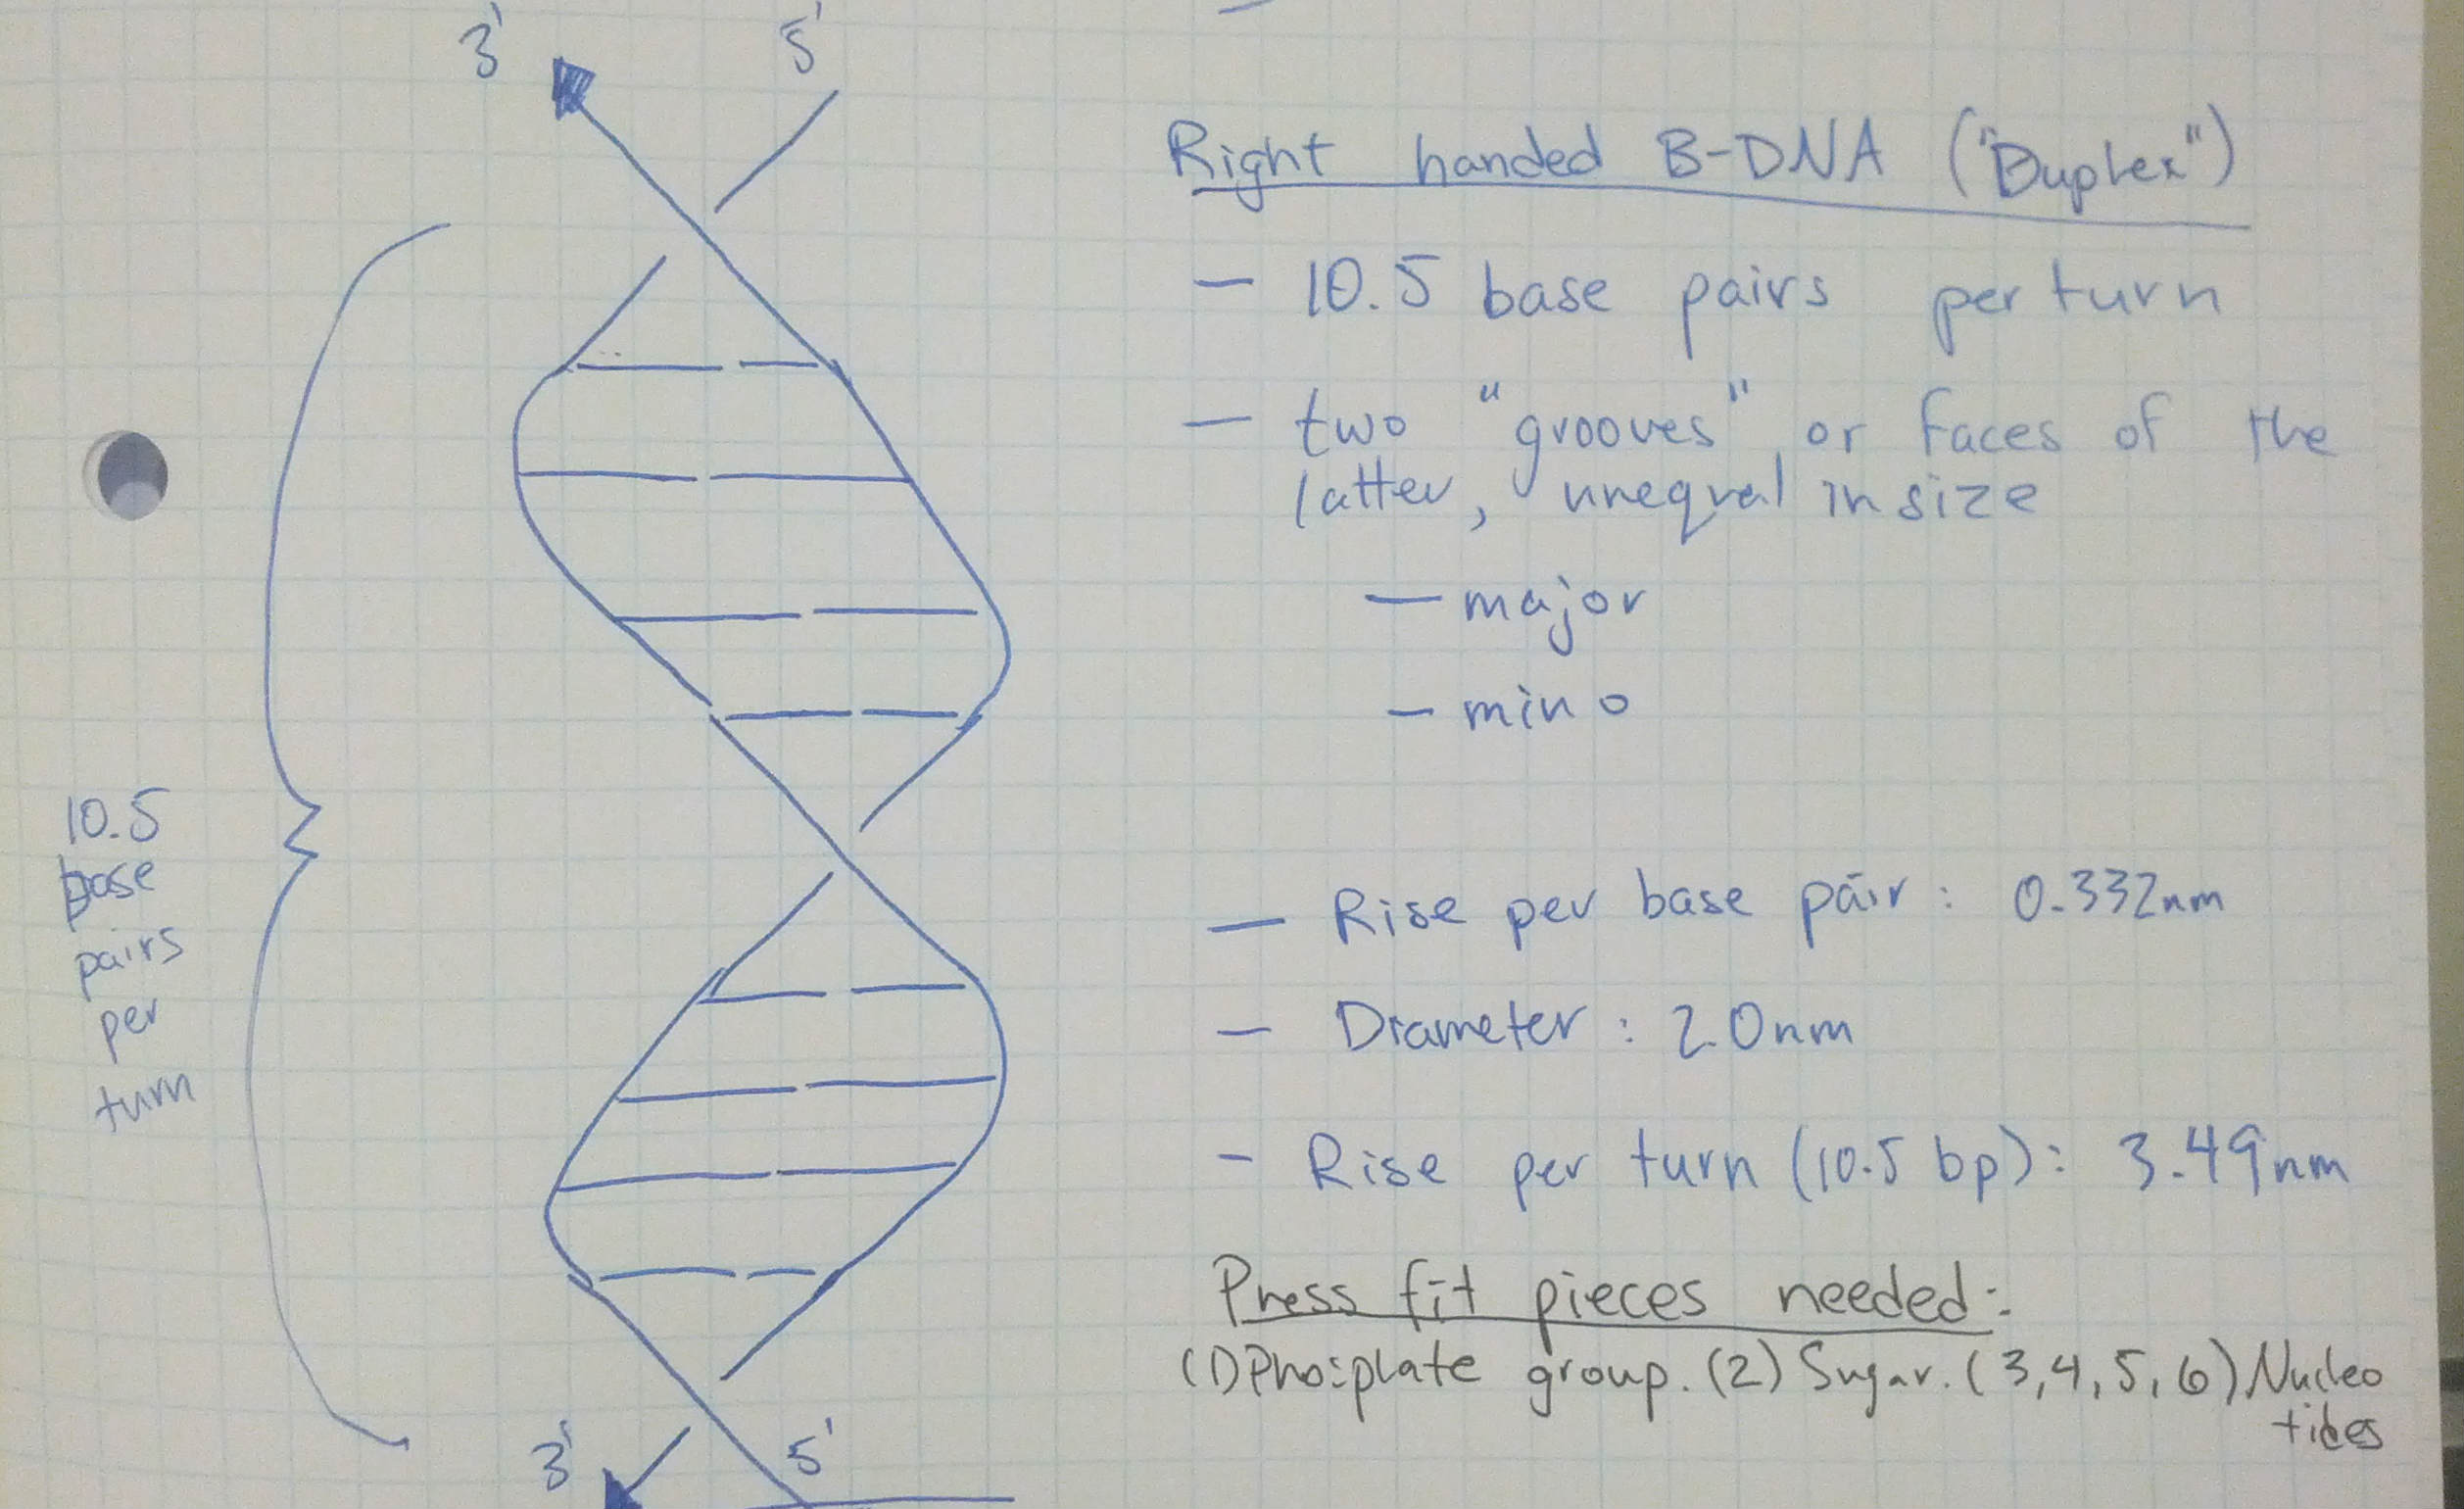
"DNA Synthesizer"
In our first assignment, Neil tasked us to laser cut cardboard into a press fit kit. A press fit kit is simply a set of discrete, “lego-like” 2D blocks that can be joined to create 3D shapes.
This semester, I’m also taking a course on designing DNA nano structures where I'm designing DNA nanstructures using a couple of software tools (NanoEngineer and CaDNAno). The programs are great but as a biology novice I don’t have an intuitive understanding of the three-dimensional geometry of DNA. So for this week's project, I decided to make press fit DNA double helices which I could then physically move and play with to get a better understanding of DNA.
My initial paper design of the helix
Grasshopper + Rhino
For this assignment, I wanted to learn a new piece of software: Rhino with Grasshopper. Rhino is a surface modeling tool popular with architects and industrial designers. Having been a Solidworks user for the past several years, I’ve always heard that Rhino is more intuitive and easier to generate surfaces. Grasshopper adds a lot more power to Rhino; it’s a visual scripting language that can be used to create anything in Rhino. Using Grasshopper, one can create parametric designs. For the double helix press fit kit, I wanted to vary inputs like the thickness of the material and the size of the press-fit notches, so I thought Grasshopper might be a nice way to do that.
To get started, I got a few tips from my officemate John Klein (like to John) and also watched a couple of the tutorials on the plethora project .
Here's the first thing I ever built in Grasshopper
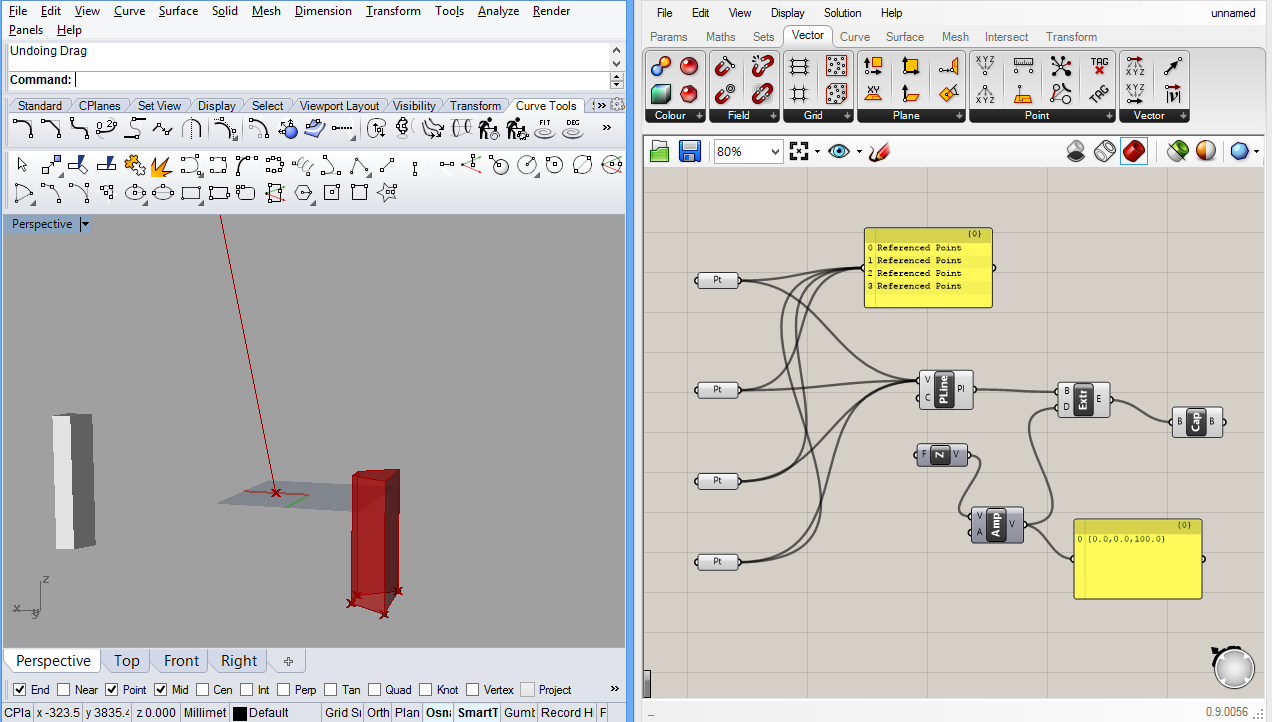
Script development
The hardest parts of building this grasshopper script were (1) retraining myself how to build solid models in a "Grasshopper mindset" and (2) calculating the geometry of each surface based on the overall structure.
- I found the design process in Grasshopper to be very different than SolidWorks, the 3D modeling tool I've used in the past. Typical sketching operations that I’m accustomed to in Solidworks like Offset, Trim, and Extend are difficult to use in Grasshopper since each of these actions would require an additional function block. Eventually, I figured out the following strategy for designing each piece of the DNA helix: (1) compute and create the sketch plane of the piece, (2) use “Point oriented” to sketch all the points on the plane, (3) create curves from the points, and (4) create surface and extrude.
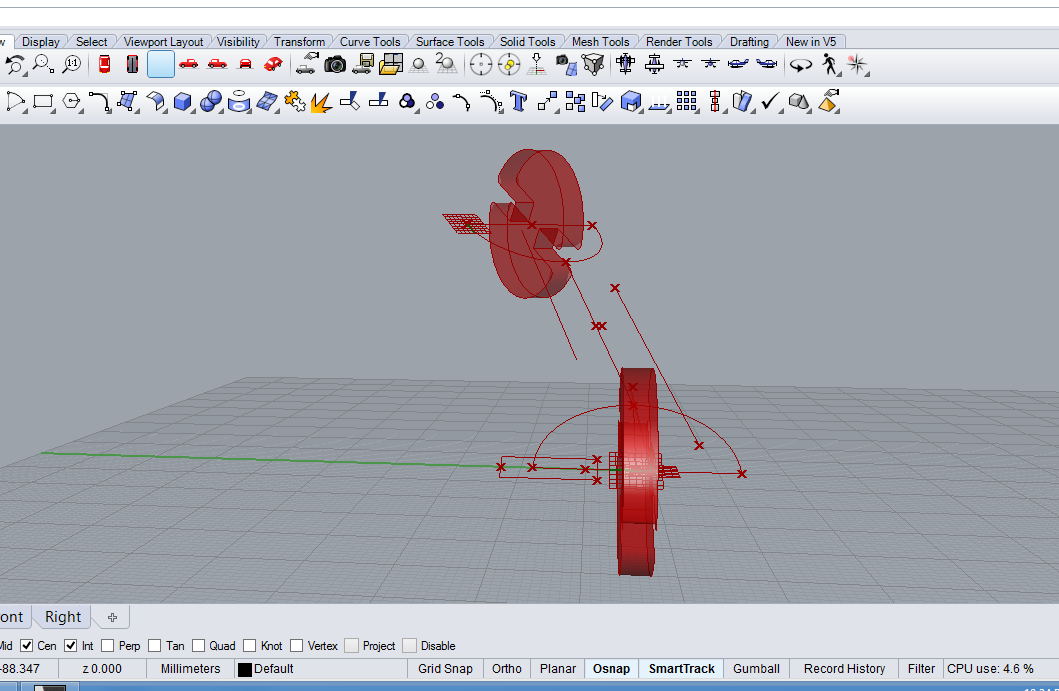
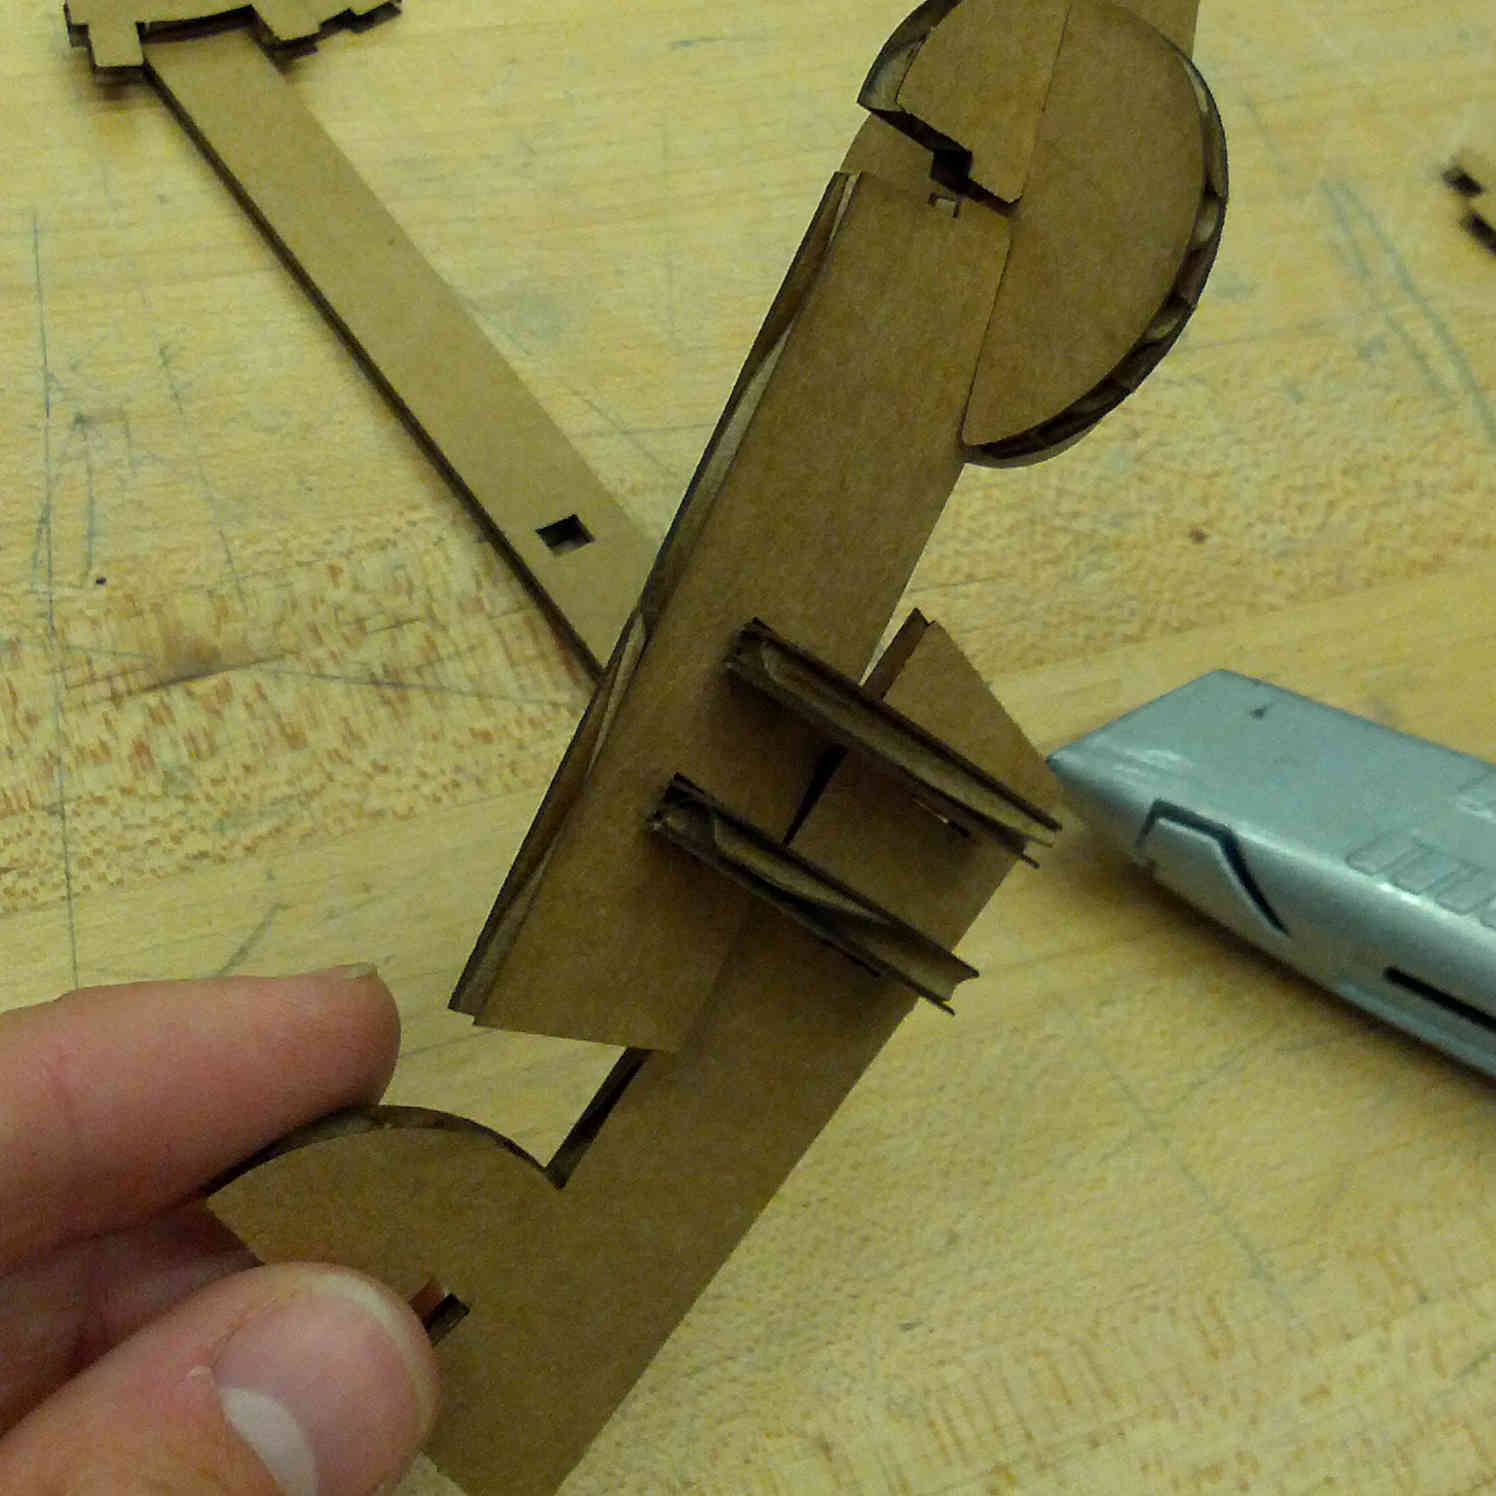
- Translating the spiraling geometry into flat extruded structures was challenging. The first "a-ha" moment was to establish cylindrial coordinates with an origin at the base of the double helix. This allowed me to compute the position of the second sugar molecule based on the number of base pairs per turn and the rise per base pair. The two sugars were now seperated by a rotation in space around the center of the helix (by 2 Pi / 10.5) and a translation in the z direction by the rise per base pair. The real challenge then was to design the "phosphate group"; the pieces that would combine to attach these two sugars together. I found this to be quite complicated and challenging; you should be able to get a feel for what I hacked together by looking below at the piece under construction and script output. Although I got the geometry correct, the resulting joints were weak and caused a lot of problems.
Making the phosphate joint
Finished script
This is what the script looks like:
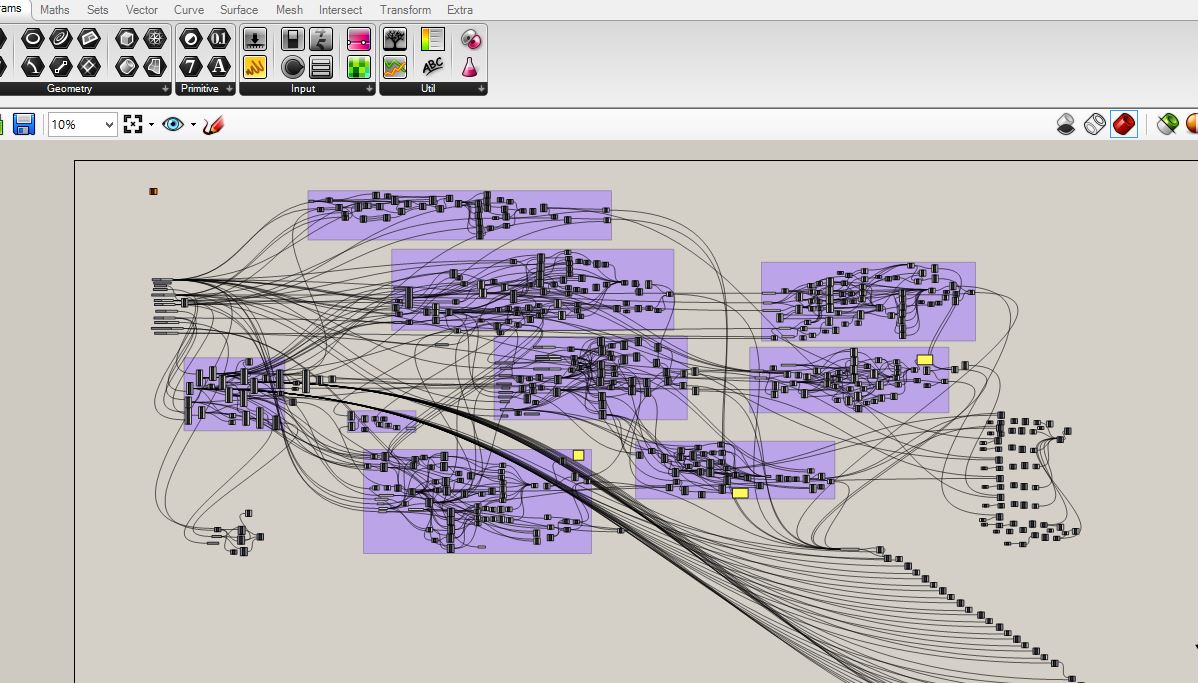
The script is obviously a mess. Again, it was my first time using Grasshopper. I'm sure there are ways I could have organized the space better and used the functions more efficiently. For example, the huge cascade of functions to create each base pair should be replaced with a looping function.
Here's what the output looked like.
To create the 2D curves, I took each surface and oriented it to the XY plane and then spaced them out on the X-axis.
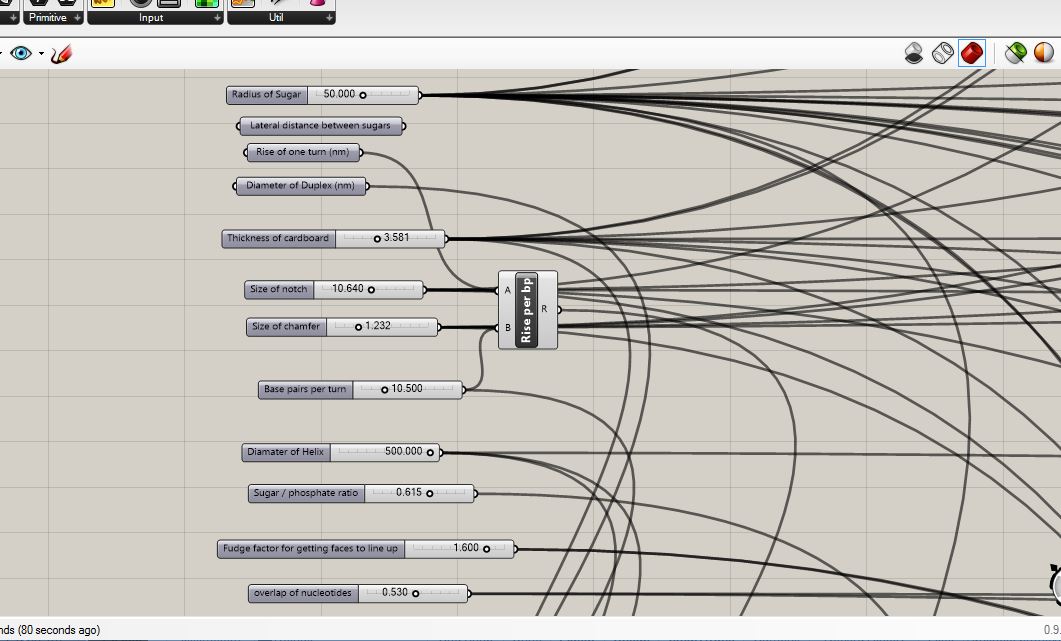
The real power in using software like Grasshopper is setting up a few parameters which you can use to dynamically change the structure. In my code, I set up a number of different parameters on the left side of the script (see below). Hopefully, the script could be used to create press fit helices that are tens of centimeters tall or meters tall. Also - you can adjust the base pairs per turn to visualize a wound or unwound helix.
Parameters used to build the script:
Laser cutting and assembly
Next, I moved on to cutting the shapes so I could assemble the helix. I went to the CBA lab to begin working with the Epilog laser cutter. The real challenges began there. Here were a few of the biggest challenges with laser cutting and assembly:
- Bowed cardboard. If you placed the cardboard on a flat surface, the center (or edges depending on orientation) would be raised by a few millimeters. This caused the laser to be out of focus on the middle of the piece (or edges depending on orientation) while cutting. On my first cut, using the suggesting settings (75/25/700) some of the pieces on the edge of the cardboard were cut while pieces in the middle weren't cut all the way through. To overcome this, I turned the power intensity of the laser up a bit, while watching closely to make sure the cardboard didn't catch on fire. A big downside of this approach was that the kerf (laser width) varied around the piece, varying the size of the press fit notches. As a result, some of the pieces fit tighly while others were loose.
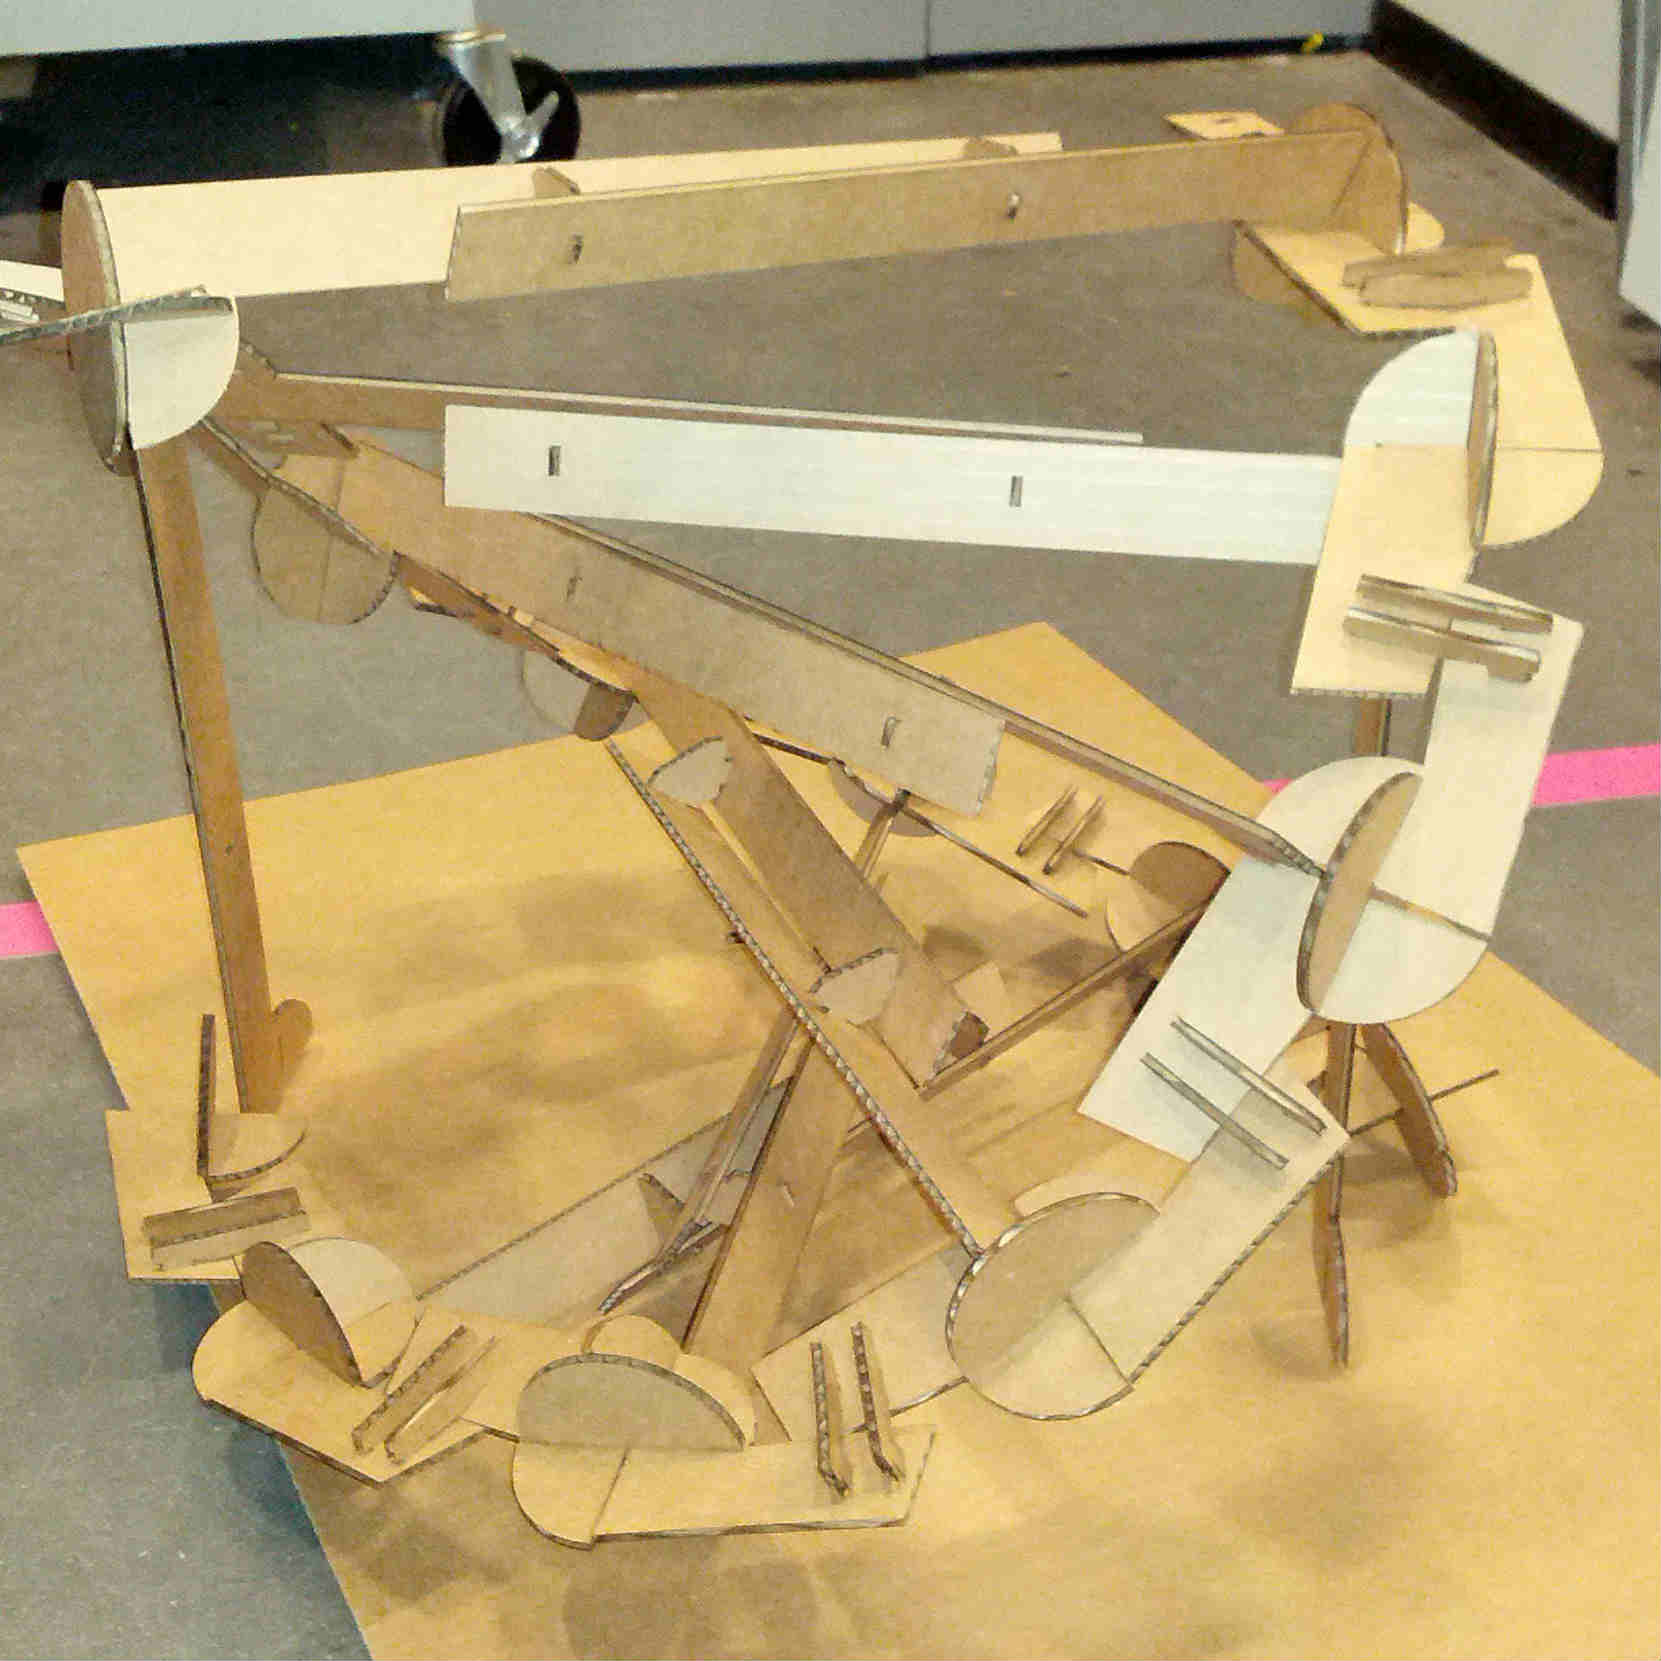
- Joint design I realized a couple minutes into laser cutting that I spent a lot of time designing the helix geometry and not enough time thinking about physics and how the structure would resist gravity. Quickly it became clear that the friction joints I designed weren't going to cut it (at least with cardboard).
Example of the joint:
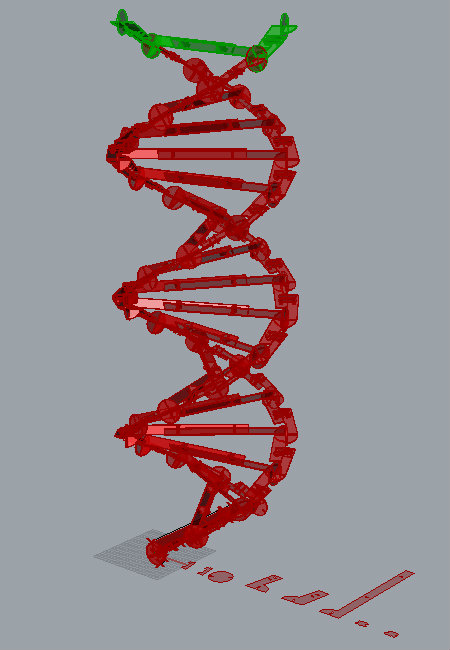
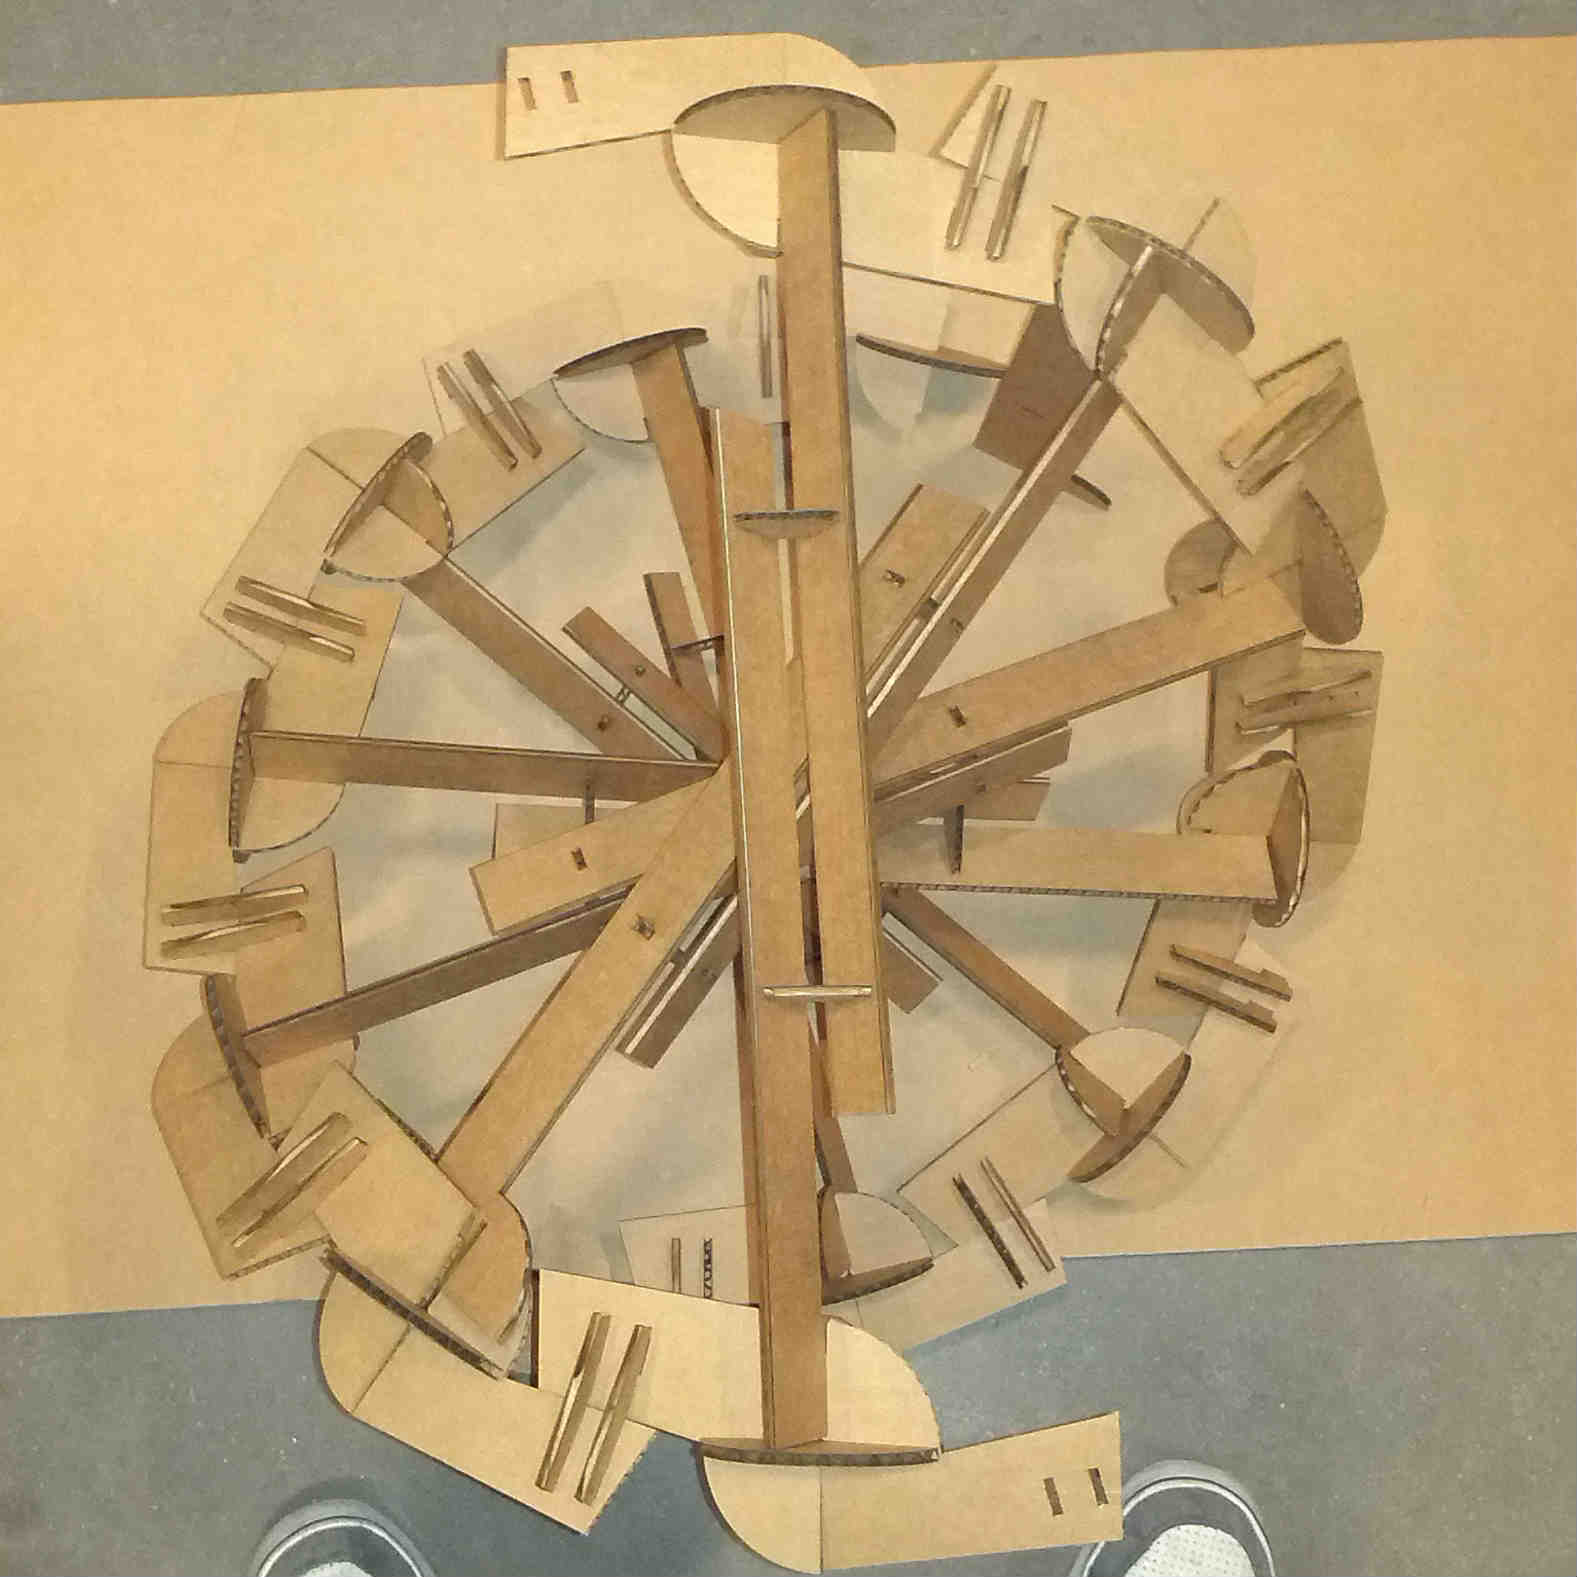
I waited to the last minute to laser cut the piece, so I didn't have time to redesign the joints. I used a couple of props to help the structure resist gravity. Below are a couple photos of what one turn of the helix looks like.
Top view of the assembly
Side view of piece
Next steps
I would love to get this working. So, in the next few weeks I hope to tweak the design of the joints to make them more structurally sound while retaining the geometry.
Downloads
GenerativeDNA.gh — Grasshopper file for parametric generation of DNA helices — Updated September 17, 2013