How to Make (Almost) Anything
Project 15 - Final Project
Title: System Integration and Integrated Design
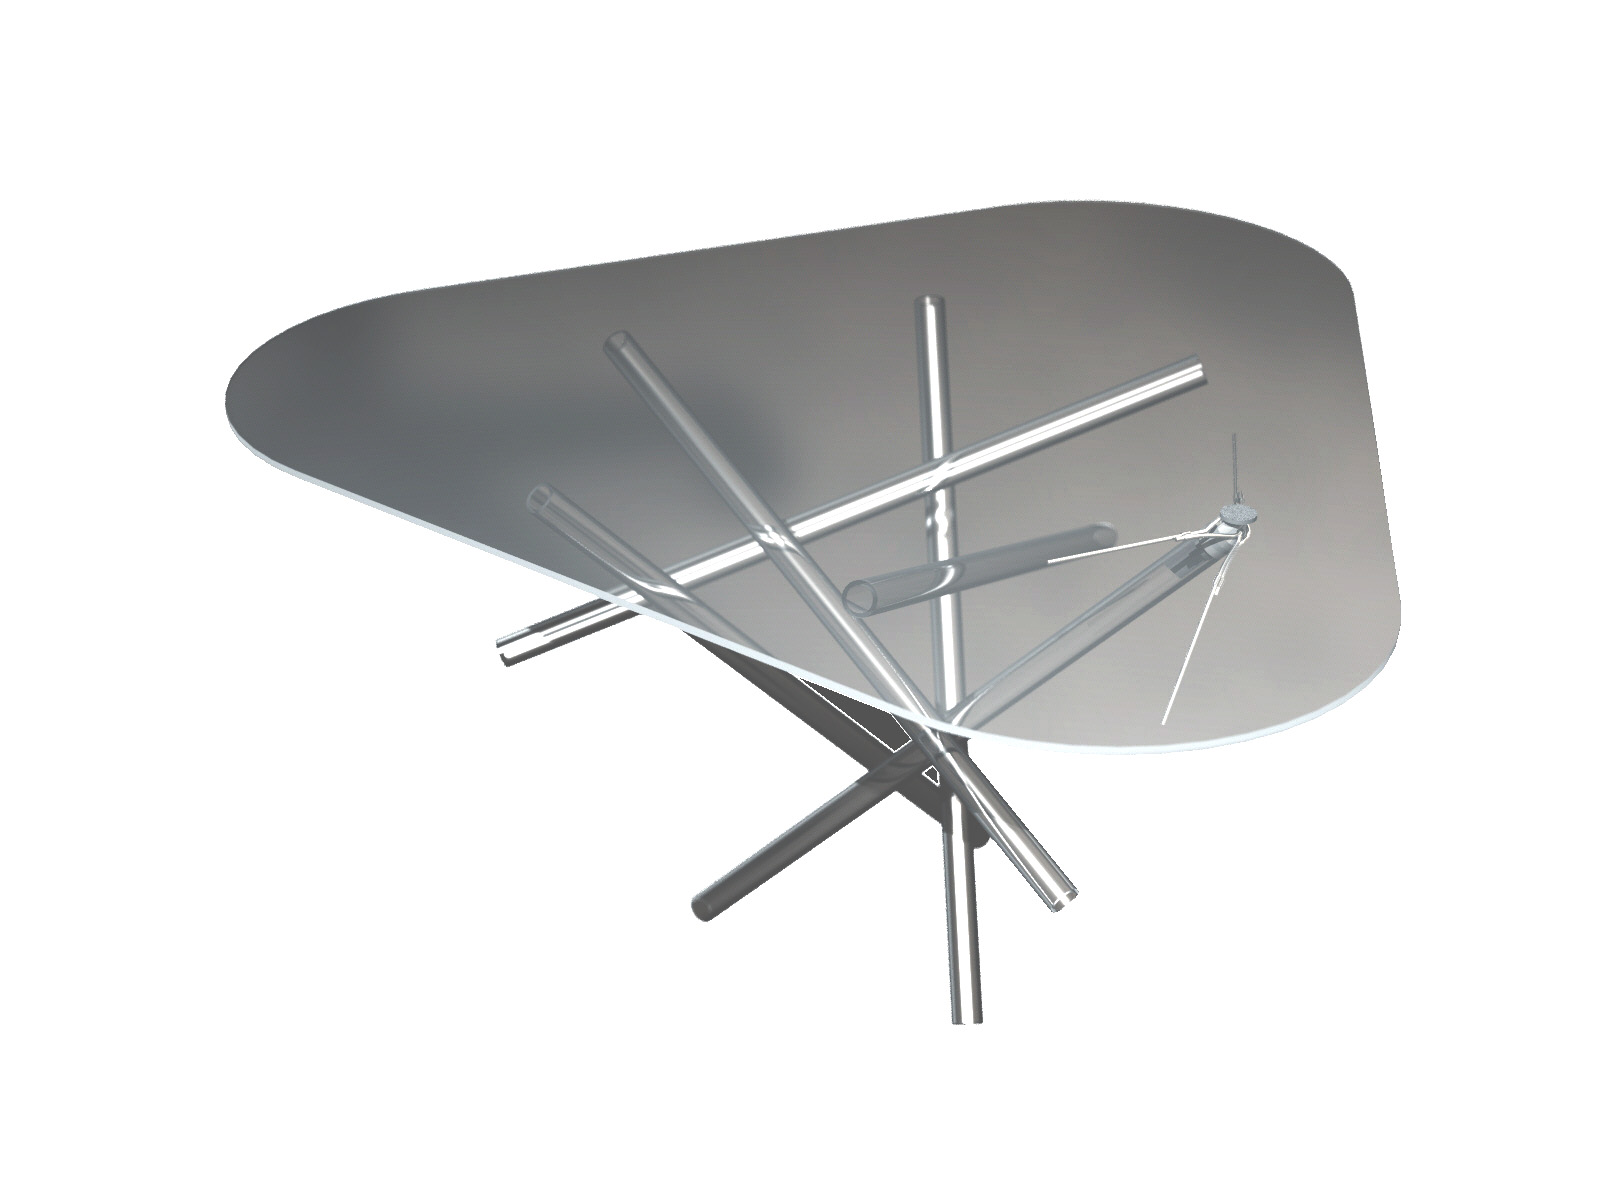
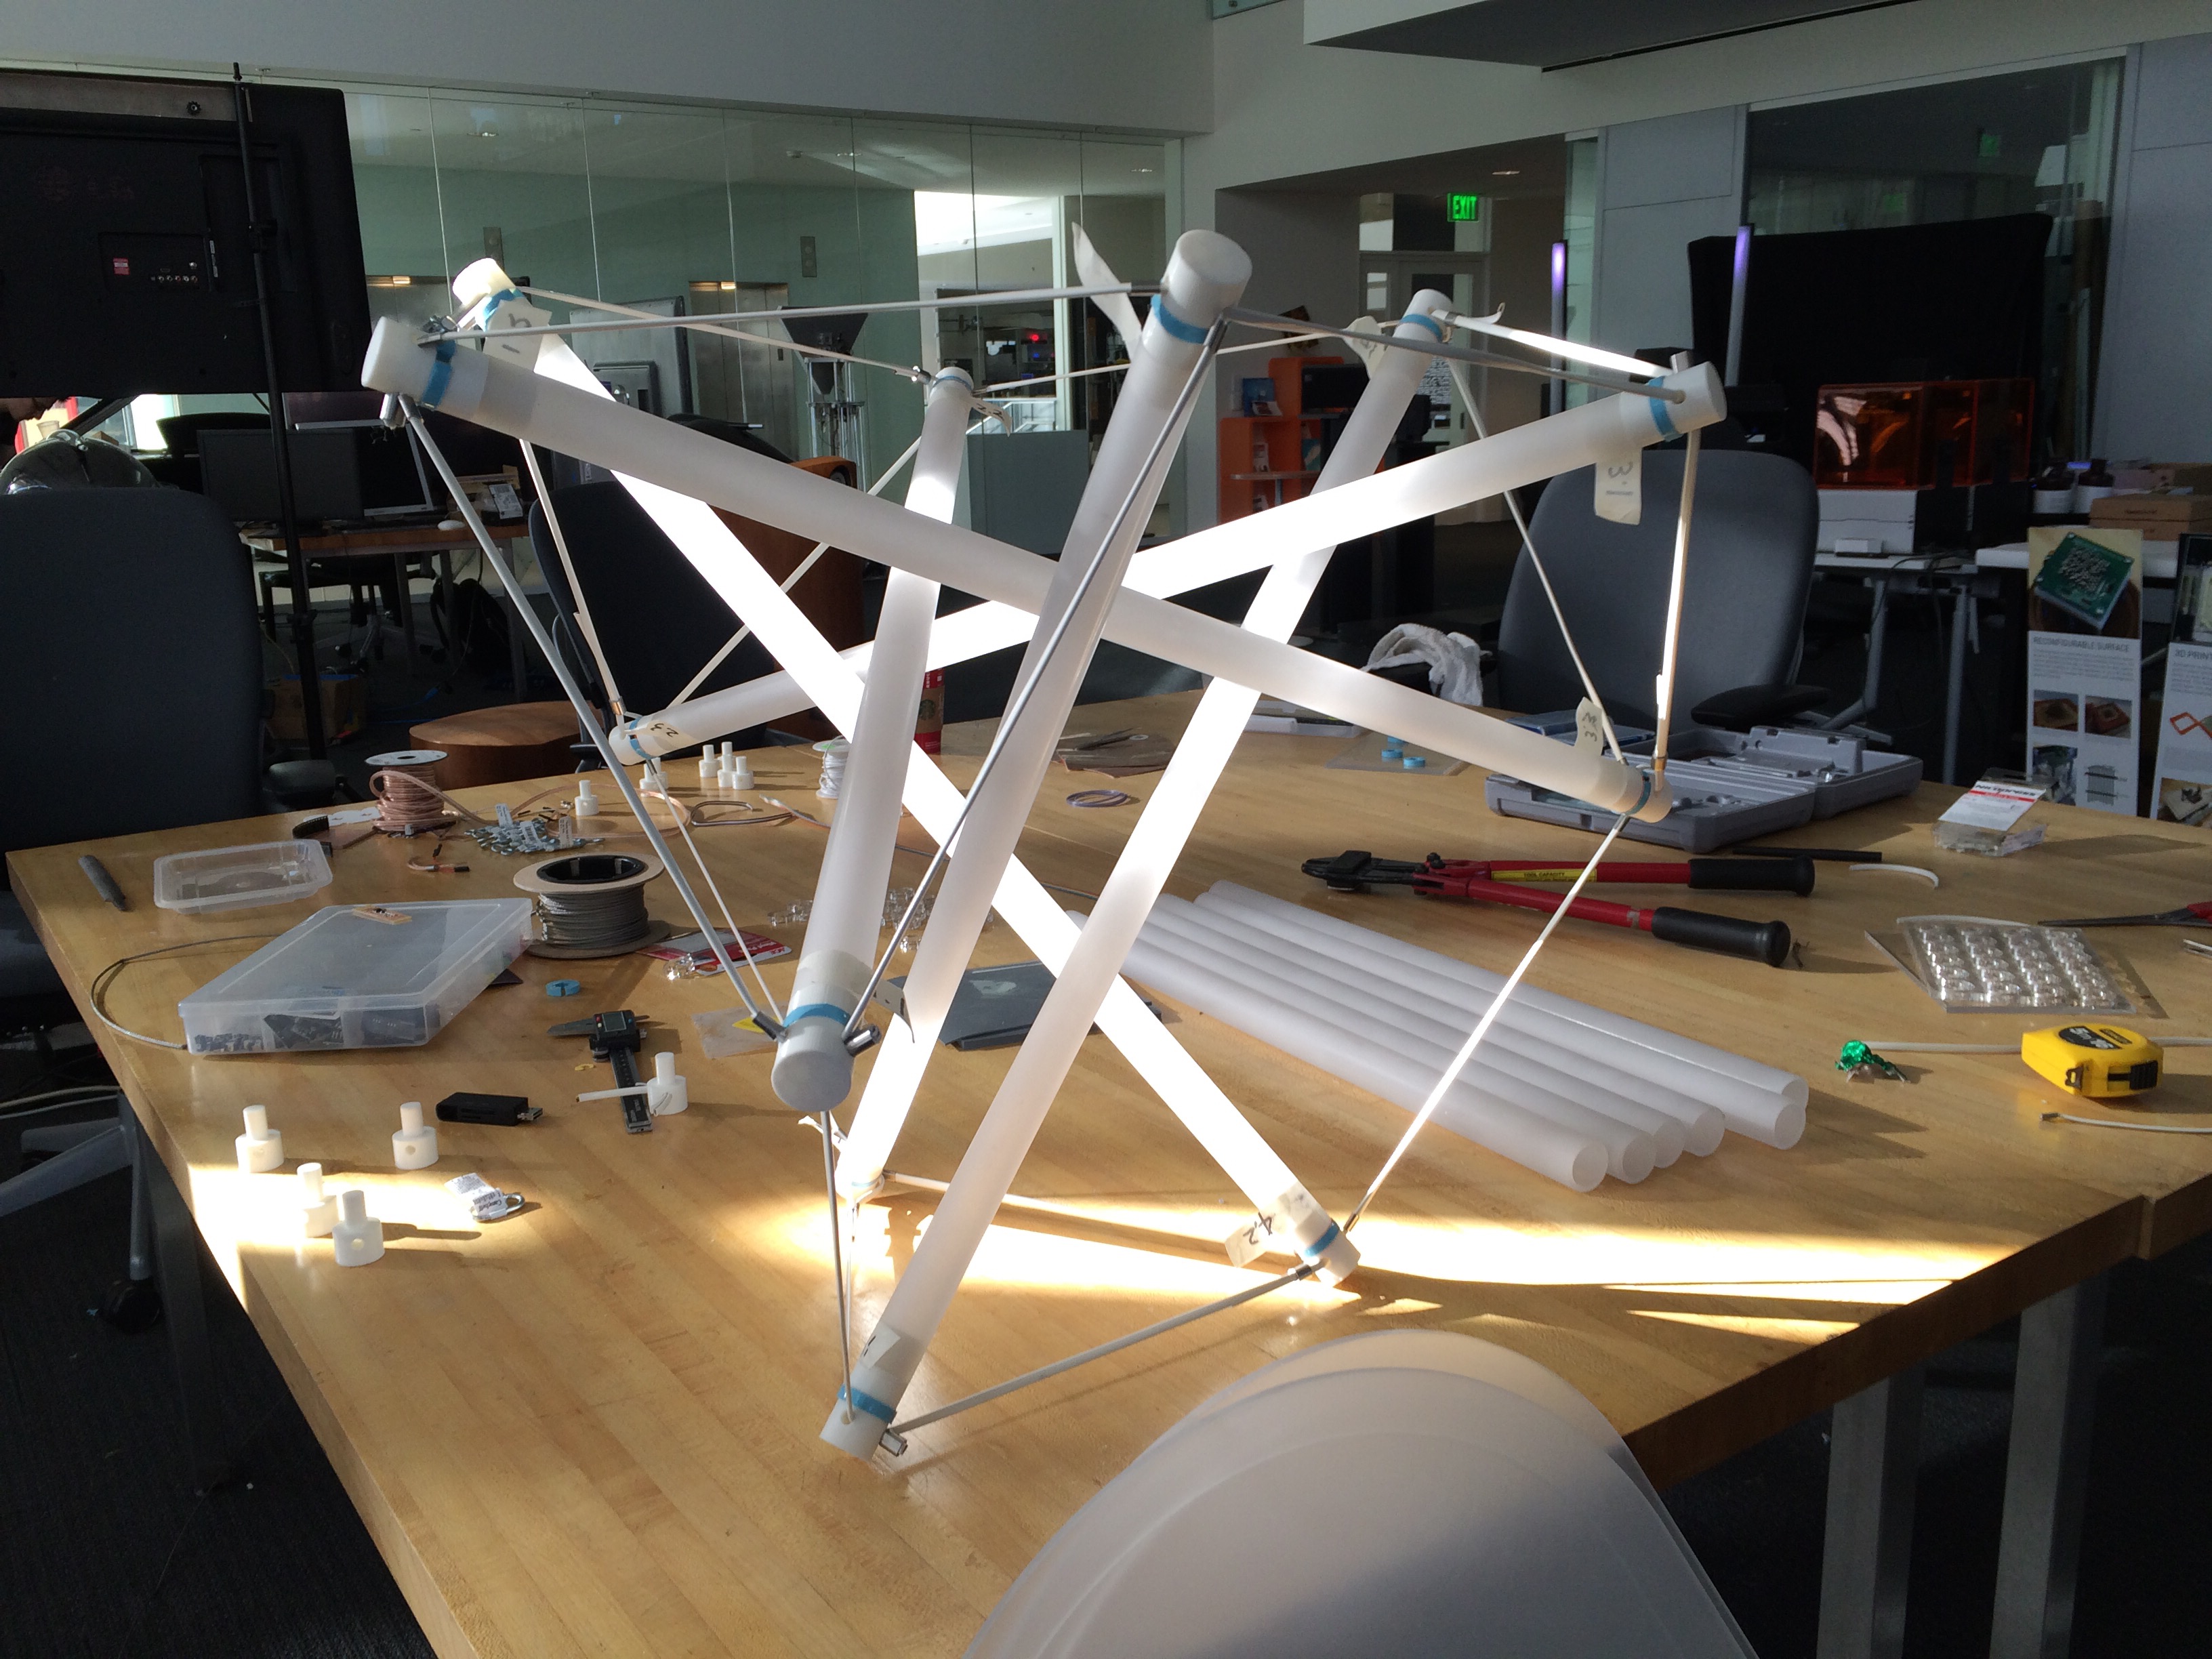
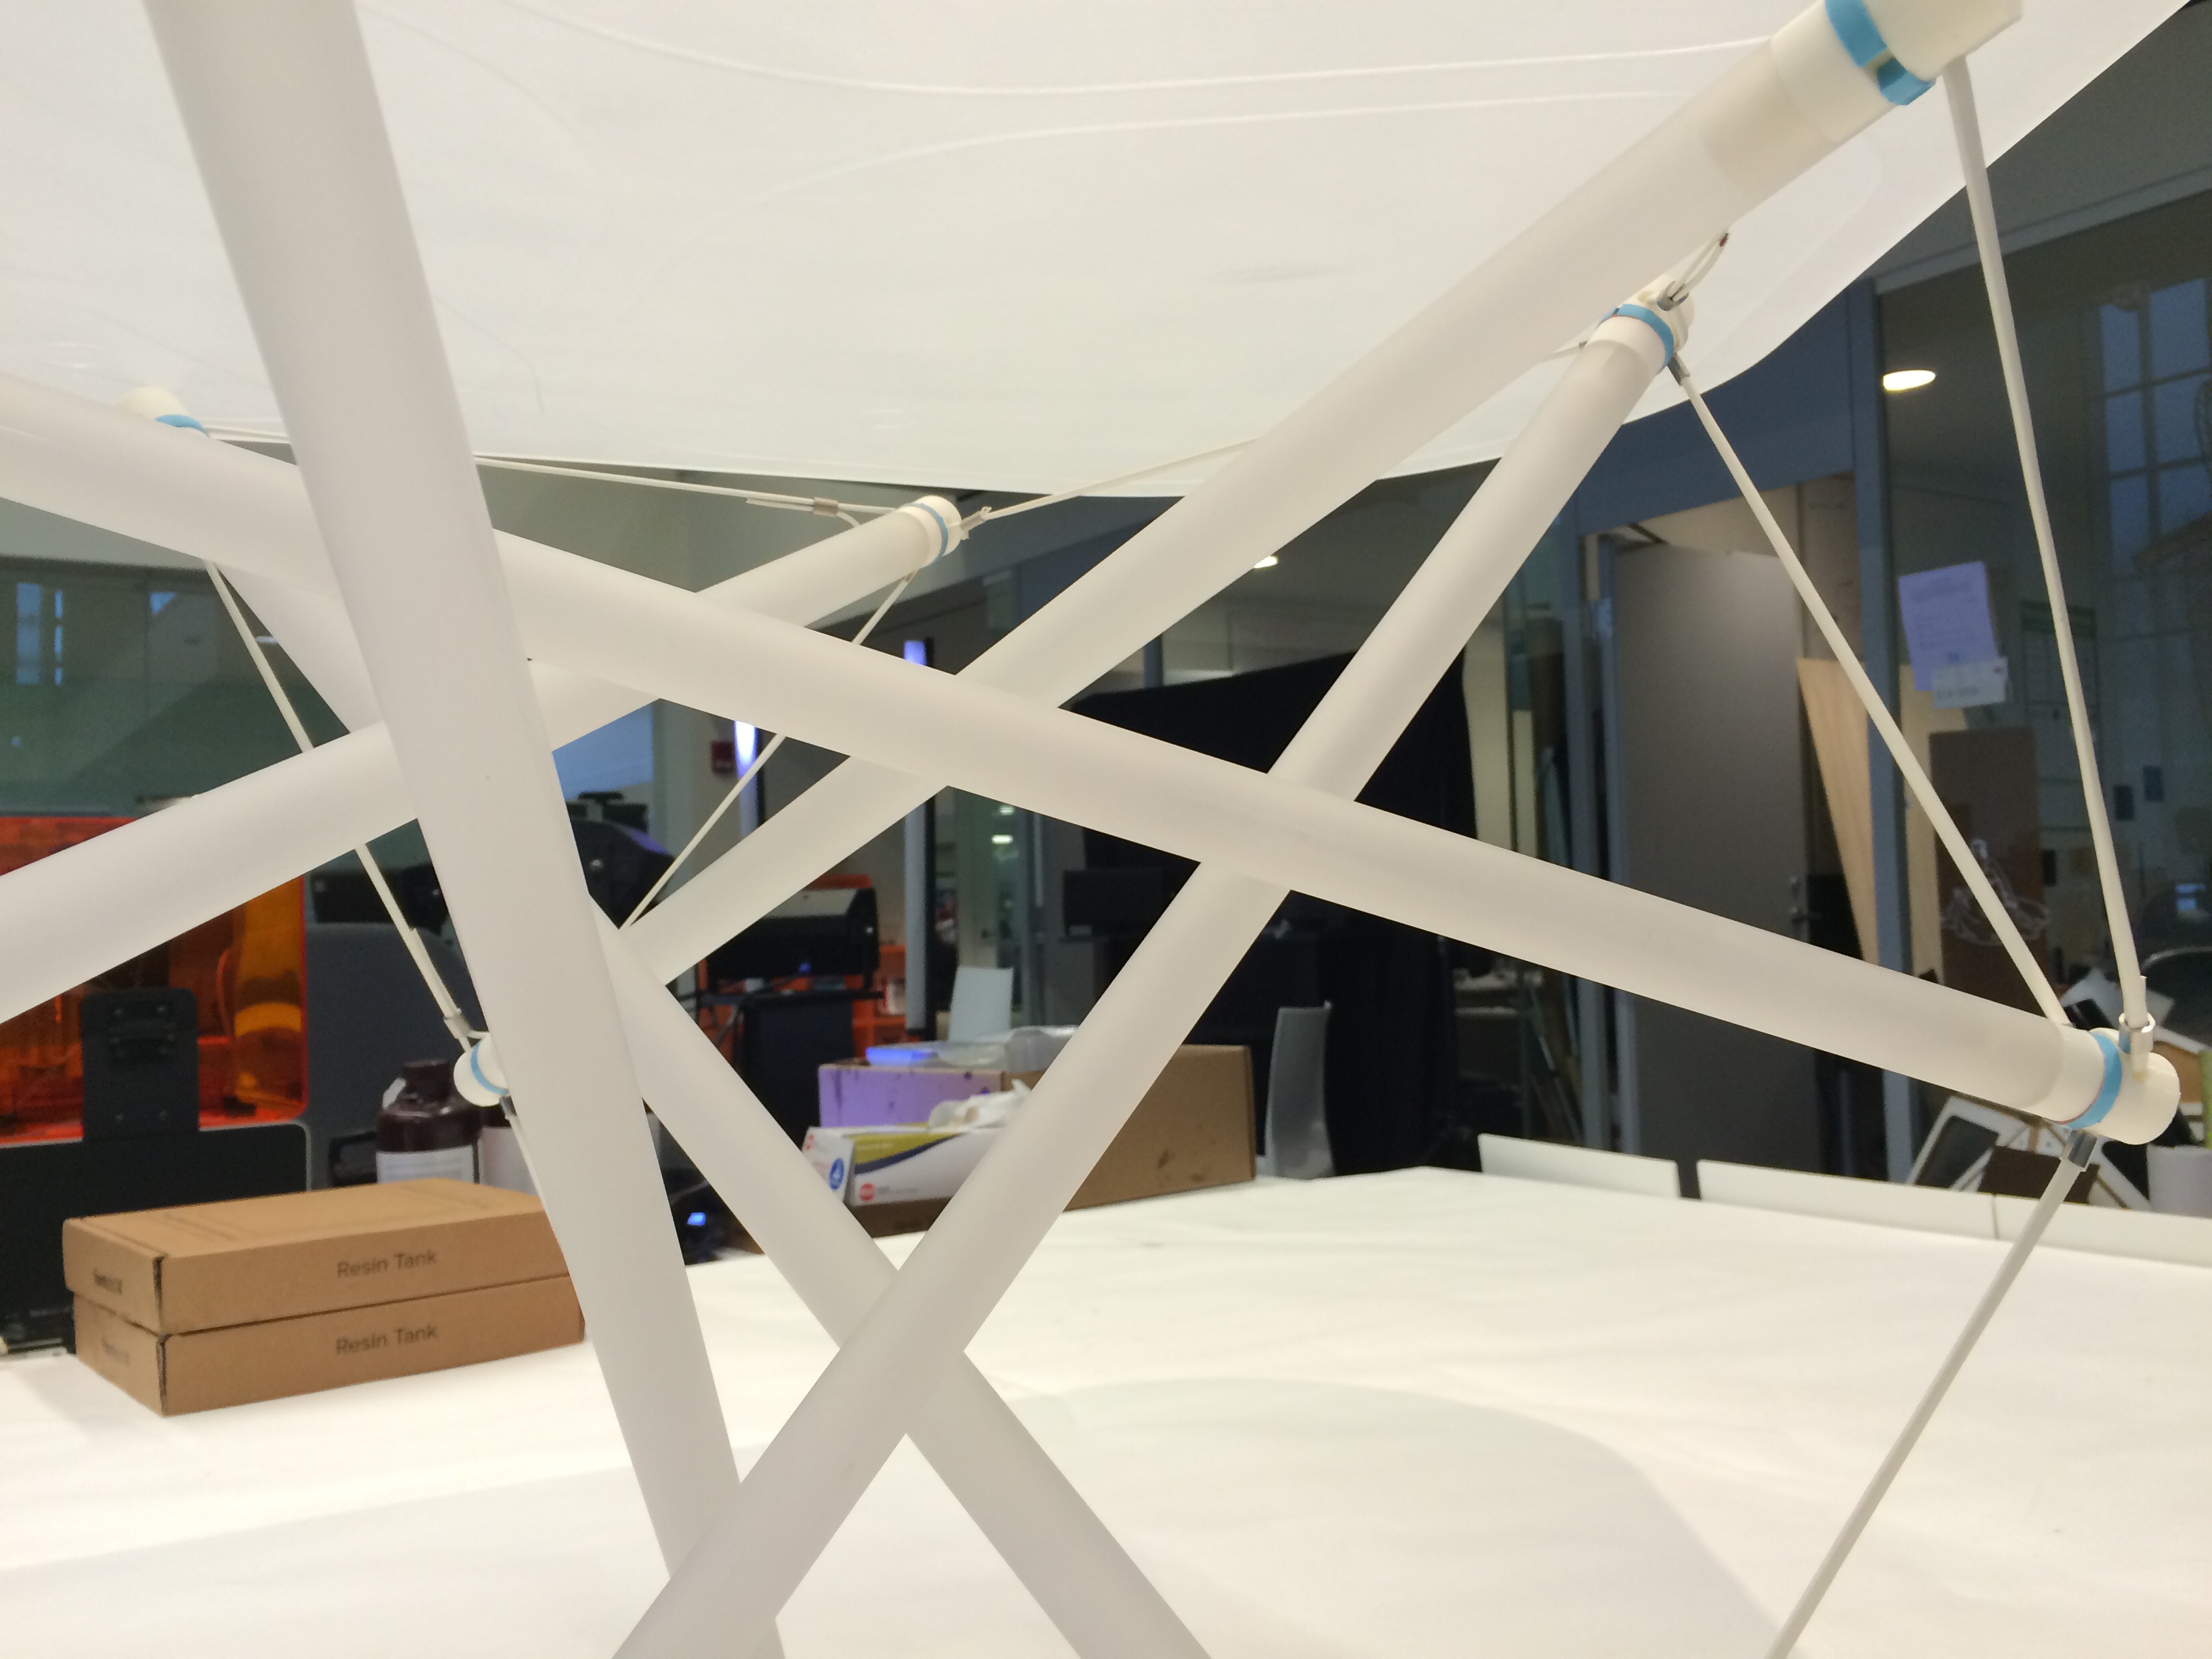
Design: Capacitive Load Sensing Tensegrity Structure
Design
For the final project, I started off with an interest in building a furniture that works as a physical finite element model and testing existing off the shelf sensors like flex sensor and strain gauge. I started speaking with our TAs after the input device week. Special thanks go to Will Langford and Jean-Francois Duval (Jeff) who have kindly helped me understand the mechanism of these sensors and pointed me to a right direction.
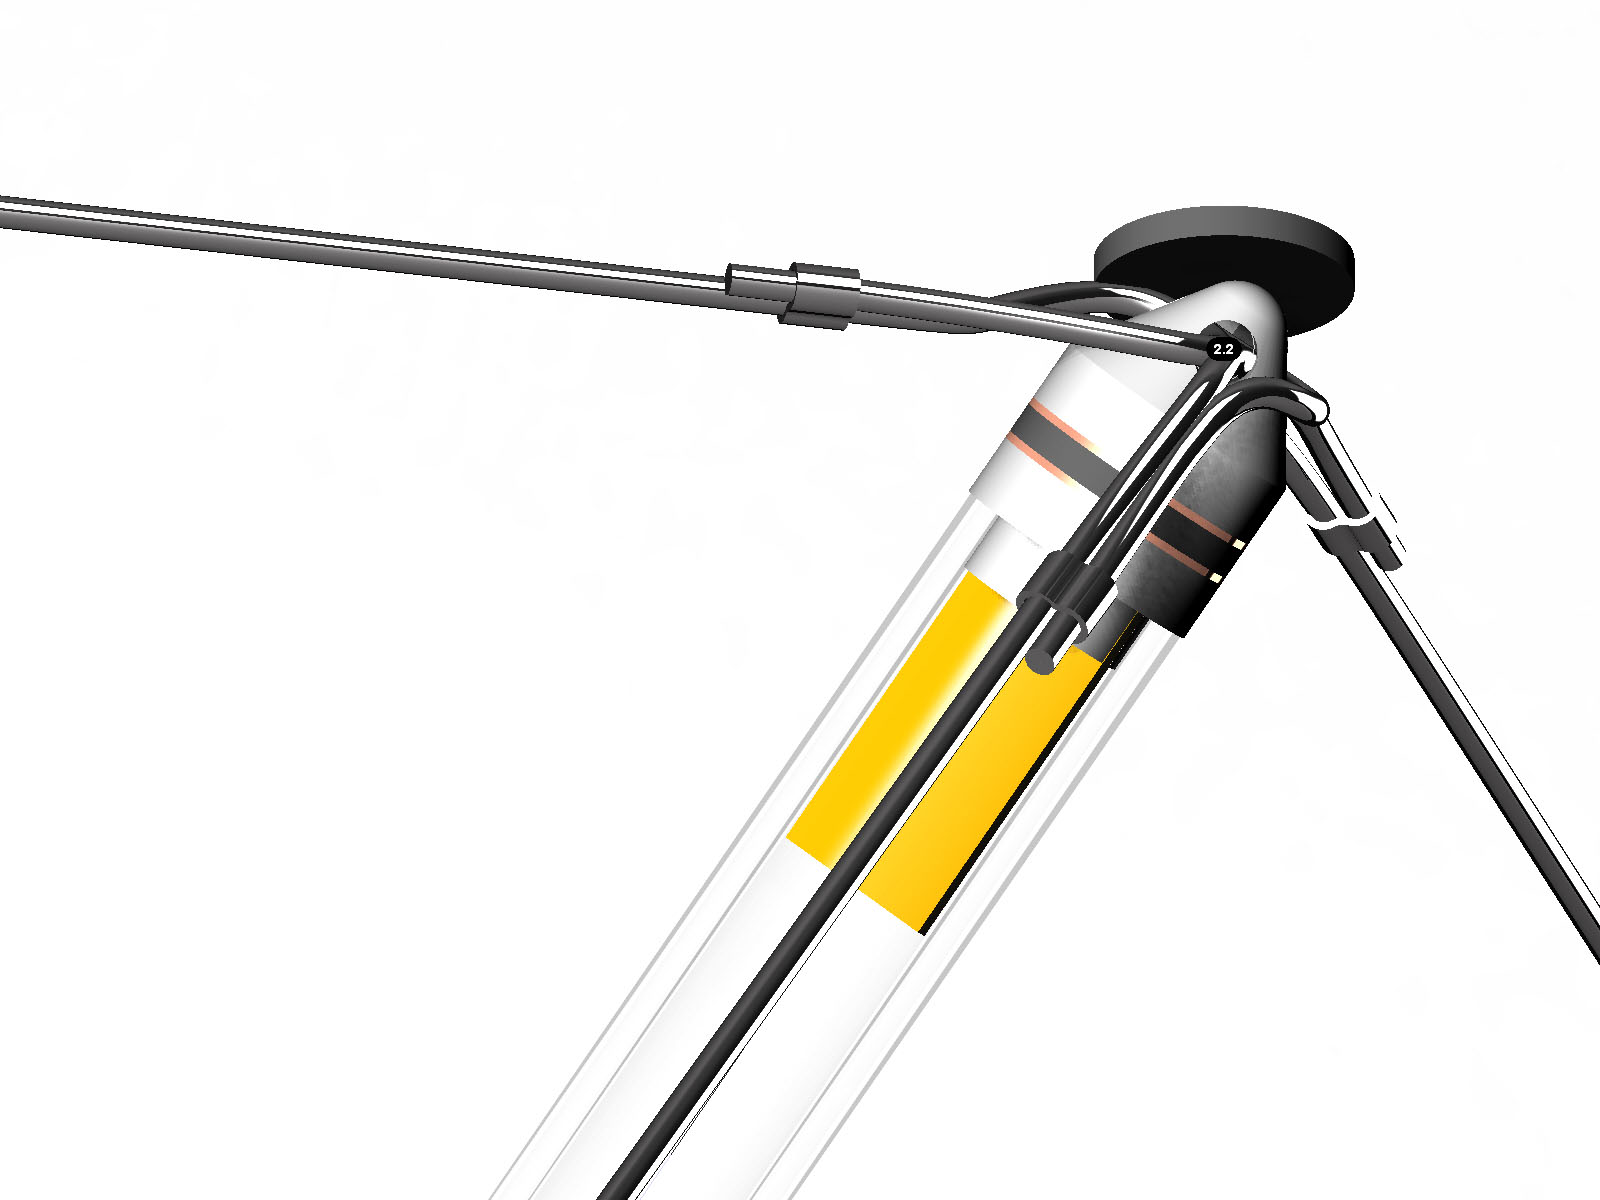
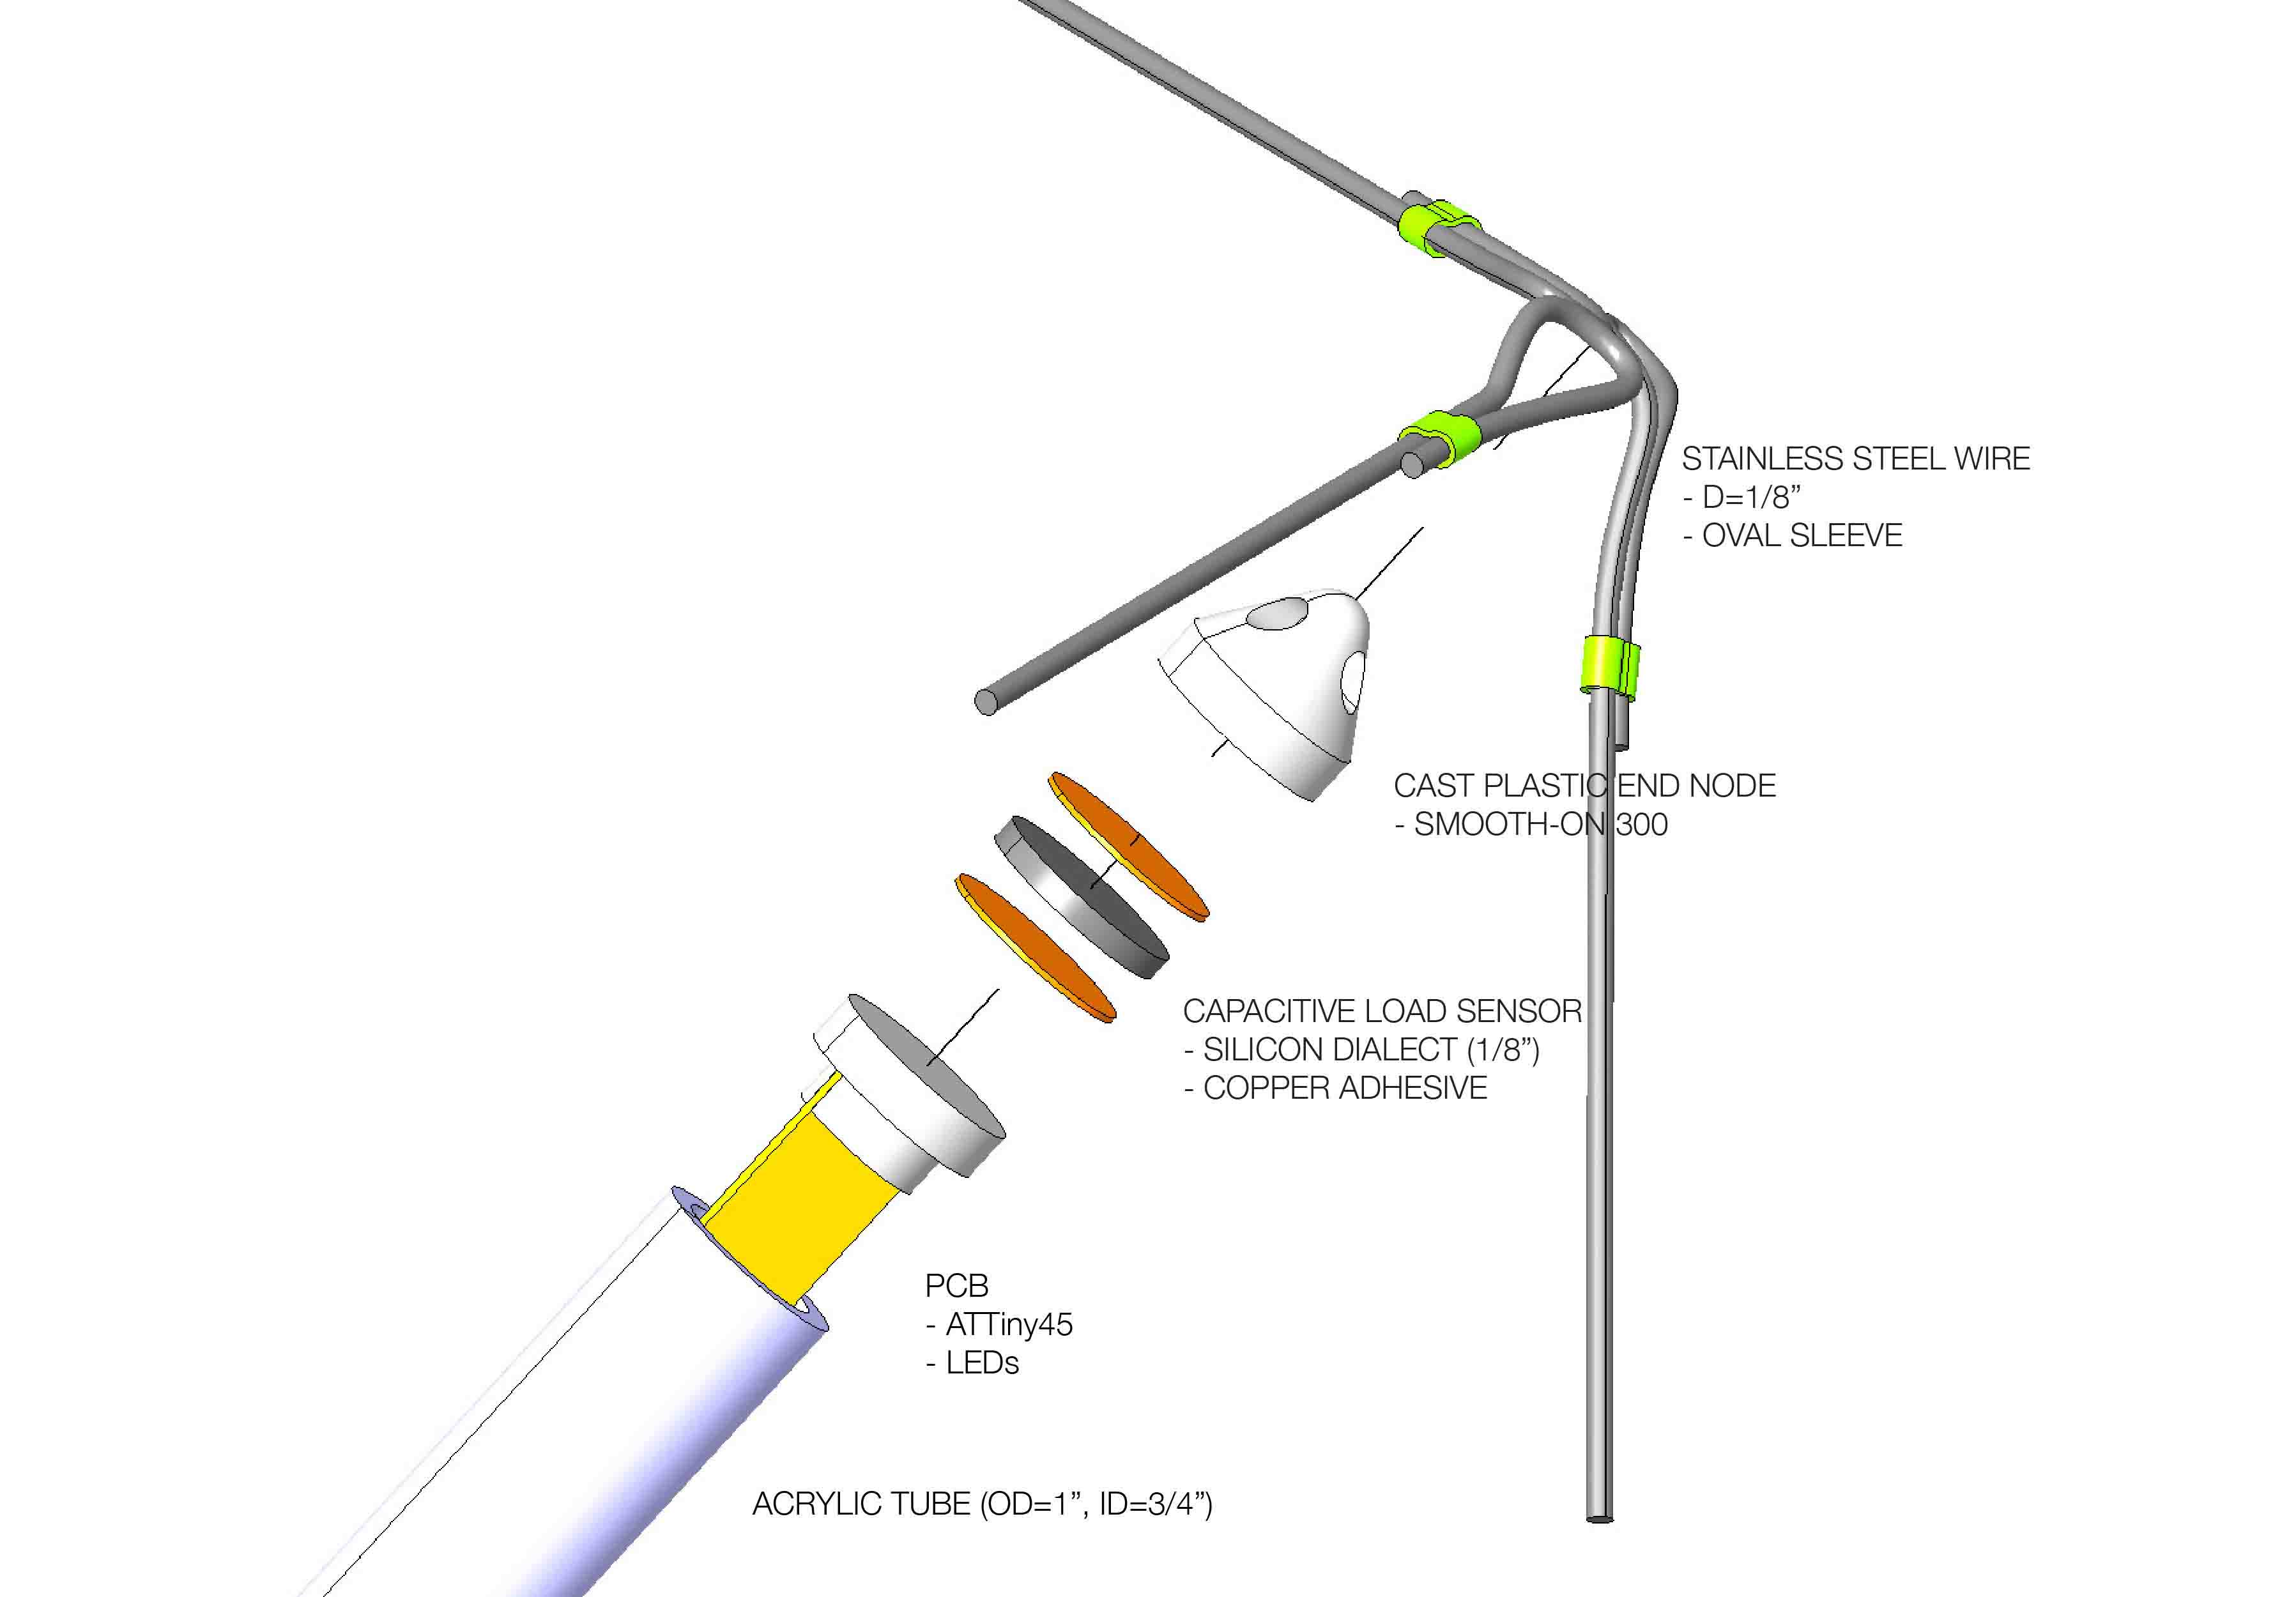
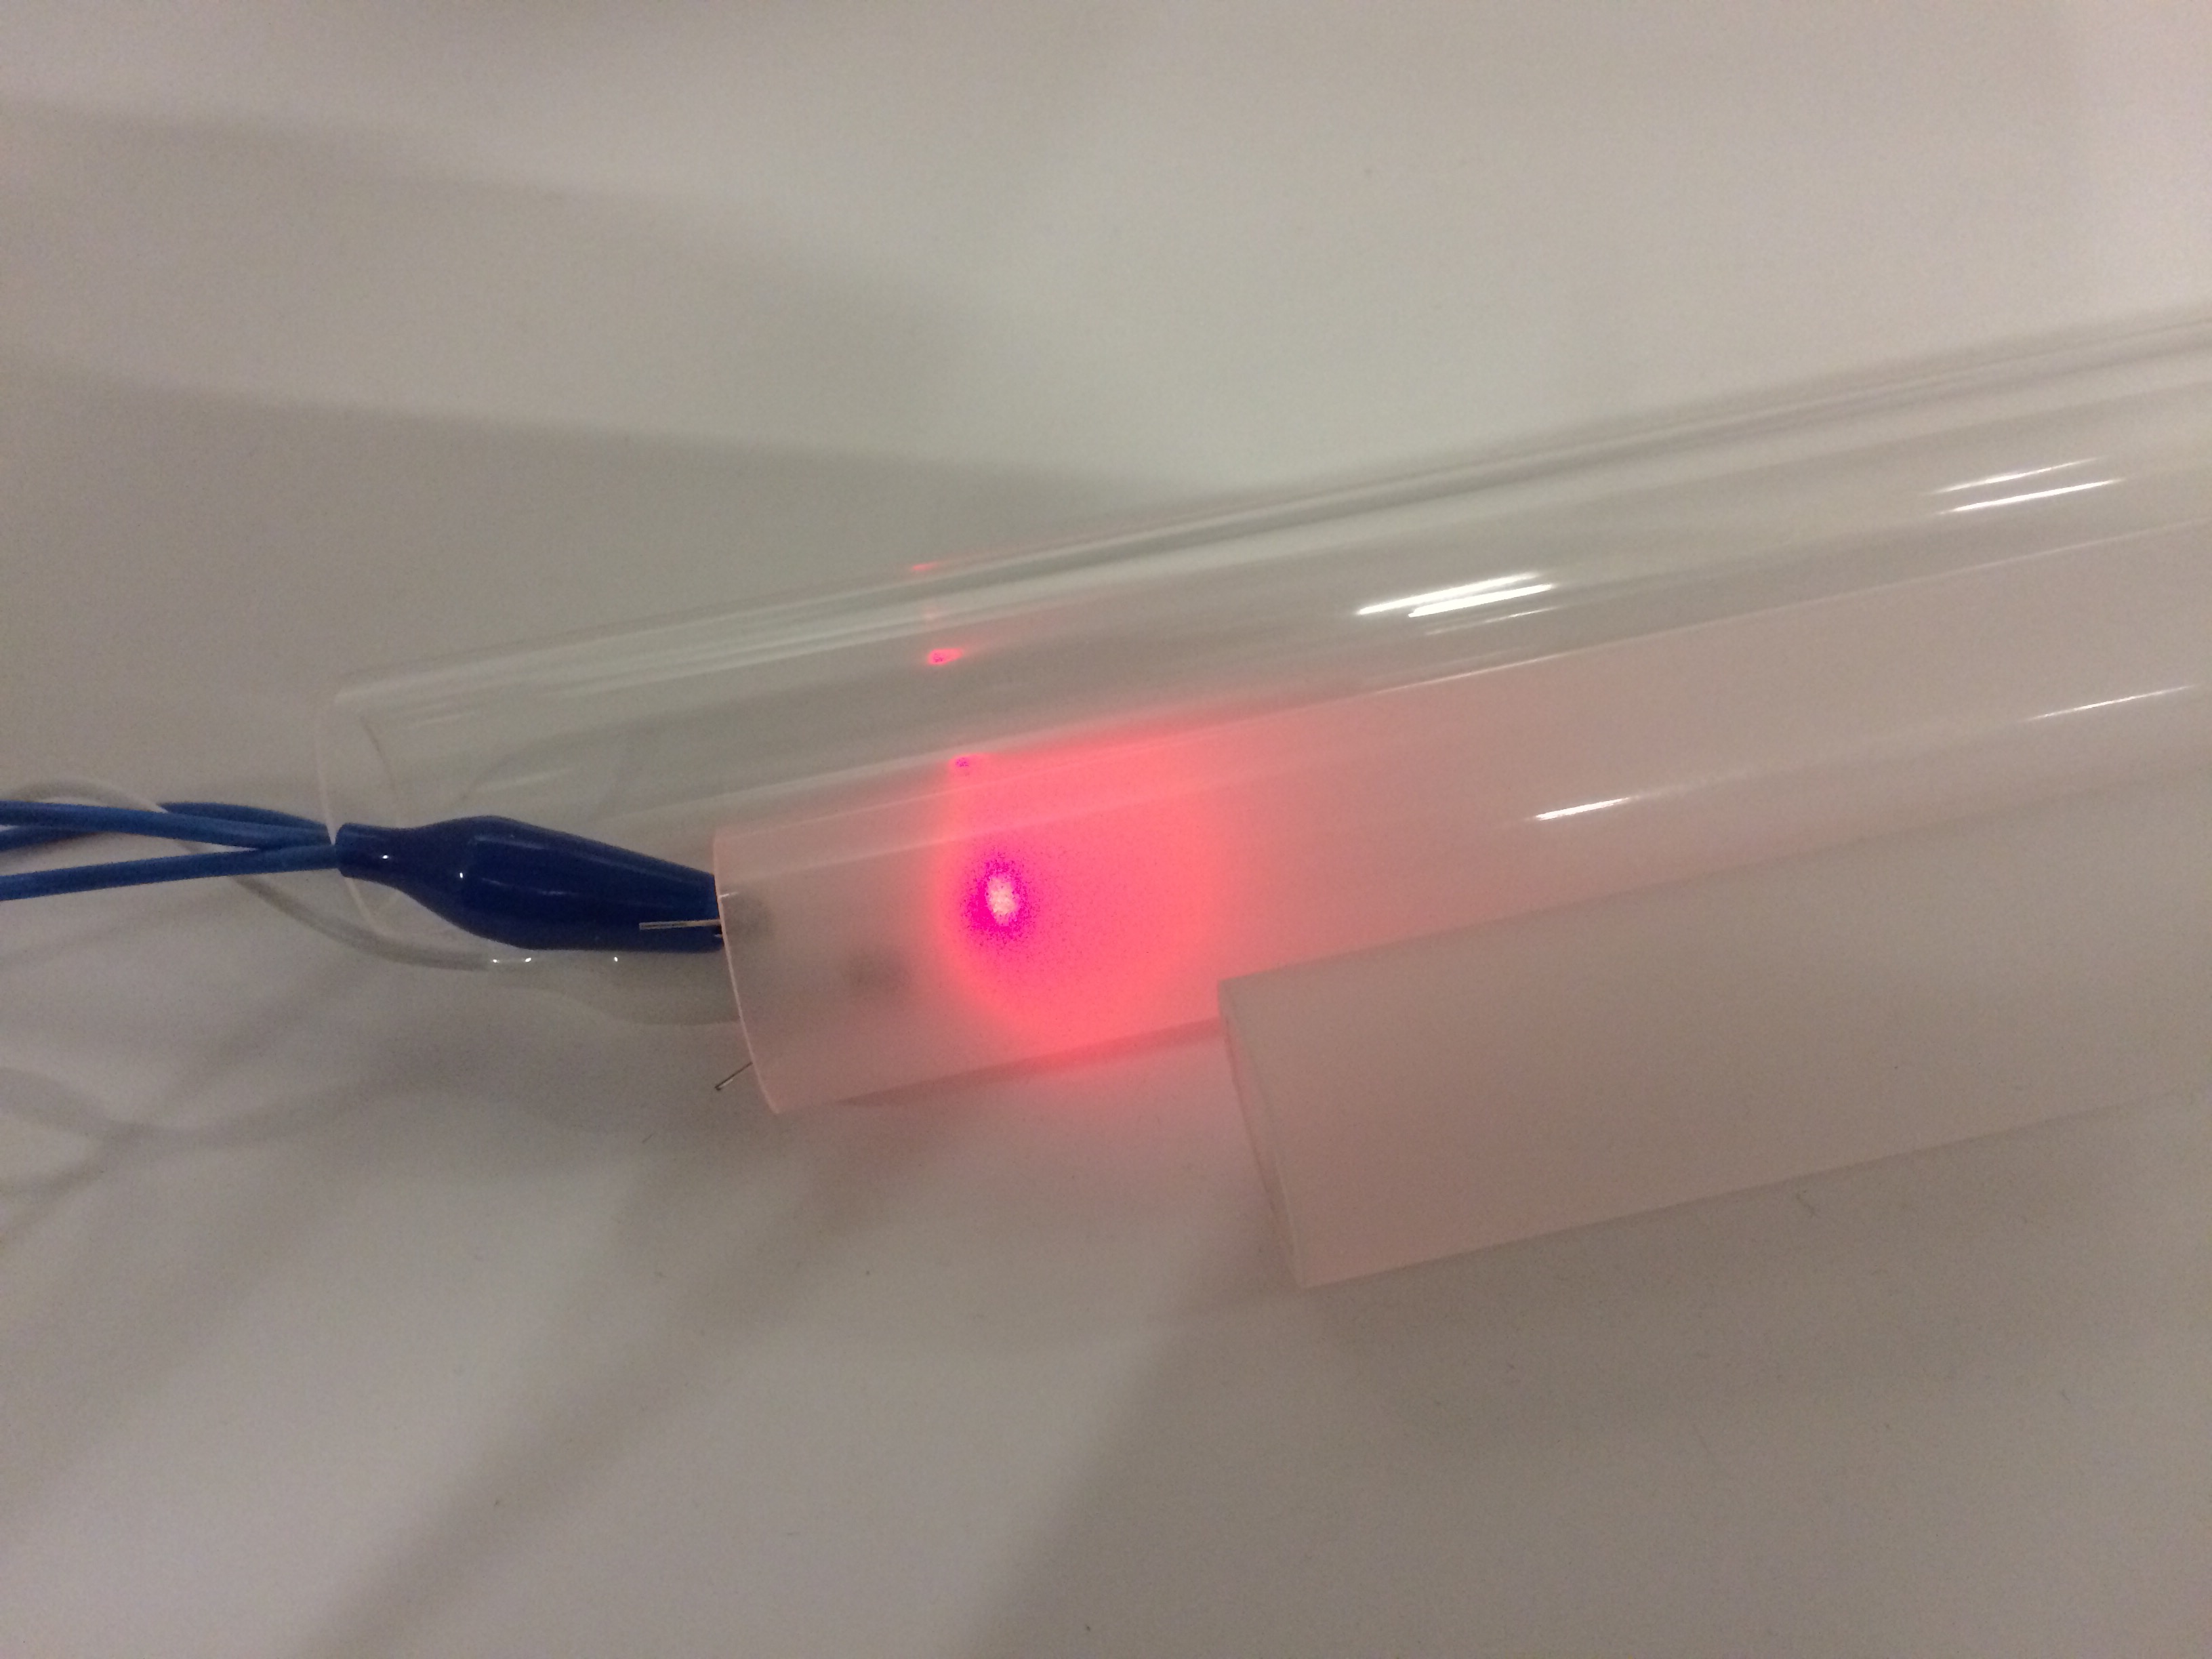
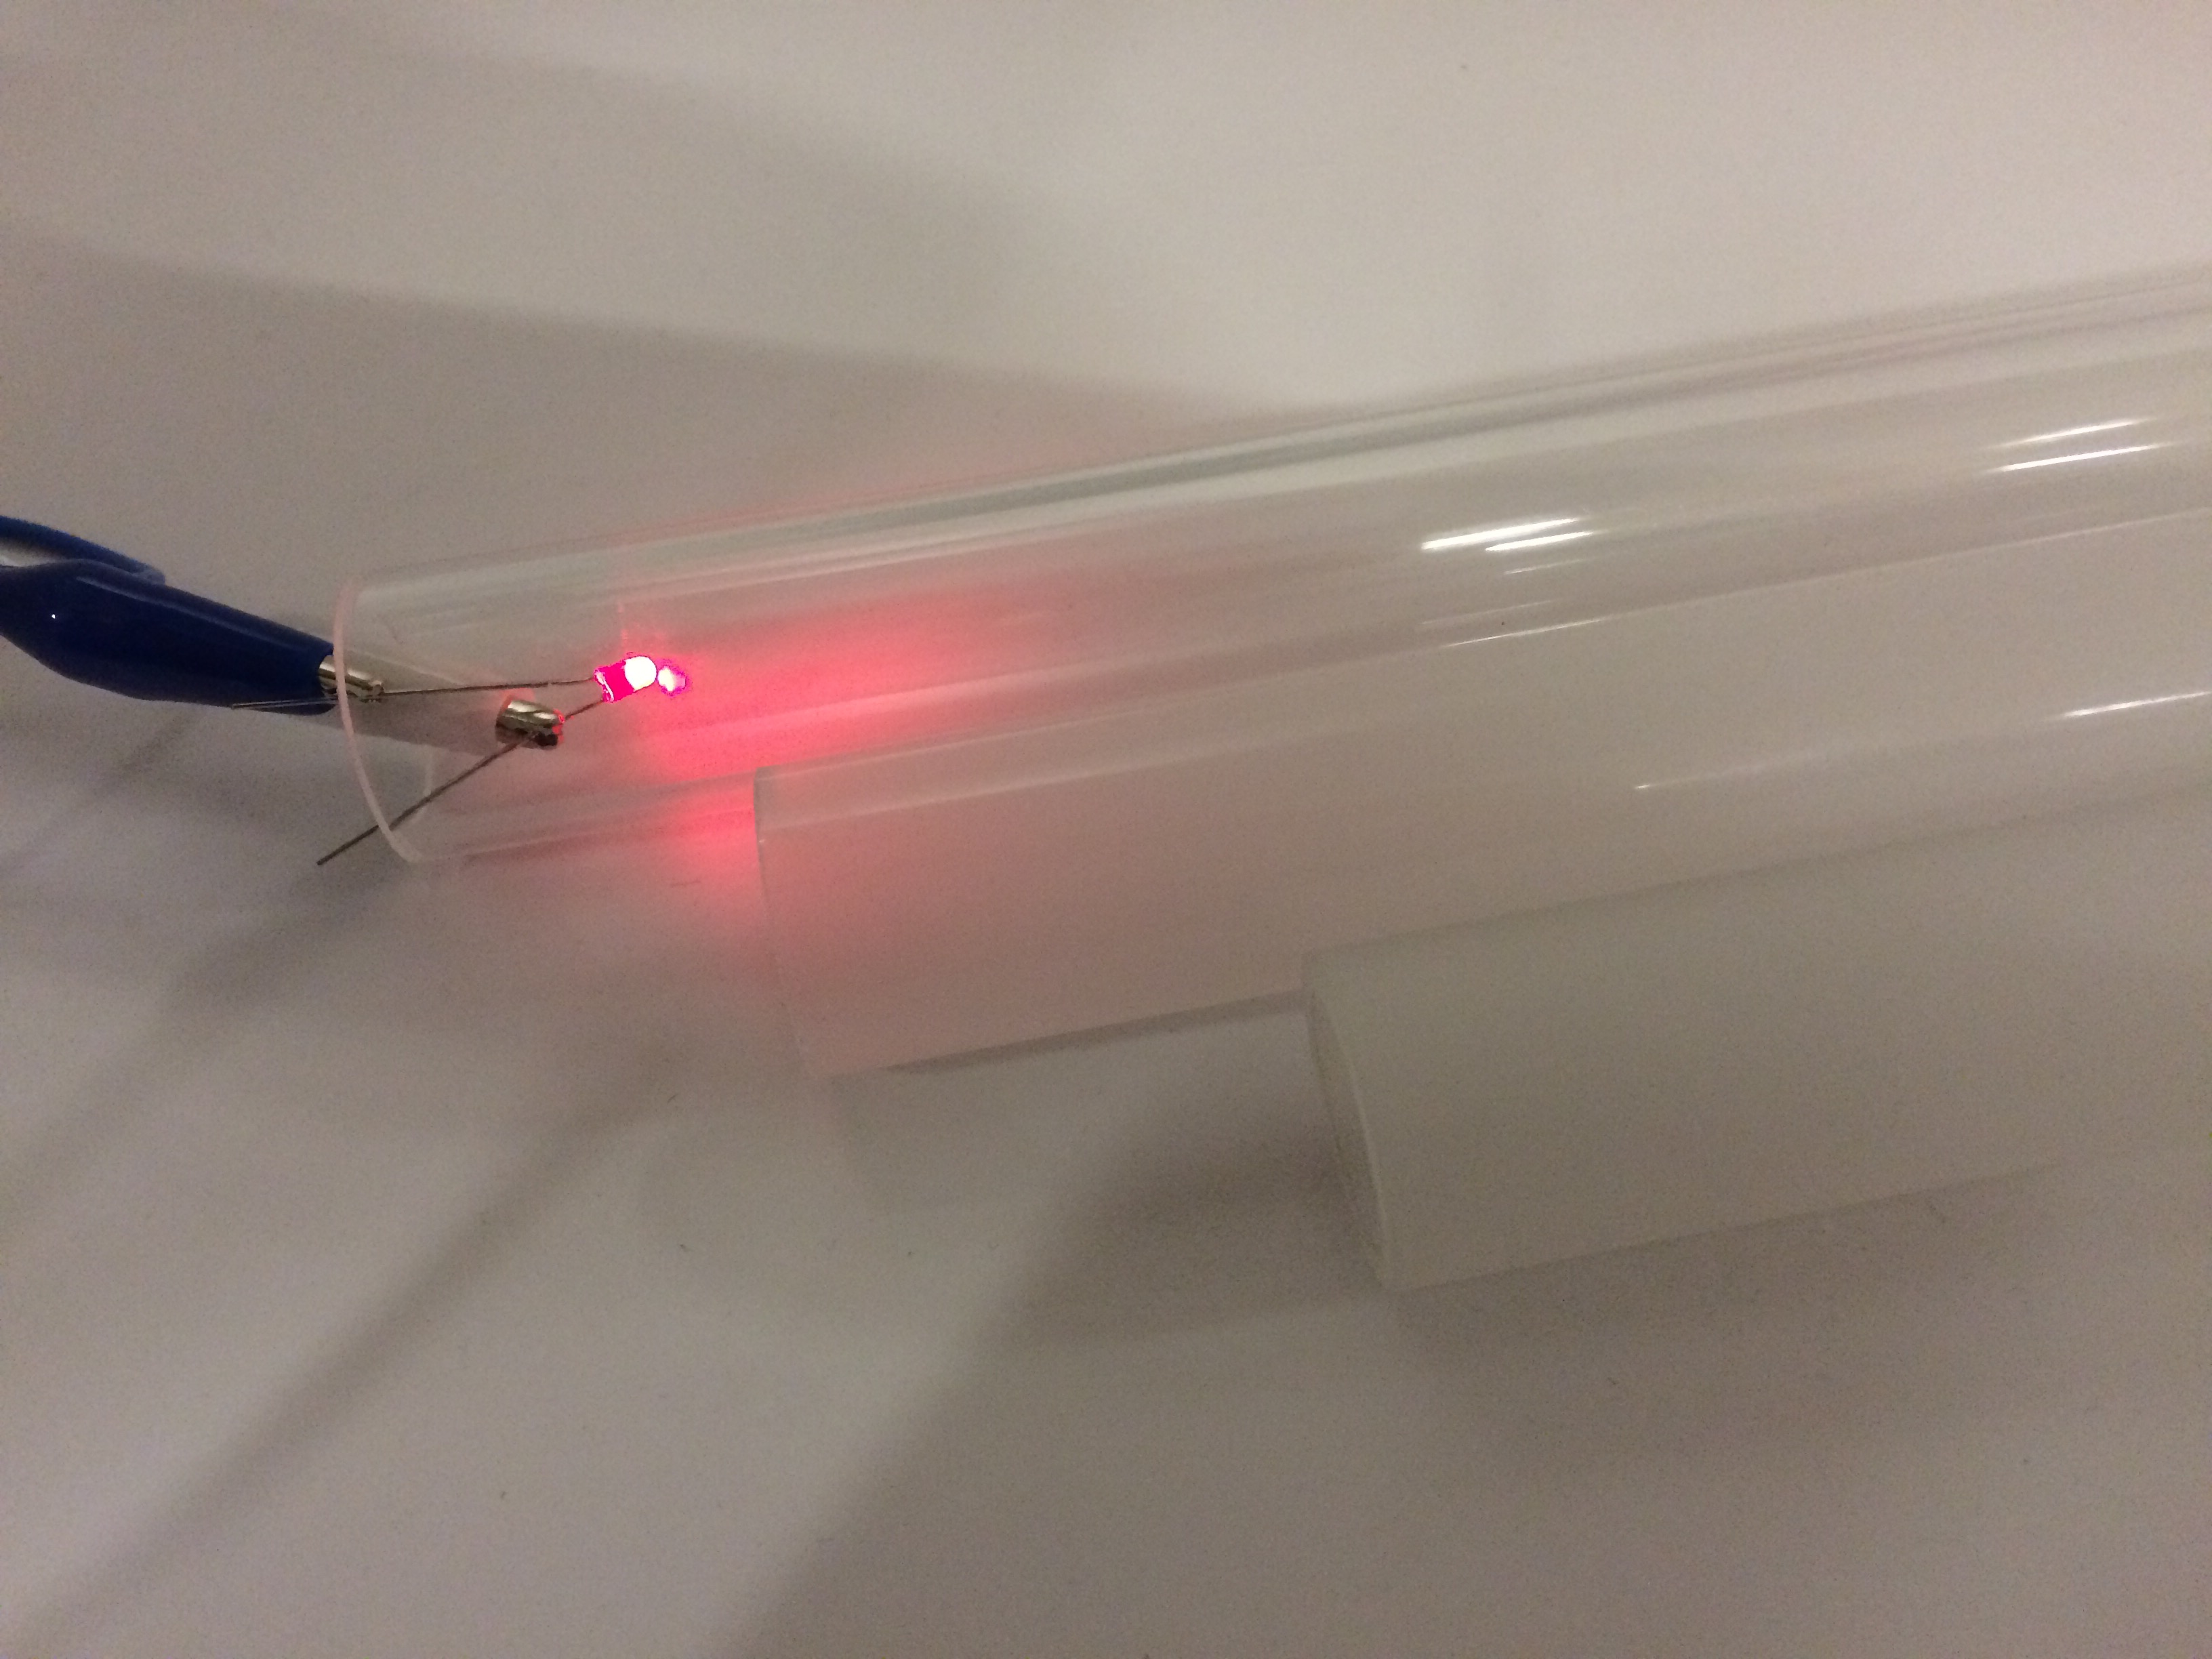
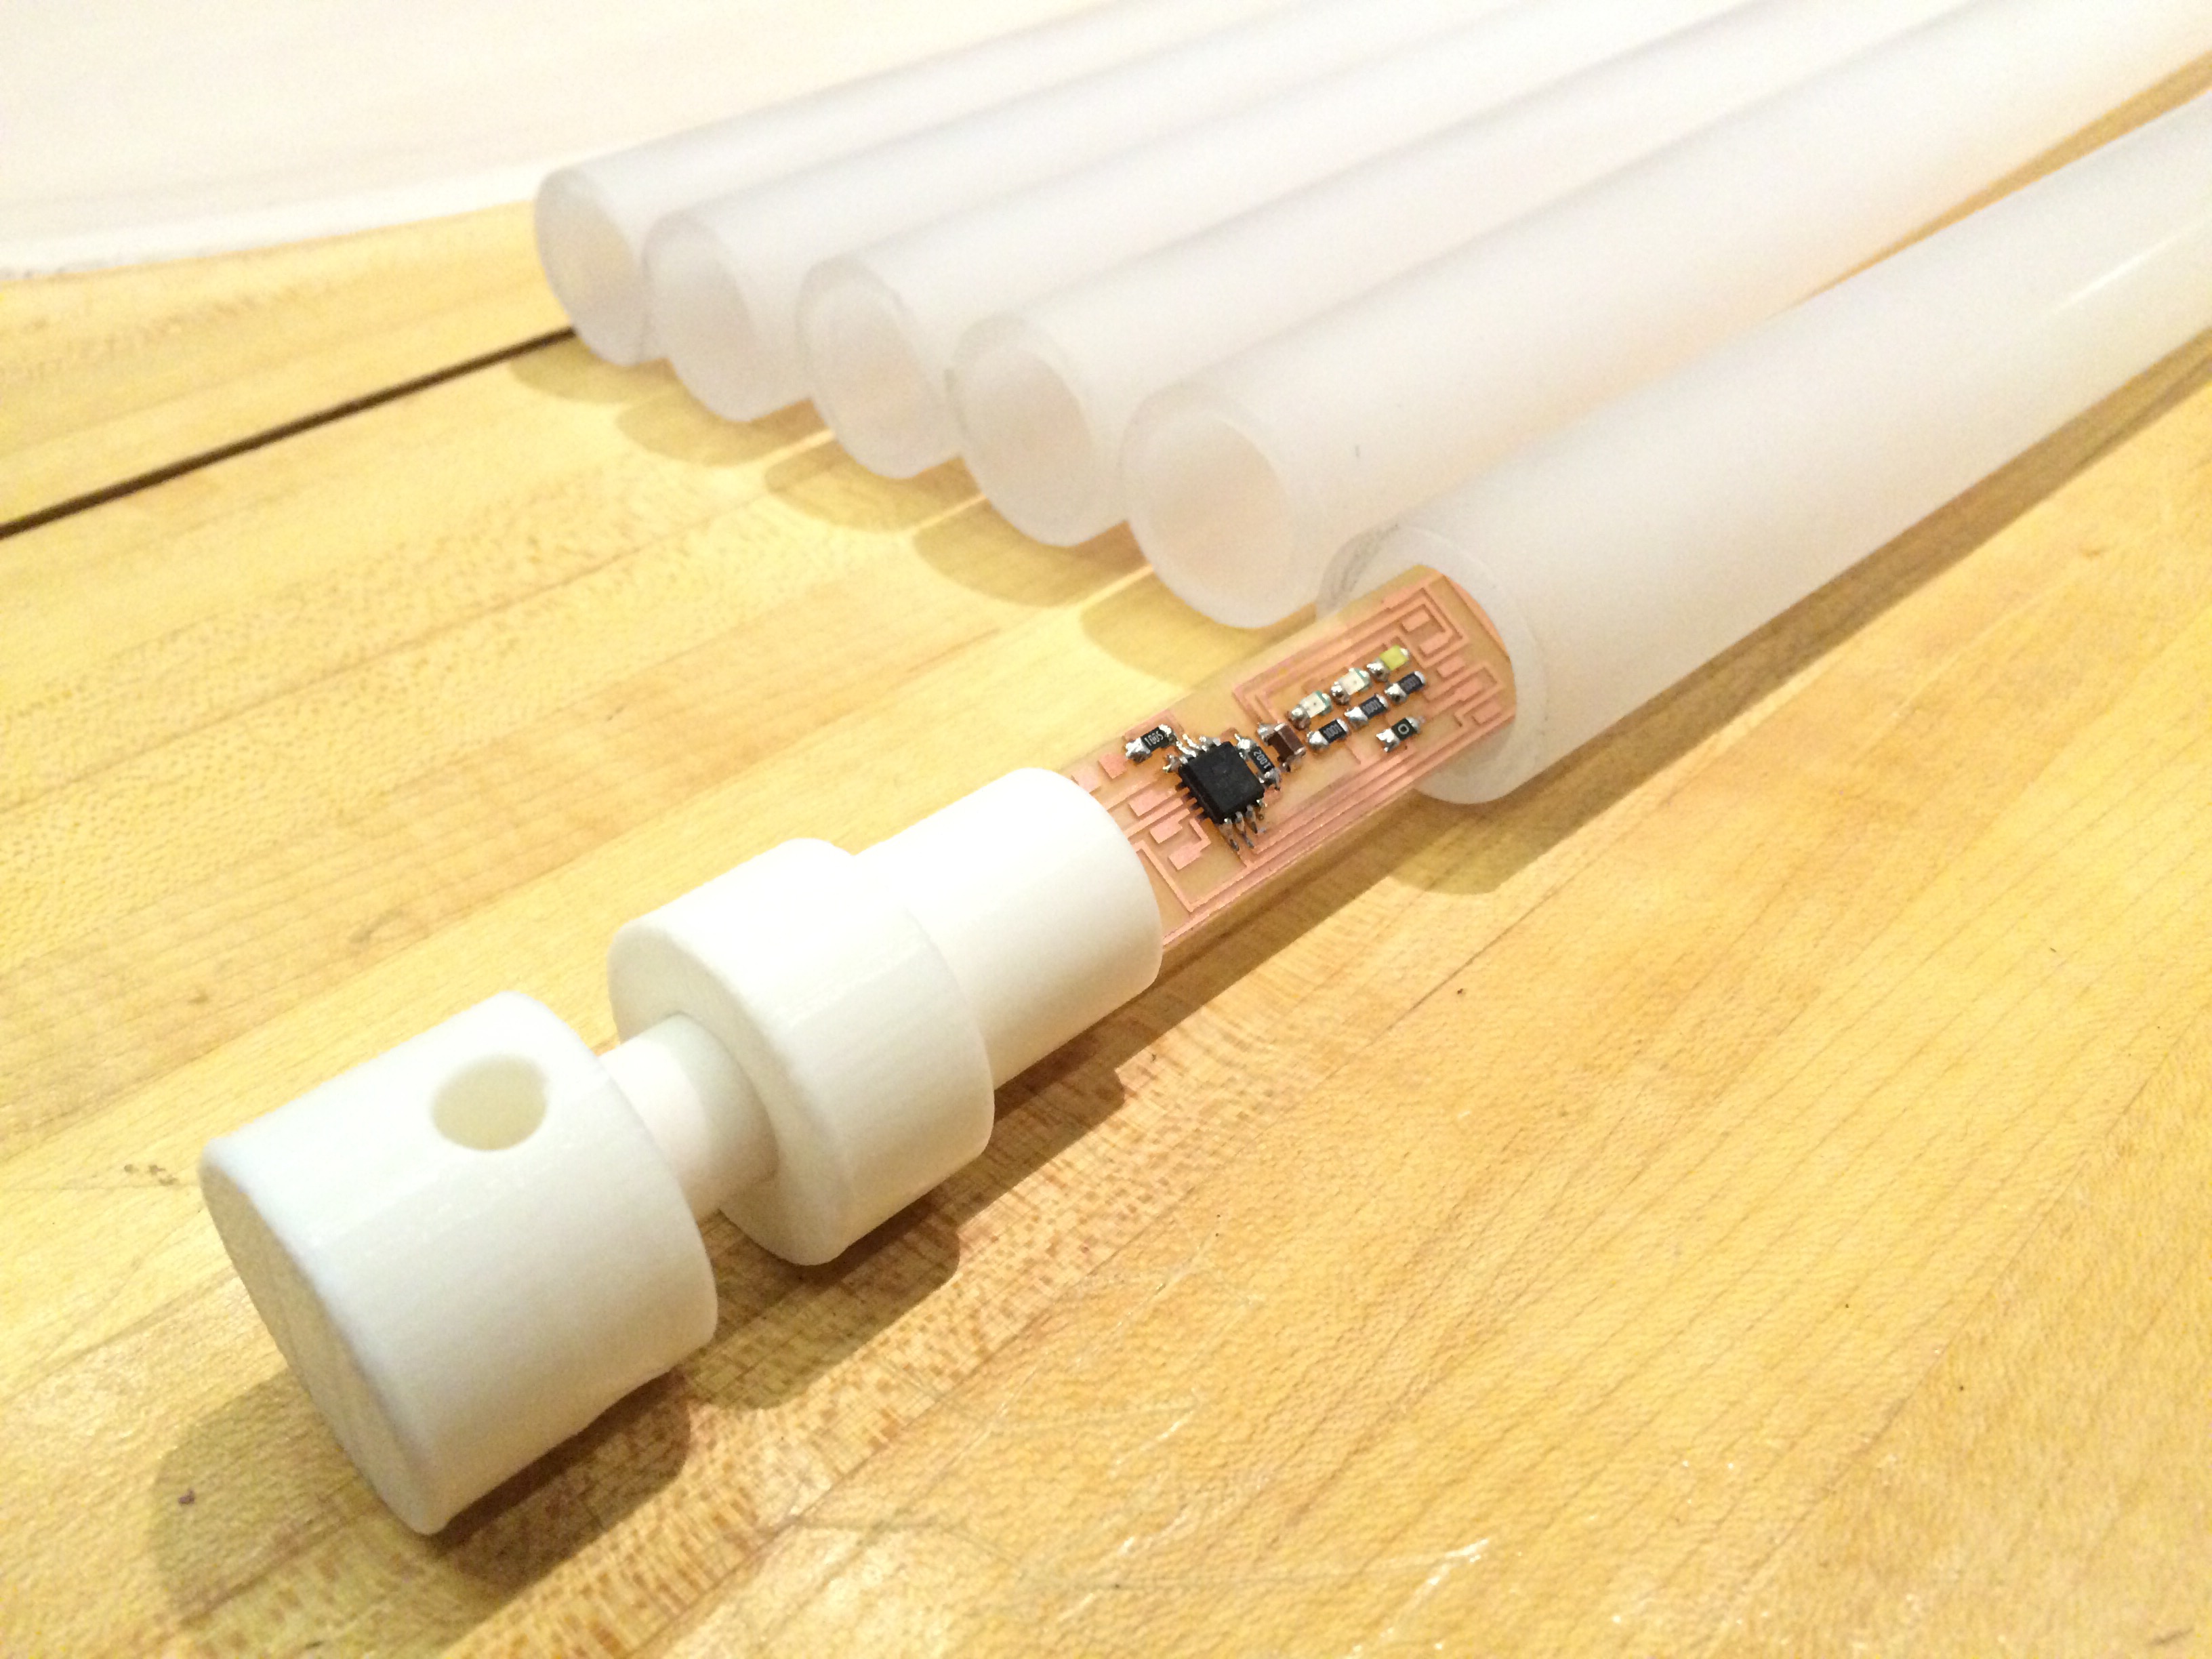
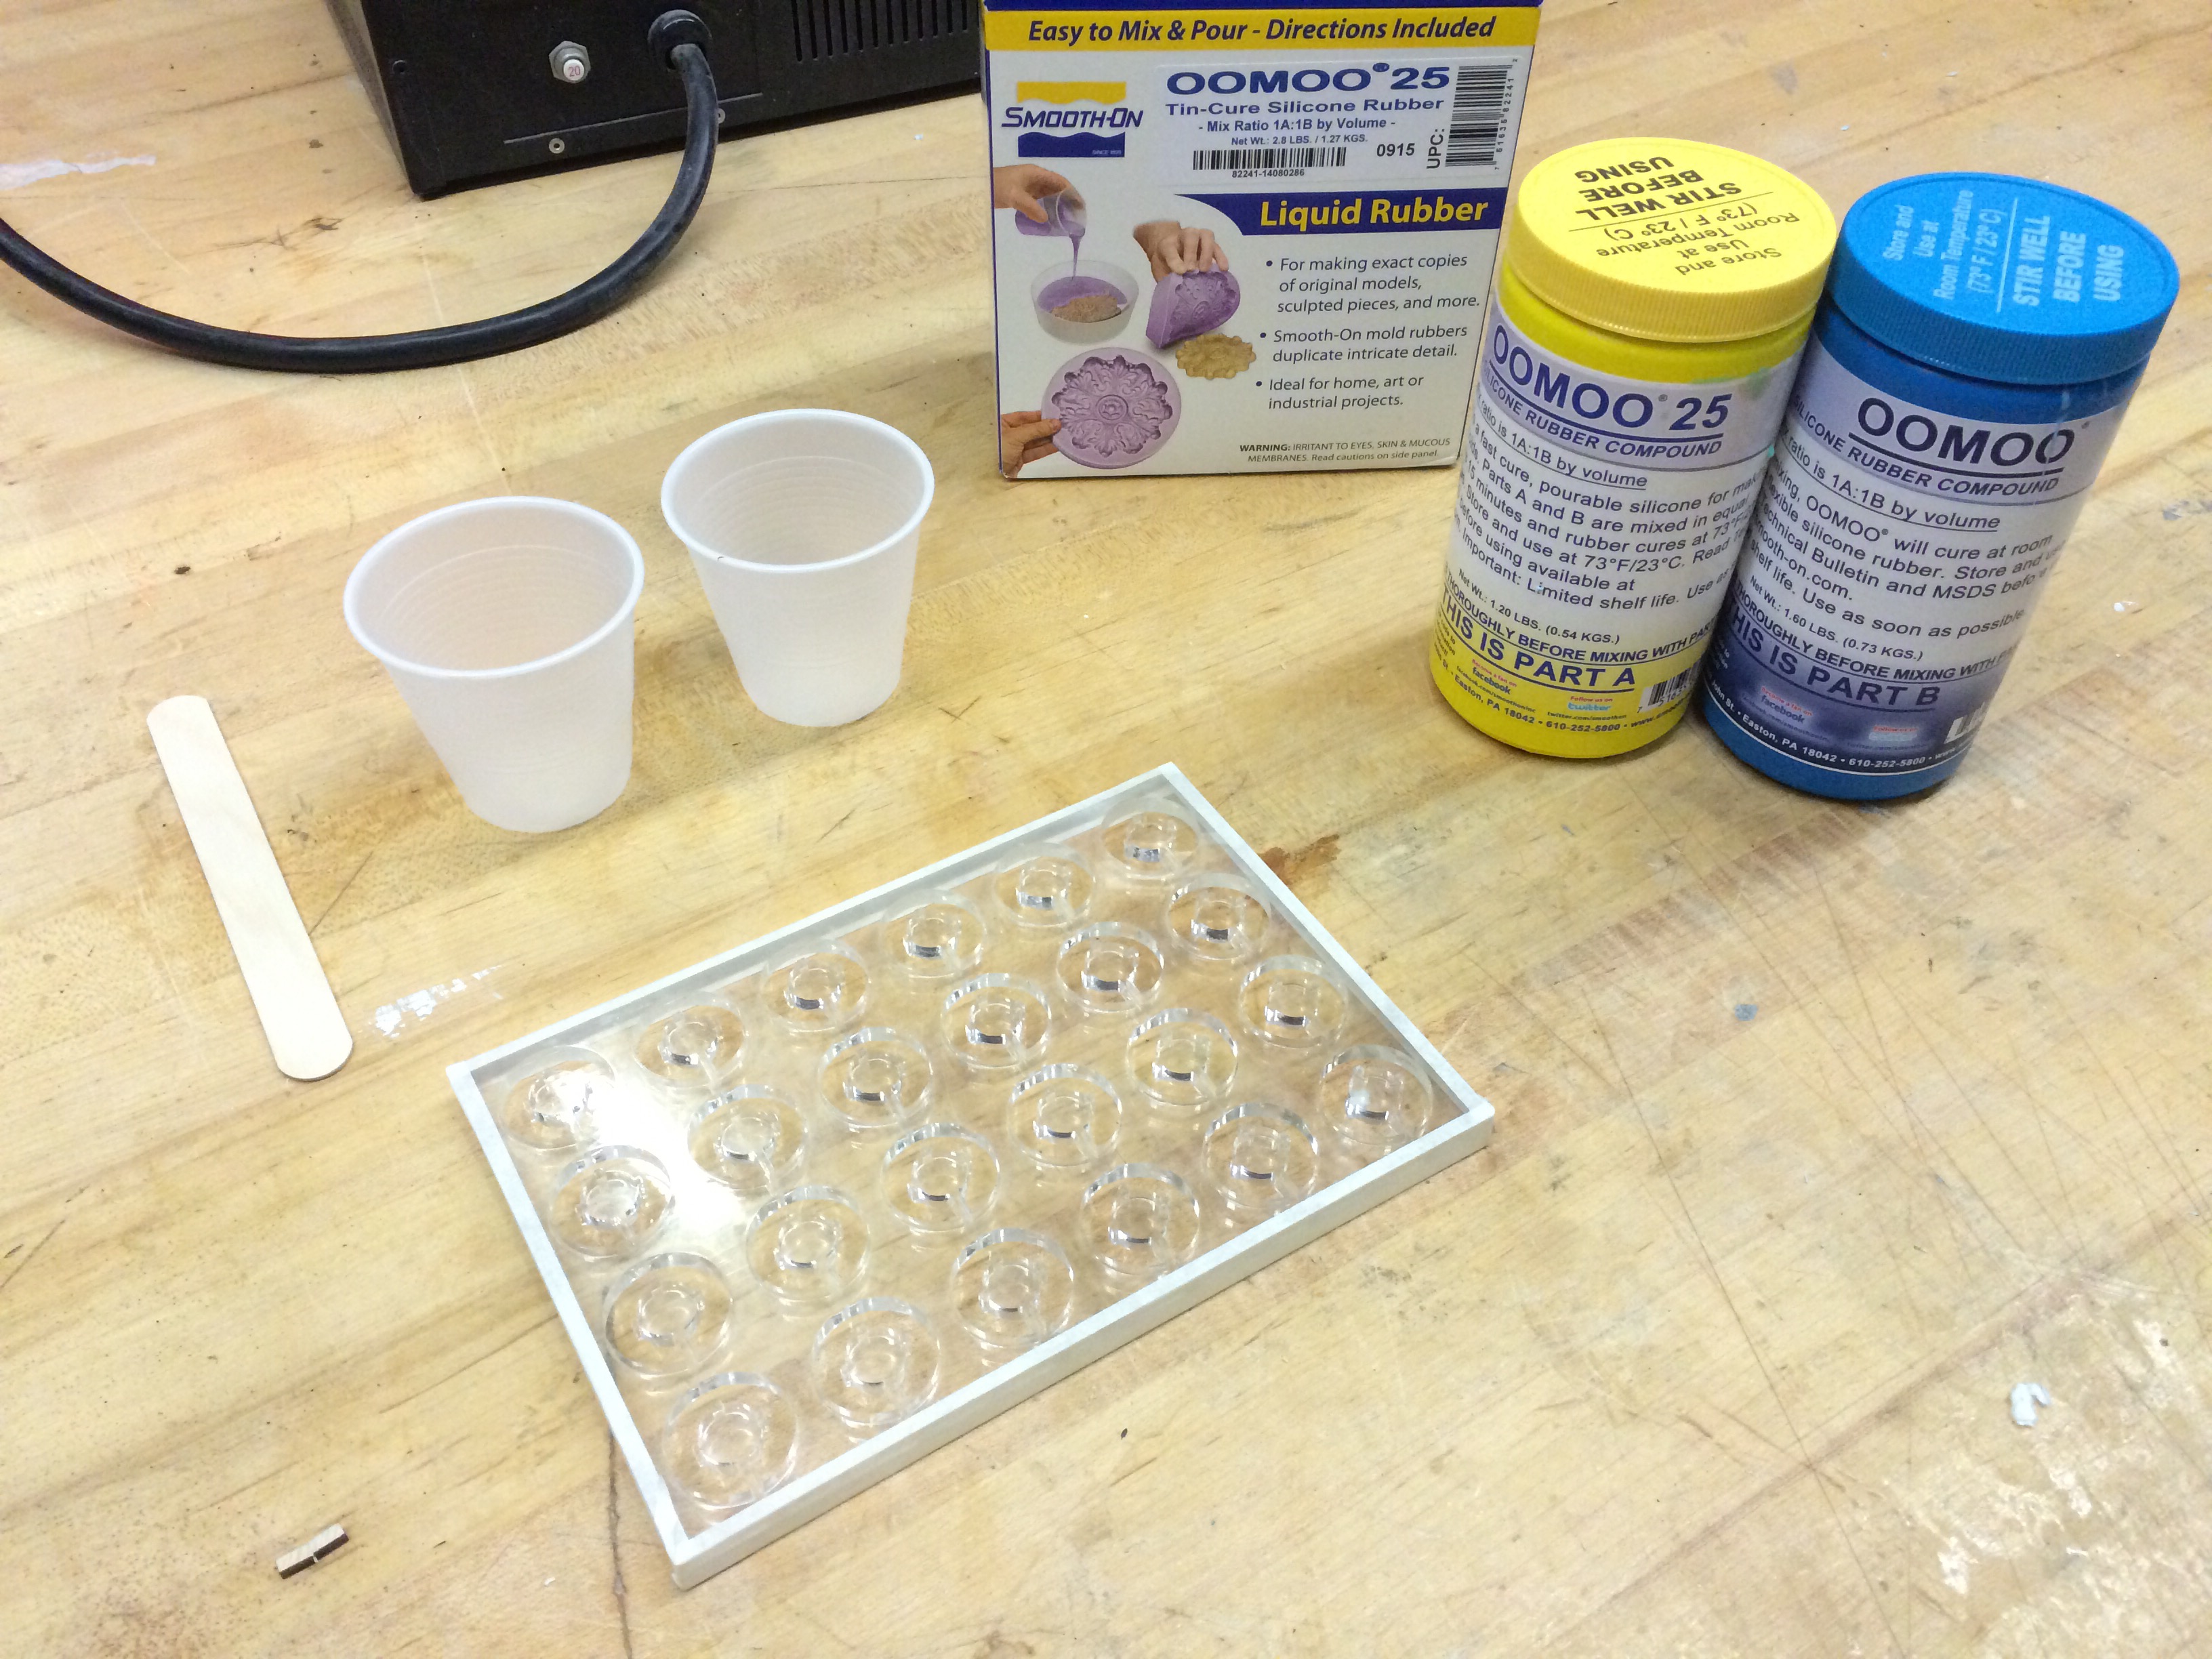
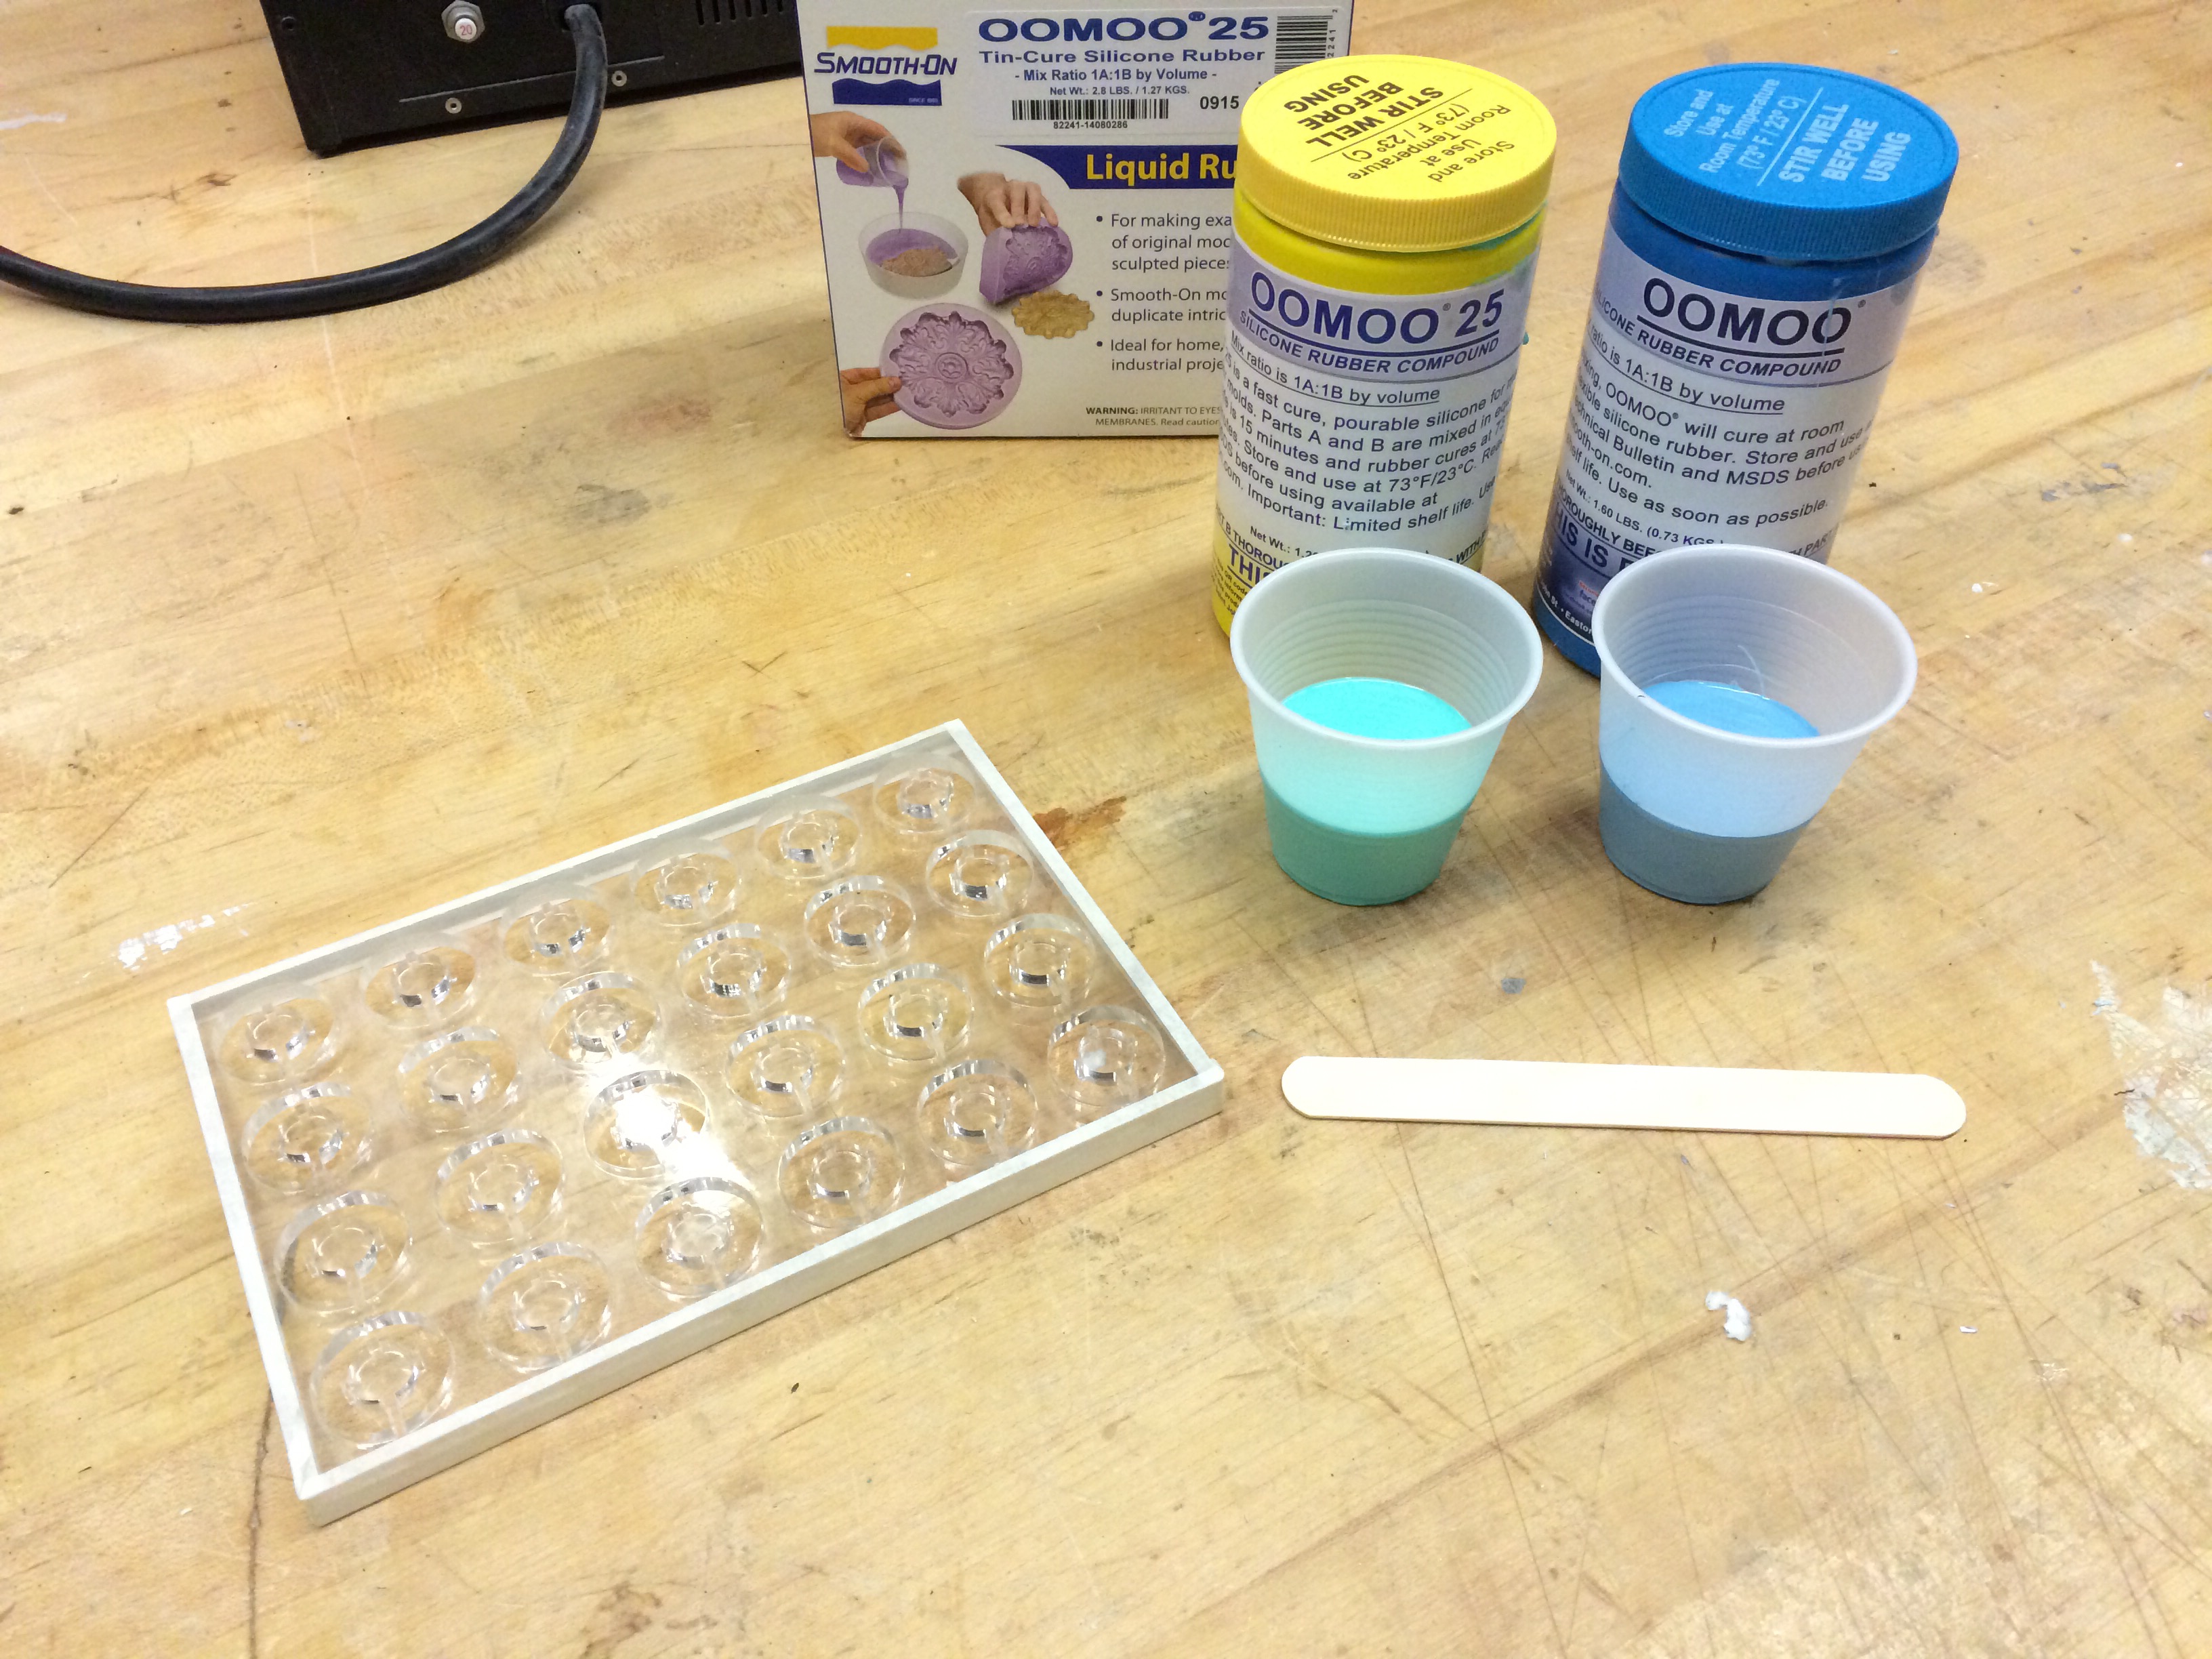
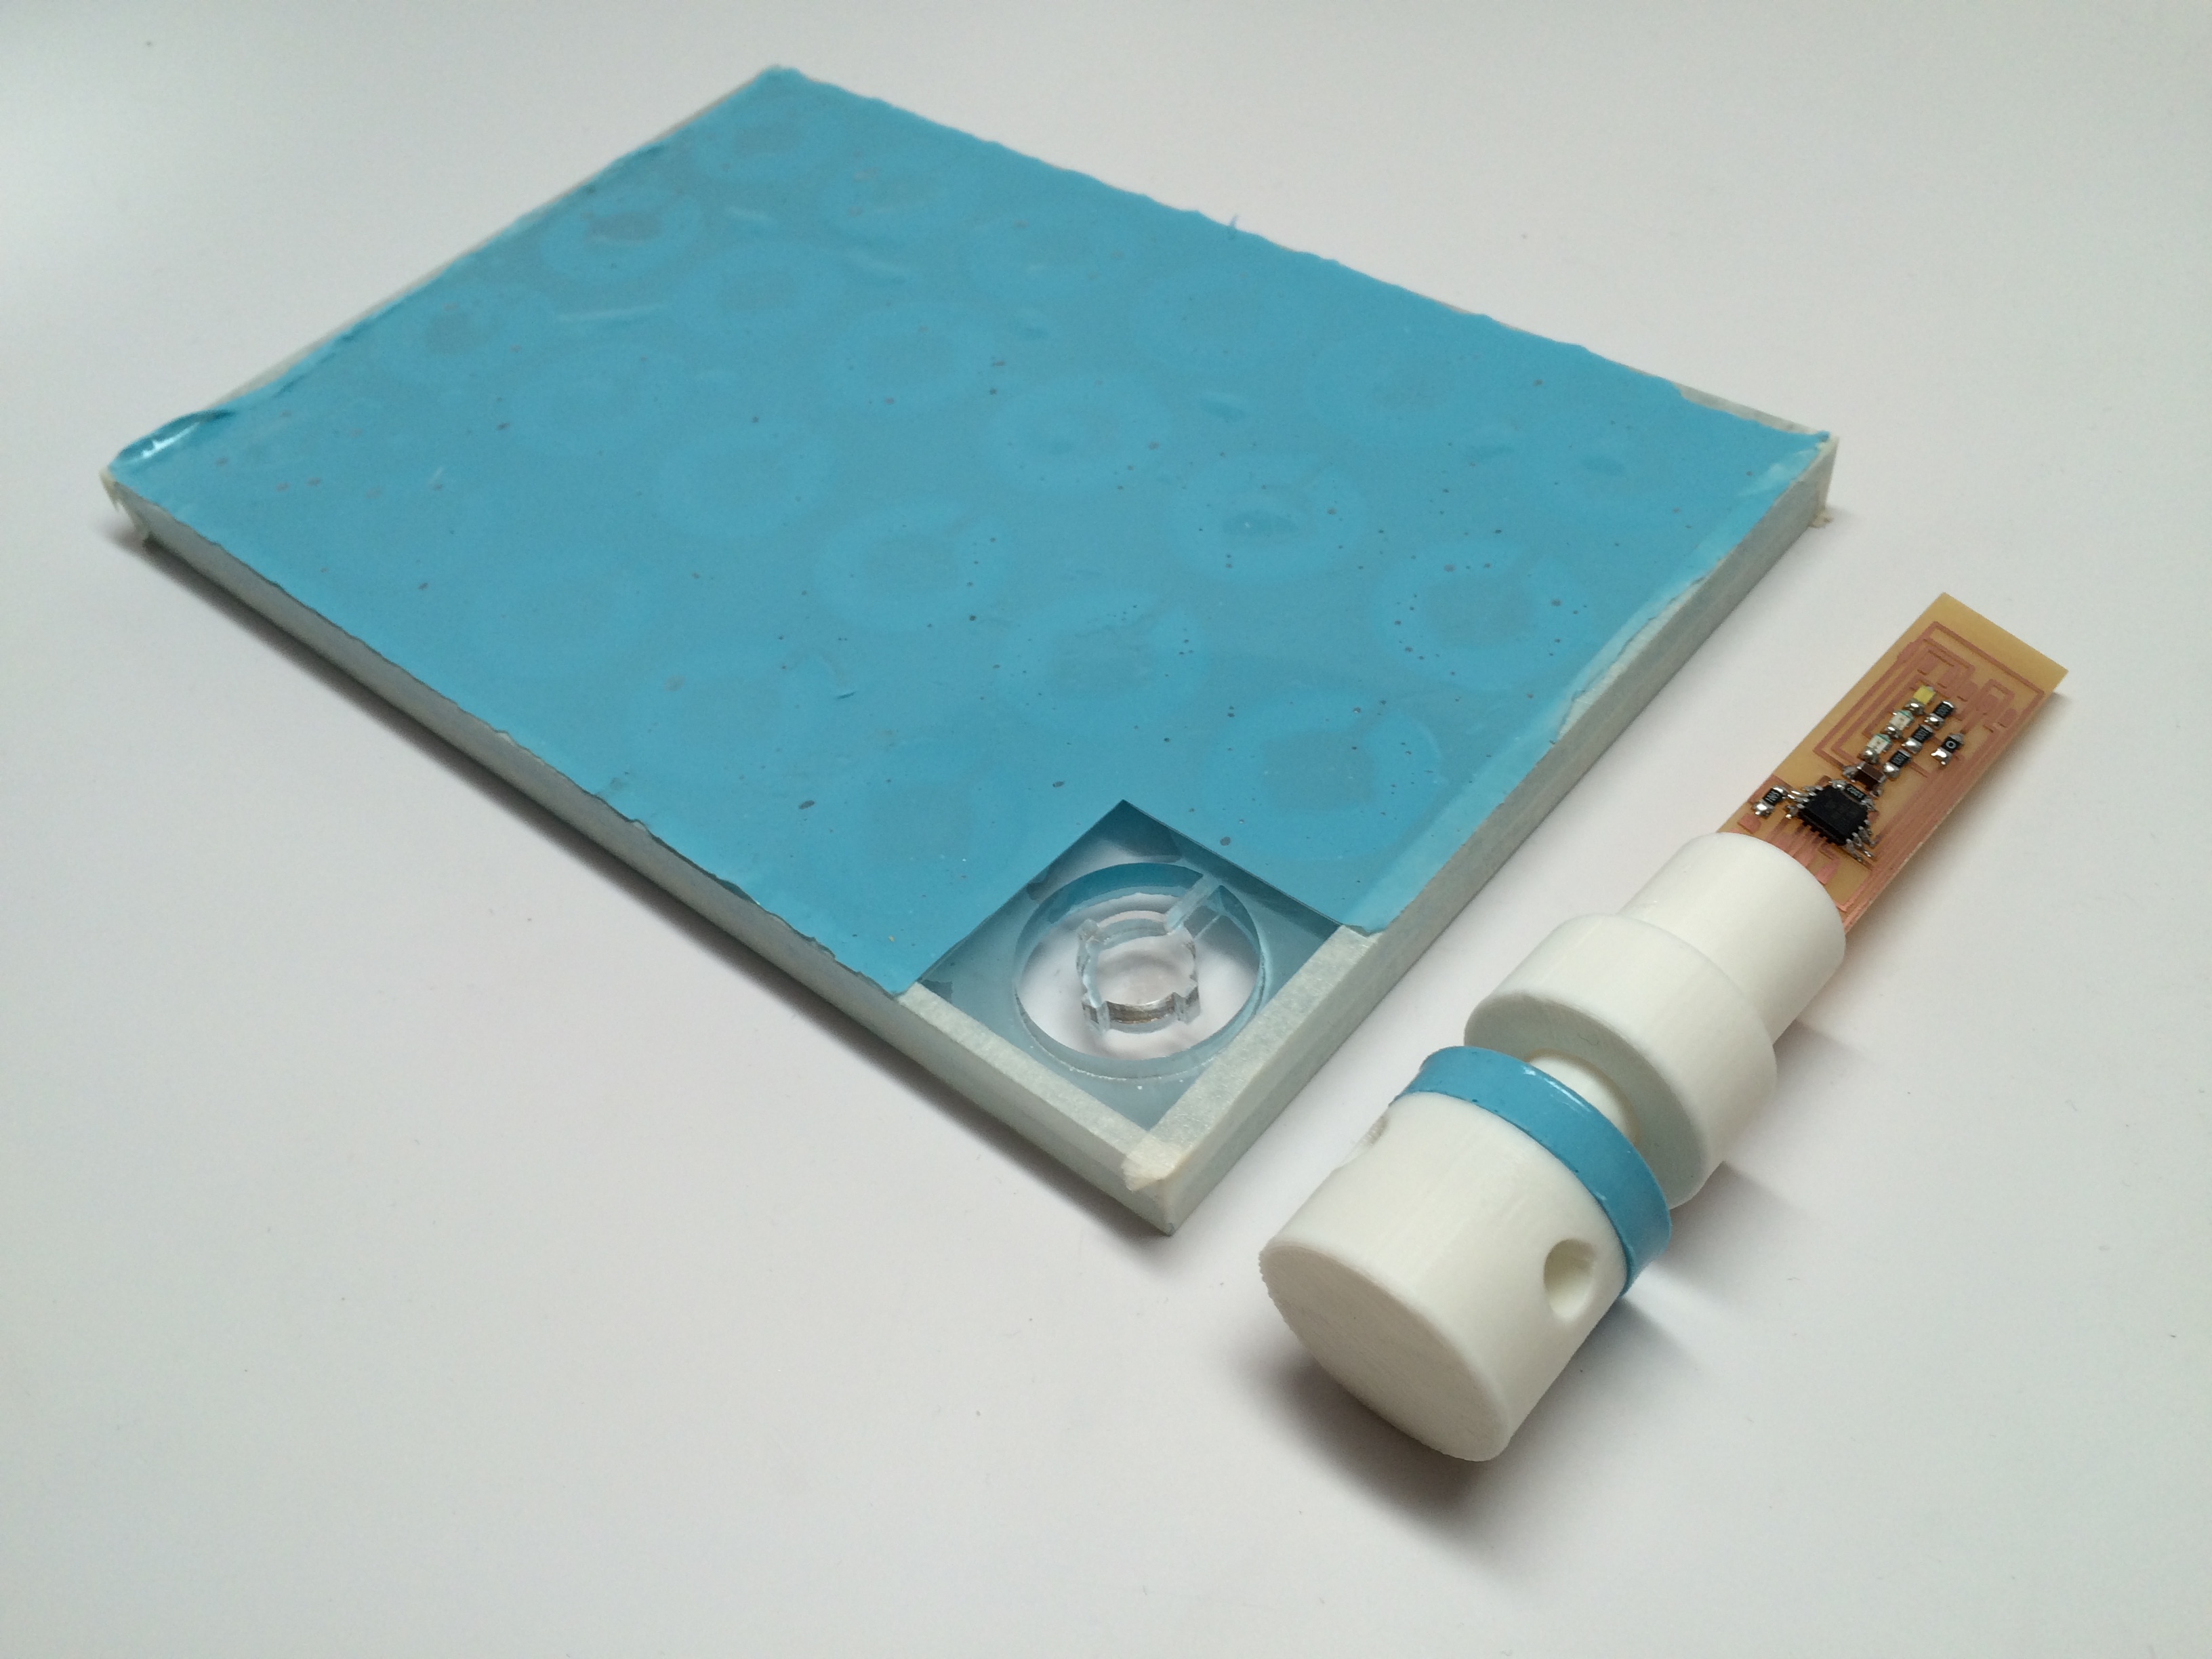
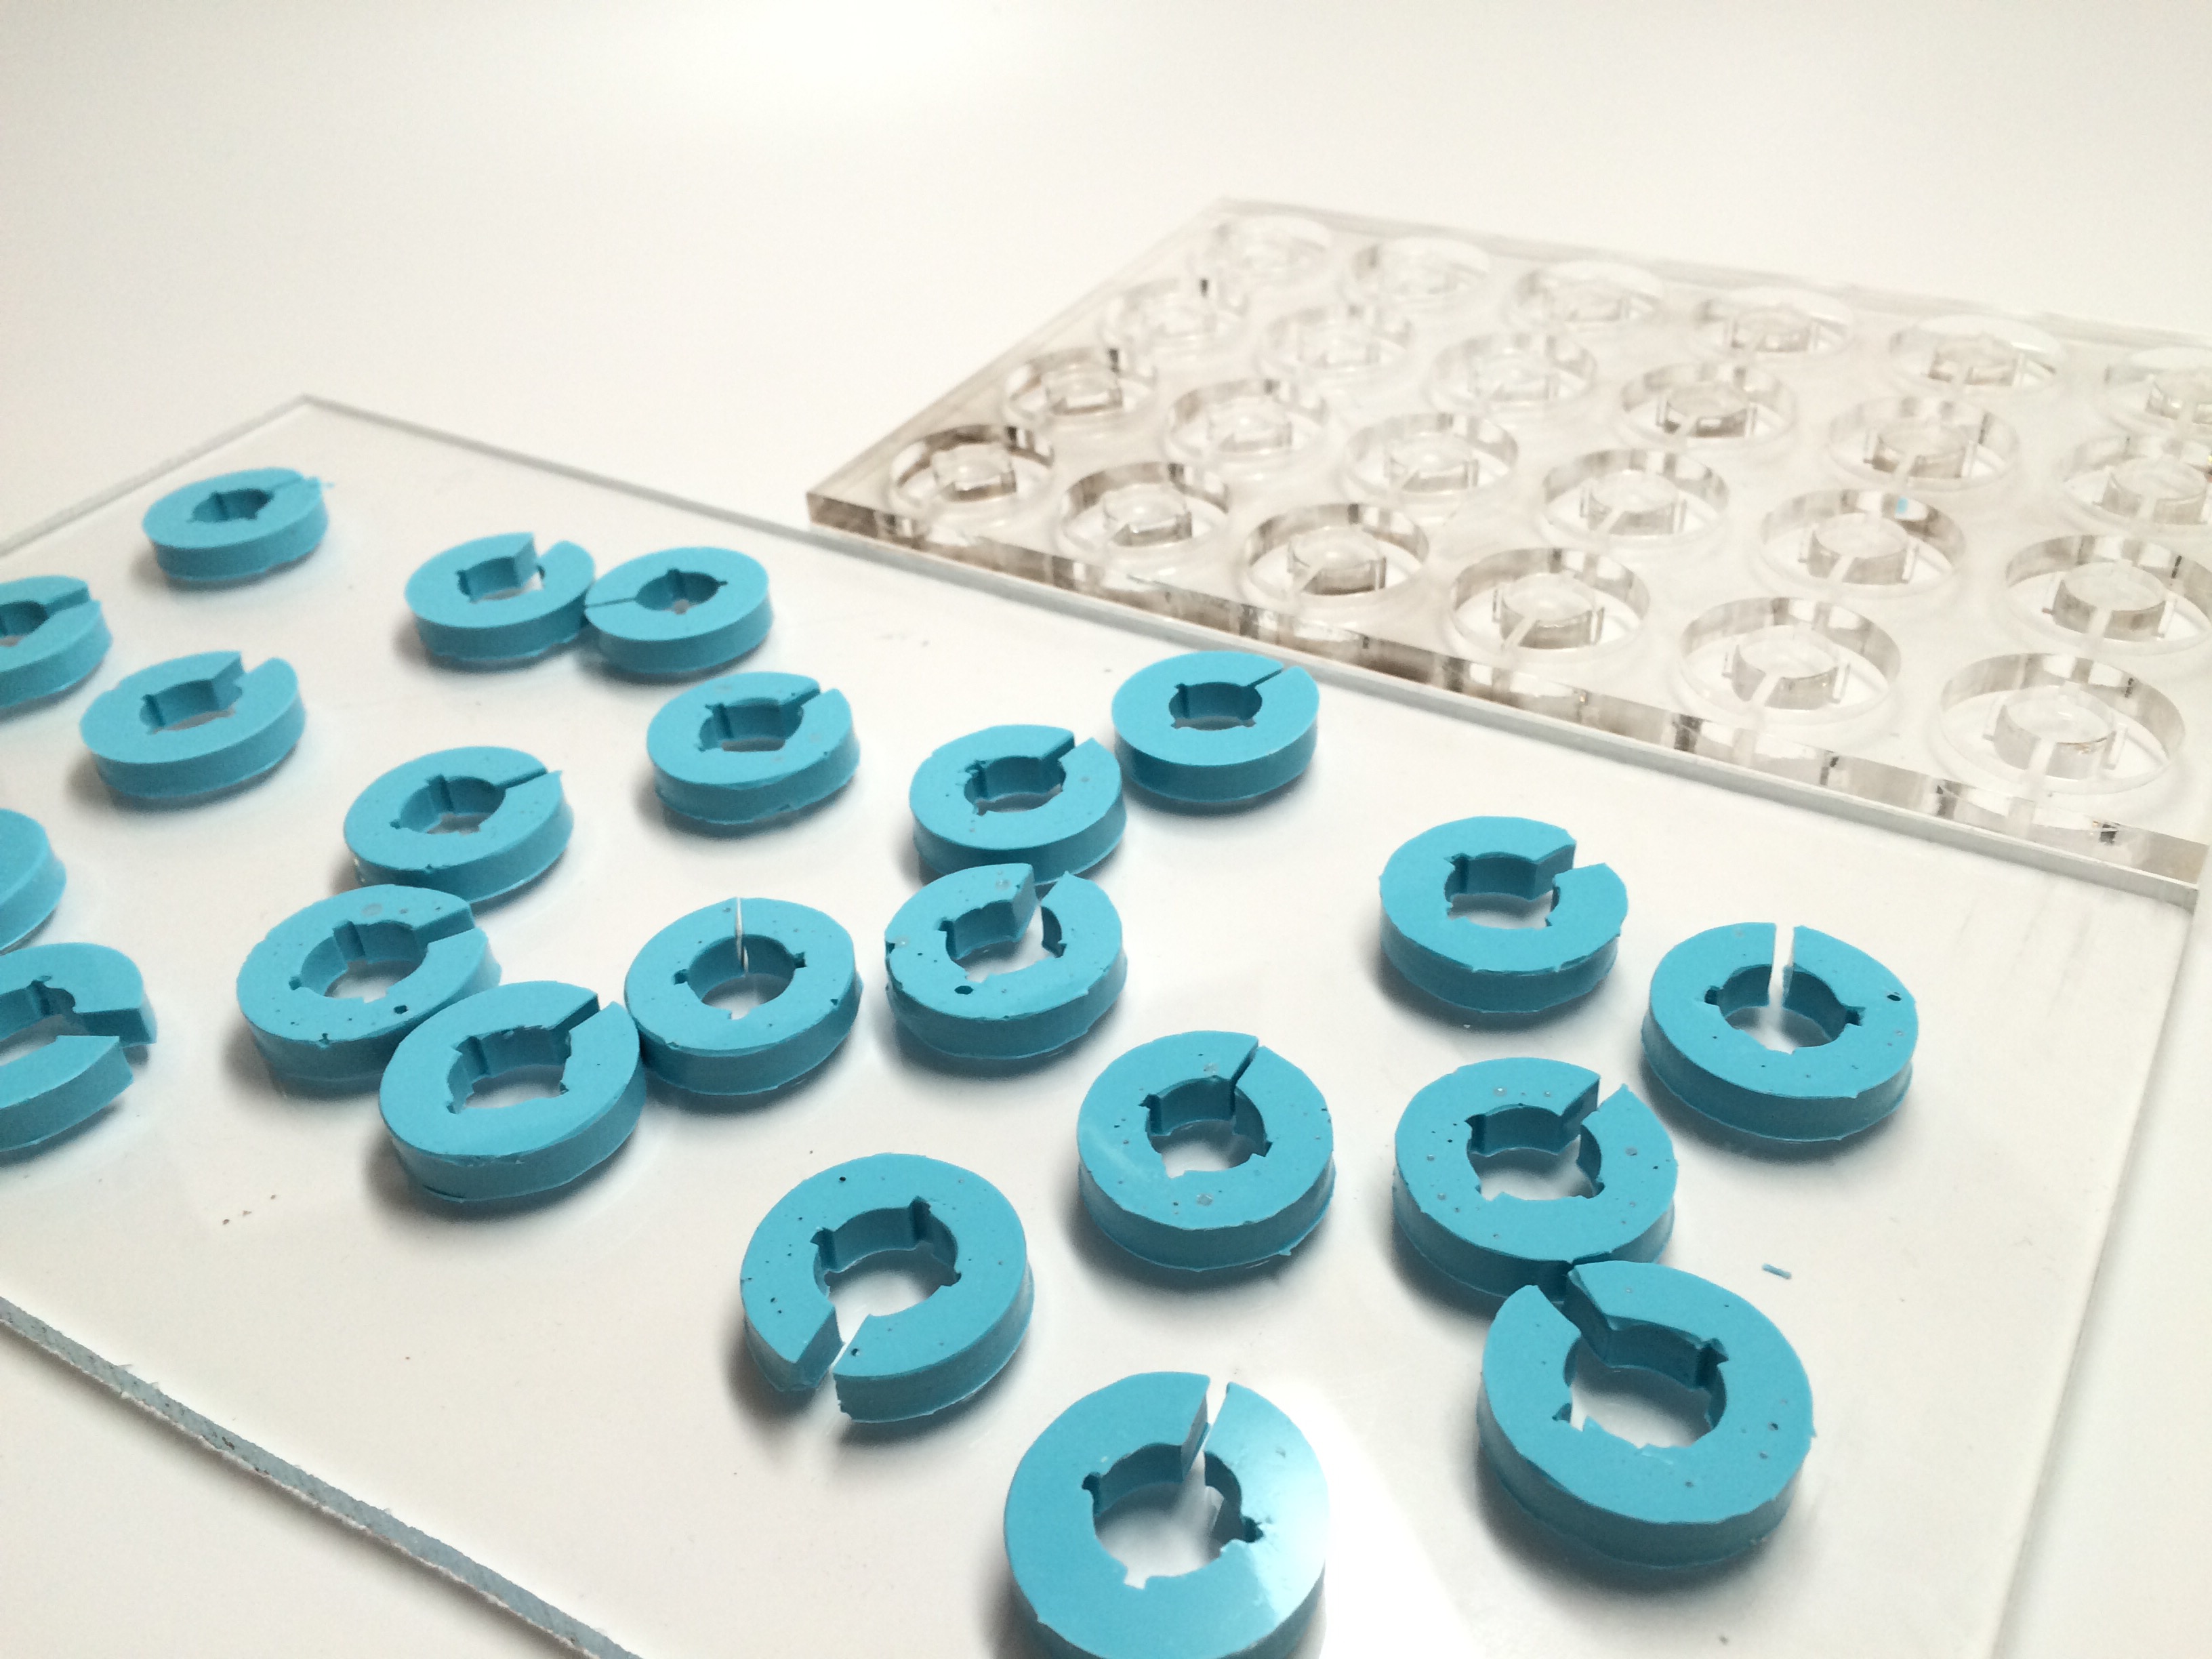
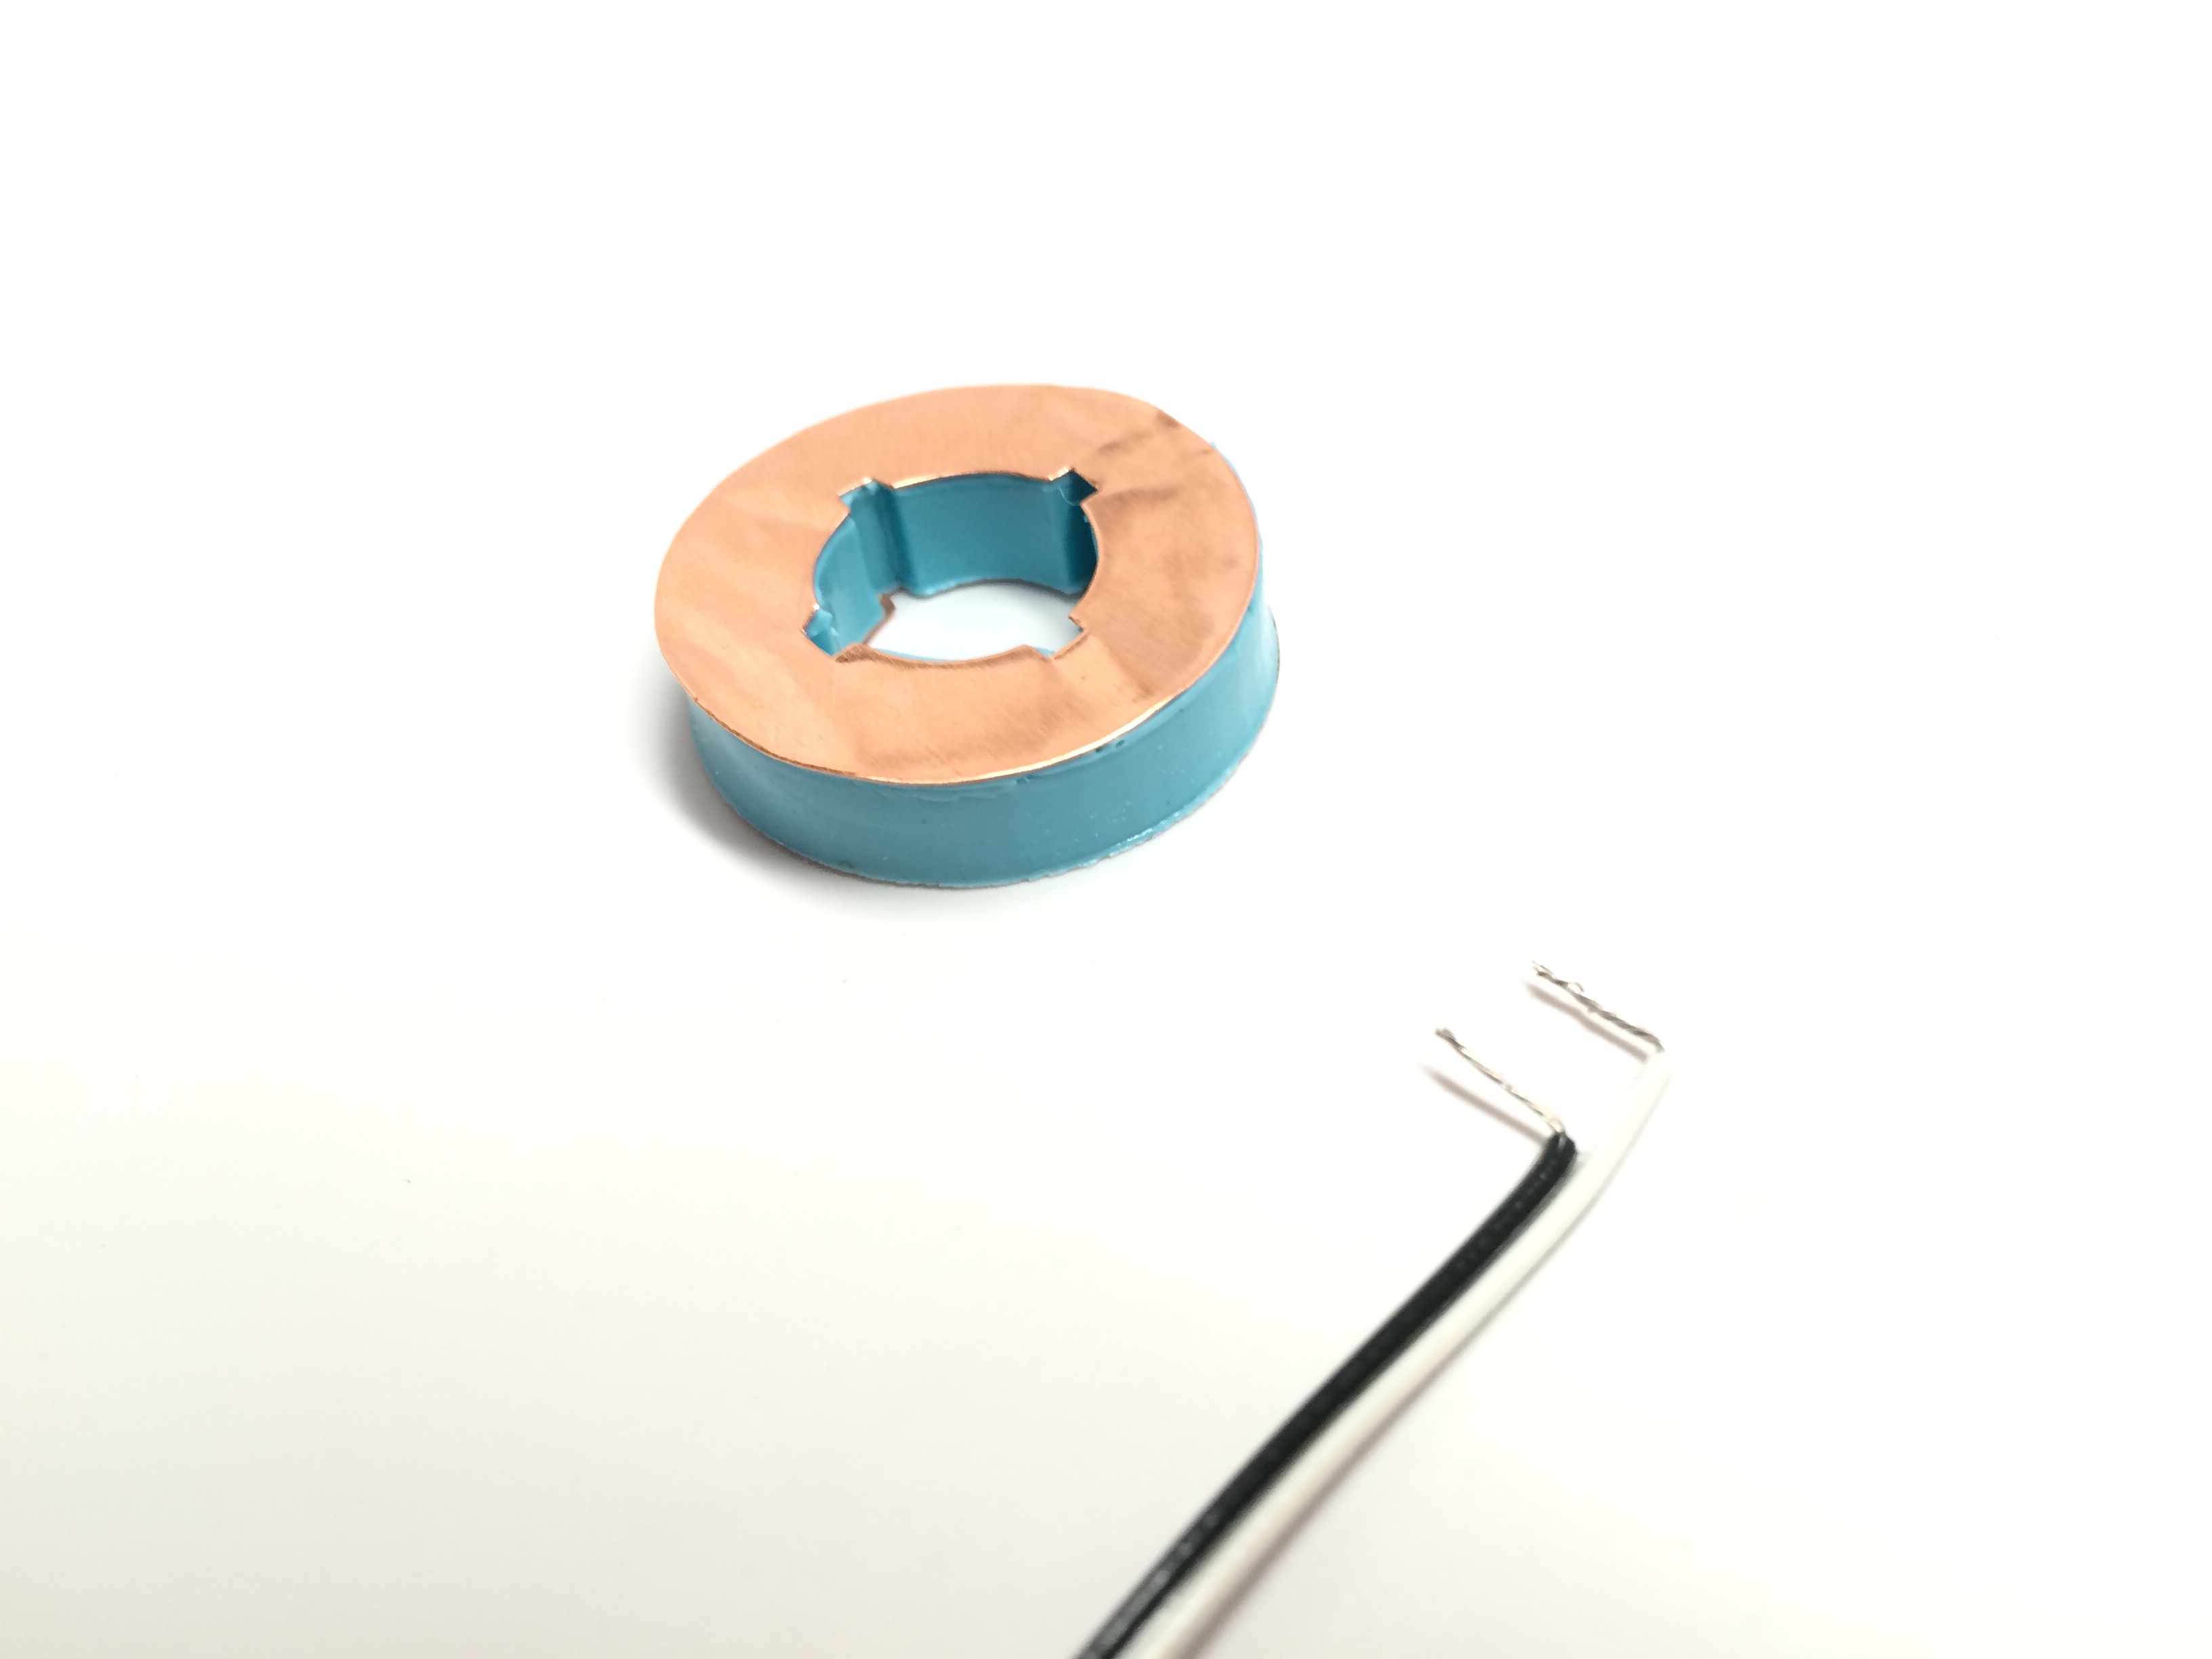
After learning how capacitor and its capacitance work, I've decided to focus on making my own capacitive load cell with two copper adhesive sheets as compliant electrodes and elastomer (silicone rubber) as the dielectric in between.
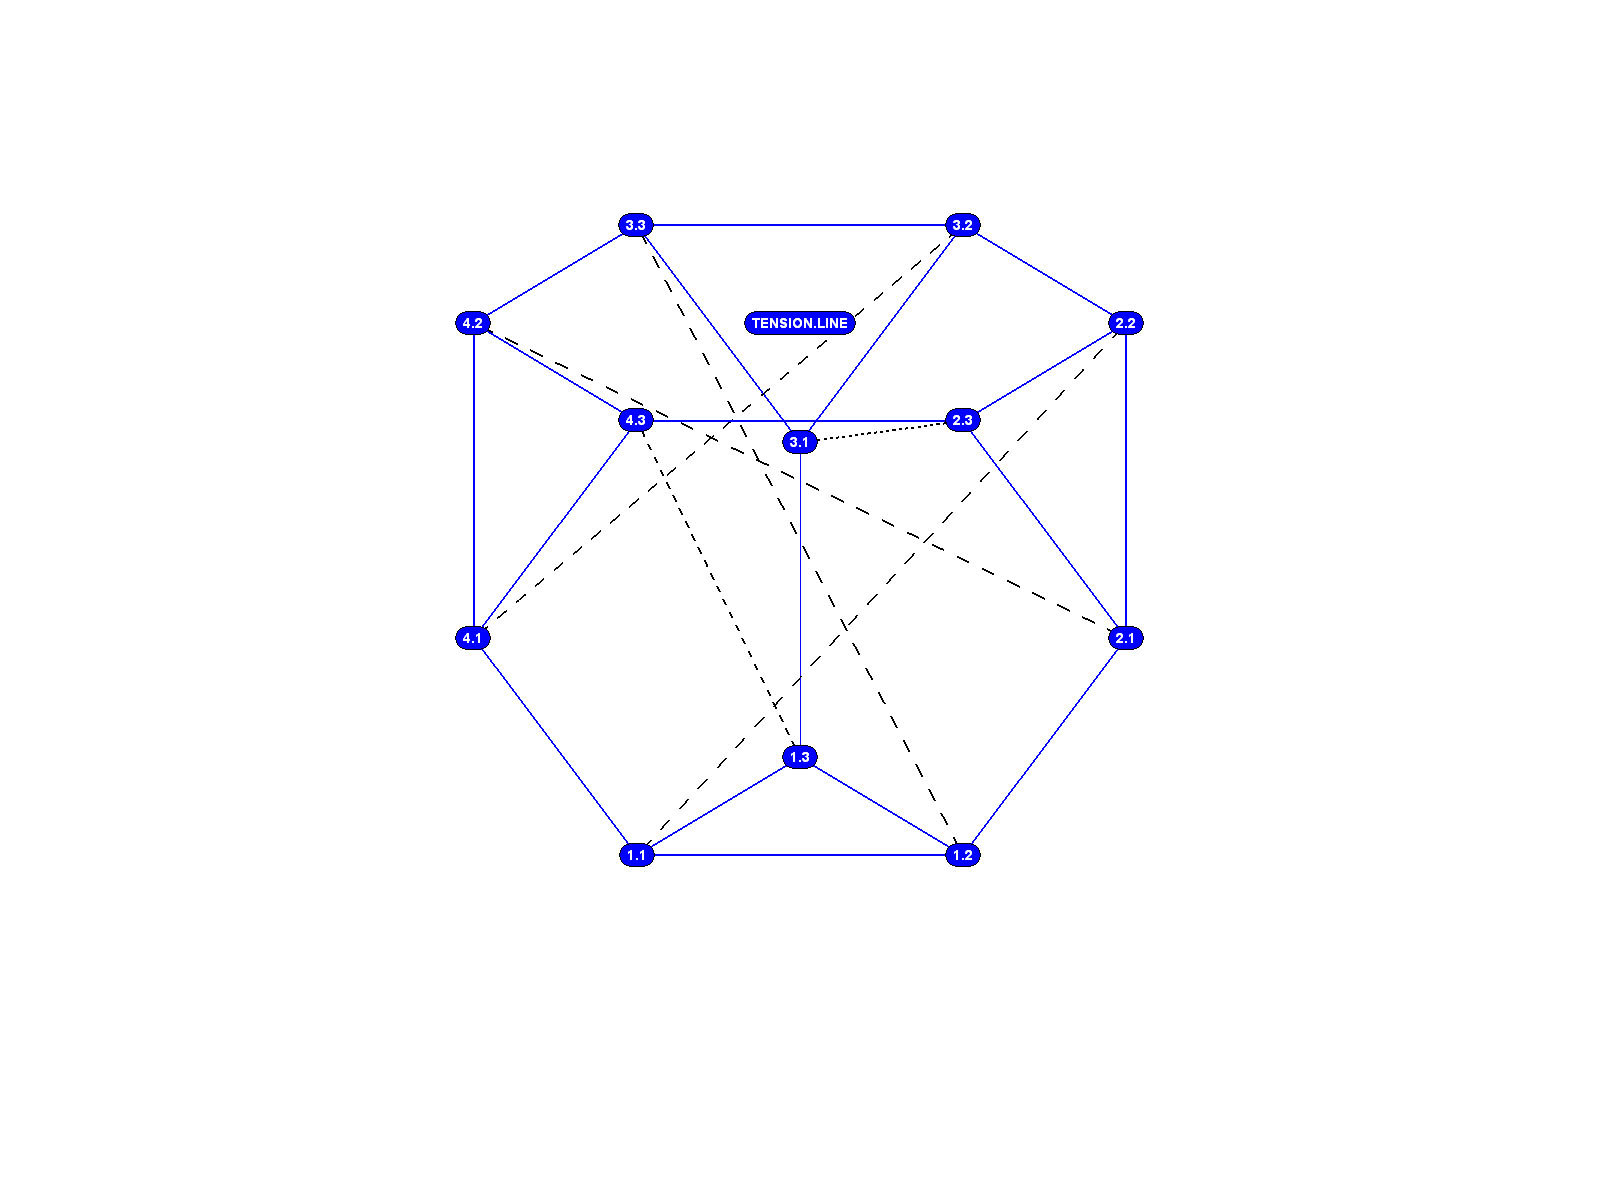
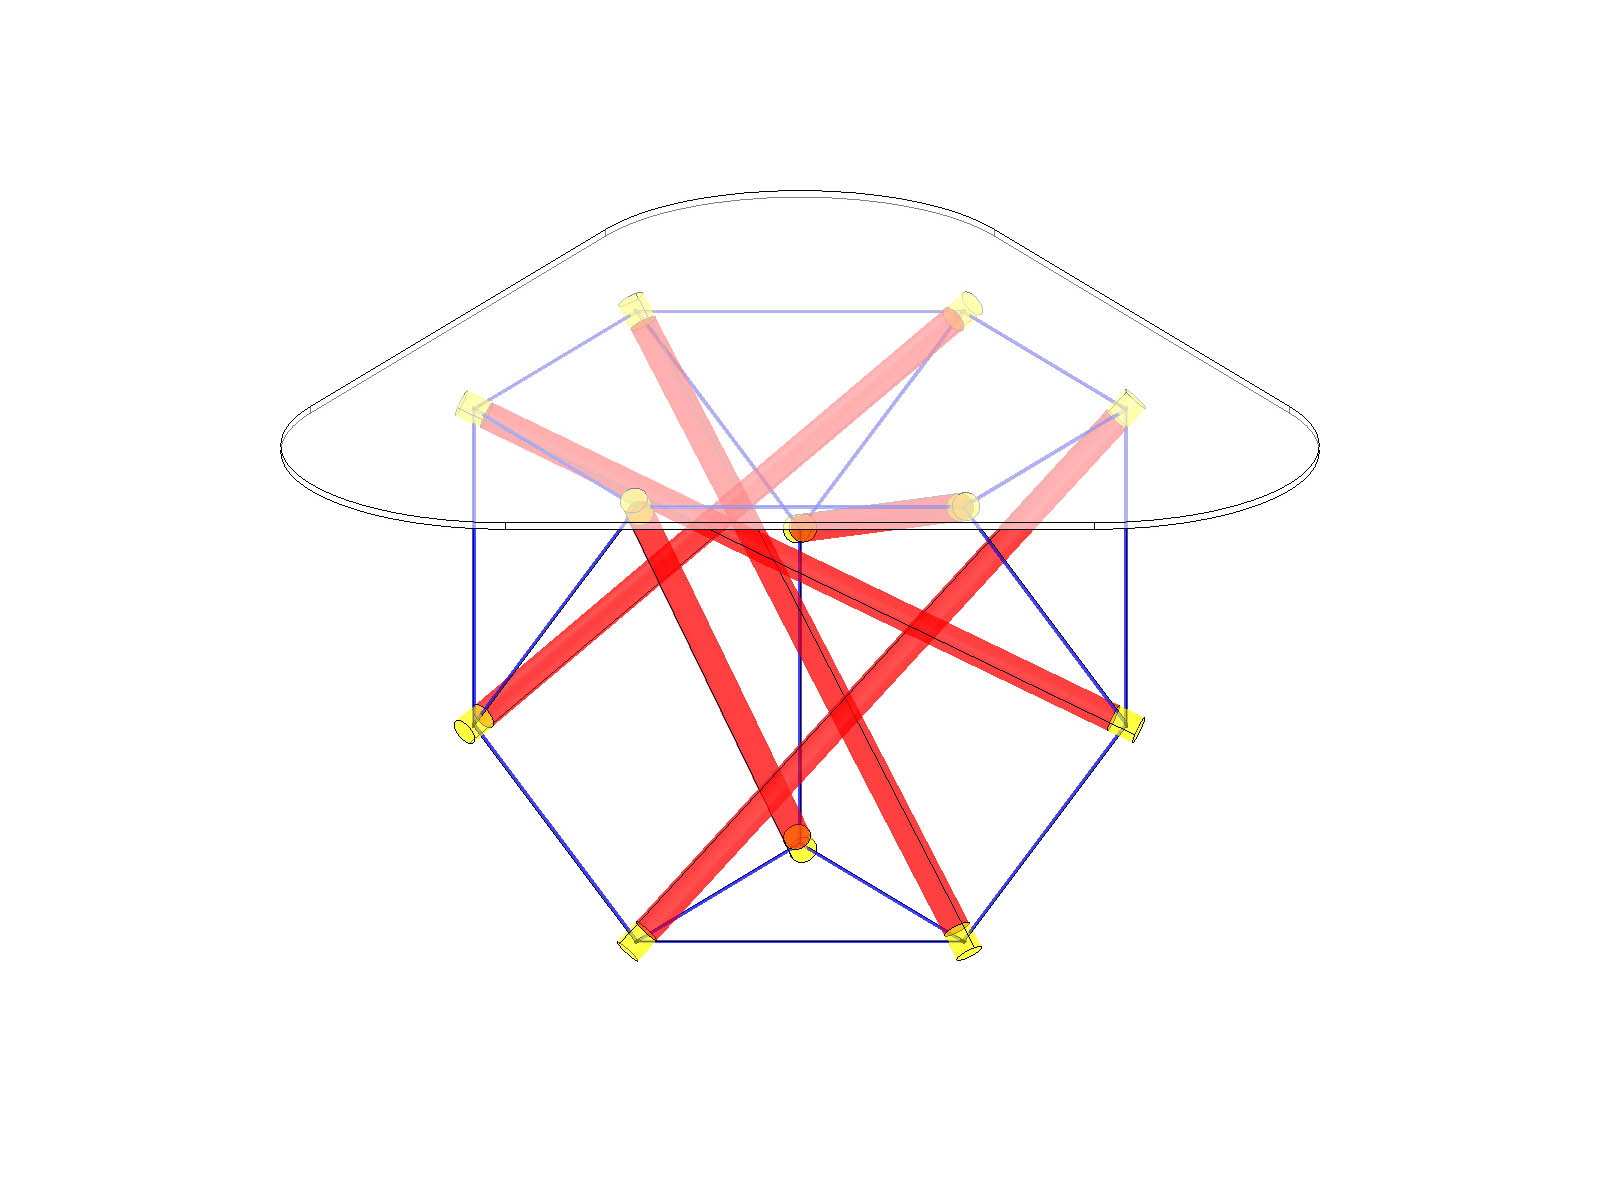
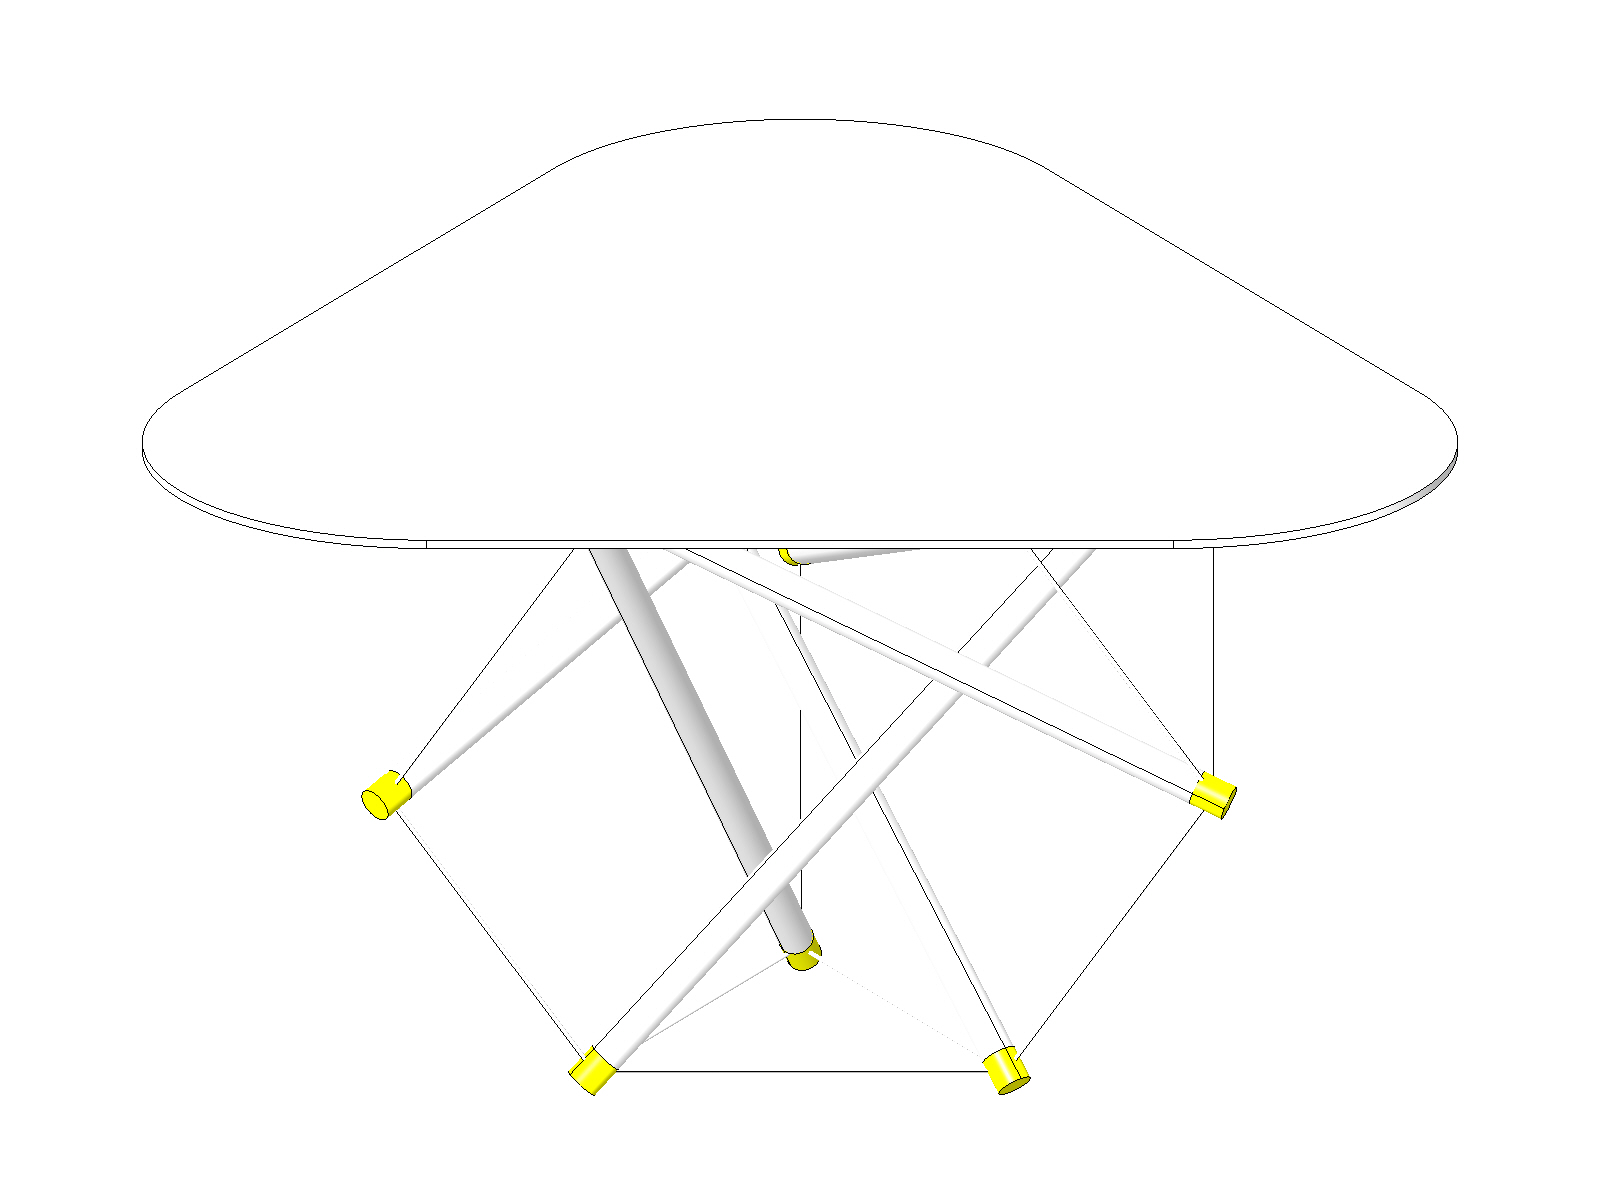
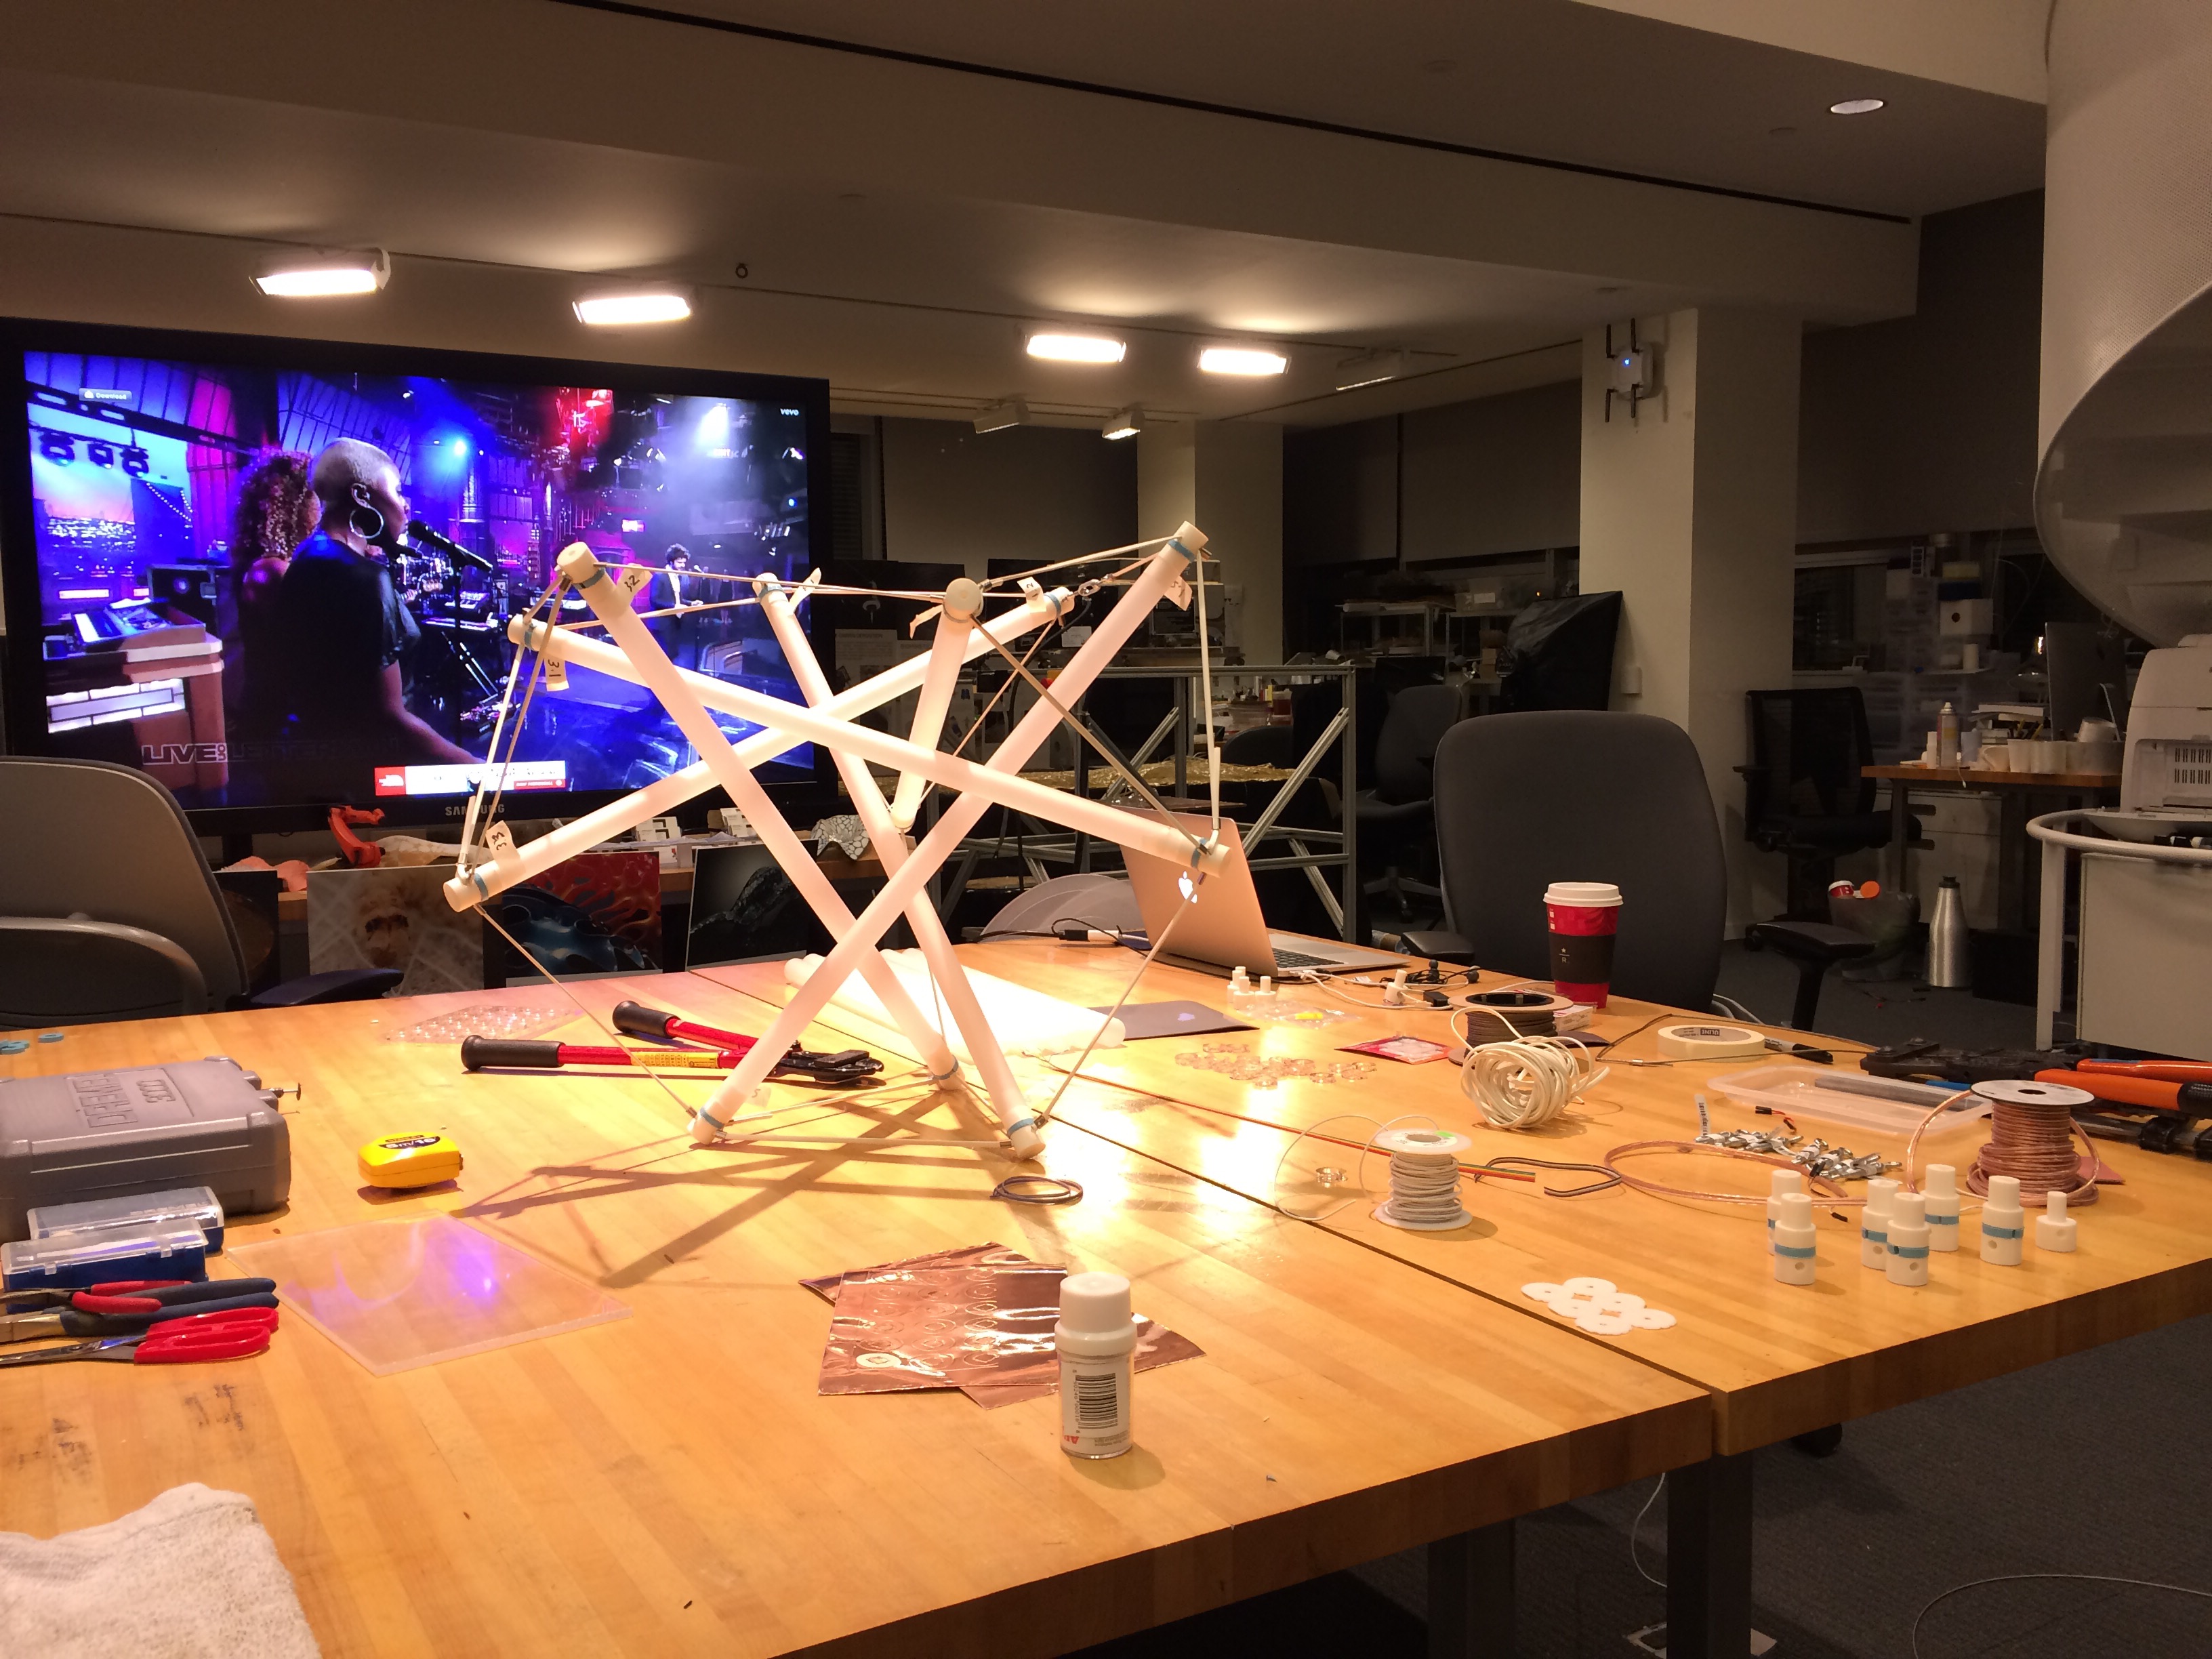
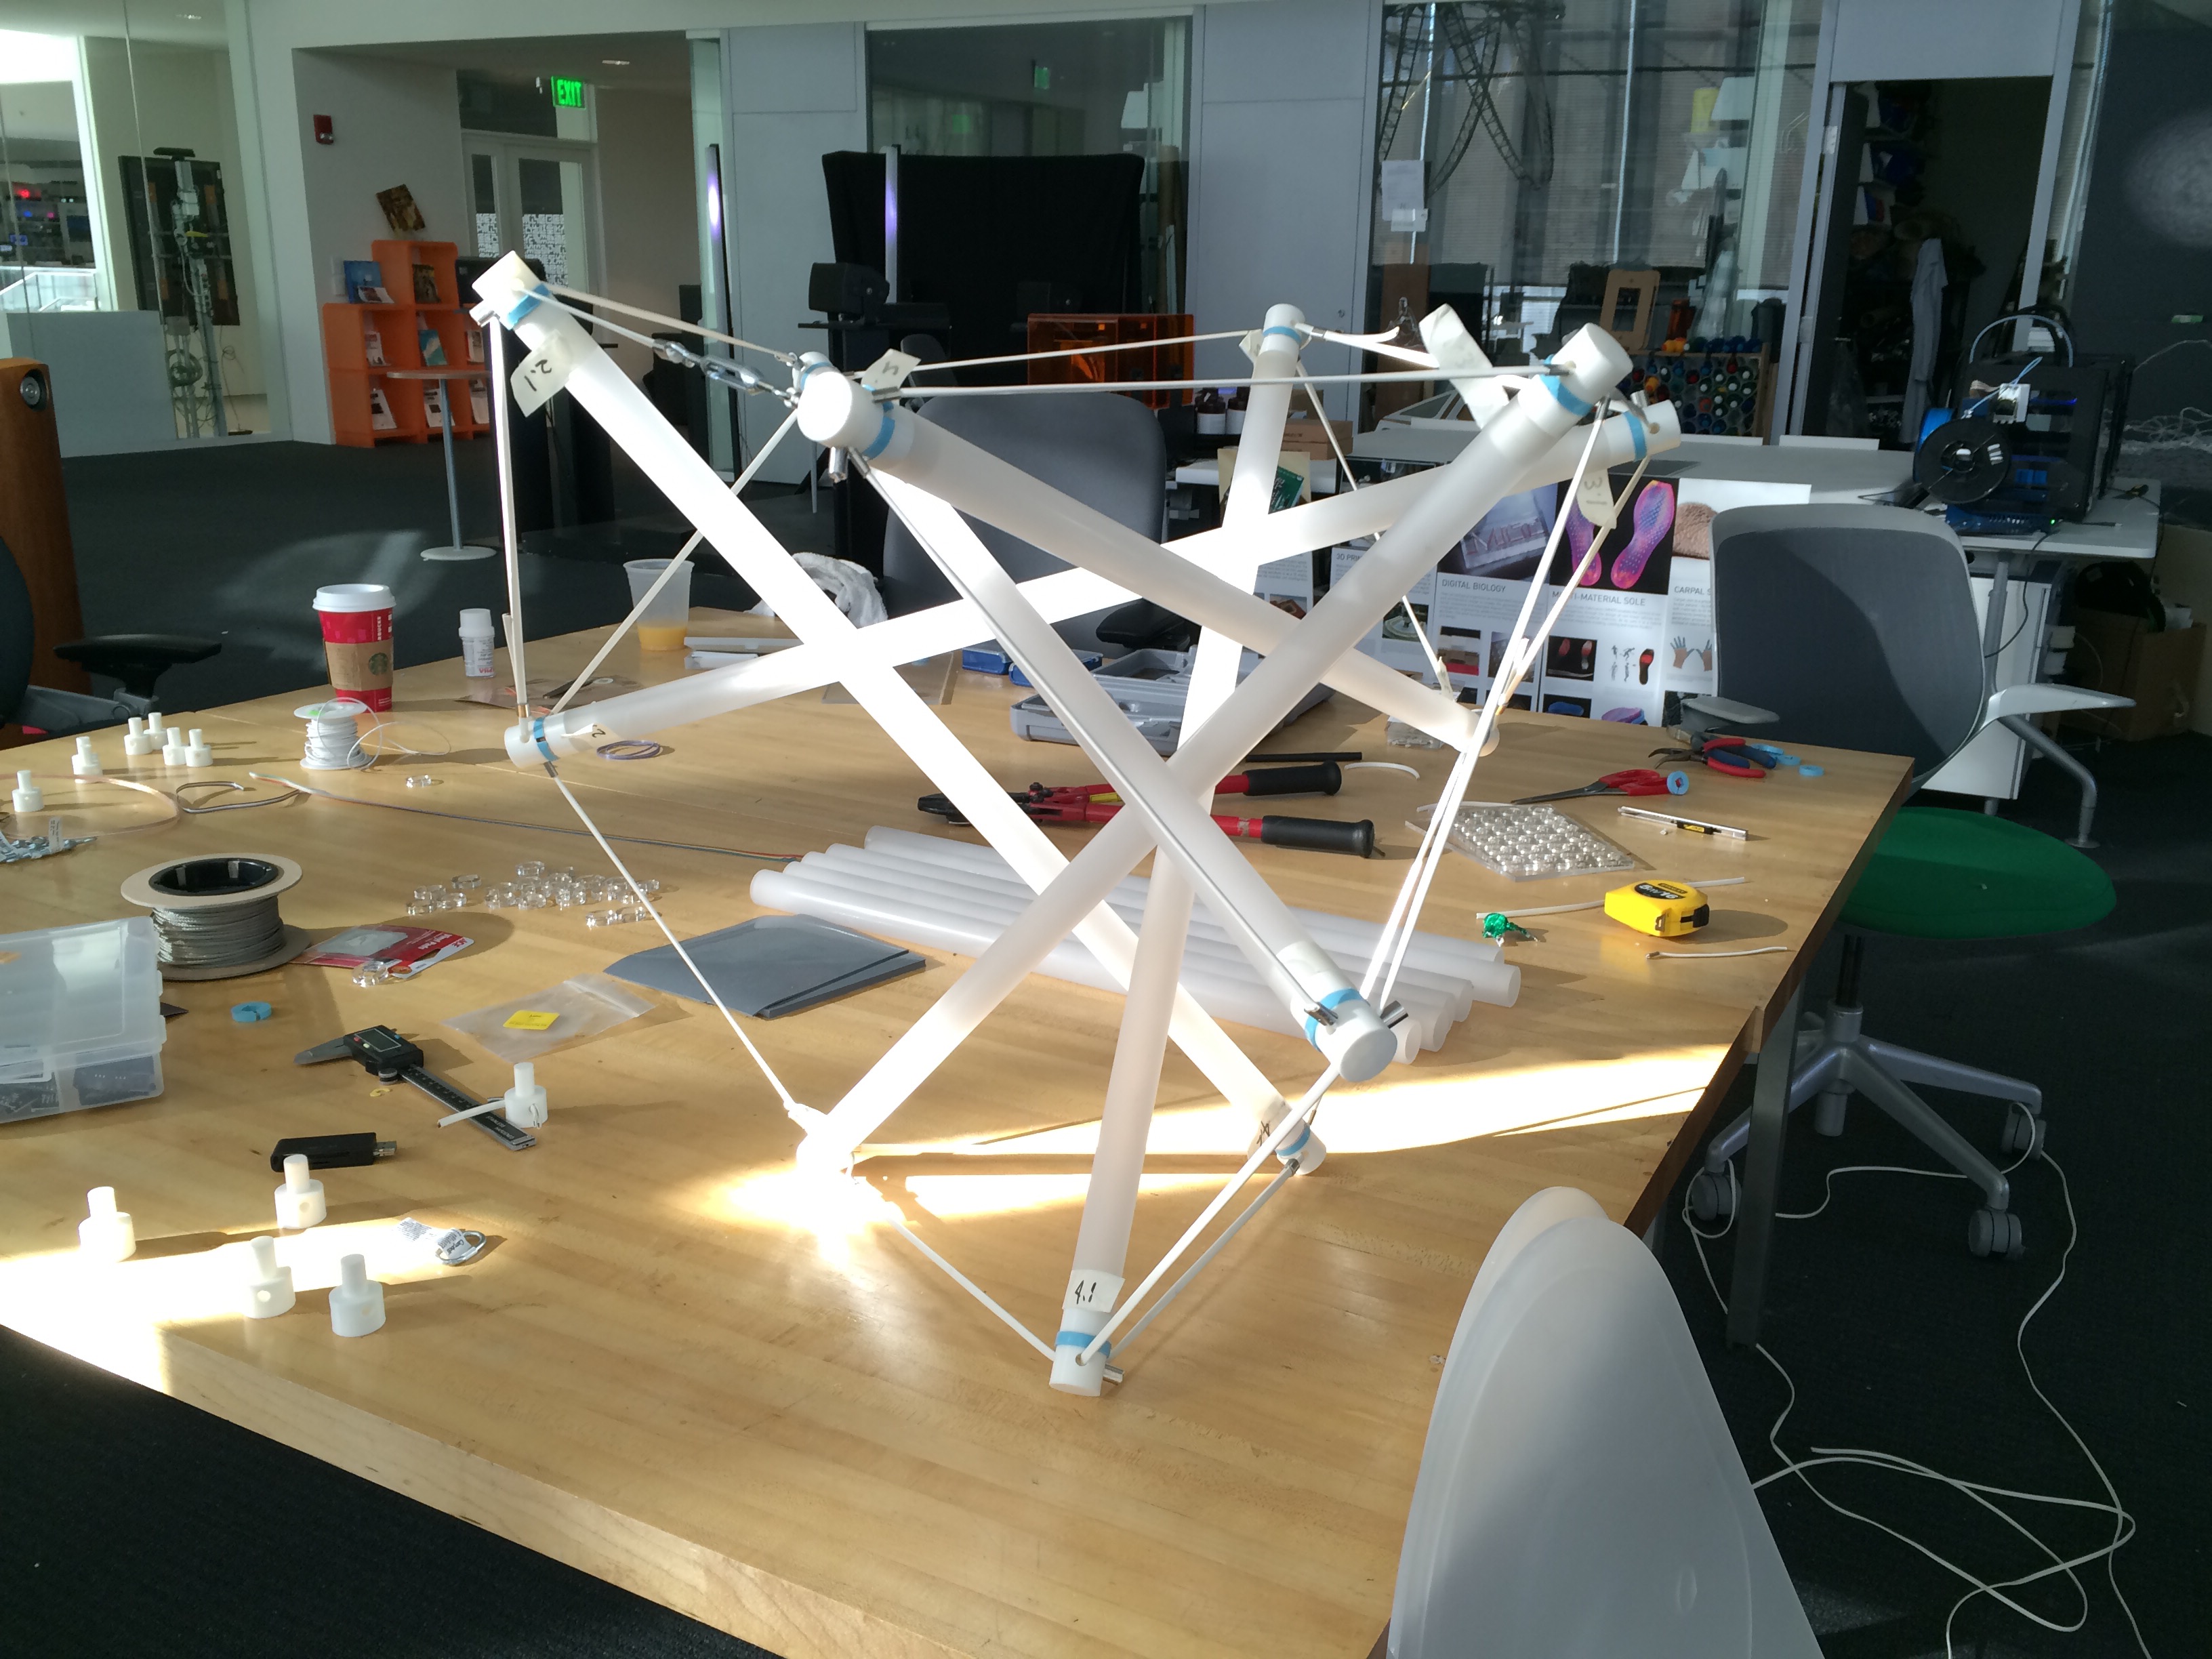
This selection of the load sensor allowed me to narrow down a type of structure that I shall focus on designing so that it’s structural property can be measured by simple axial strains as oppose to having to measure other properties such as shear and flexure. Hence, I’ve decided to design a structure based on Buck-minster Fuller’s Tensegrity model to achieve a synergy between the design of the structure and the type of the sensor.
I quite like the synergy between the mechanism of the sensor and the structure. The two works complimentary to each other and conceptually manifests a nicely integrated design. Now it's time to work on the system integration to make this happen.

Material
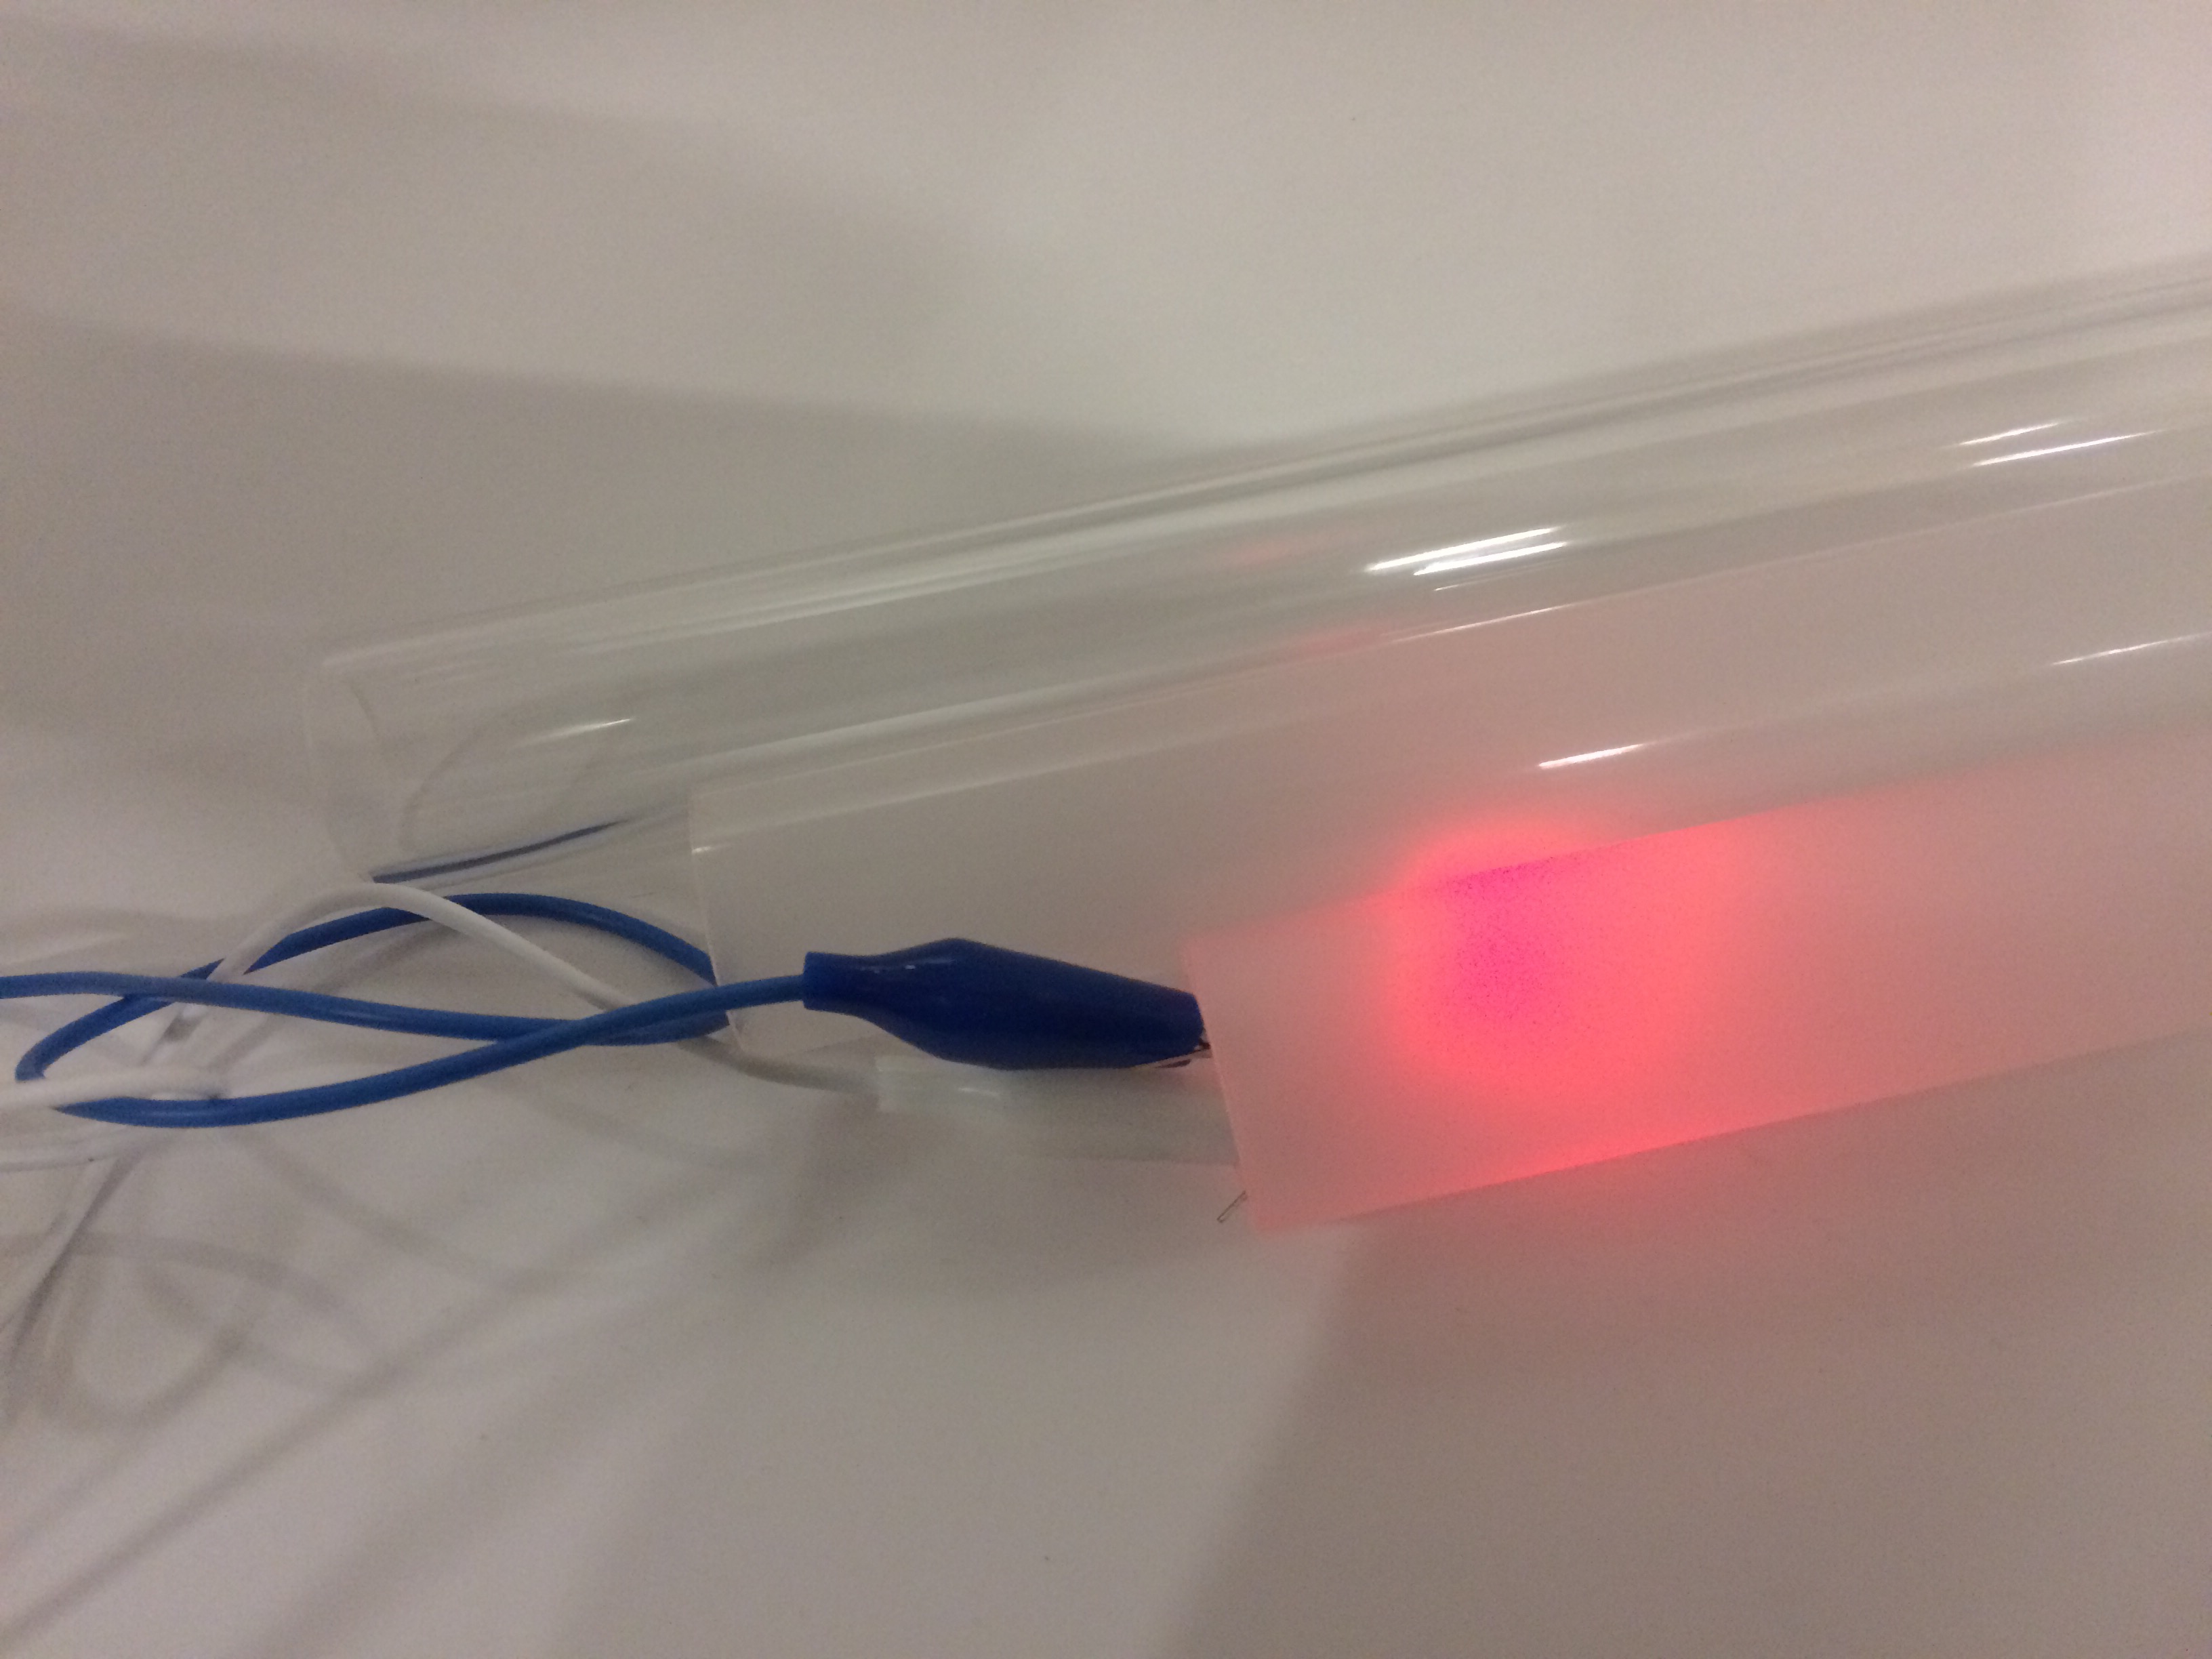
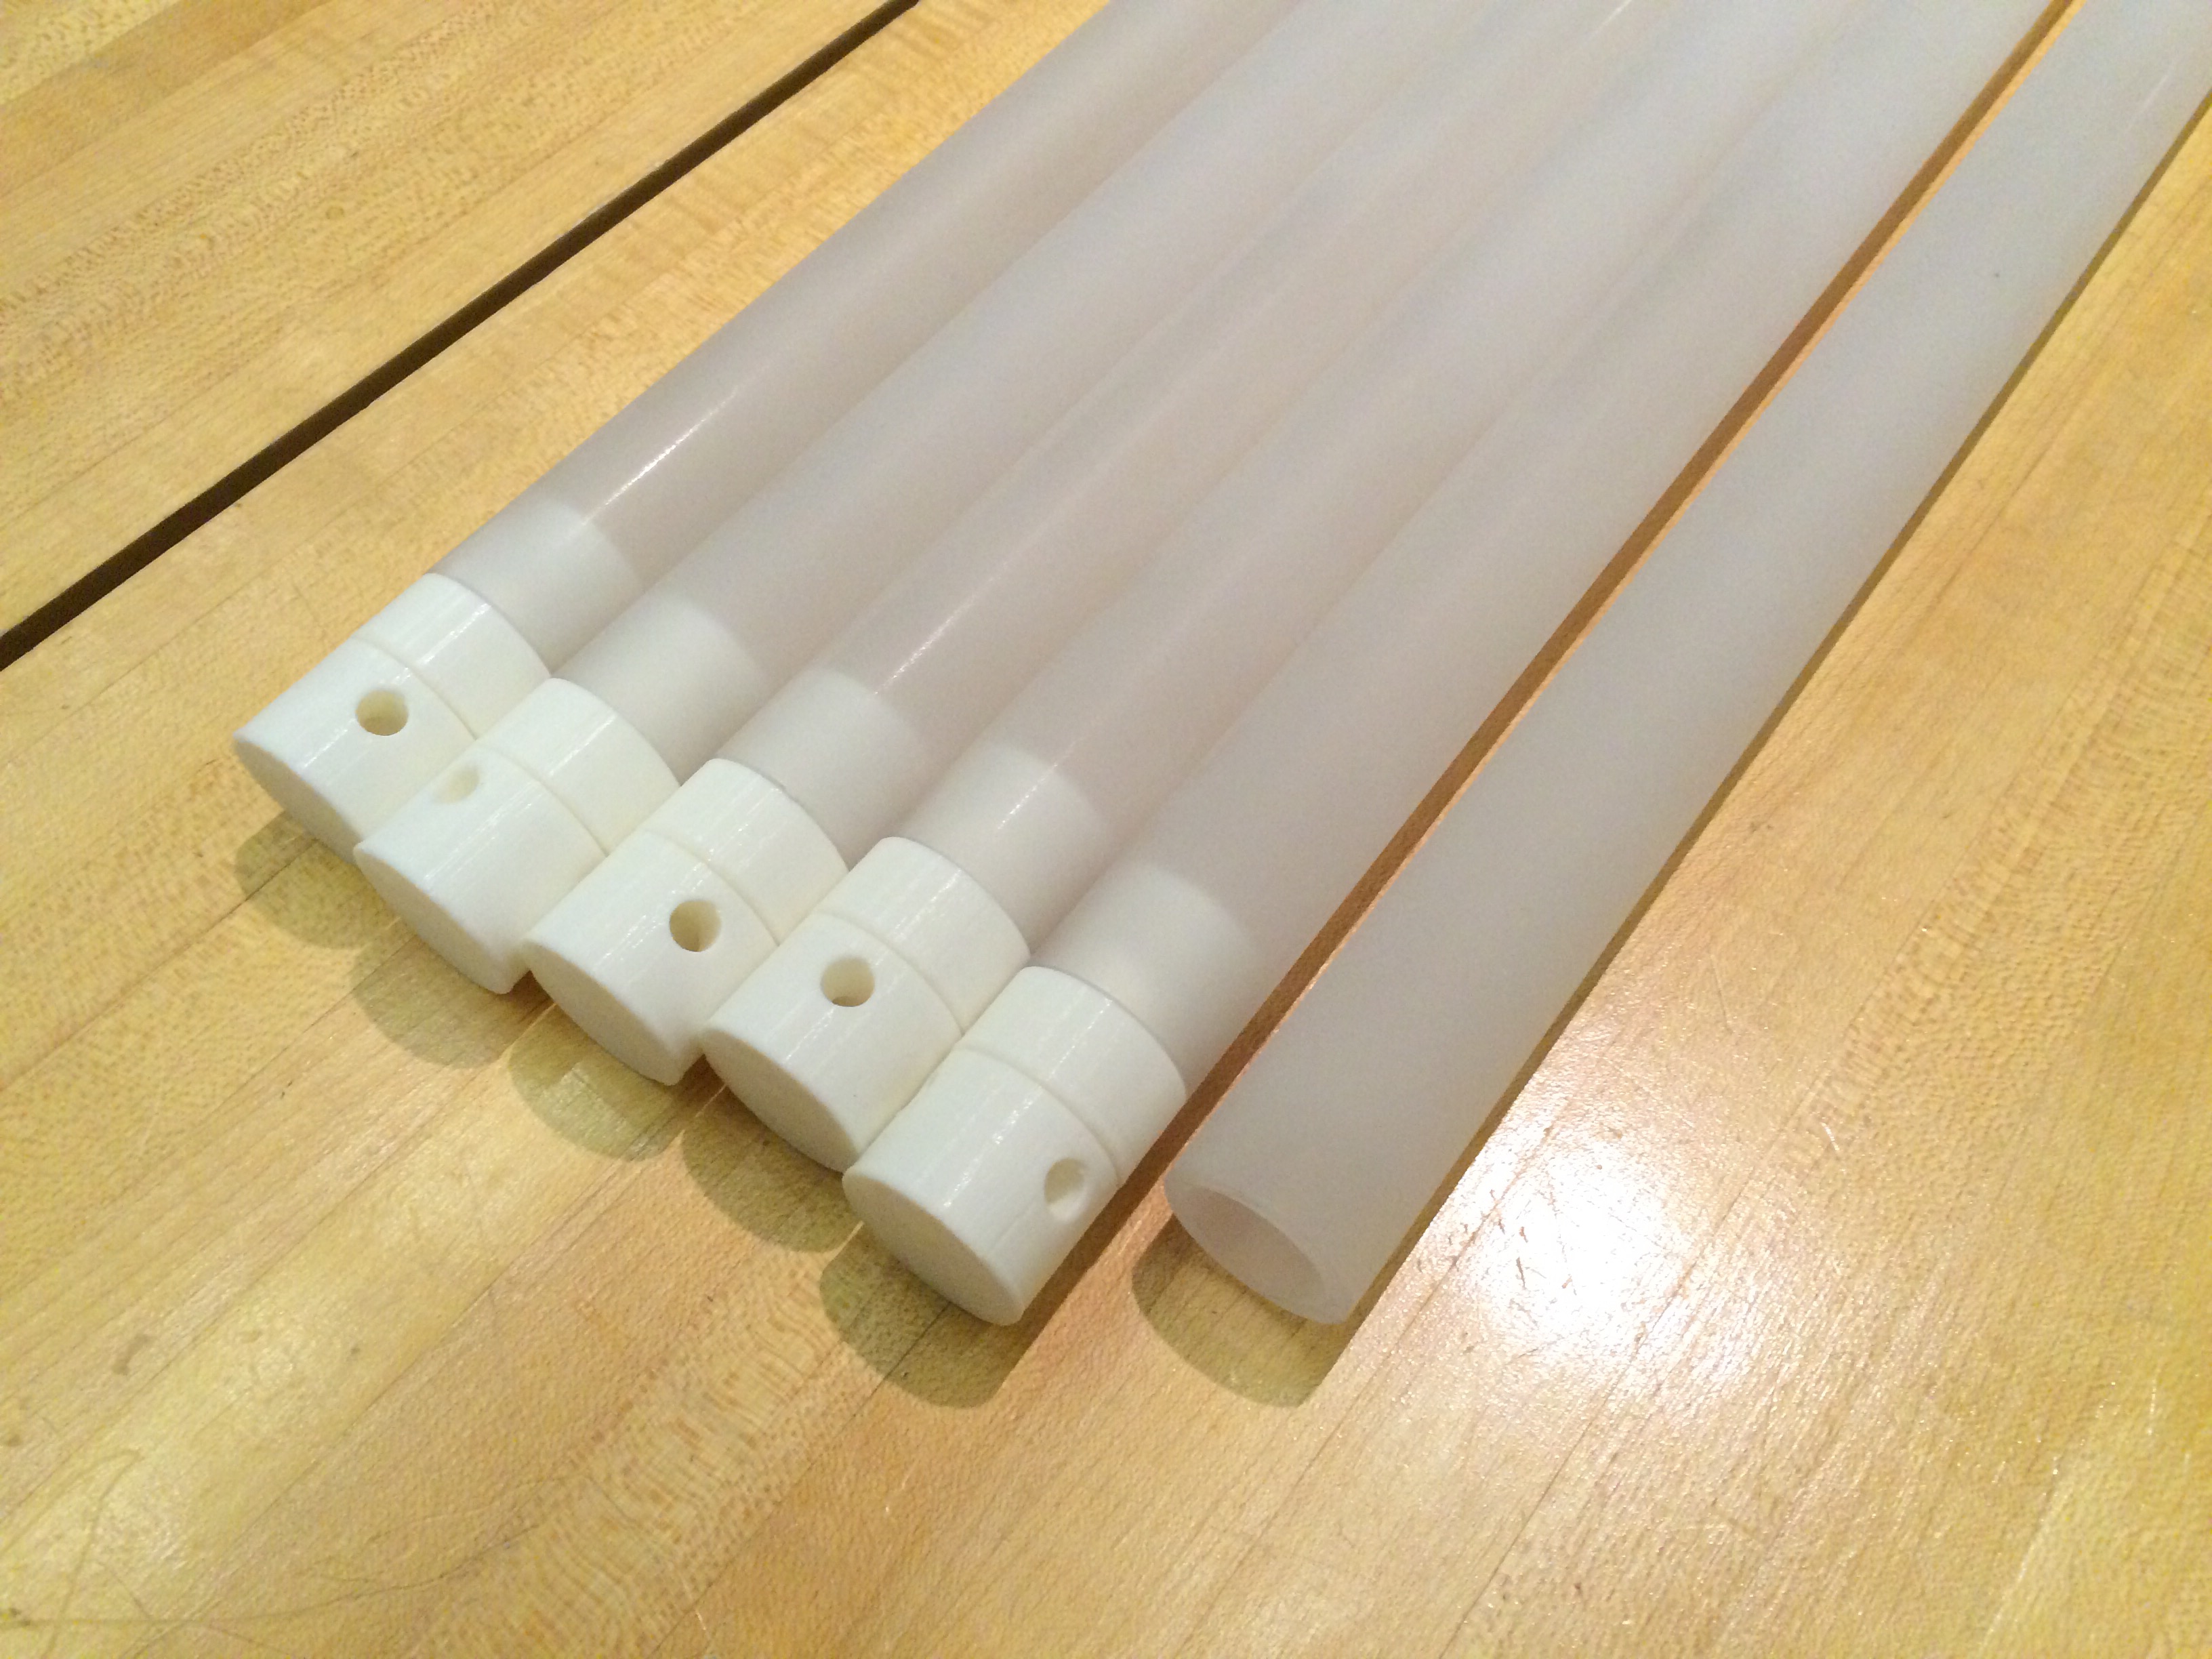
For the compression members, I was looking for a clear material to cast so that to diffuse the LED lights on the capacitive sensor at each node. In addition, in order to achive an integrated design system between structural and electrical functionality, conductive capacity of the material is a point of consideration as well as its optical quality. Here's the list of resources I was refering to and materials I was considering:
Resources
- Fab Academy - Molding and Casting
- Fab Lab Inventory
- THe Engineering Toolbox - Young's Modulus for Common Materials
Thermoplastic
For caasting, Reynolds Advanced Materials has great range of plastics for various use.
For exisiting off the shelf rods, McMaster-carr has also wide range of materials and profiles.
For casting and finishing materials, instructables has great range of tutorials.
- Bubble-Free Resin Casting
- Glass Casting
- Optically Clear Cast Acrylic Tube
- Thermally Conductive Polycarbonate Rod
- Clear Casting Epoxy Resin
- Smooth-on: Smooth-Cast 326
Glass
It is worth mentioning the mechanical properties of glass. Glass is strong in compression and weak in tension. Saint Gobain Glass from UK has a concise description of the property of the glass.
- Density = 2.5 [g/cm^3] ( = [kg/m^2/mm])
- Compressive Strength = 1000 [N/mm^2] ( = [MPa] )
- Tensile Strength = 40 [N/mm^2] (annealed glass)
- Tensile Strength = 120+ [N/mm^2] (toughened glass)
- Young's Modulus = 70 * 10^9 [N/m^2] ( = [GPa])
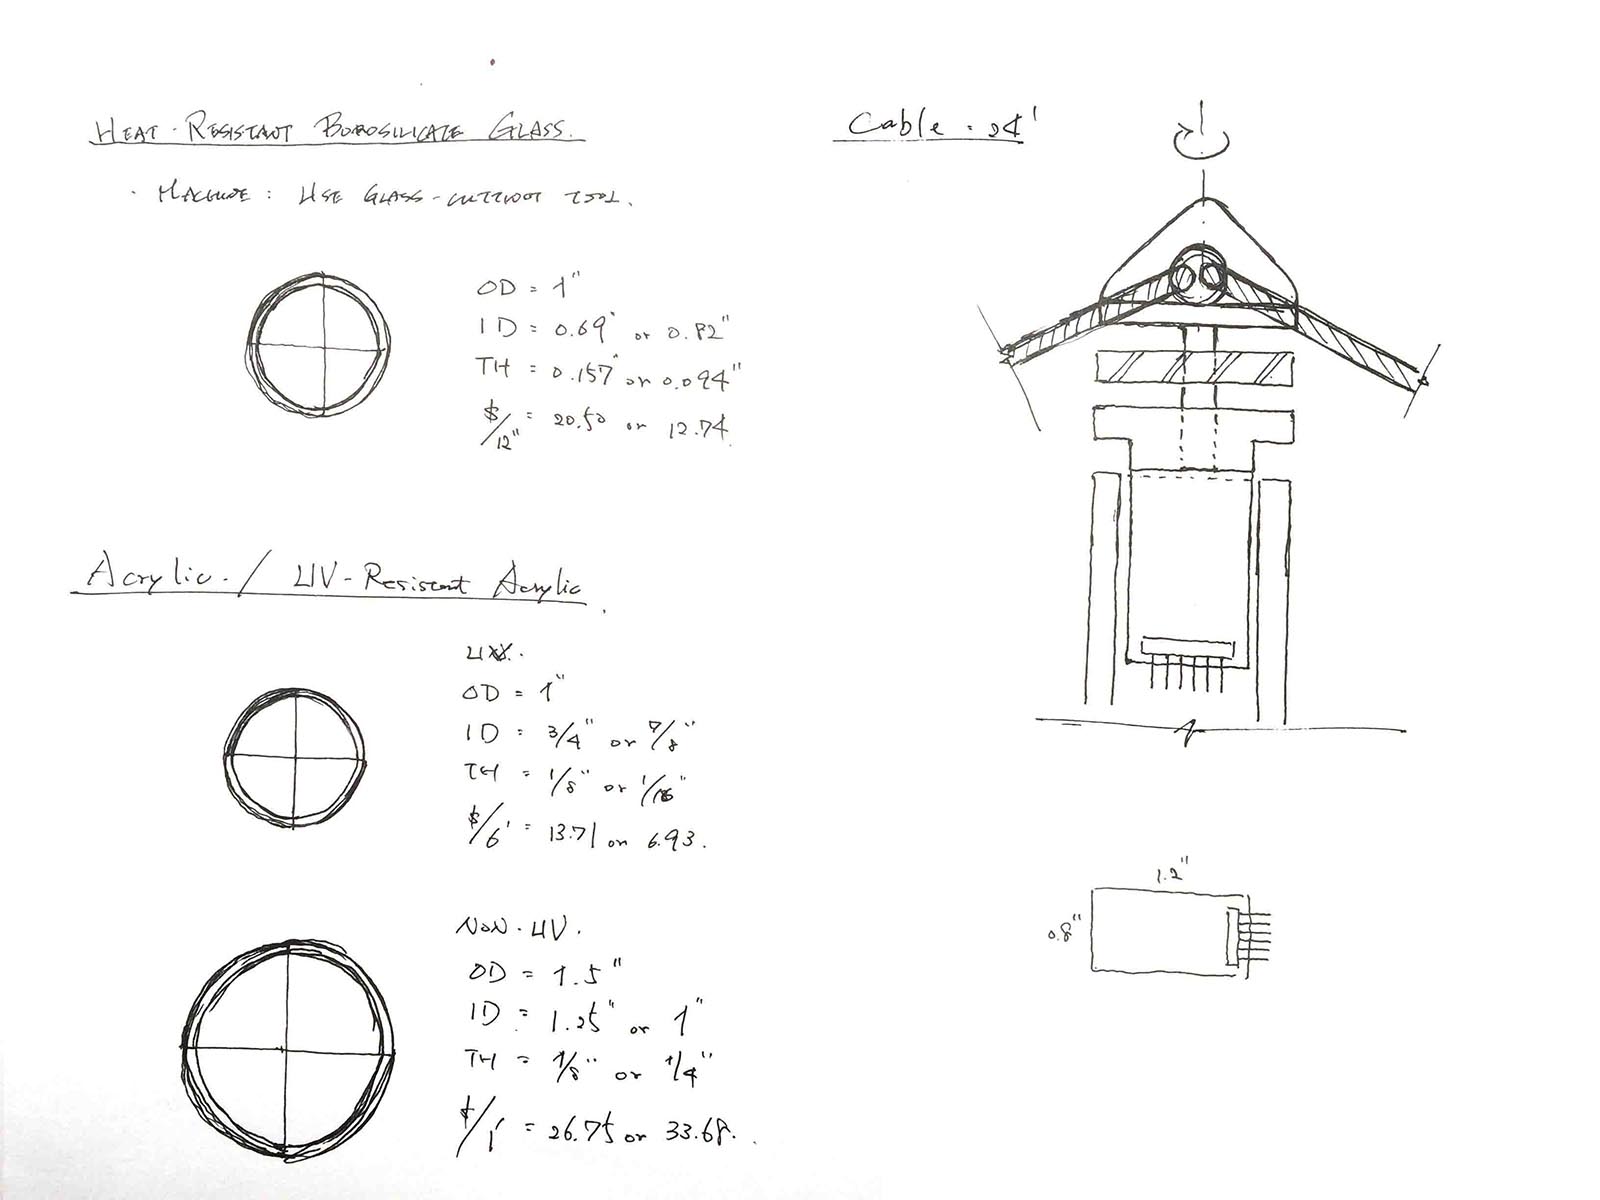
Heat-Resistant Borosilicate Glass Tube
Pros: Low rate of thermal expansion for dimensional stability during change in temperature. This might be benefitial for tuning capacitive sensors at both ends.
Cons: Limitation on sectional control. For a compression member, buckling is often the critical factor of failure mode. I was planning on making a variable section tube where the middle section is larger than the ends to increase buckling load capacity. Selection of material based on off the shelf elements limit the control in this regard.
Casting Soda-lime Glass
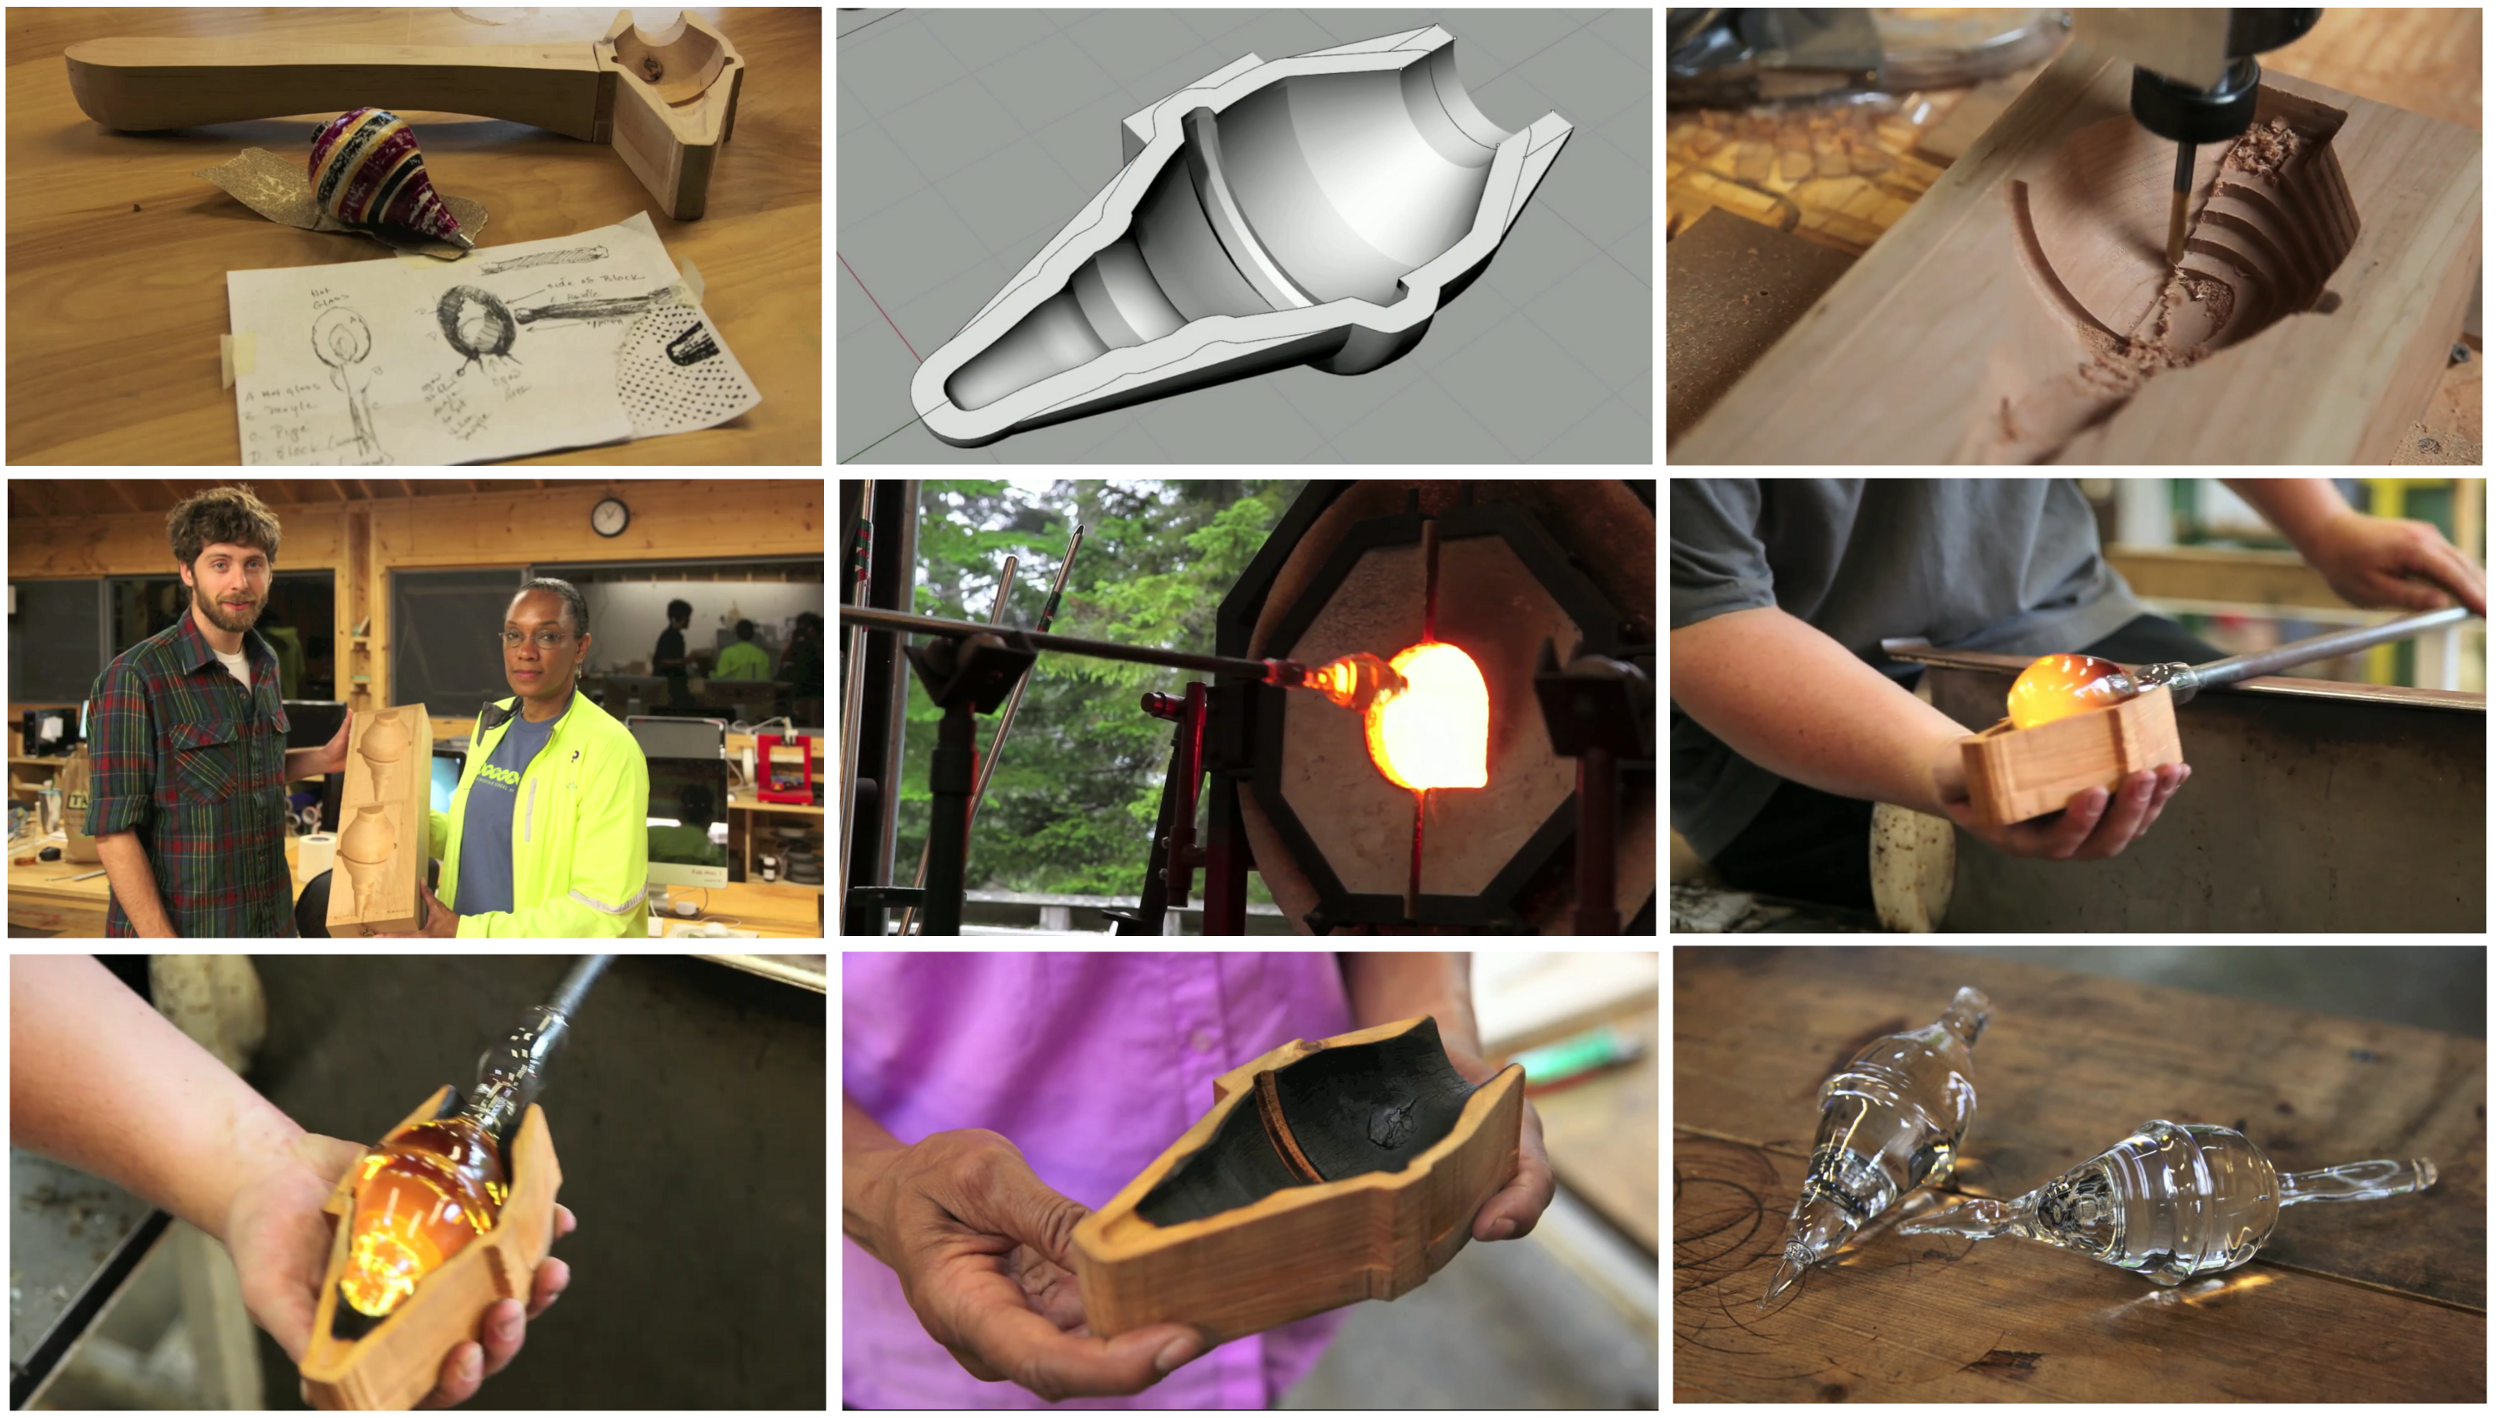
Sam Calisch from CBA has worked on casting soda-lime glass on cherry wood mold and kindly shared some insights on the material selection.
Pros: Optically transparent, good compressive strength.
Cons: Required high temperature furnace to melt and midium-high temperature kiln to anneal. While the melting furnace can be small, the annealing kiln need to be large enough to hold the end product, in this case 1' long rods.
- - Heat-Resistant Borosilicate Glass Tube
- - Sam Calisch, CBA, MIT
- - Casting Soda-lime Glass
- - Glass Annealing, Wikipedia
Sensor
Capacitive Load Cell
This parallel-plate capacitor has a nice and simple mechanism to connect the world of electronics, materials, mechanics, and geometry. The capacitor's capacitance is a linear function of the dielectric material's permittivity ε, the overlap surface area of the two electrode plates A, and the distance between the two plates, hence the thickness of the elastomer dielectric d.
Dielectric Elastomer
While I was doing precedence study, I come across a material called dielectric elastomer (DE). The DE is a capacitor and its mechanism is very similar to the capacitor I'm making, where the elastomer as dielectric is sandwitched between two plates of electrodes. The main difference is that the elastomer in DE has much larger range of strain and thus act as an actuator when applied a voltage. Therefore, DE can transform electric energy into mechanical energy. While I'm using my capacitor to simply measure the dynamic stress condition on each structural member, this DE's ability to act as an actuator is very interesting. I would love to experiment on the next project after this.
- - Capacitor, Wikipedia
- - Dielectric, Wikipedia
- - Electrode, Wikipedia
- - Dielectric Elastomers, Wikipedia
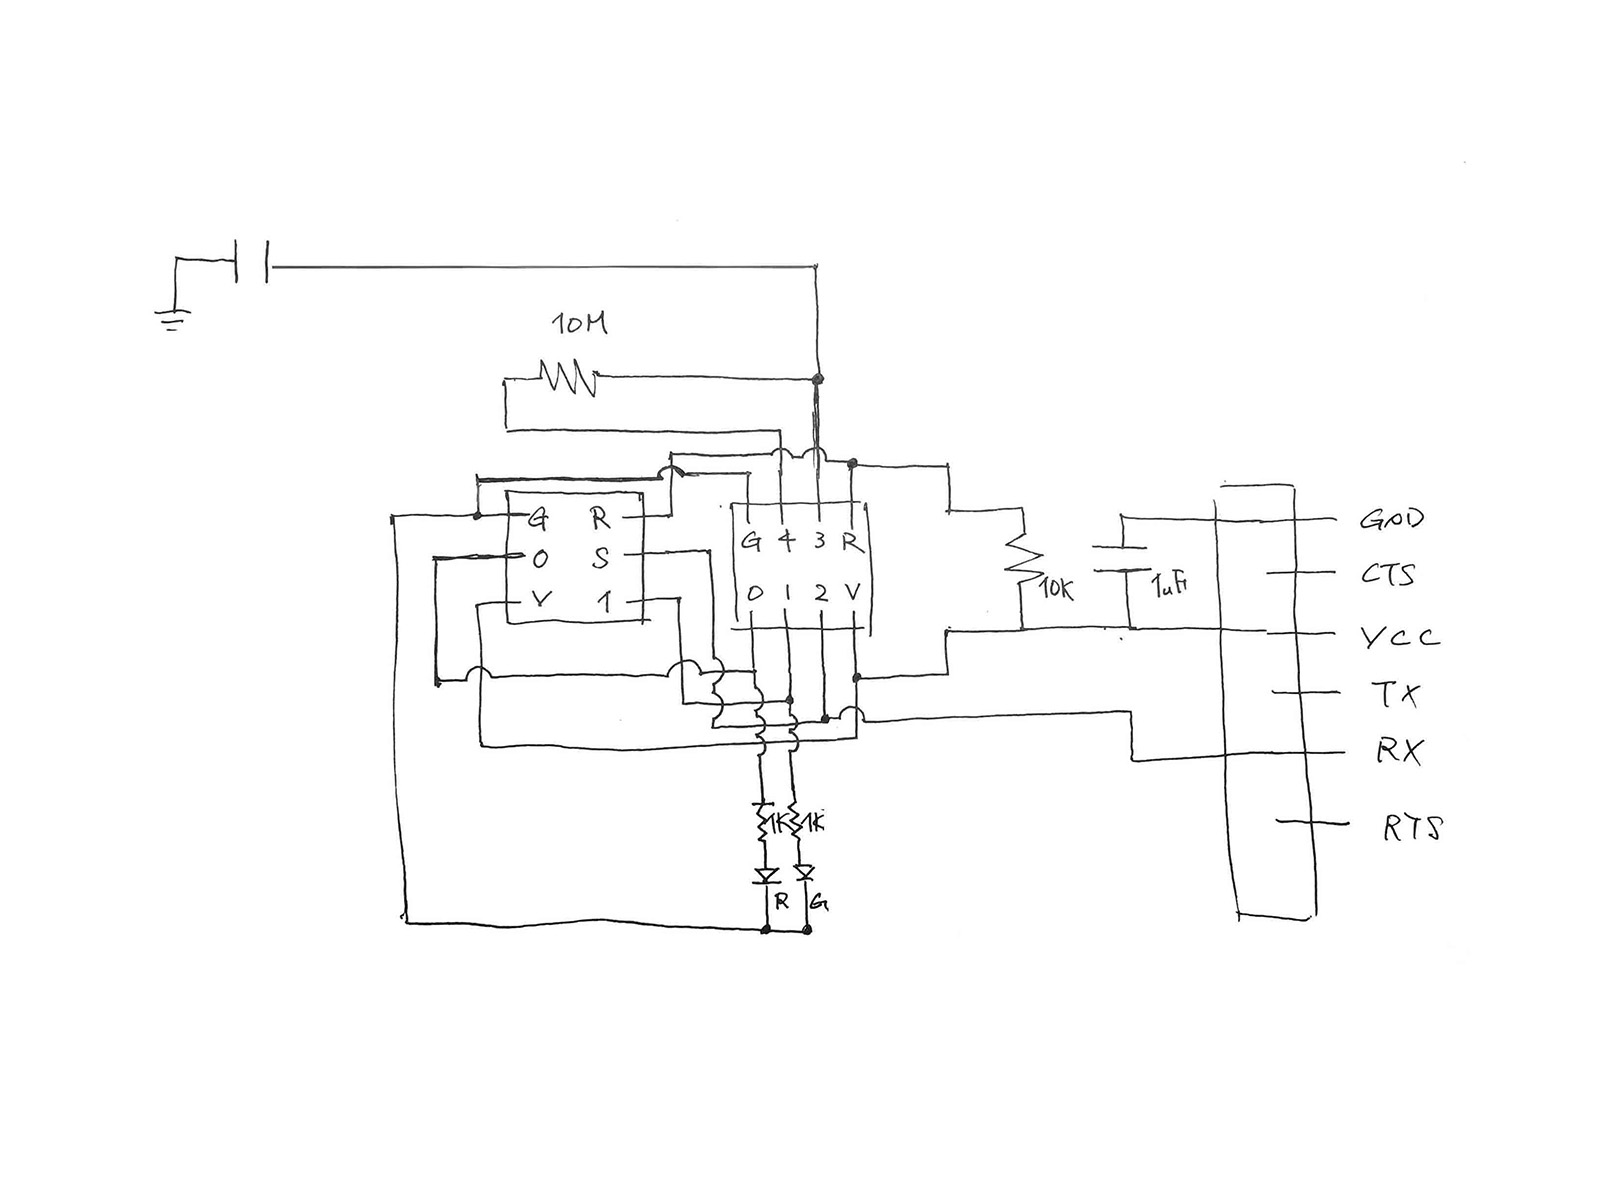
For measuring dynamic stress on the structure, I have decided to use capacitve sensors. For a capacitive sensor, I have learned that there are two ways to measure input voltage - diffenretial voltage vs single-ended voltage. A differential voltage method measures the voltage difference between two wires. A differential voltage has no reference to ground. The benefit of this method is noise rejection as the noise is added to both wires and can therefore be easily filtered. On the other hand, a single-ended measurement takes voltage differenec between a wire and ground.
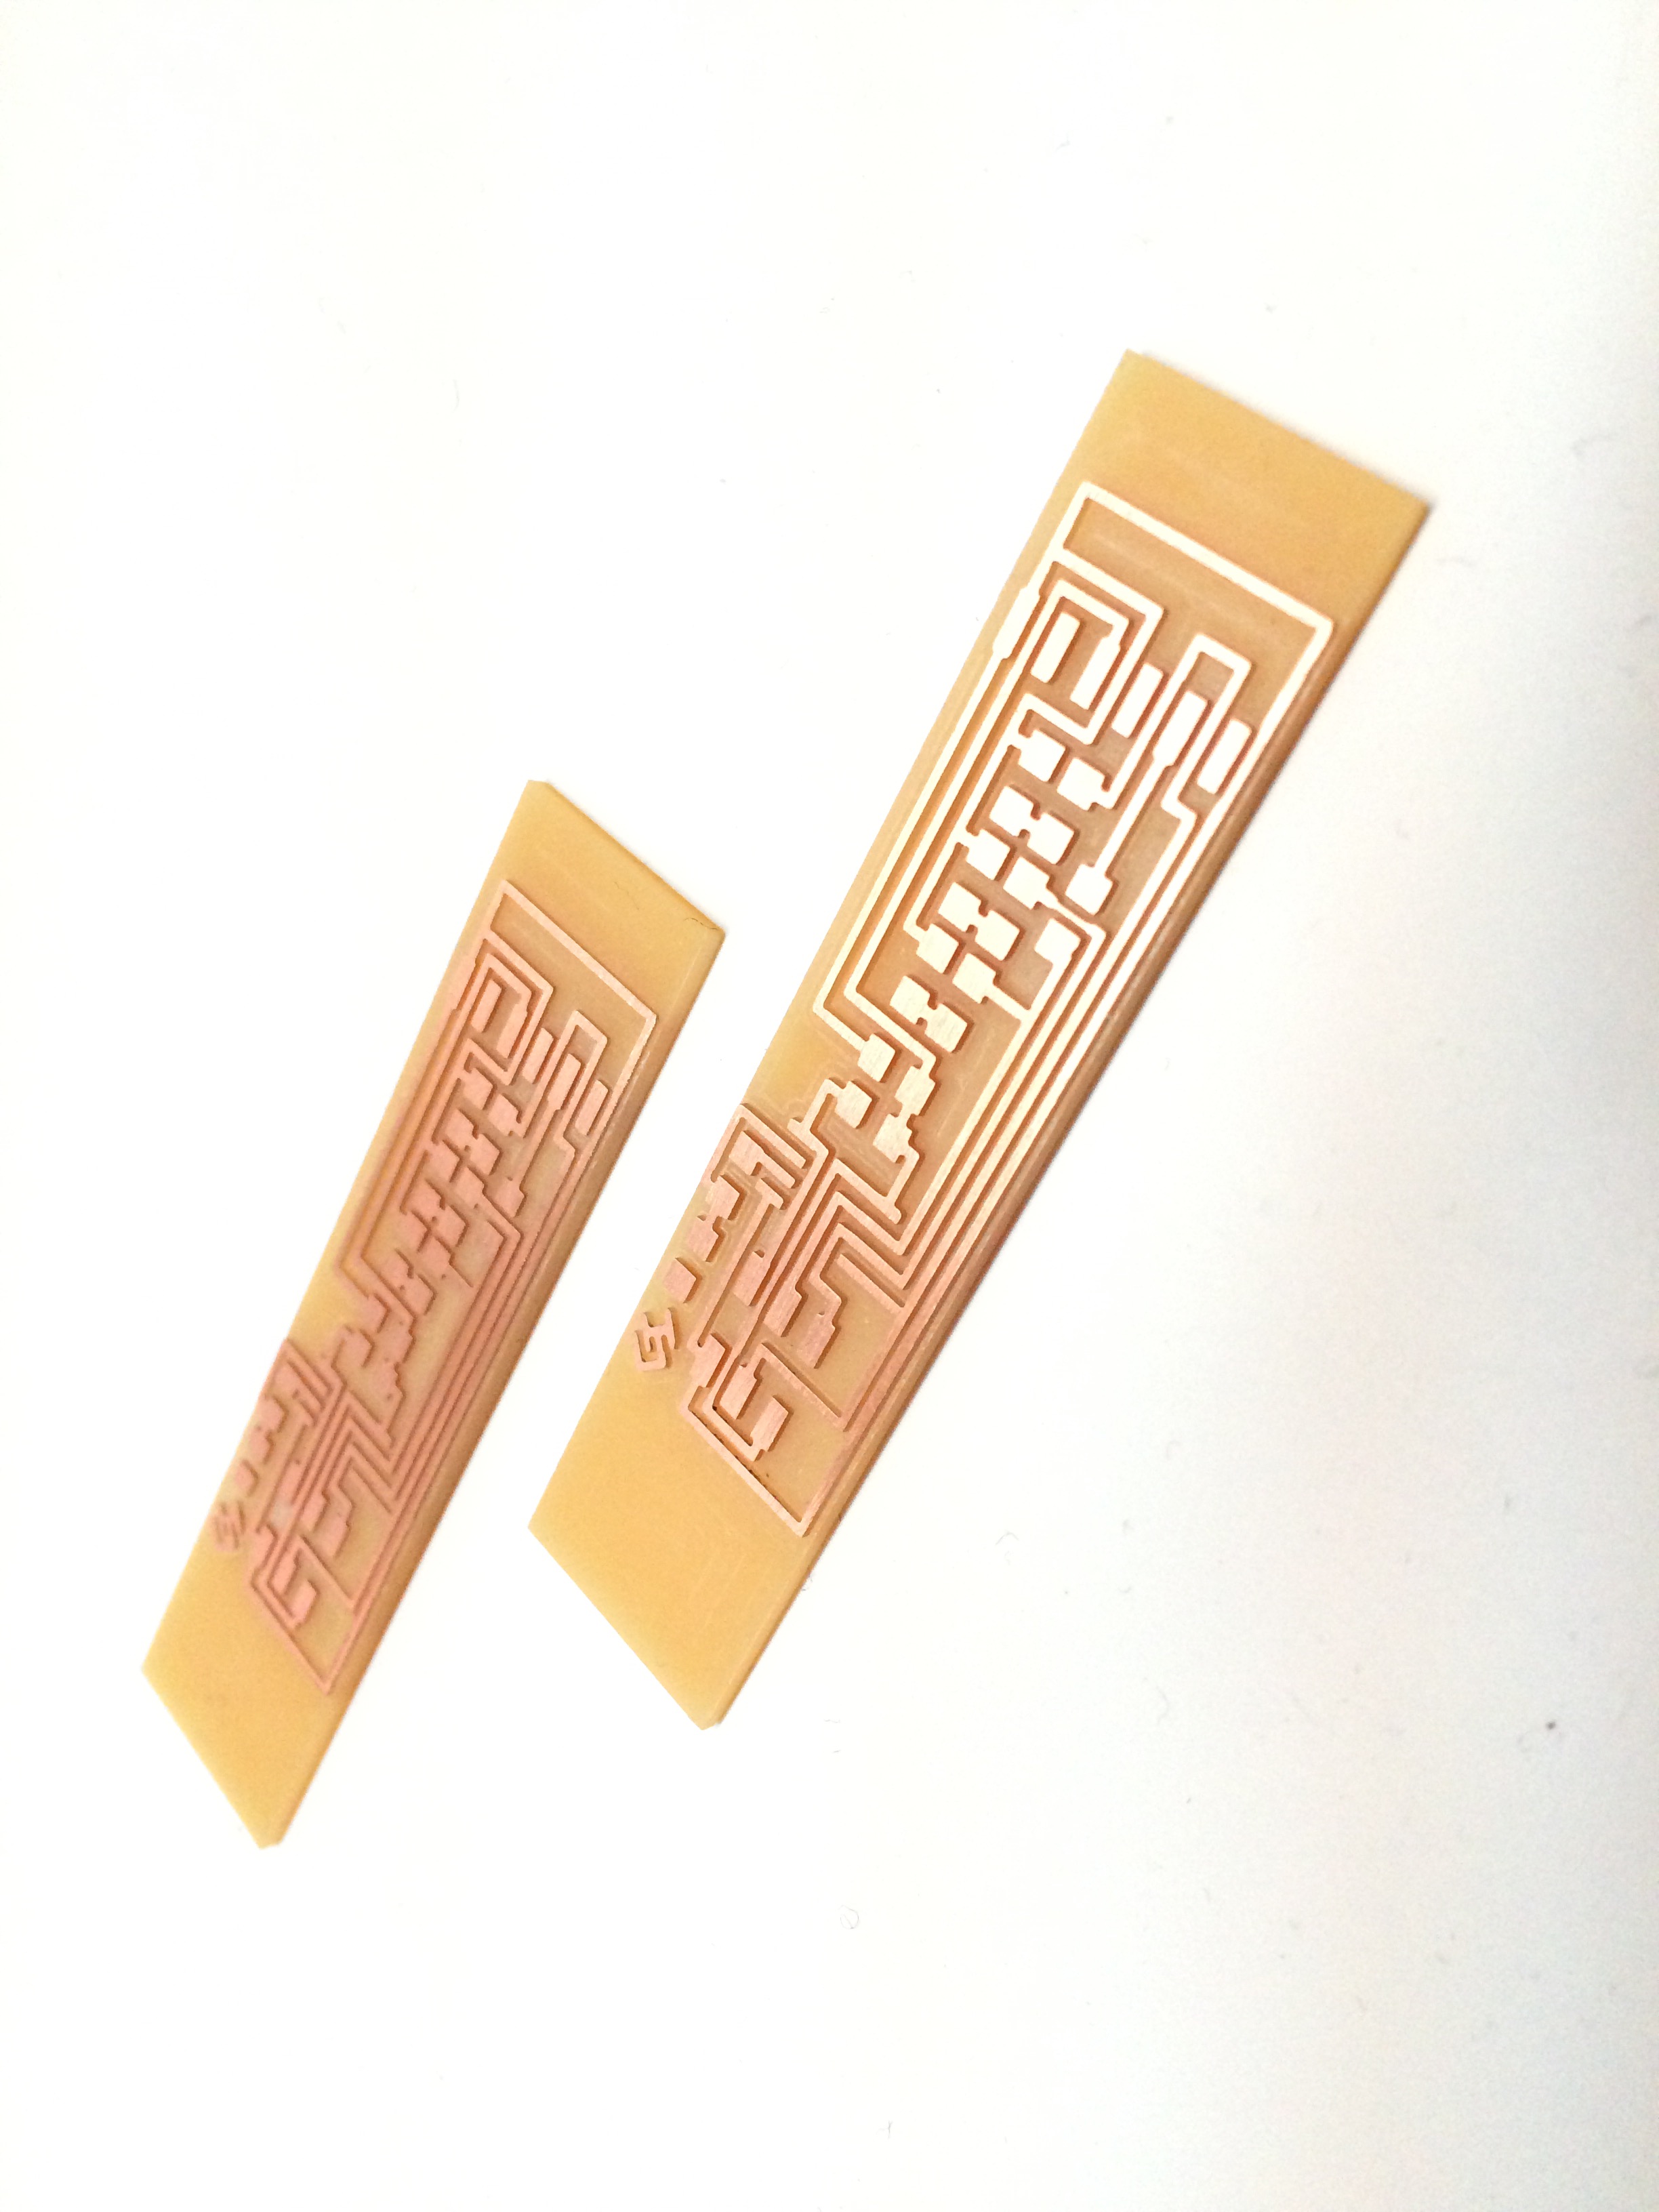
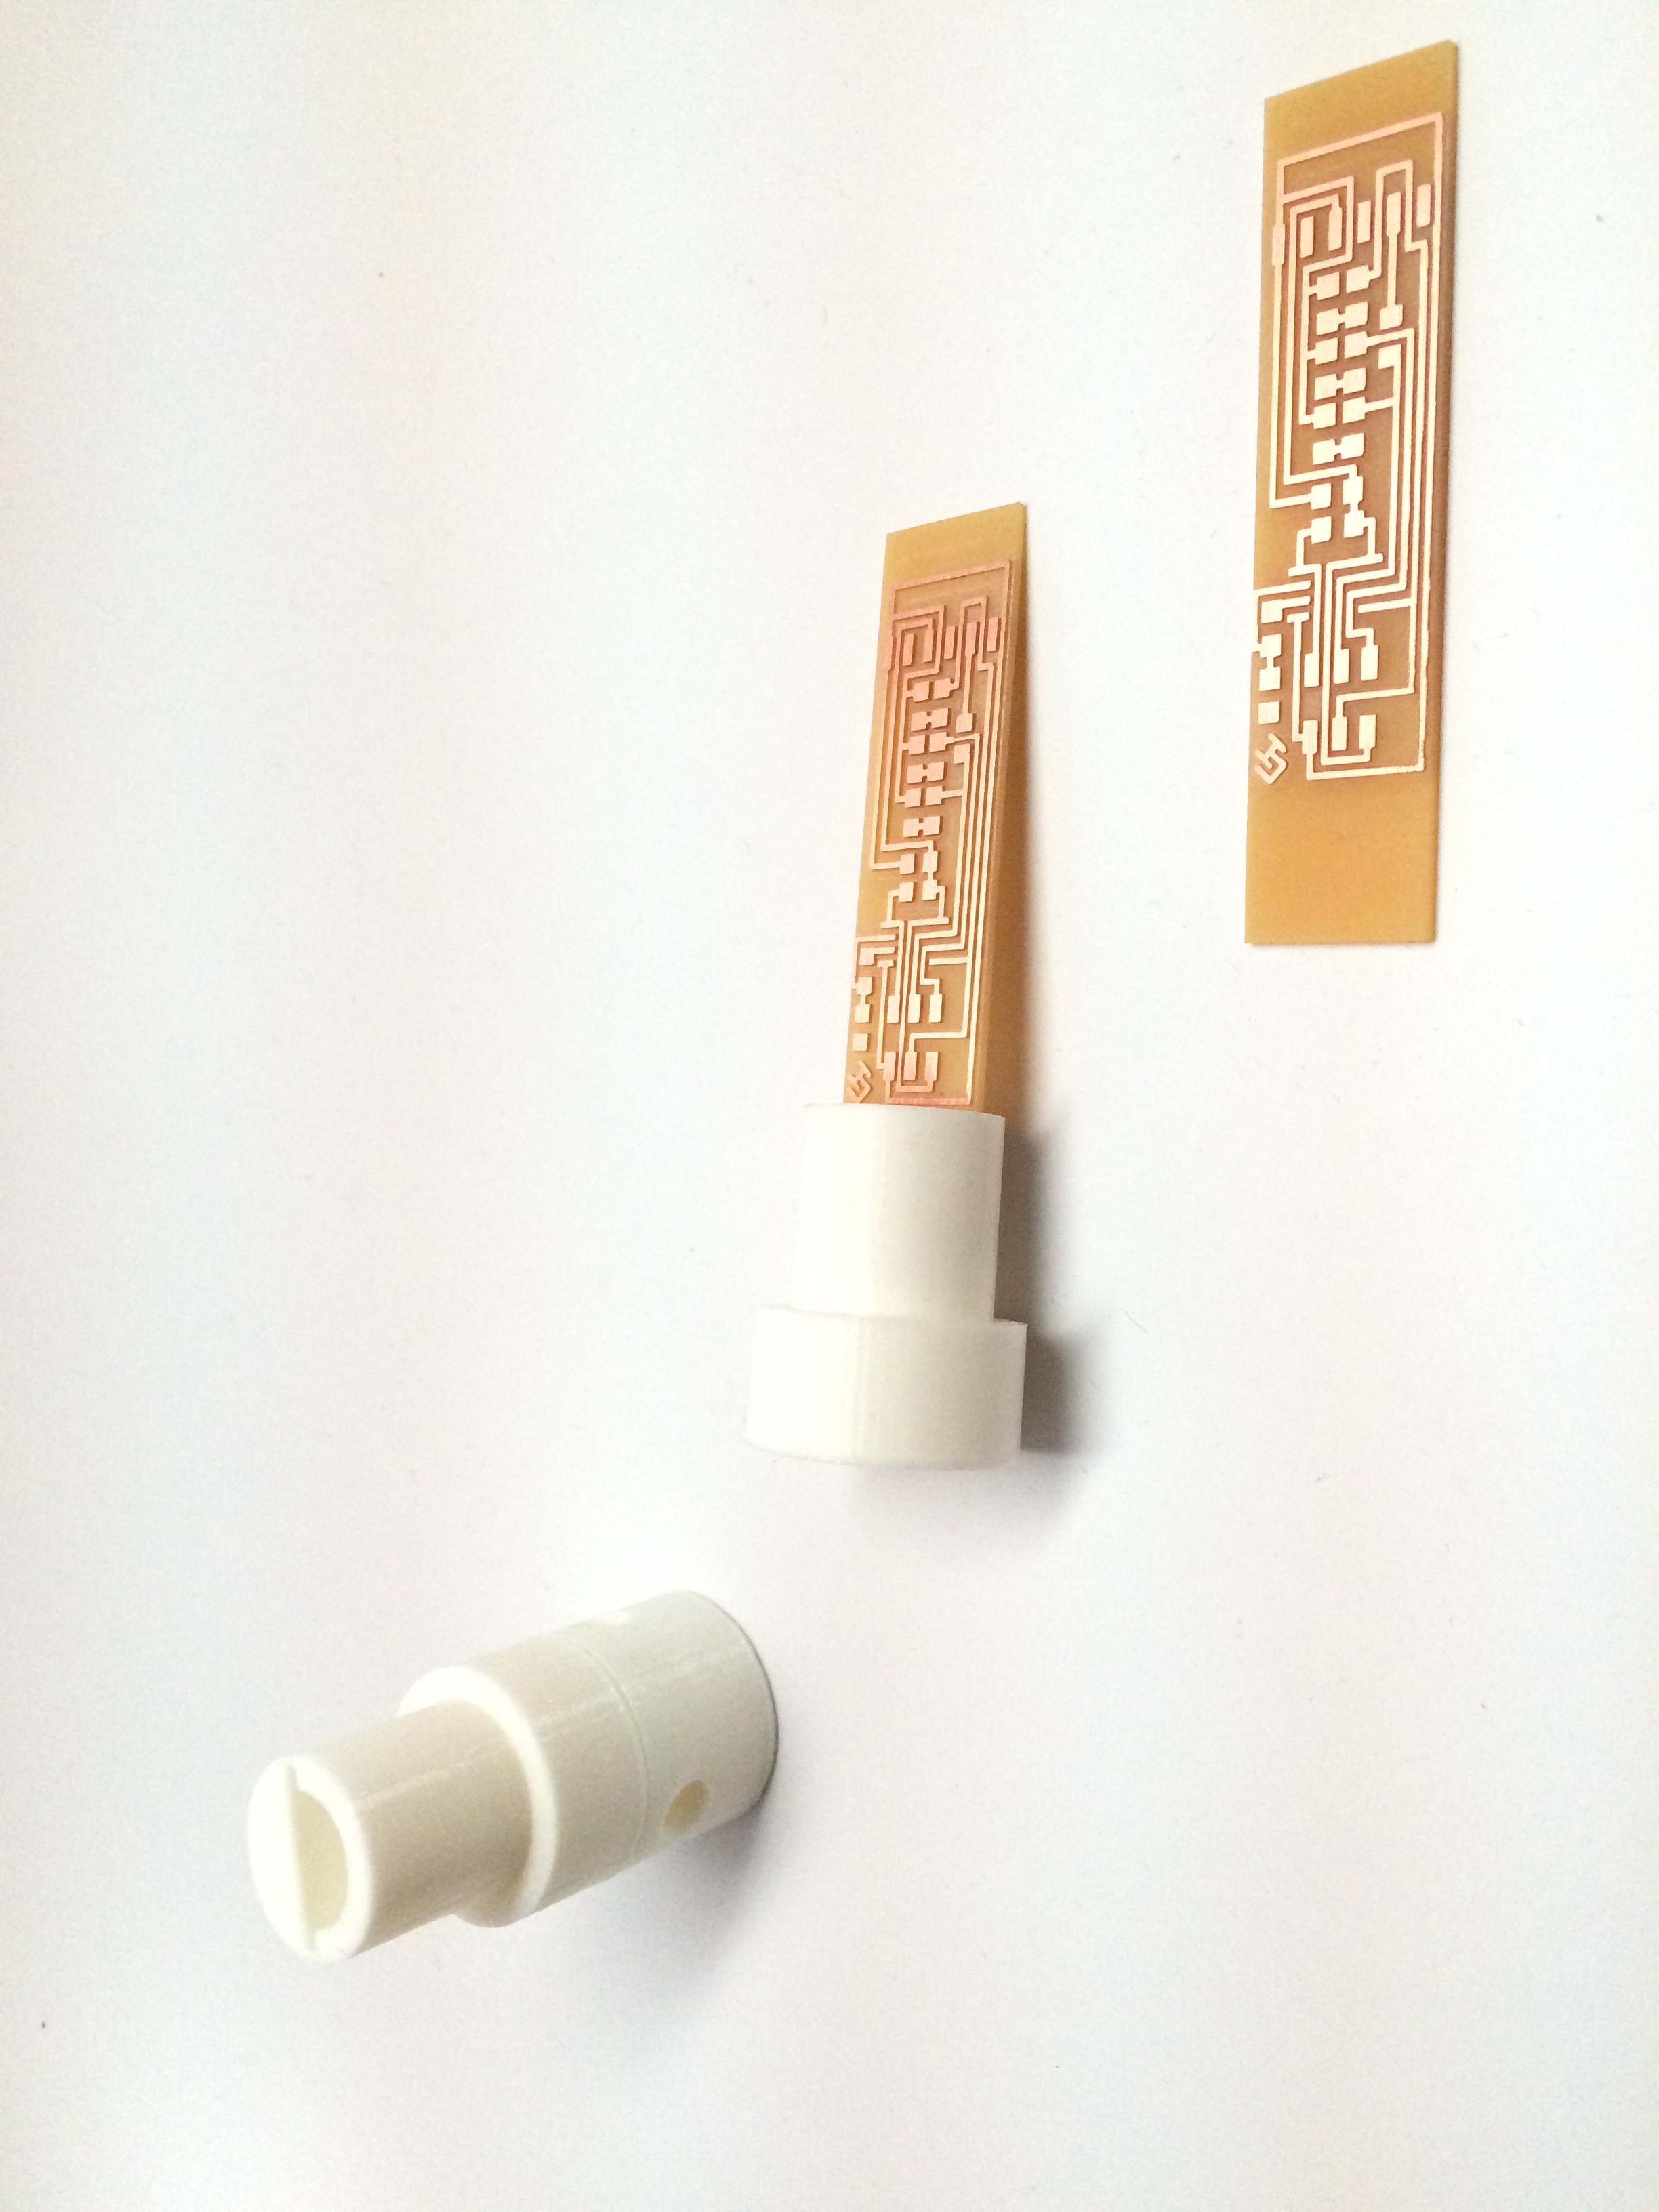
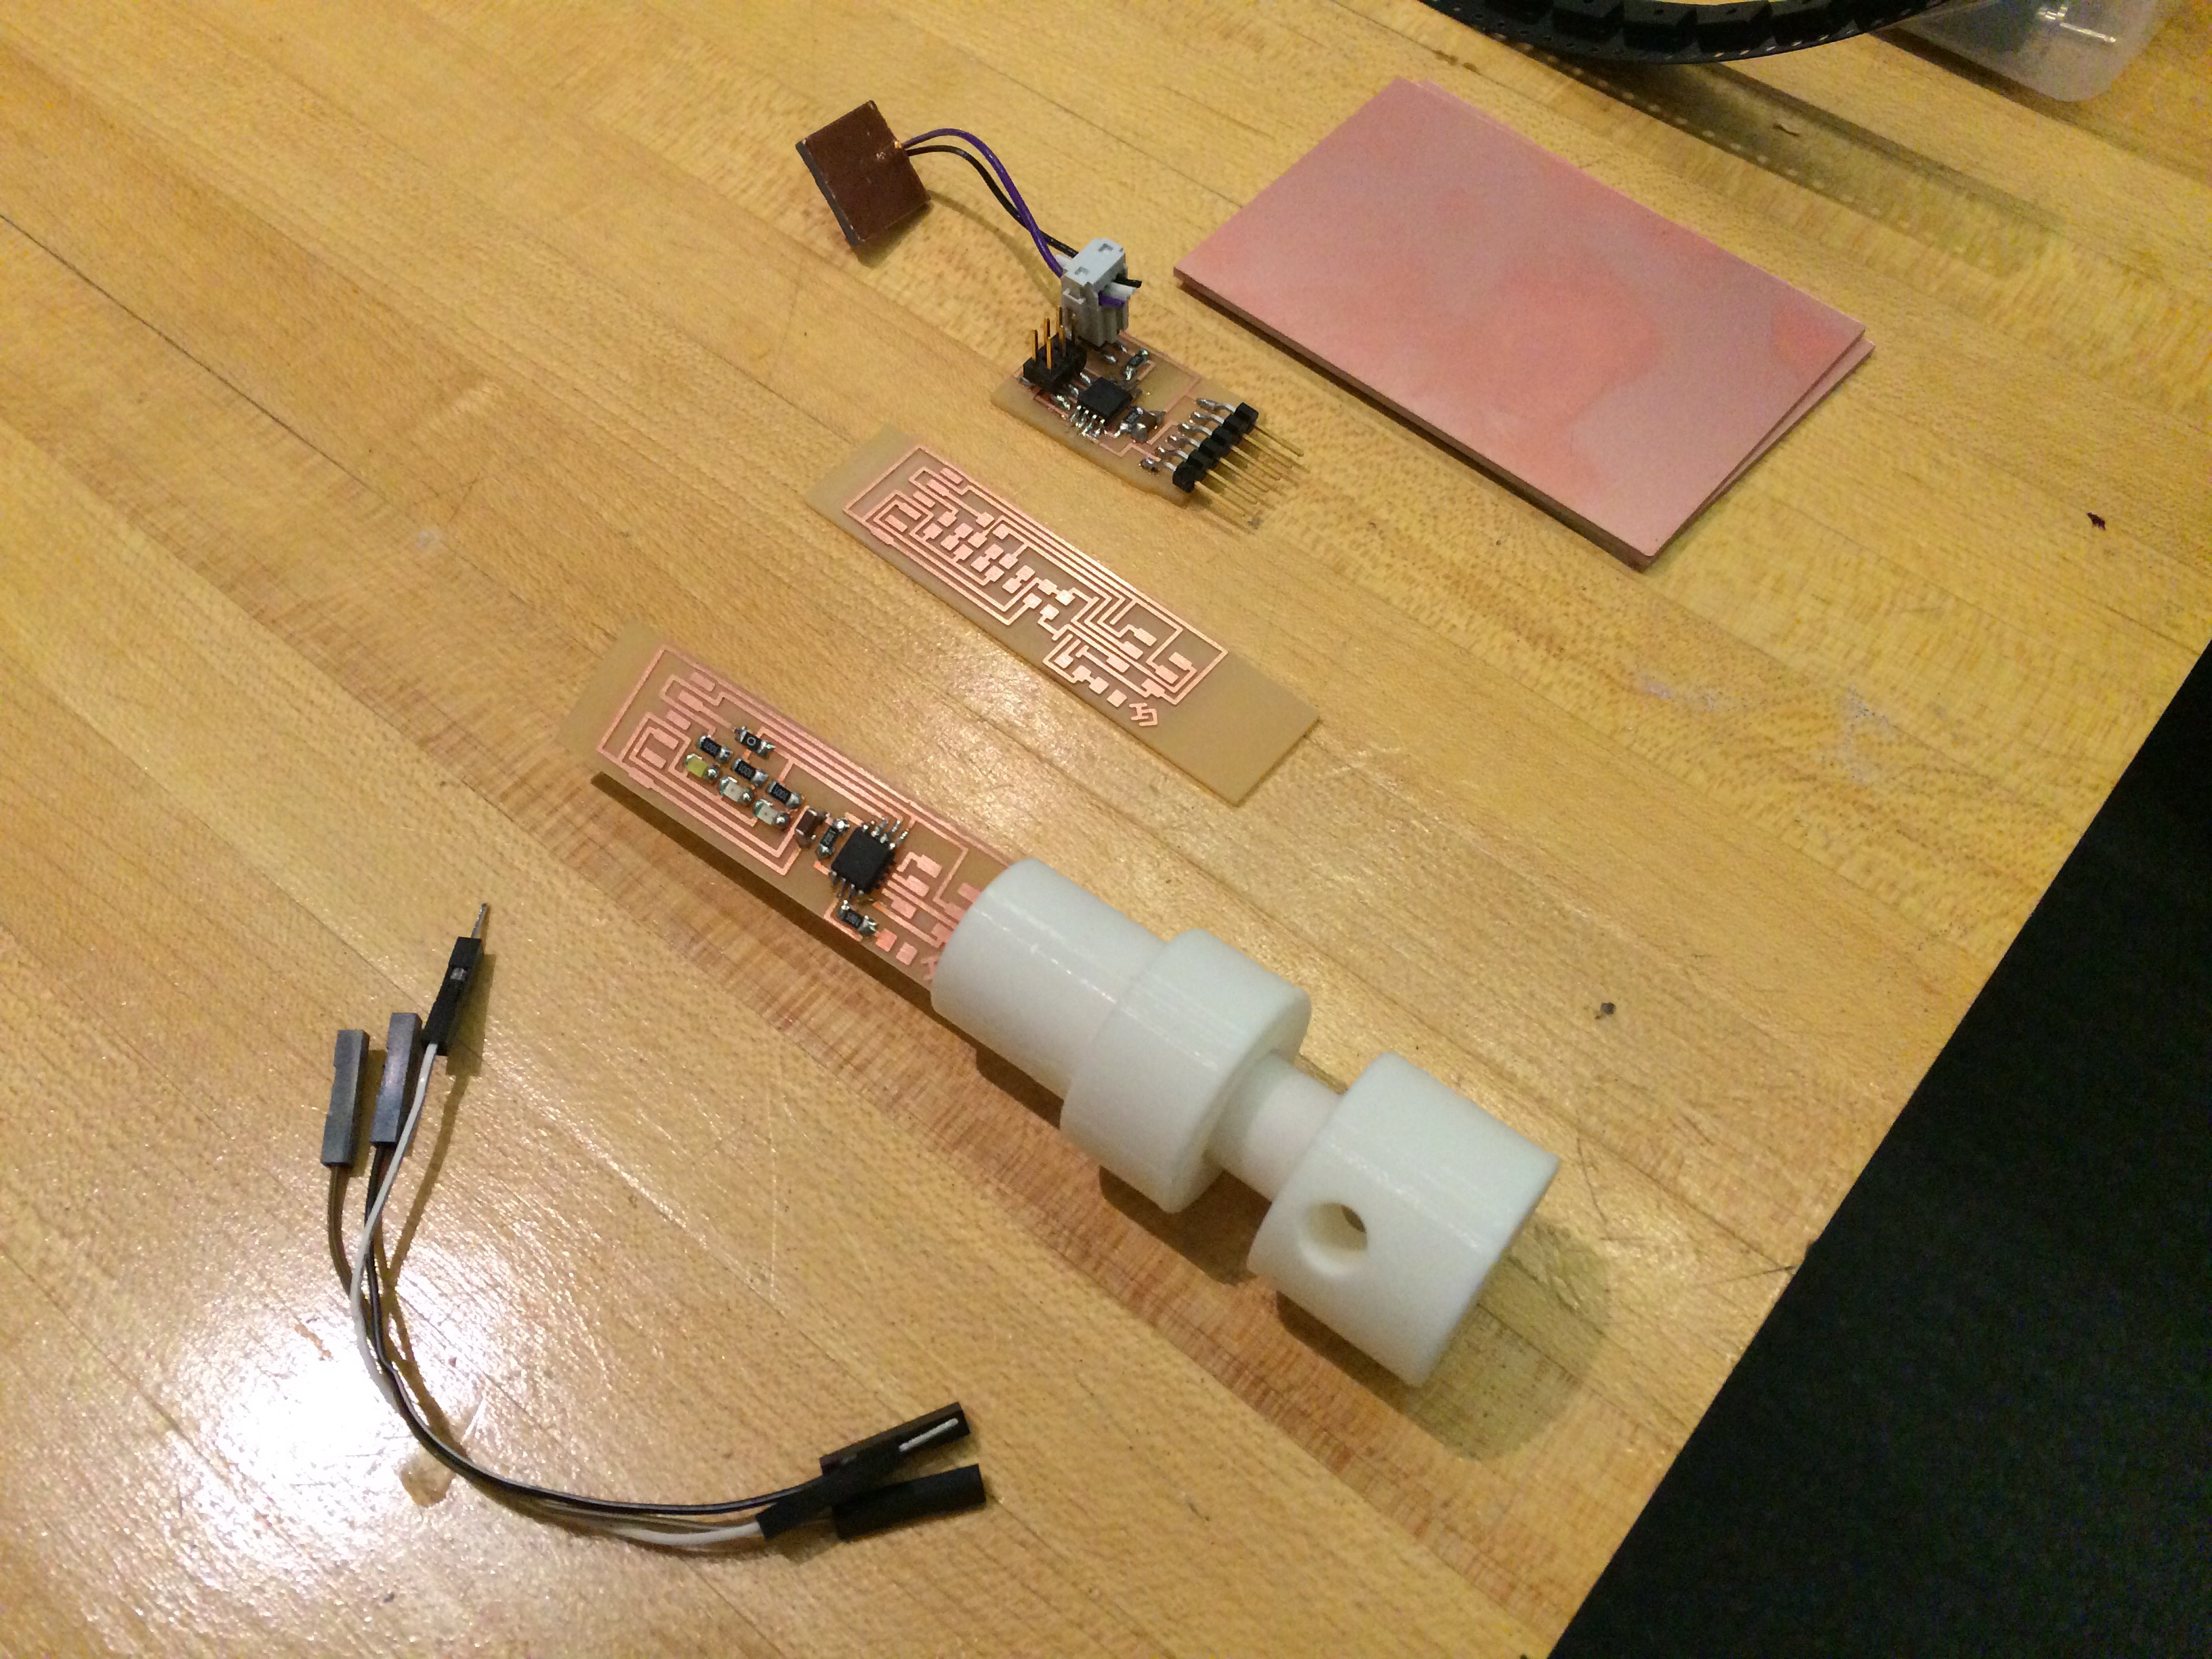
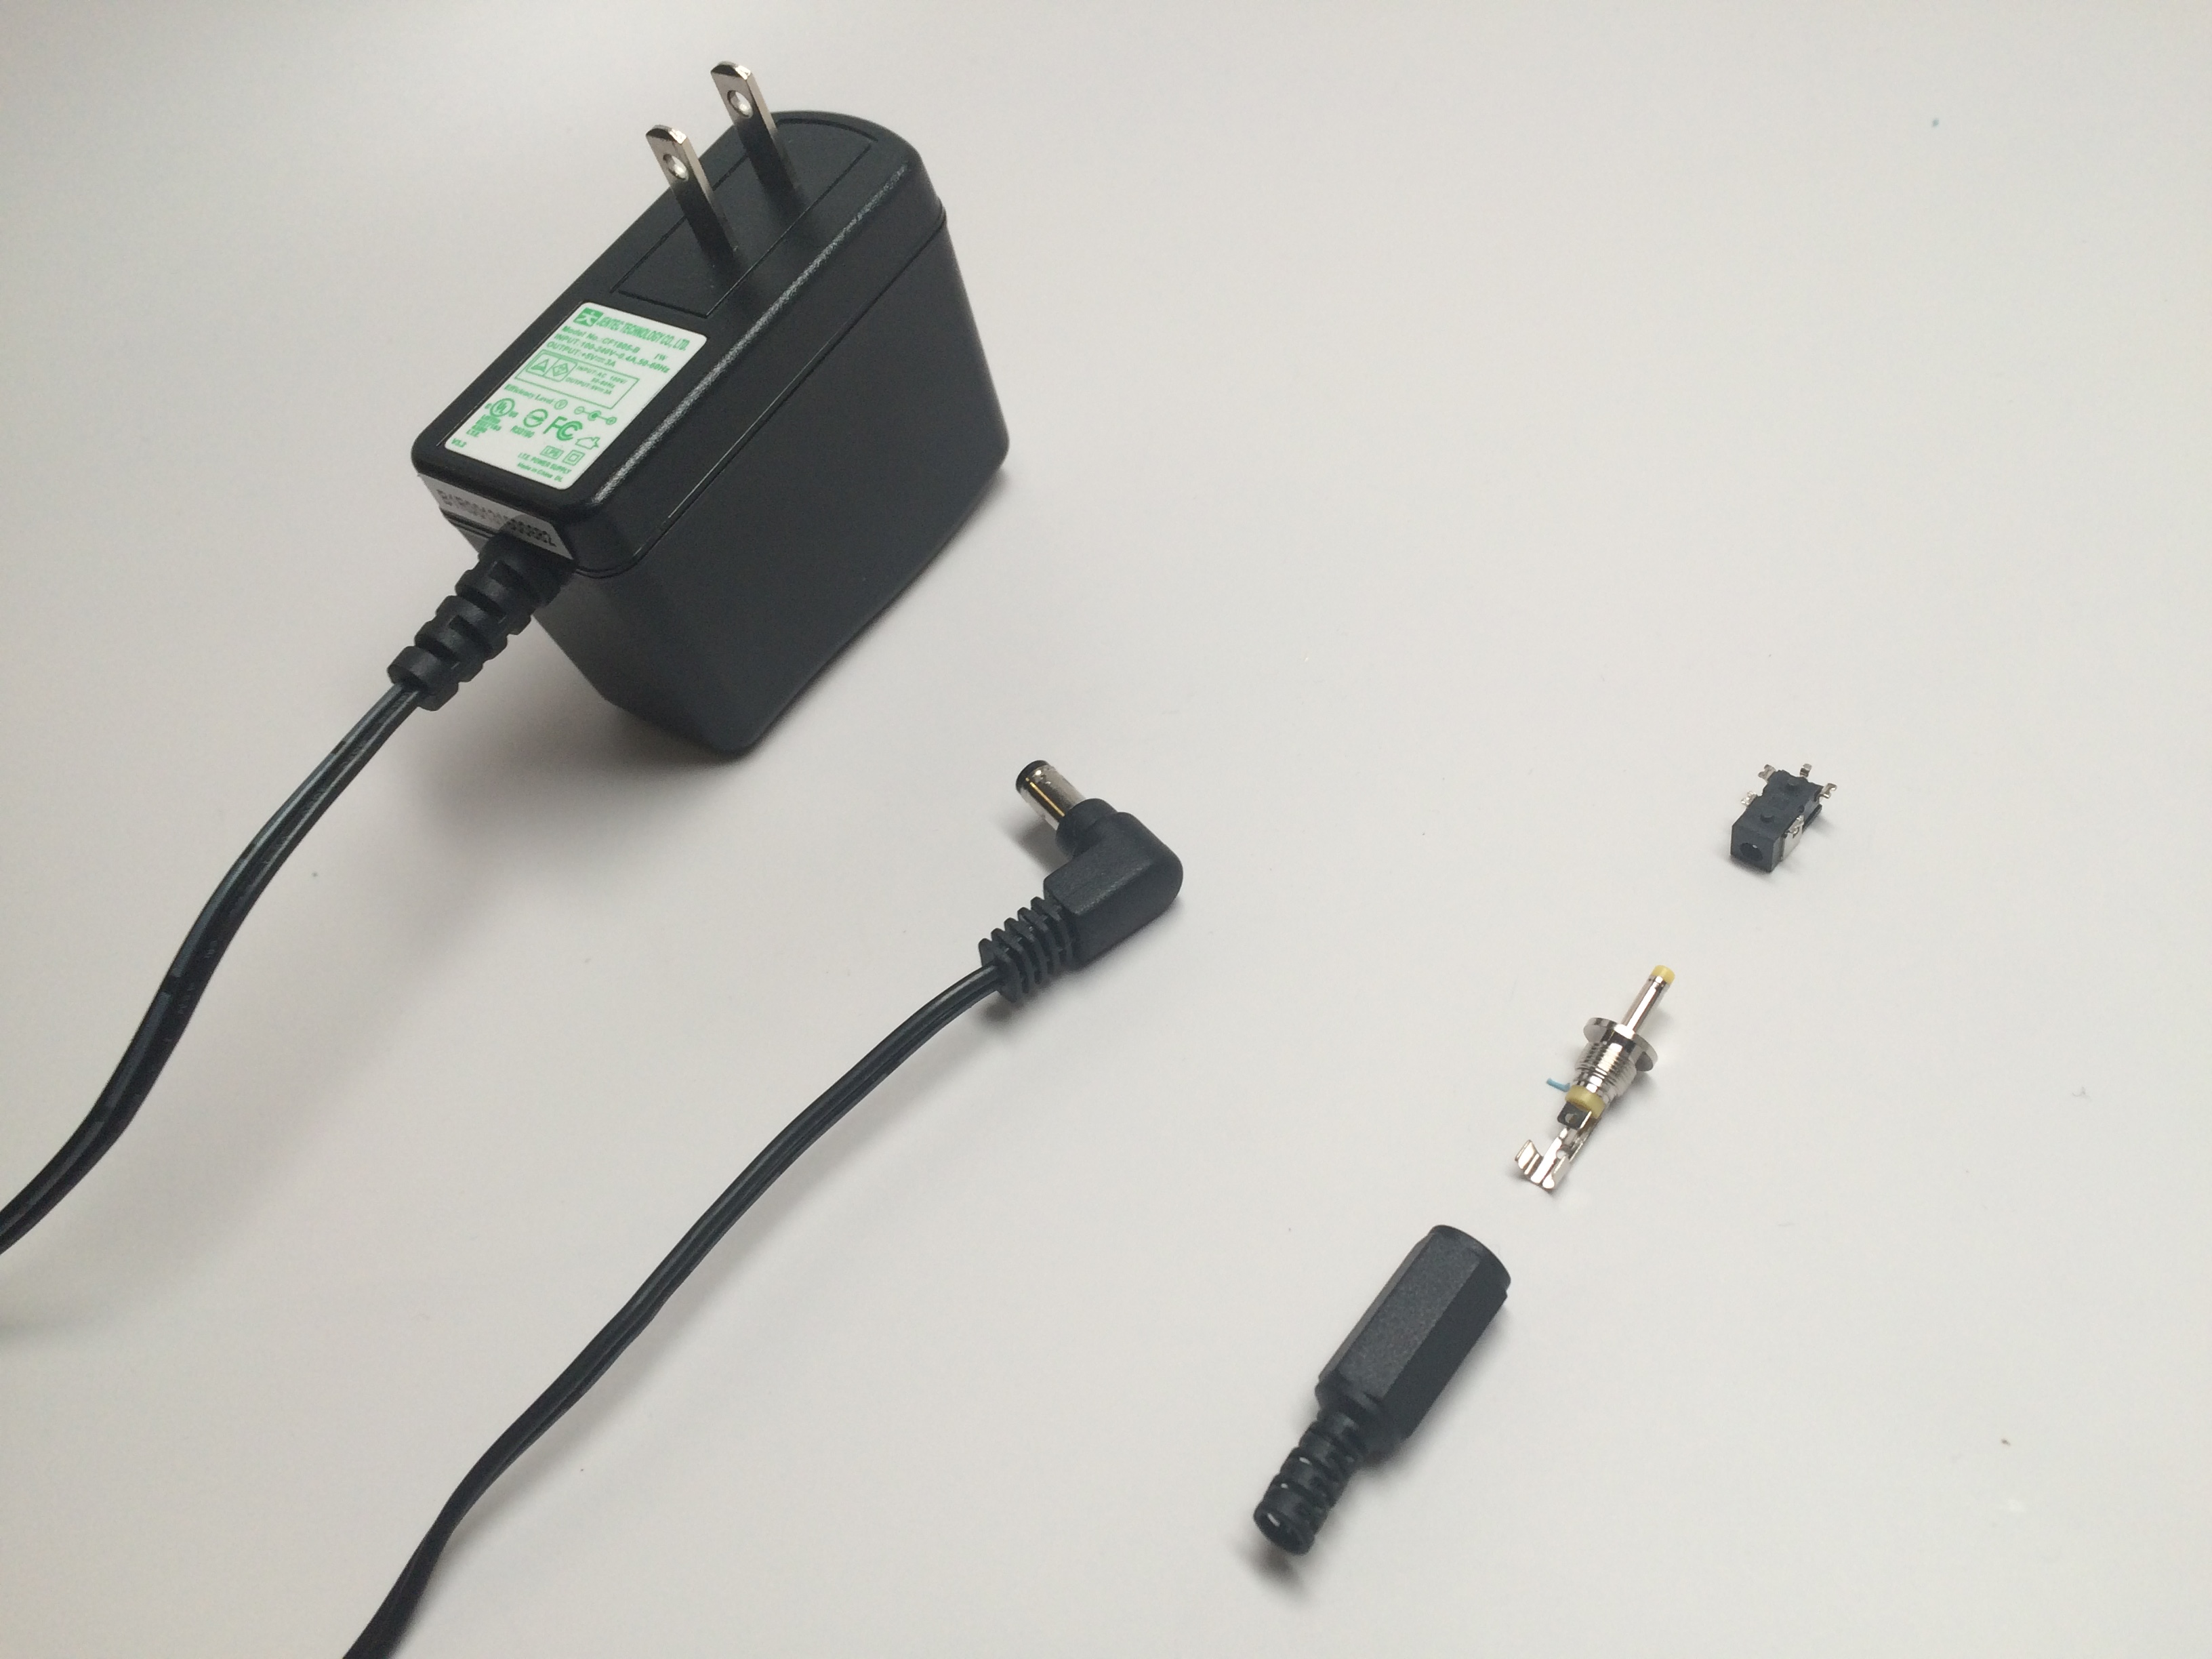
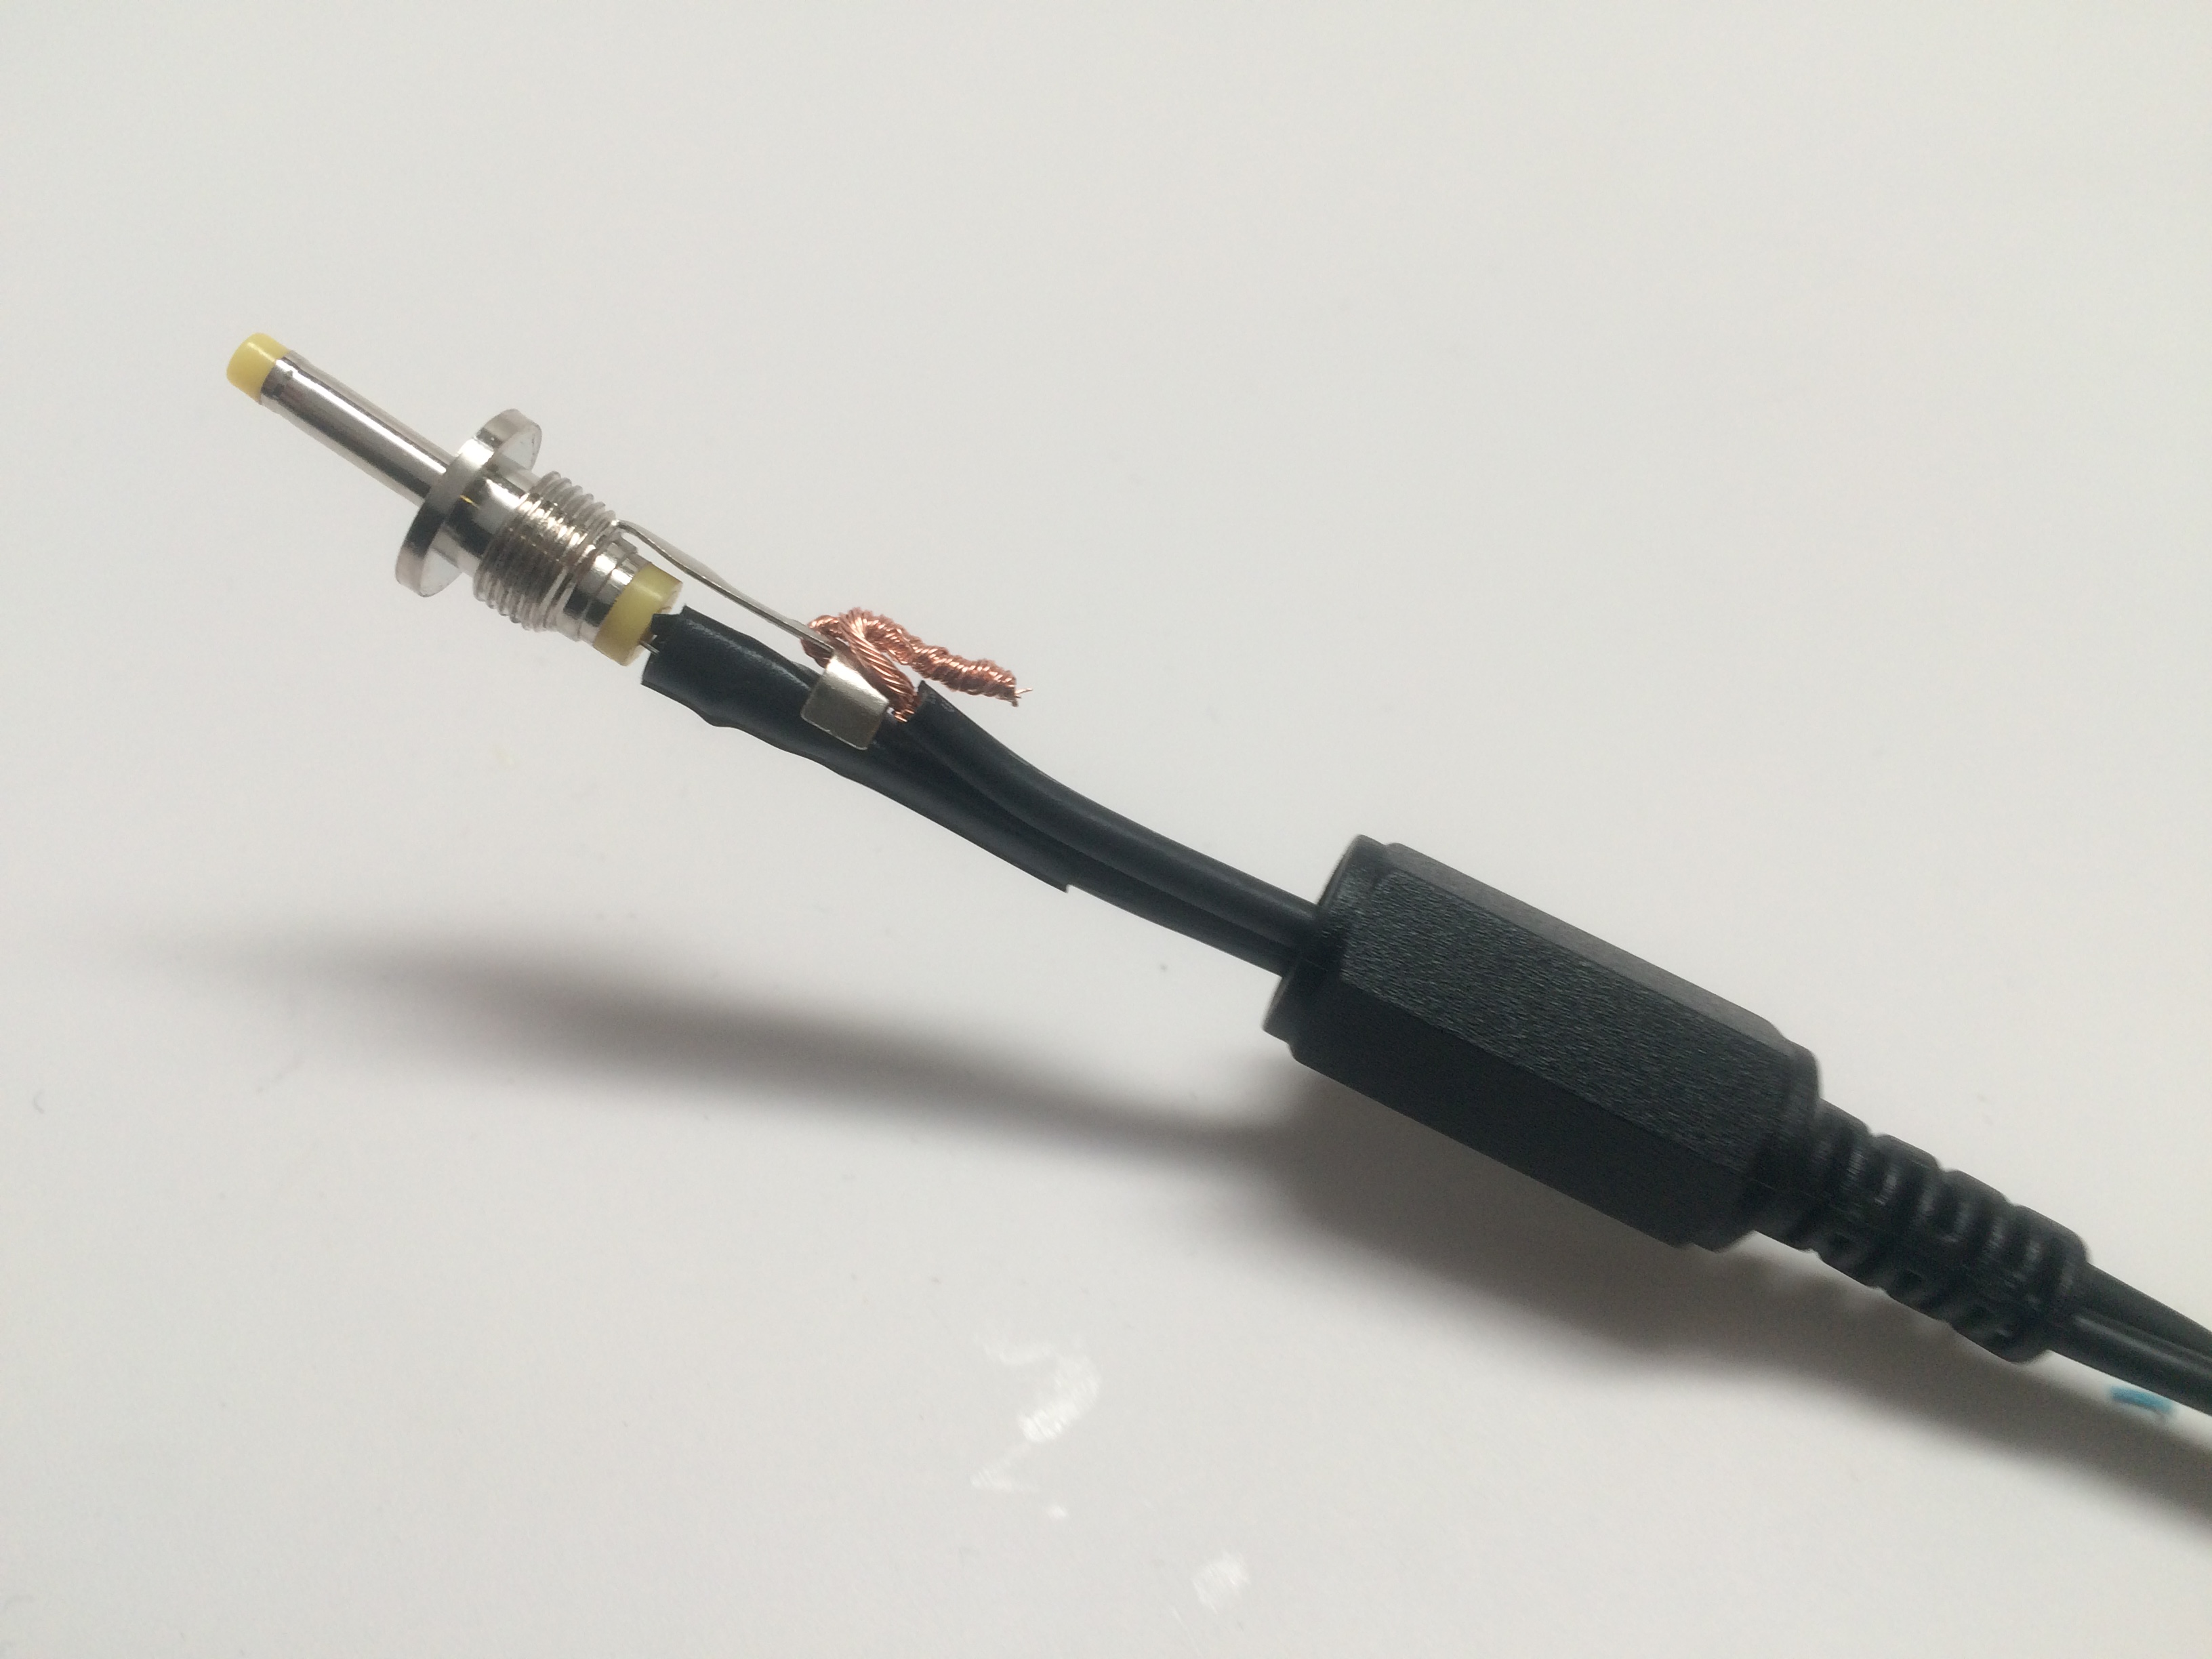
Electronics
Fabrication
Programming
Arduino IDE
SoftwareSerial Library
Capacitive Sensor Library
ATtiny45 vs 85
ATtiny45 and 85 are the exactly the same size. The onlly difference is the internal memory size. ATtiny45 has 4K byte memory, while ATtiny85 has 8K byte. This makes a big difference when you run program using Arduino IDE with custom libraries. I was originally using both CapacitiveSensor library and SoftwwareSerial library, and the code in Arduino exeeeded 4K byte and causing error uploading the code. Later I realized that this was the memory issue, and as soon as I switched from 45 to 85, I was able to upload the code.Measuring Capacitance
Capacitance
RC Time Constant
The RC time constant (also called tau) is the time constant (in seconds) of an RC circuit, is equal to the product of the circuit resistance (in ohms) and the circuit capacitance (in farads), i.e., τ = R * C.
Dielectric Constant
A dielectric constant k' (= also called the relative static permittivity) is a characteristic constant of a material that describes its ability to carry current with respect to the ability of vacuum air. The dielectric constant of the vacuum air is equal to 1.
Knowing the dielectric constant of the material is the key for a successful design and implementation of a capacitive sensor to the overall system.
Clipper Controls has a great list of dielectric constants of different materials. It shows that silicone rubber has a wide range of dielectric constant at k'=3.2-9.8. It makes sense from the material engineering point of view given that there're many types of silicone rubbers, but this was not helpful enough to estimate the RC constant of my sensor.
The dielectric constant of the Smooth-on's OOMOO-25, the elastomer I'm using for the dielectric layer, is k'=3.33, and is listed on its datasheet linked below.
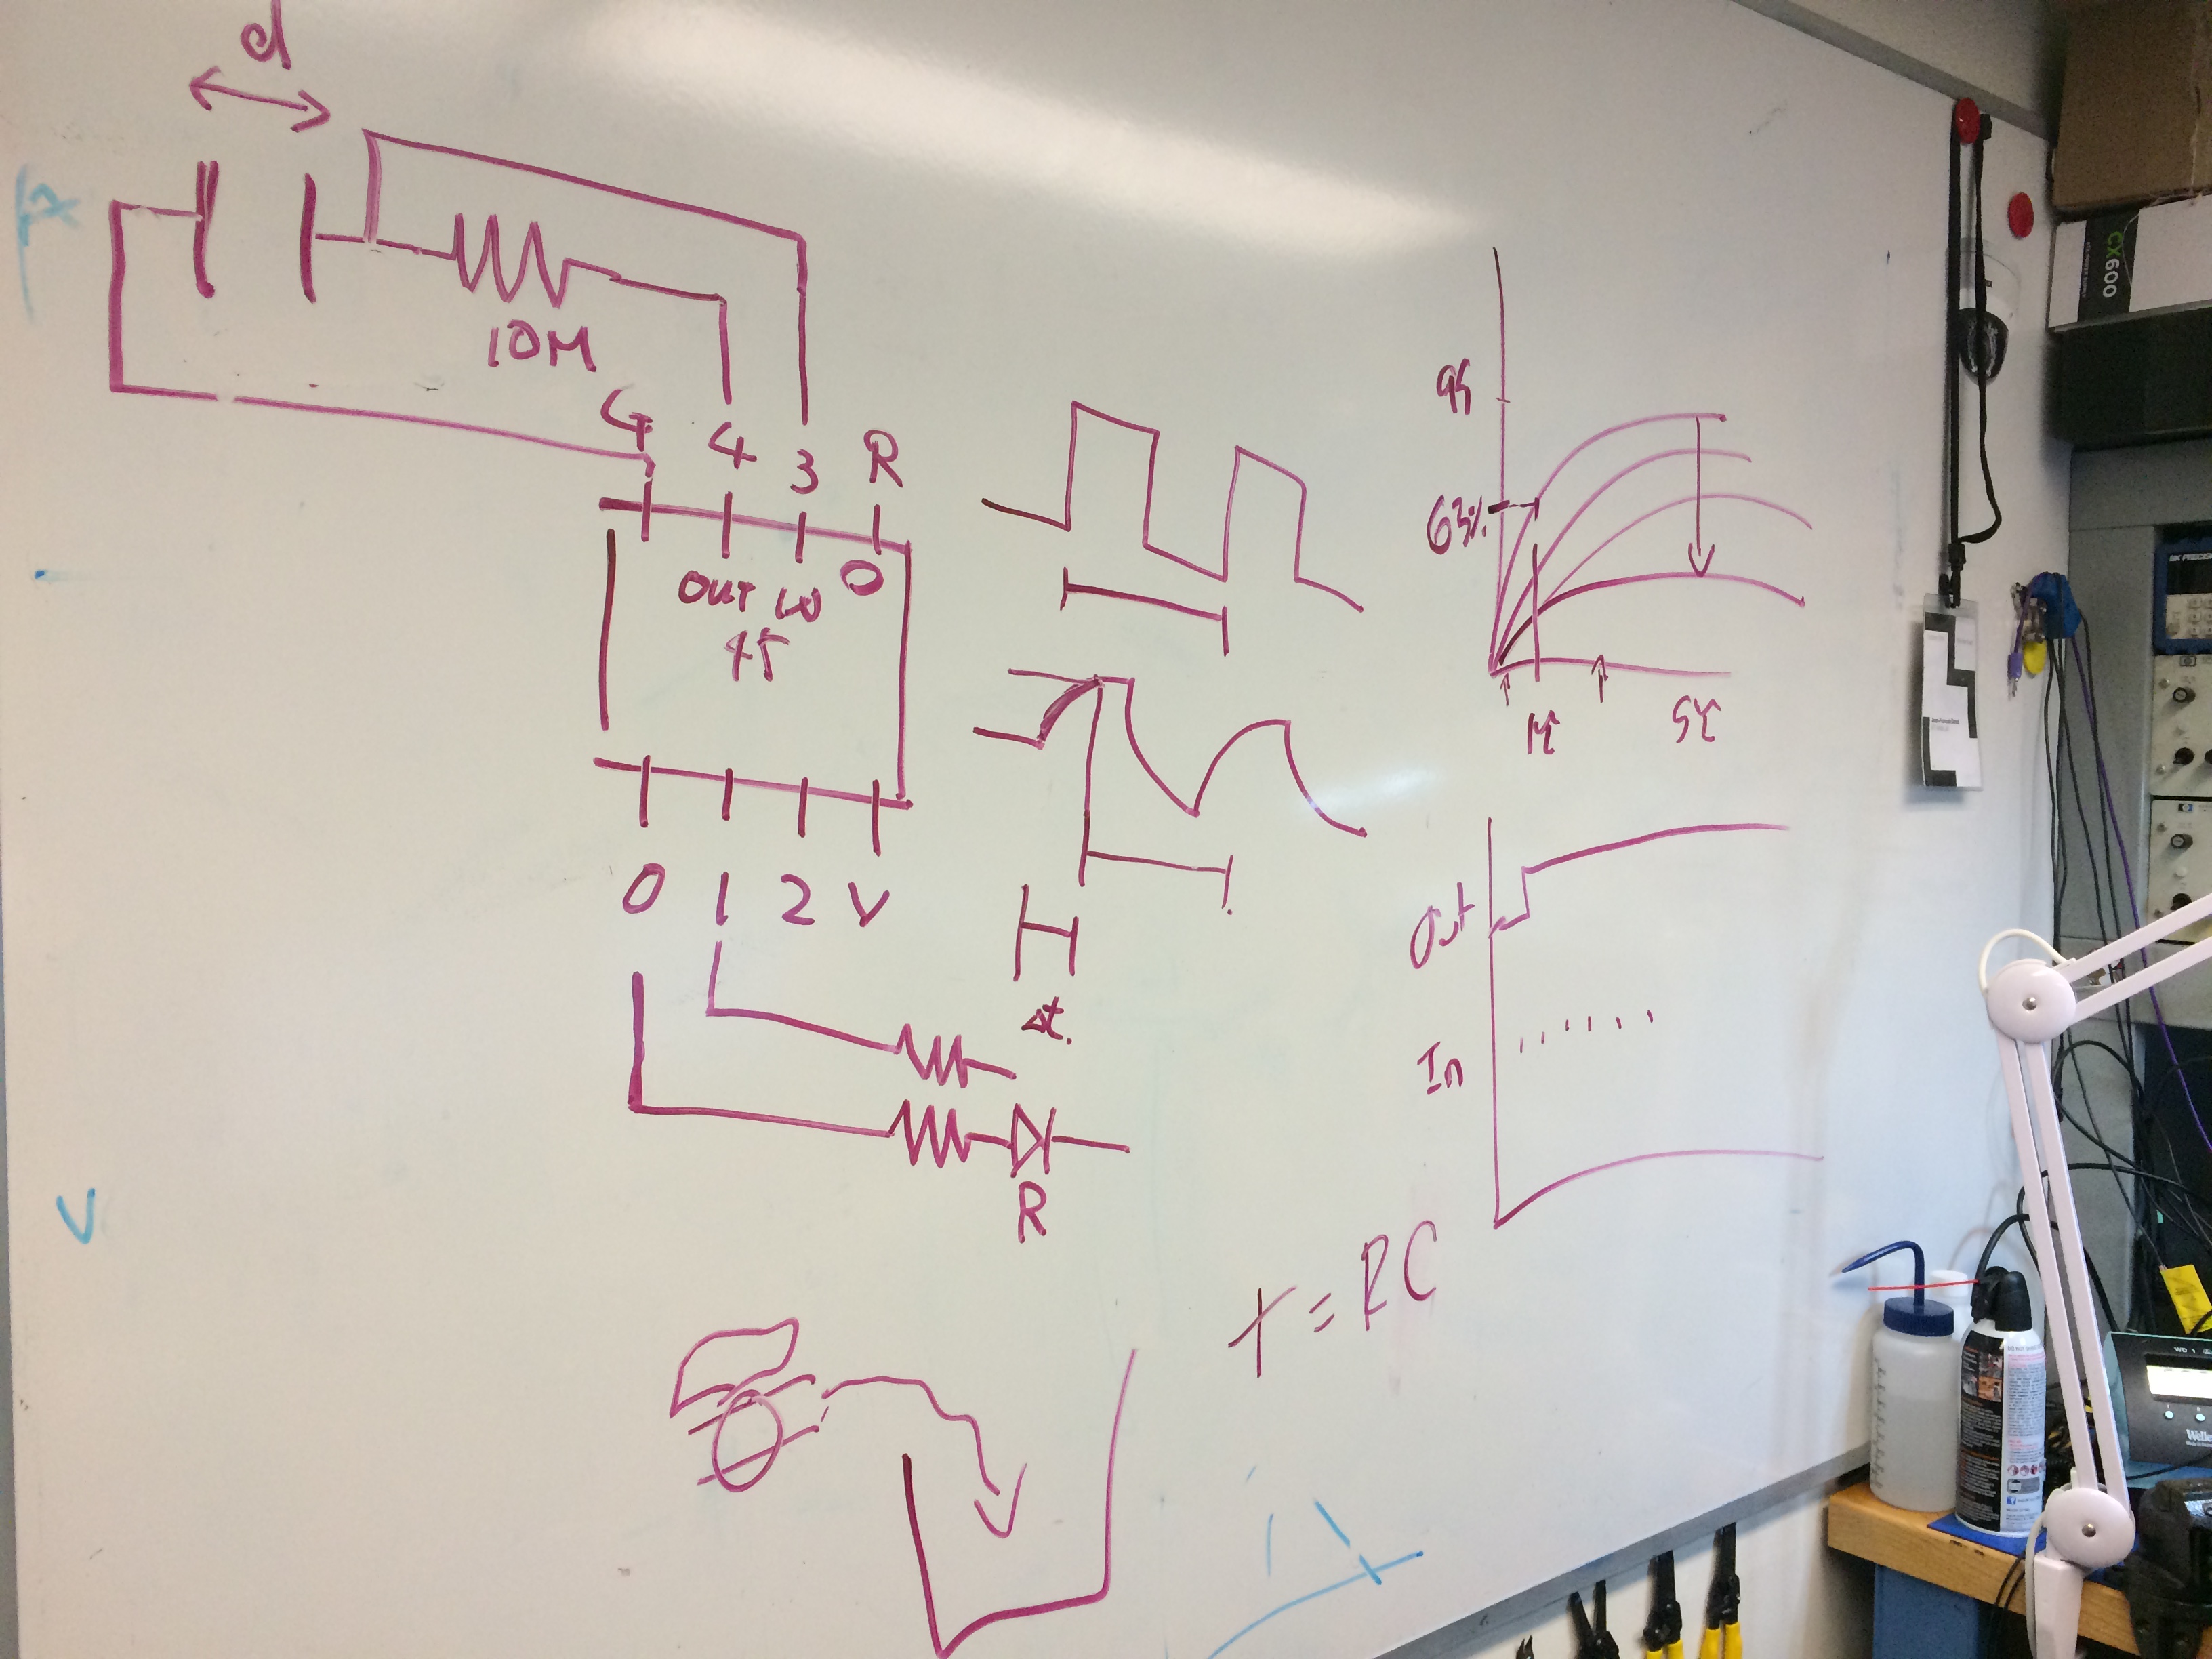
I wasn't sure what time constant to use for measuing the dynamic change in capacitance, and Jeff suggested me to calculate the time constant, τ = R*C, to approximate the time constant. 1 time constant (tau) is 63% of the maximum capacitance, and it takes 5 τs for the capacitor to fully charge itself.
The capacitance C = &epsilonl;0 * &epsilonl;r * A / d, where:
- &epsilonl;0: is the electric constant equal to 8.85 x 10 ^ (-12) [F/m]
- &epsilonl;r: is the relative permittivity, or the dielectric constant, of the dielectric material, equal to 3.33
- A: is the overlapped surface area of the two electrode plates [m^2]
- d: is the distance between the two electrode plates, hence the thickness of the dielectric layer [m]
When I calculated the capacitance based on the above equation, it turned out to be 5.8 x 10^(-5) [pF], and R being 10 [MΩ], the RC time constant was estimated as 2.9 x 10^(-3) [nS (nanoseconds)]. This is three orderes of magnitude smaller than the time interval that ATtinies are capable of reading.

I might be making mistake in the unit conversion, but one thought about improving the reading was to reduce the distance, d, and increase the resistor value, R, to increase the RC time constant.
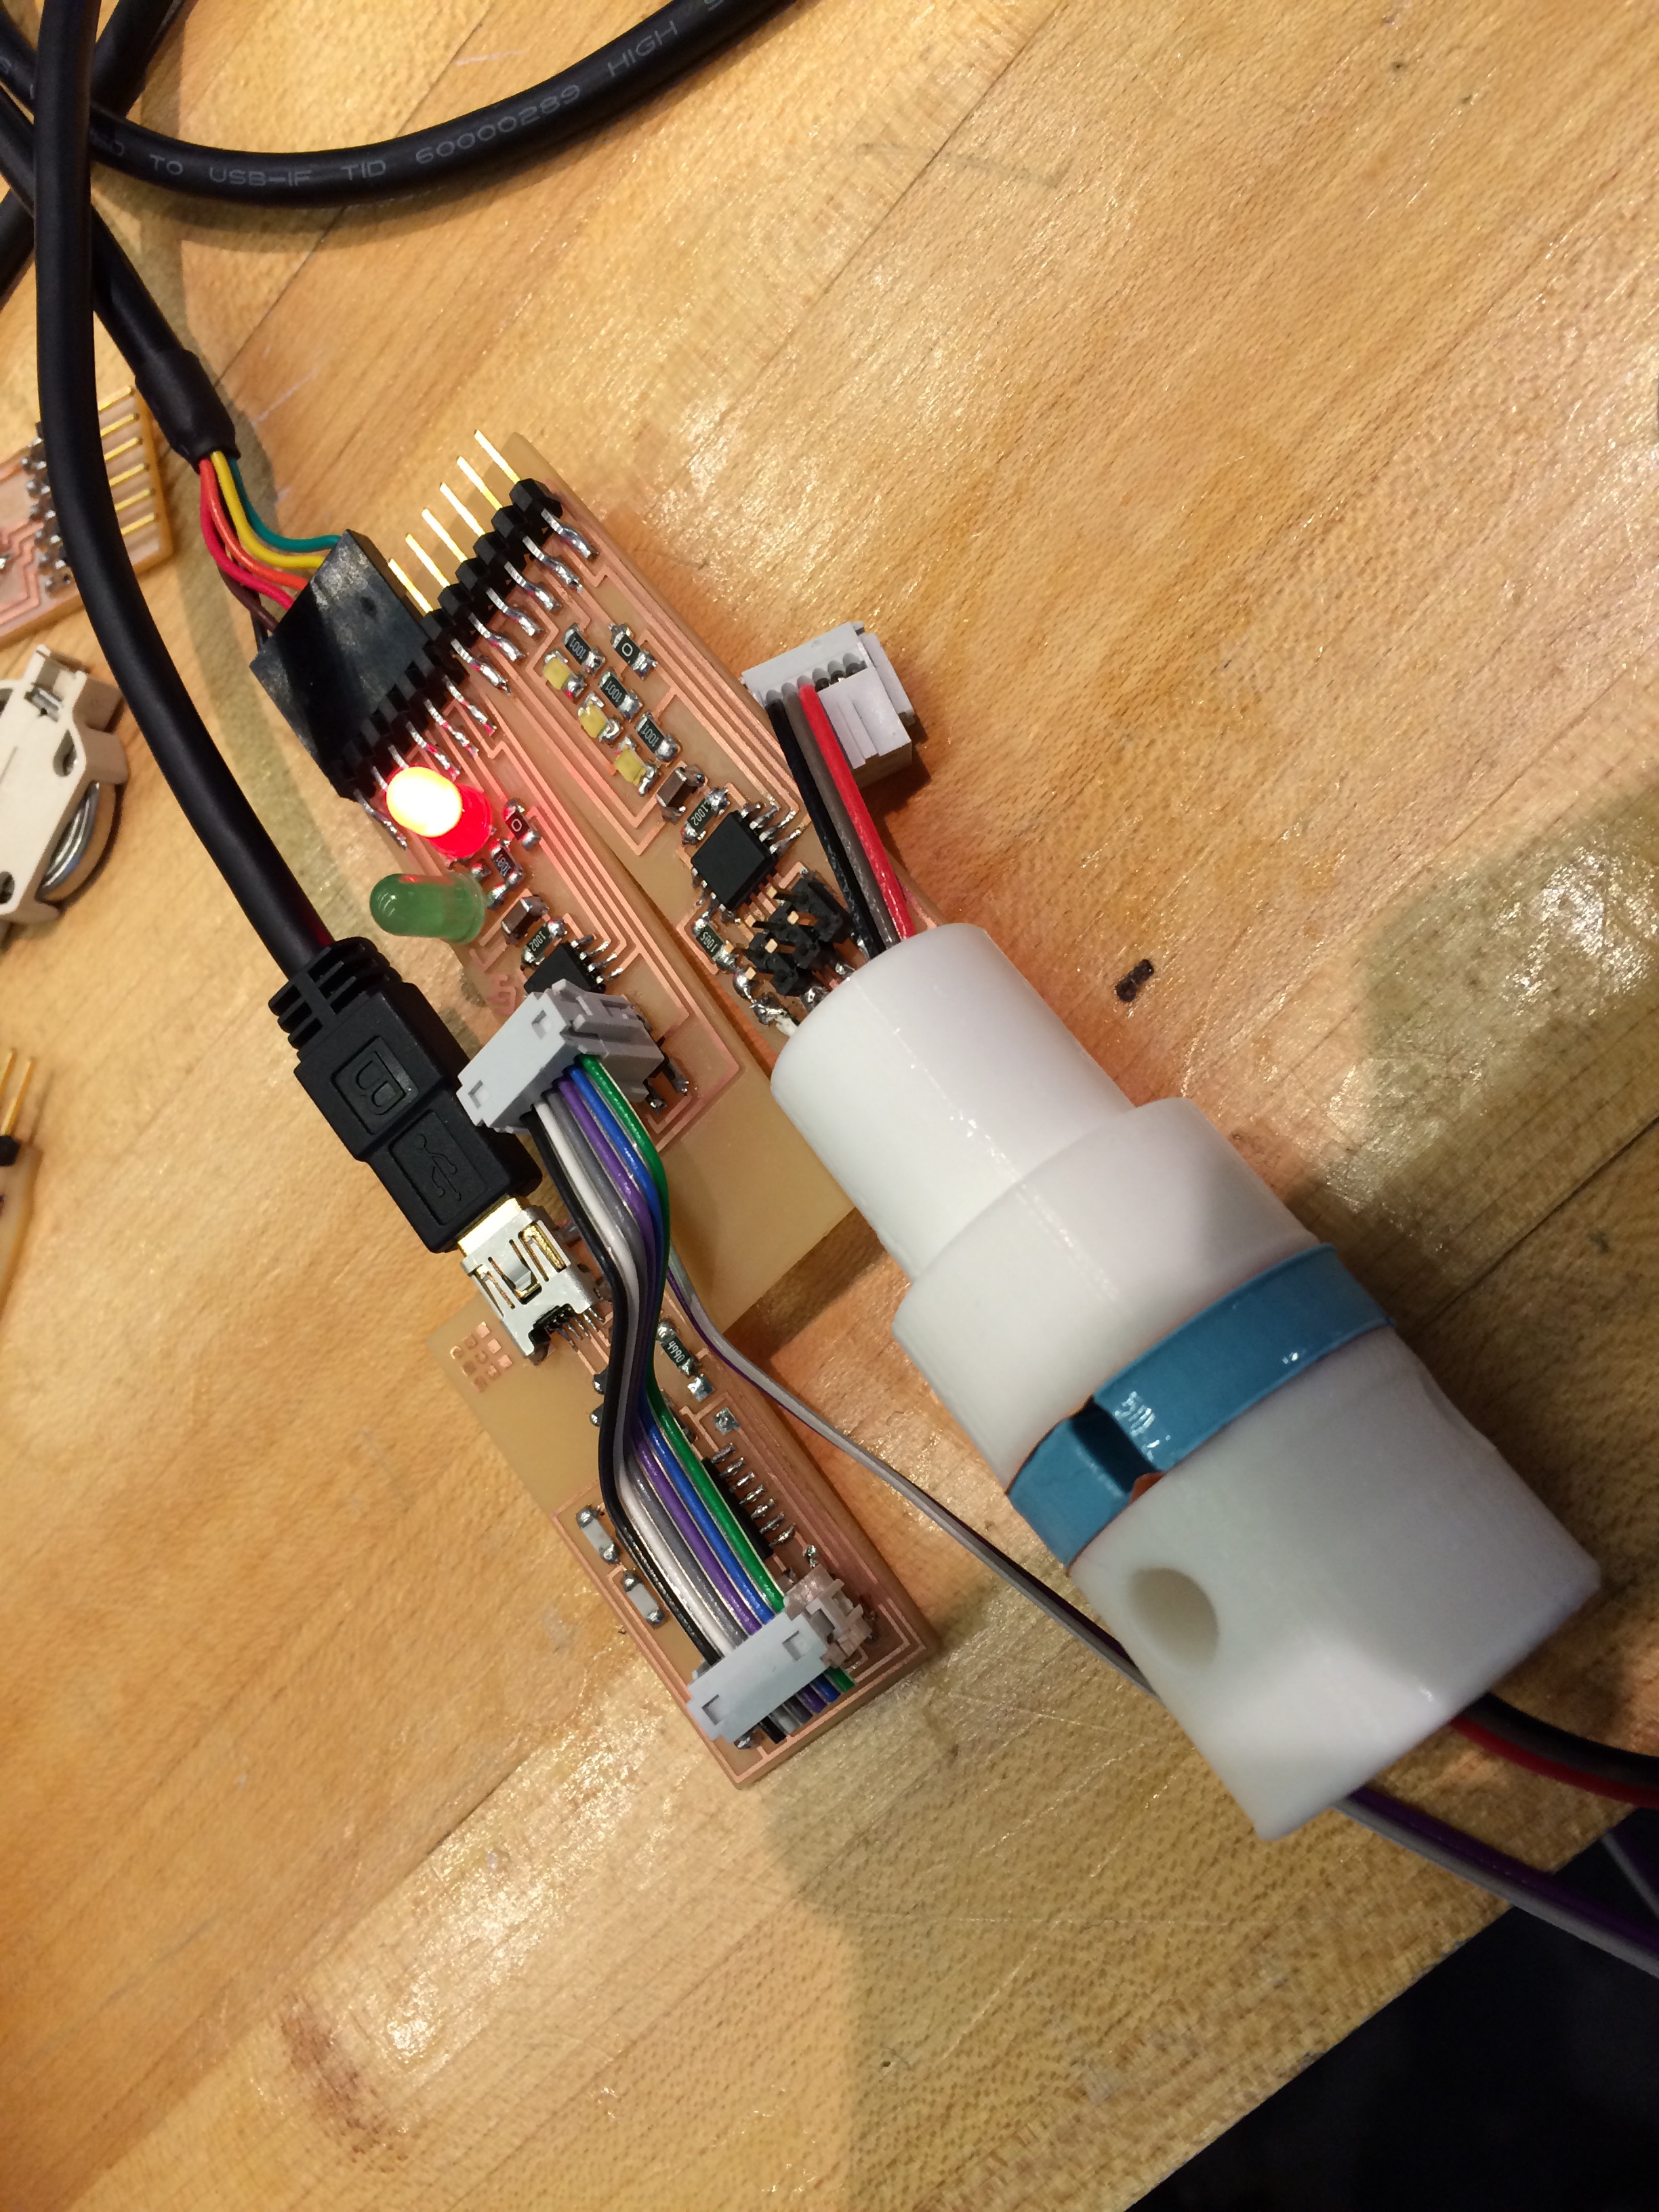
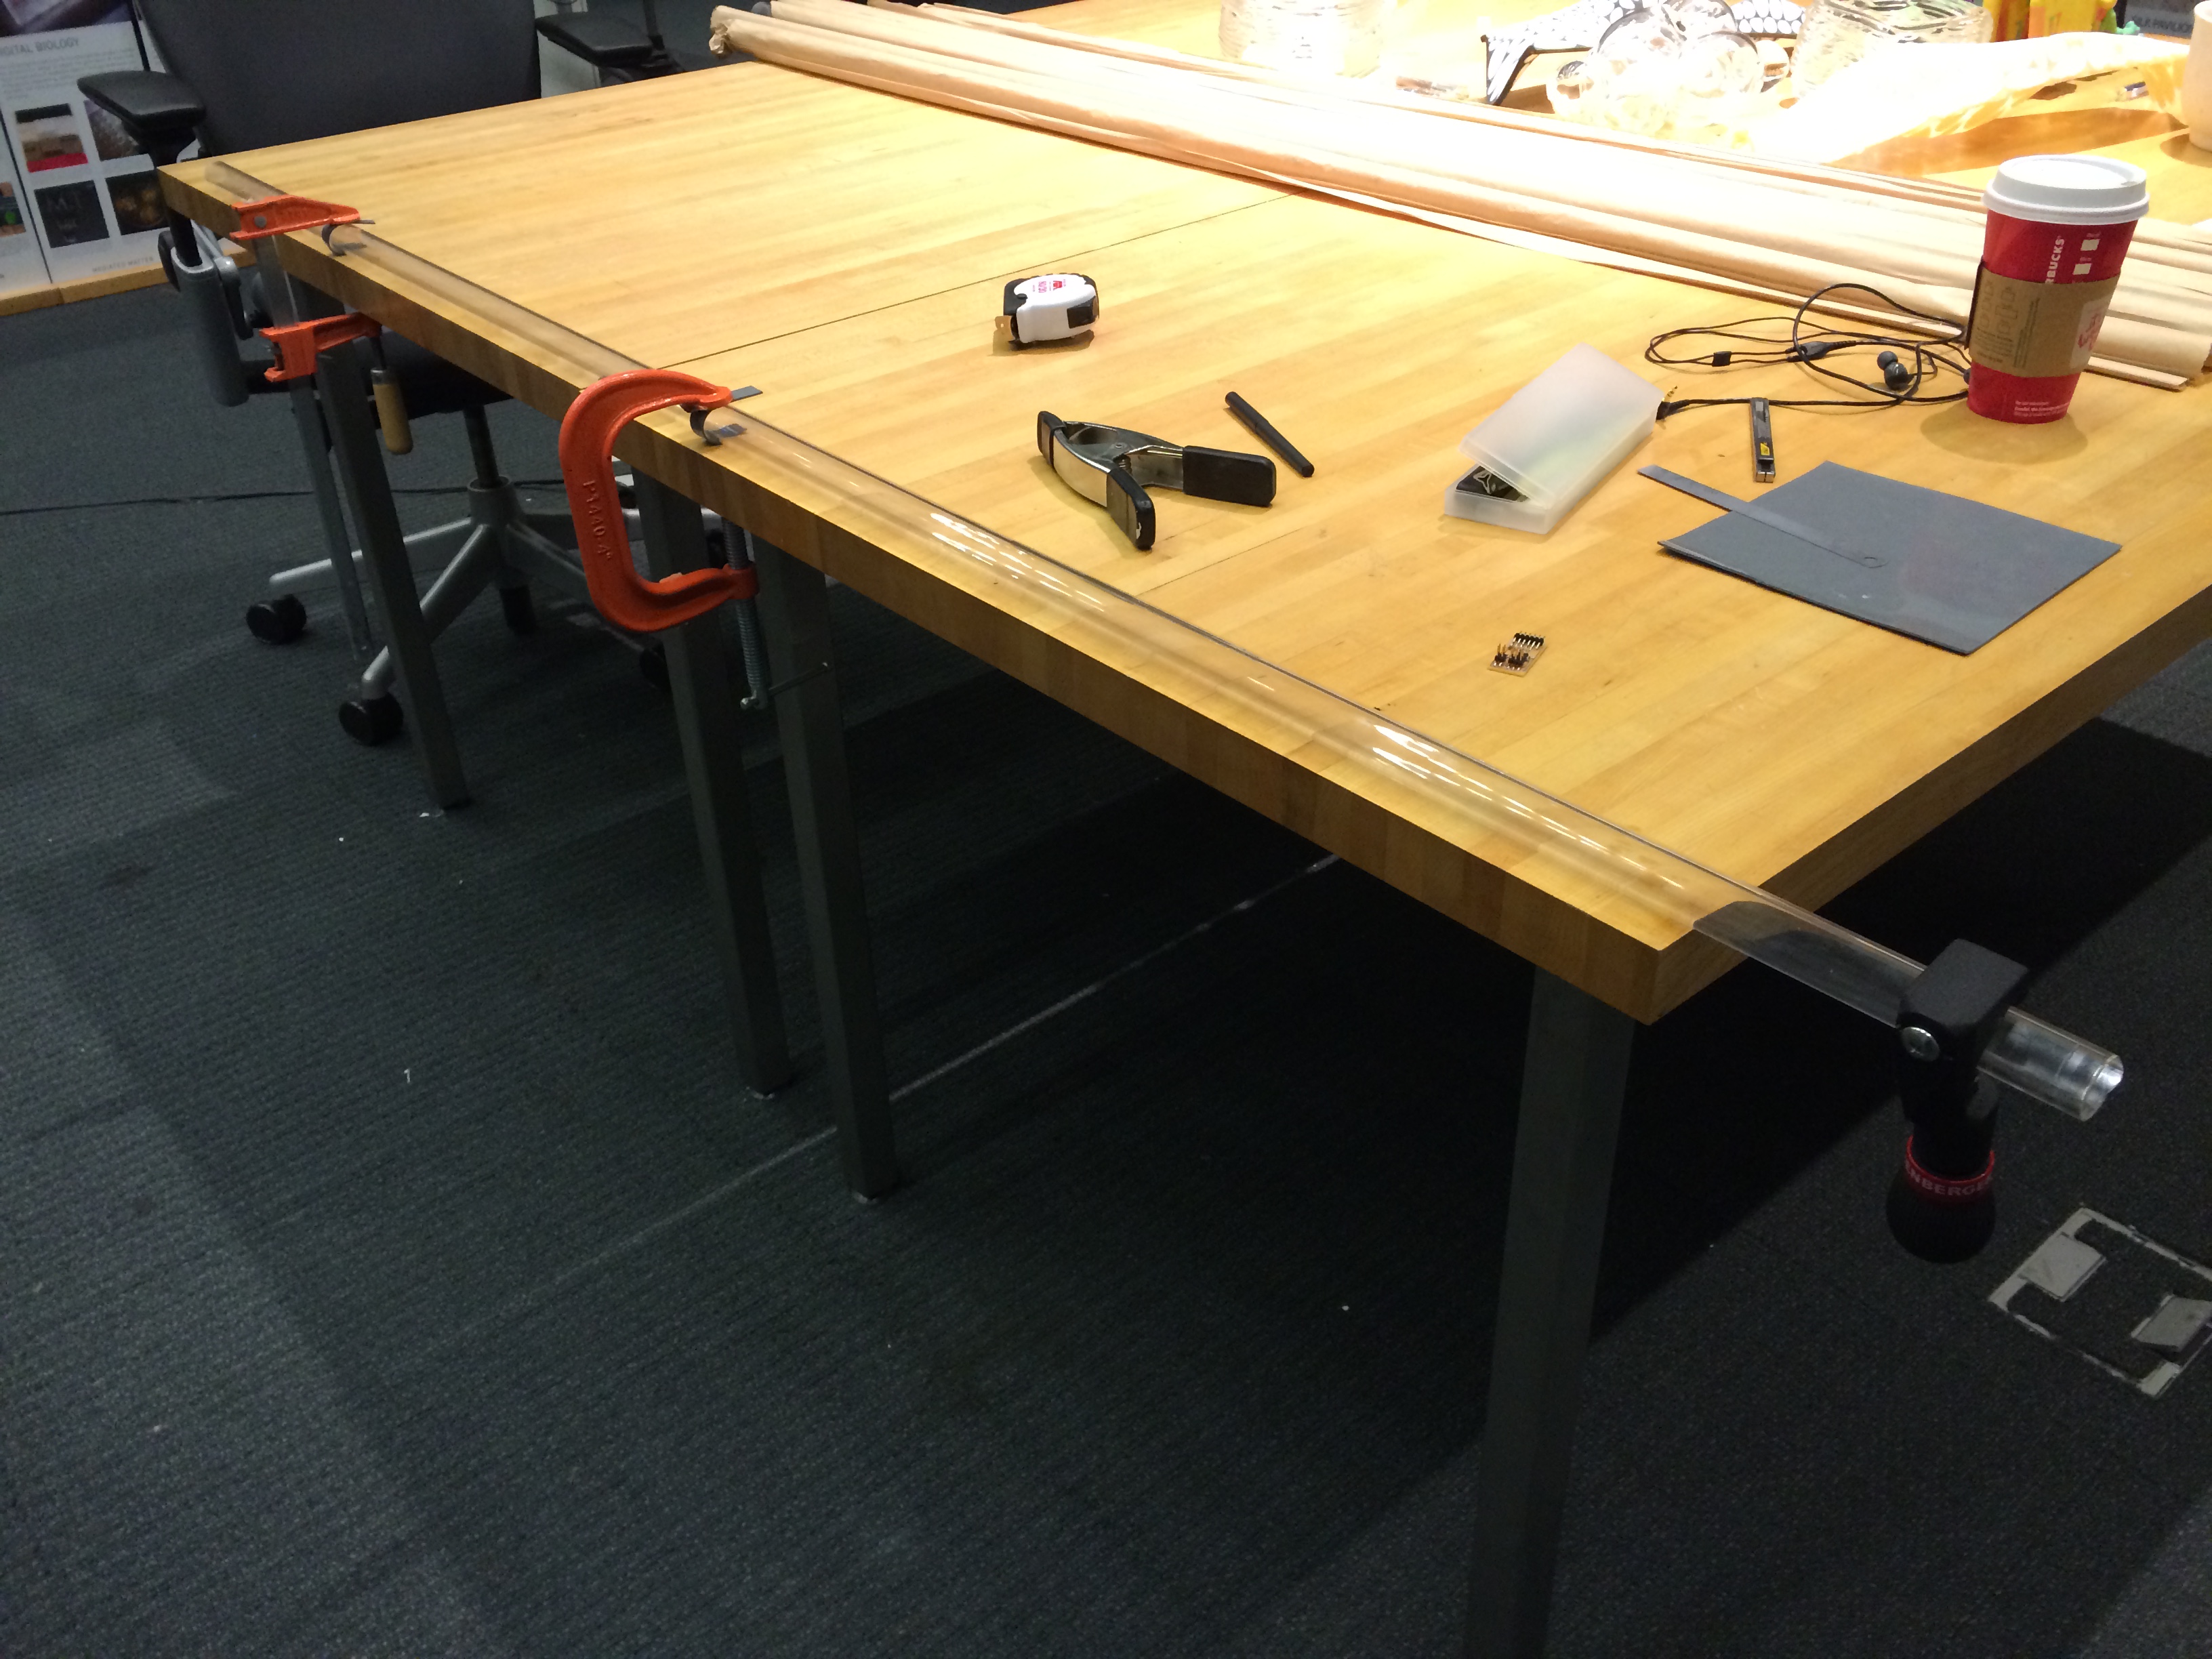
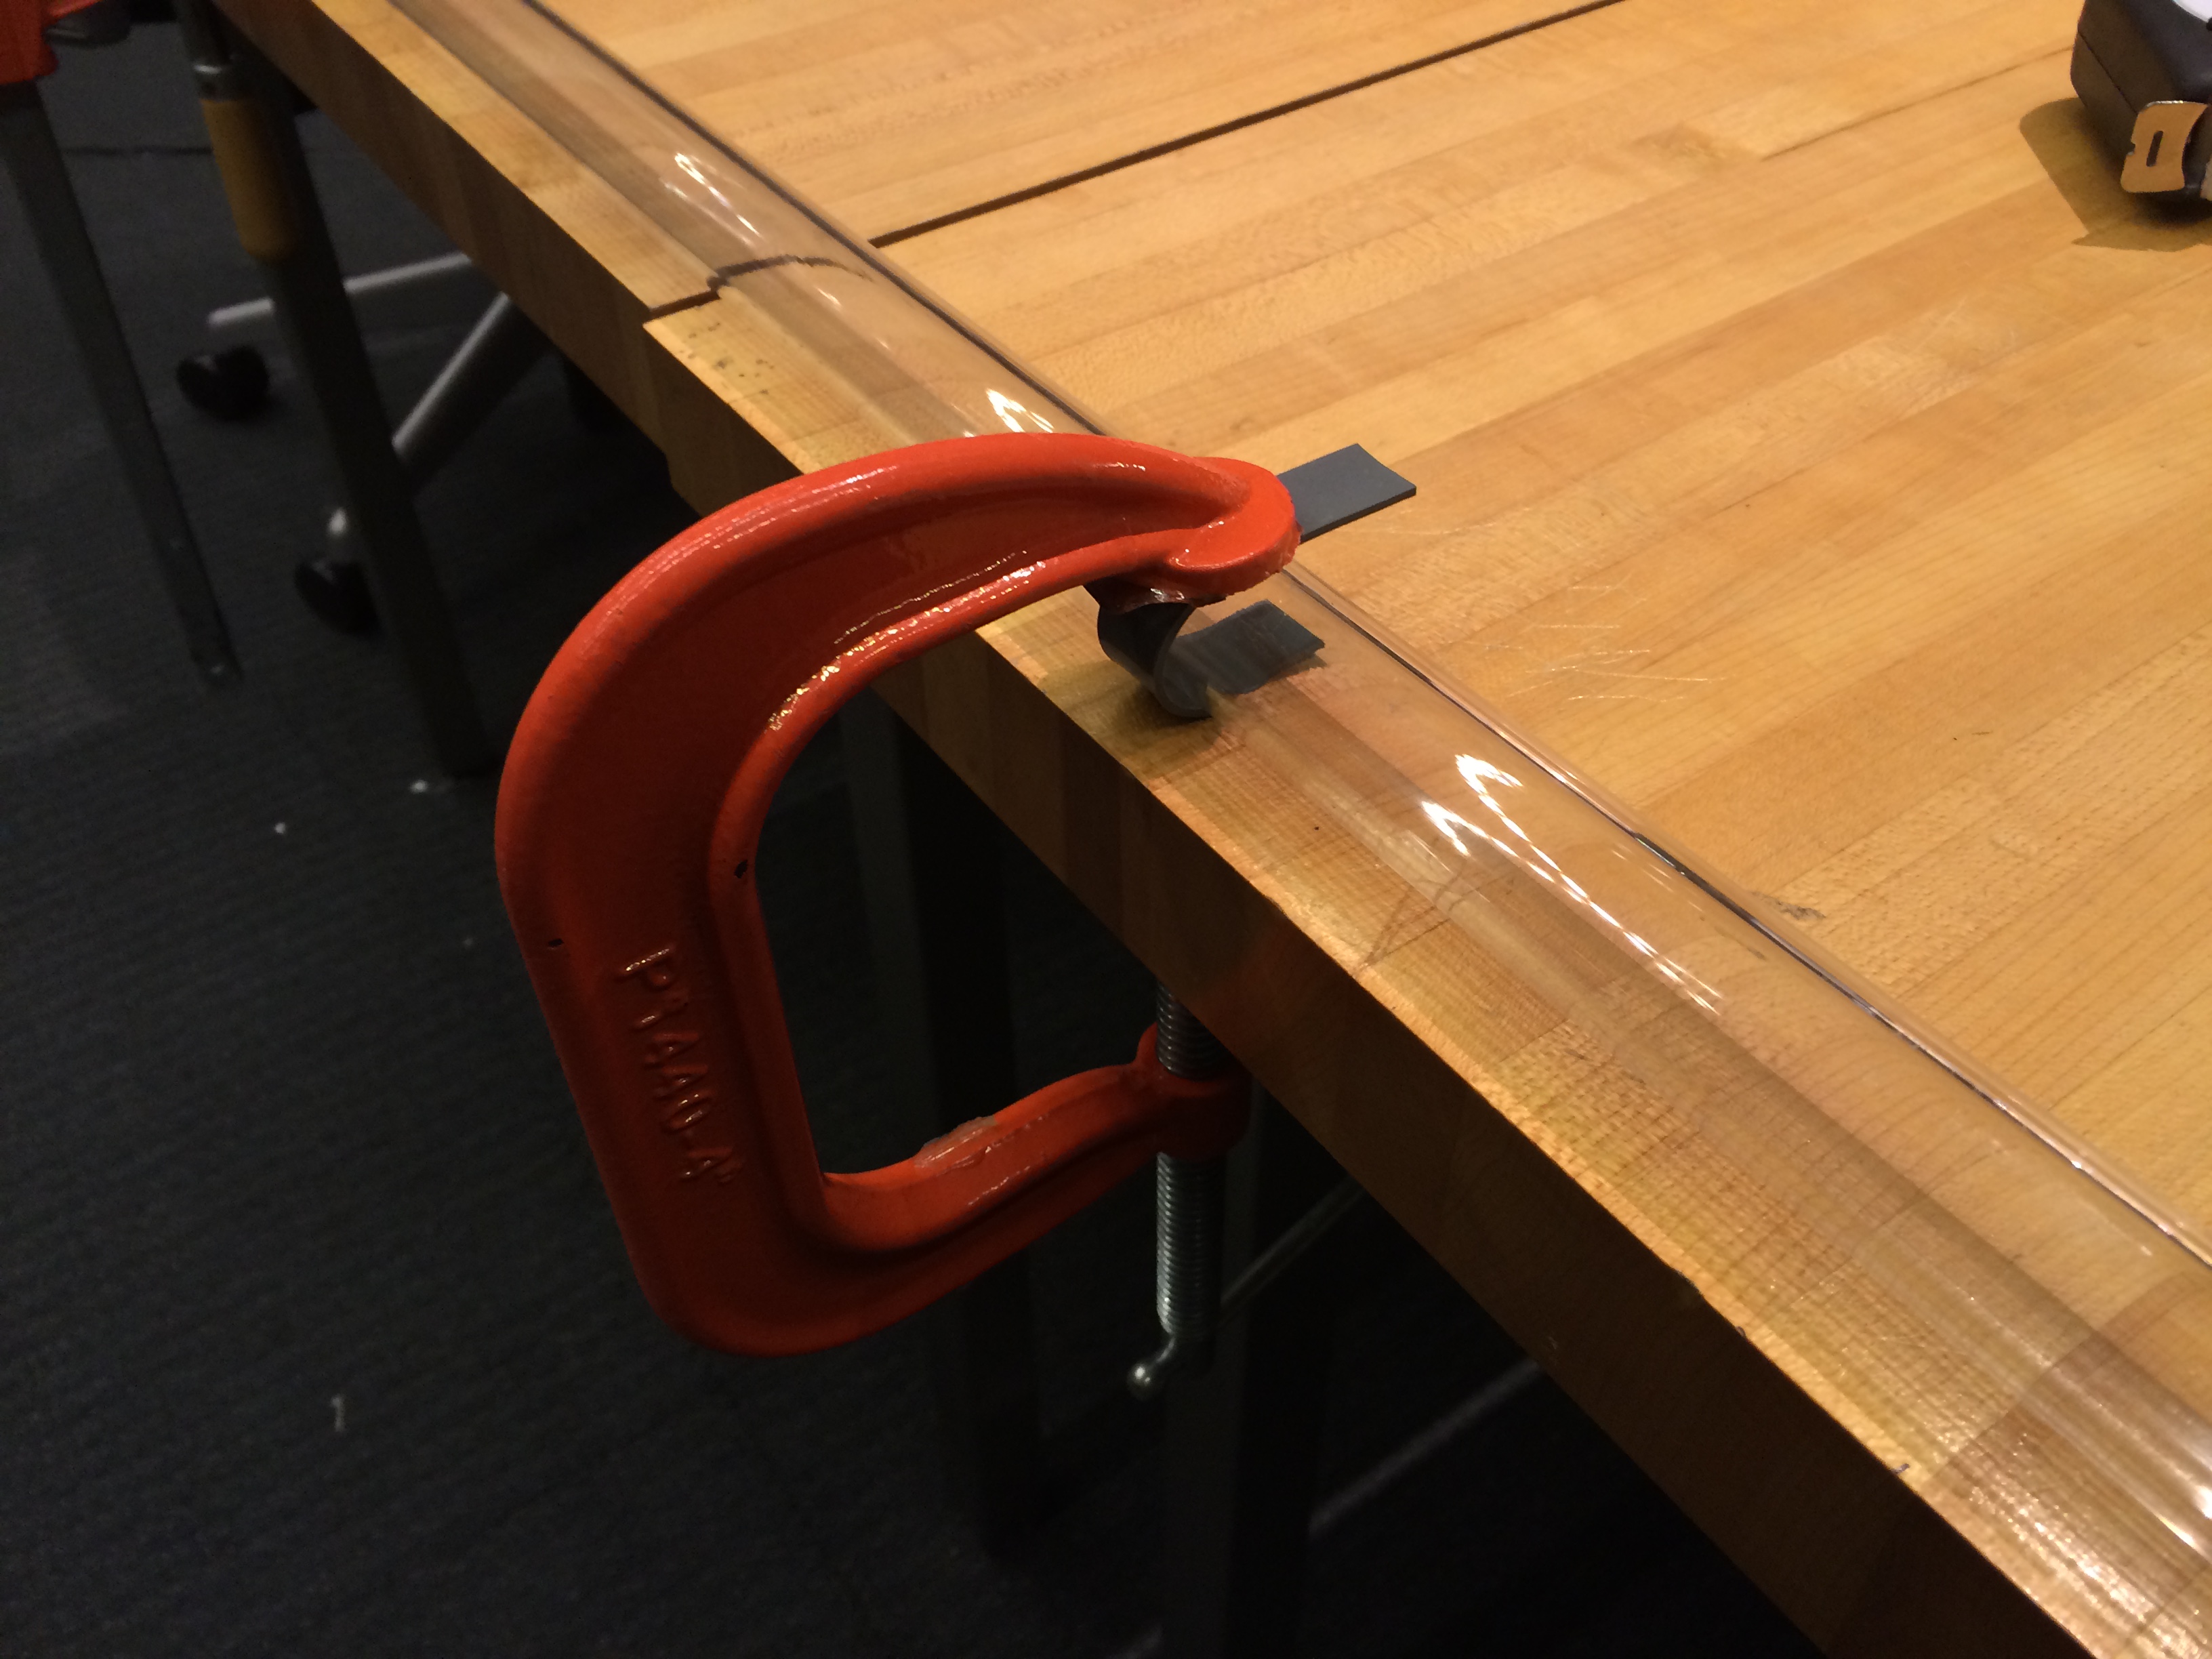
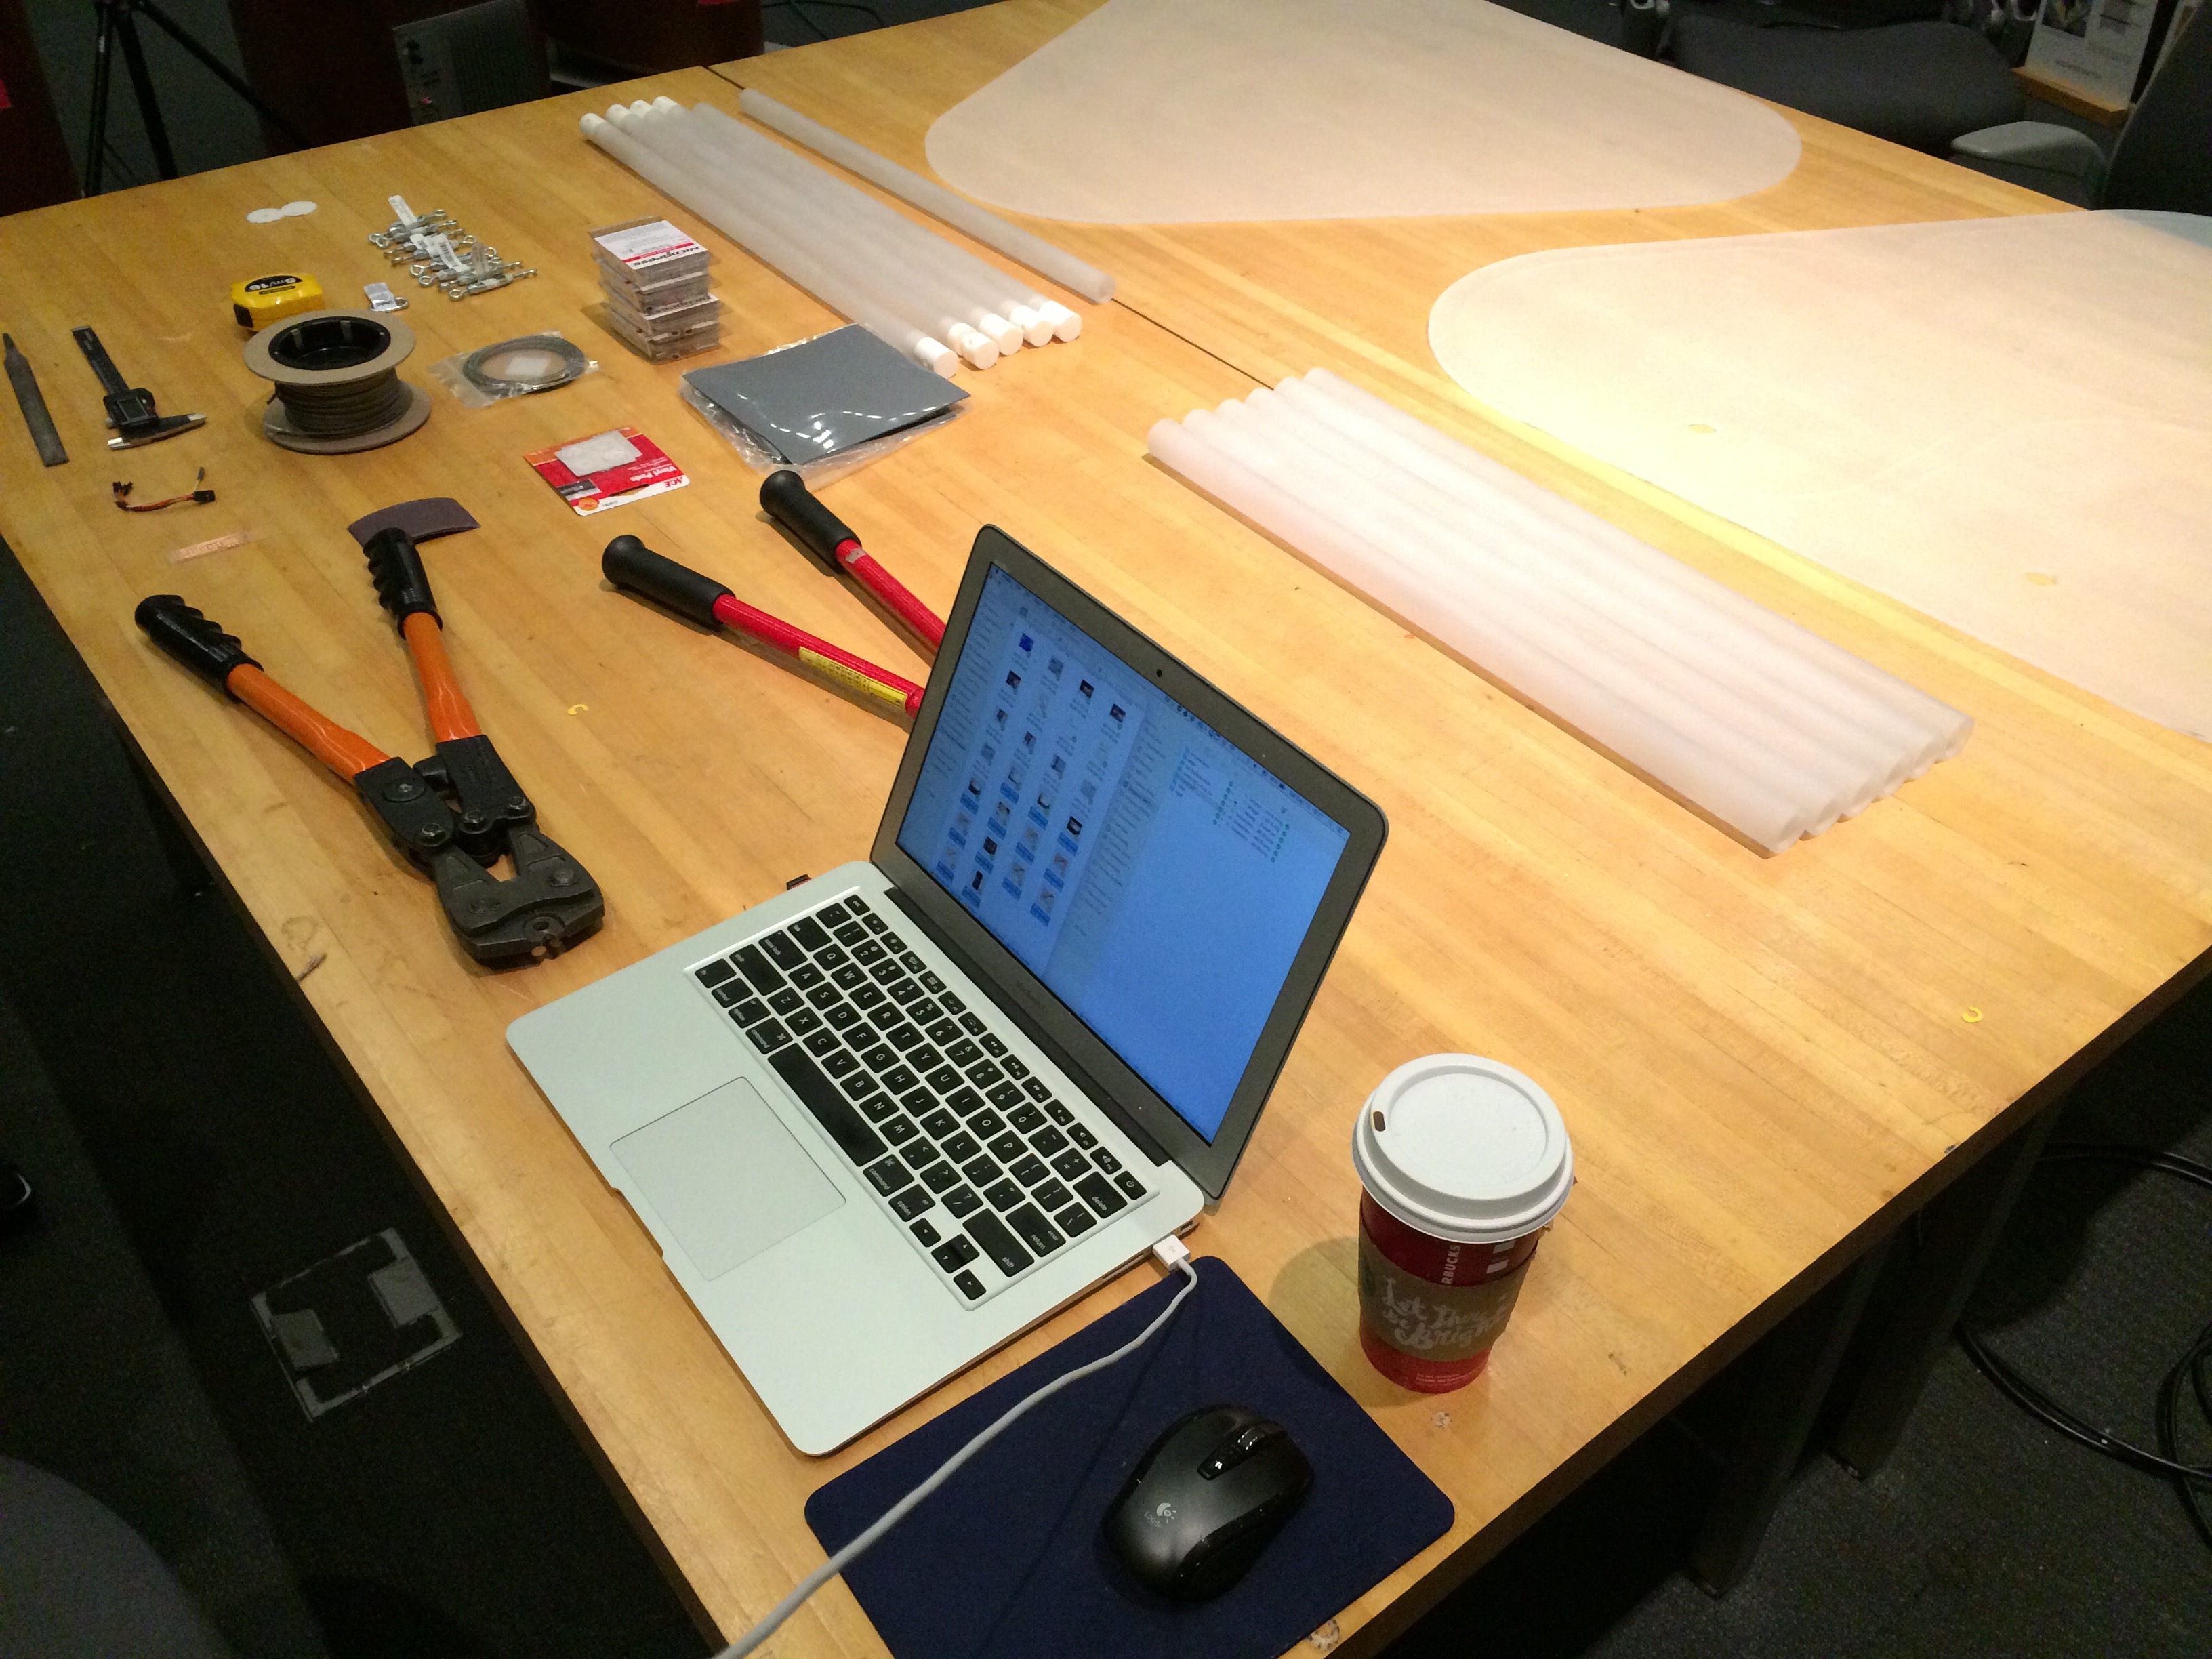
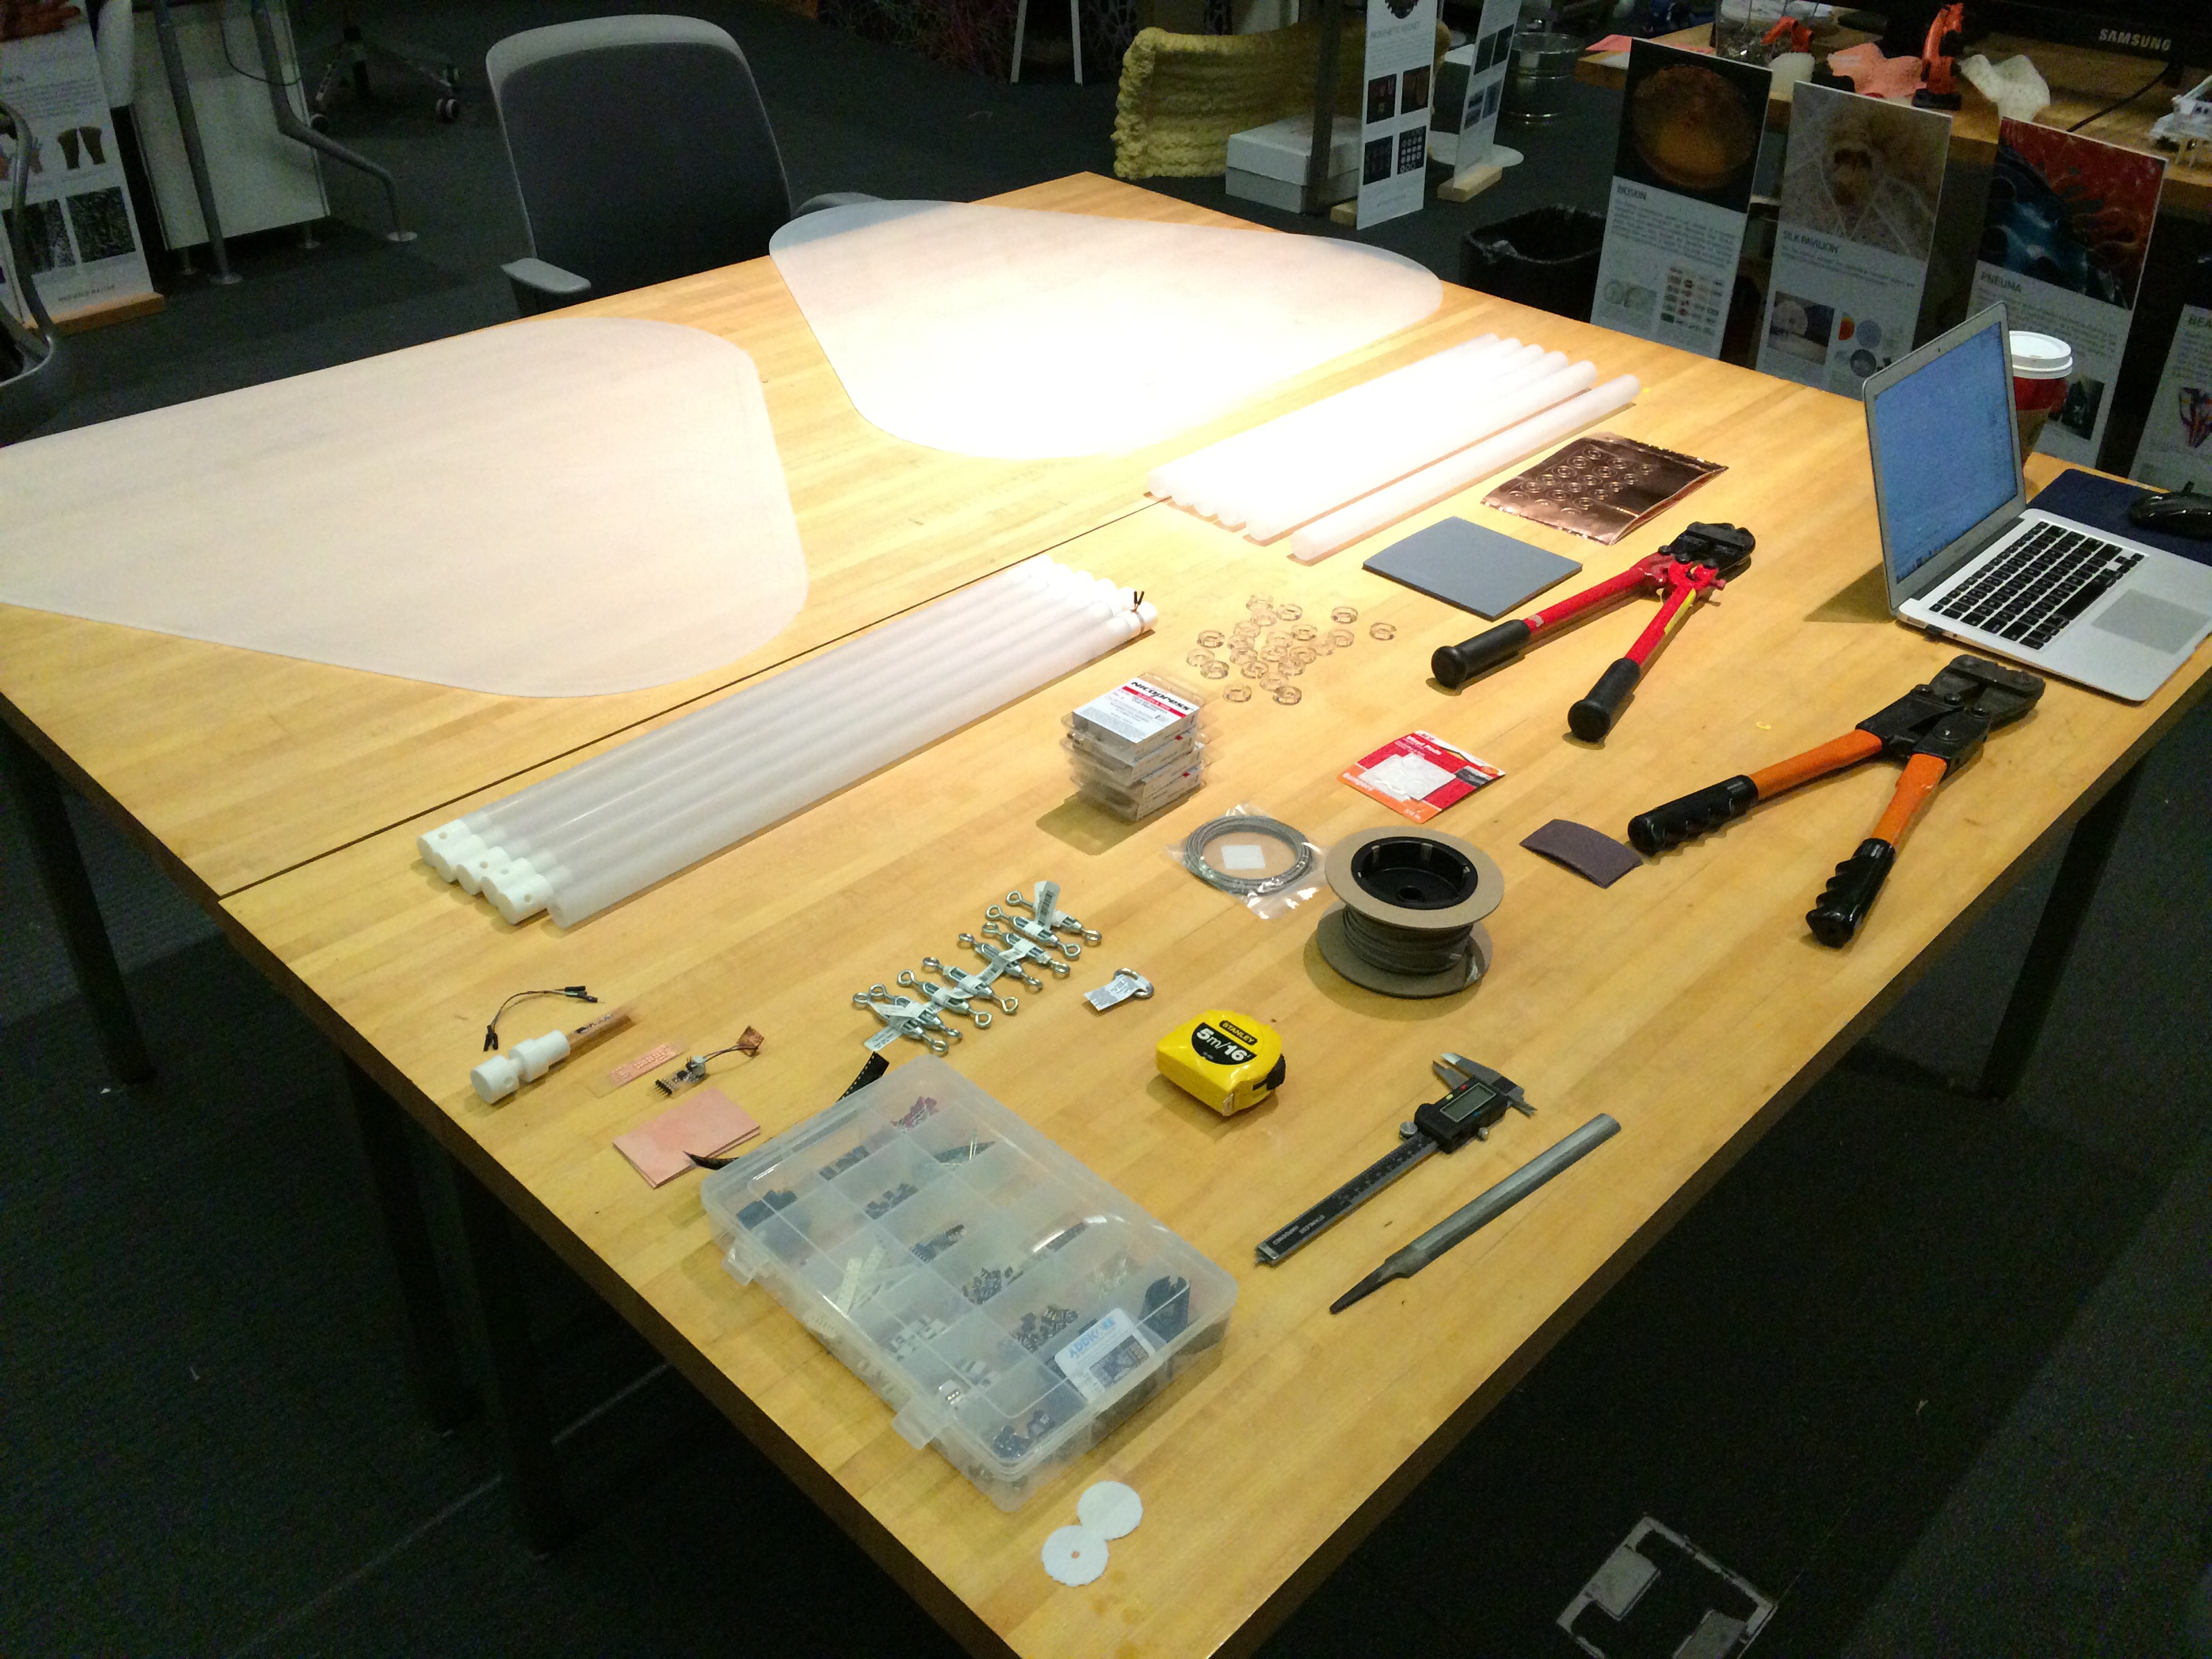
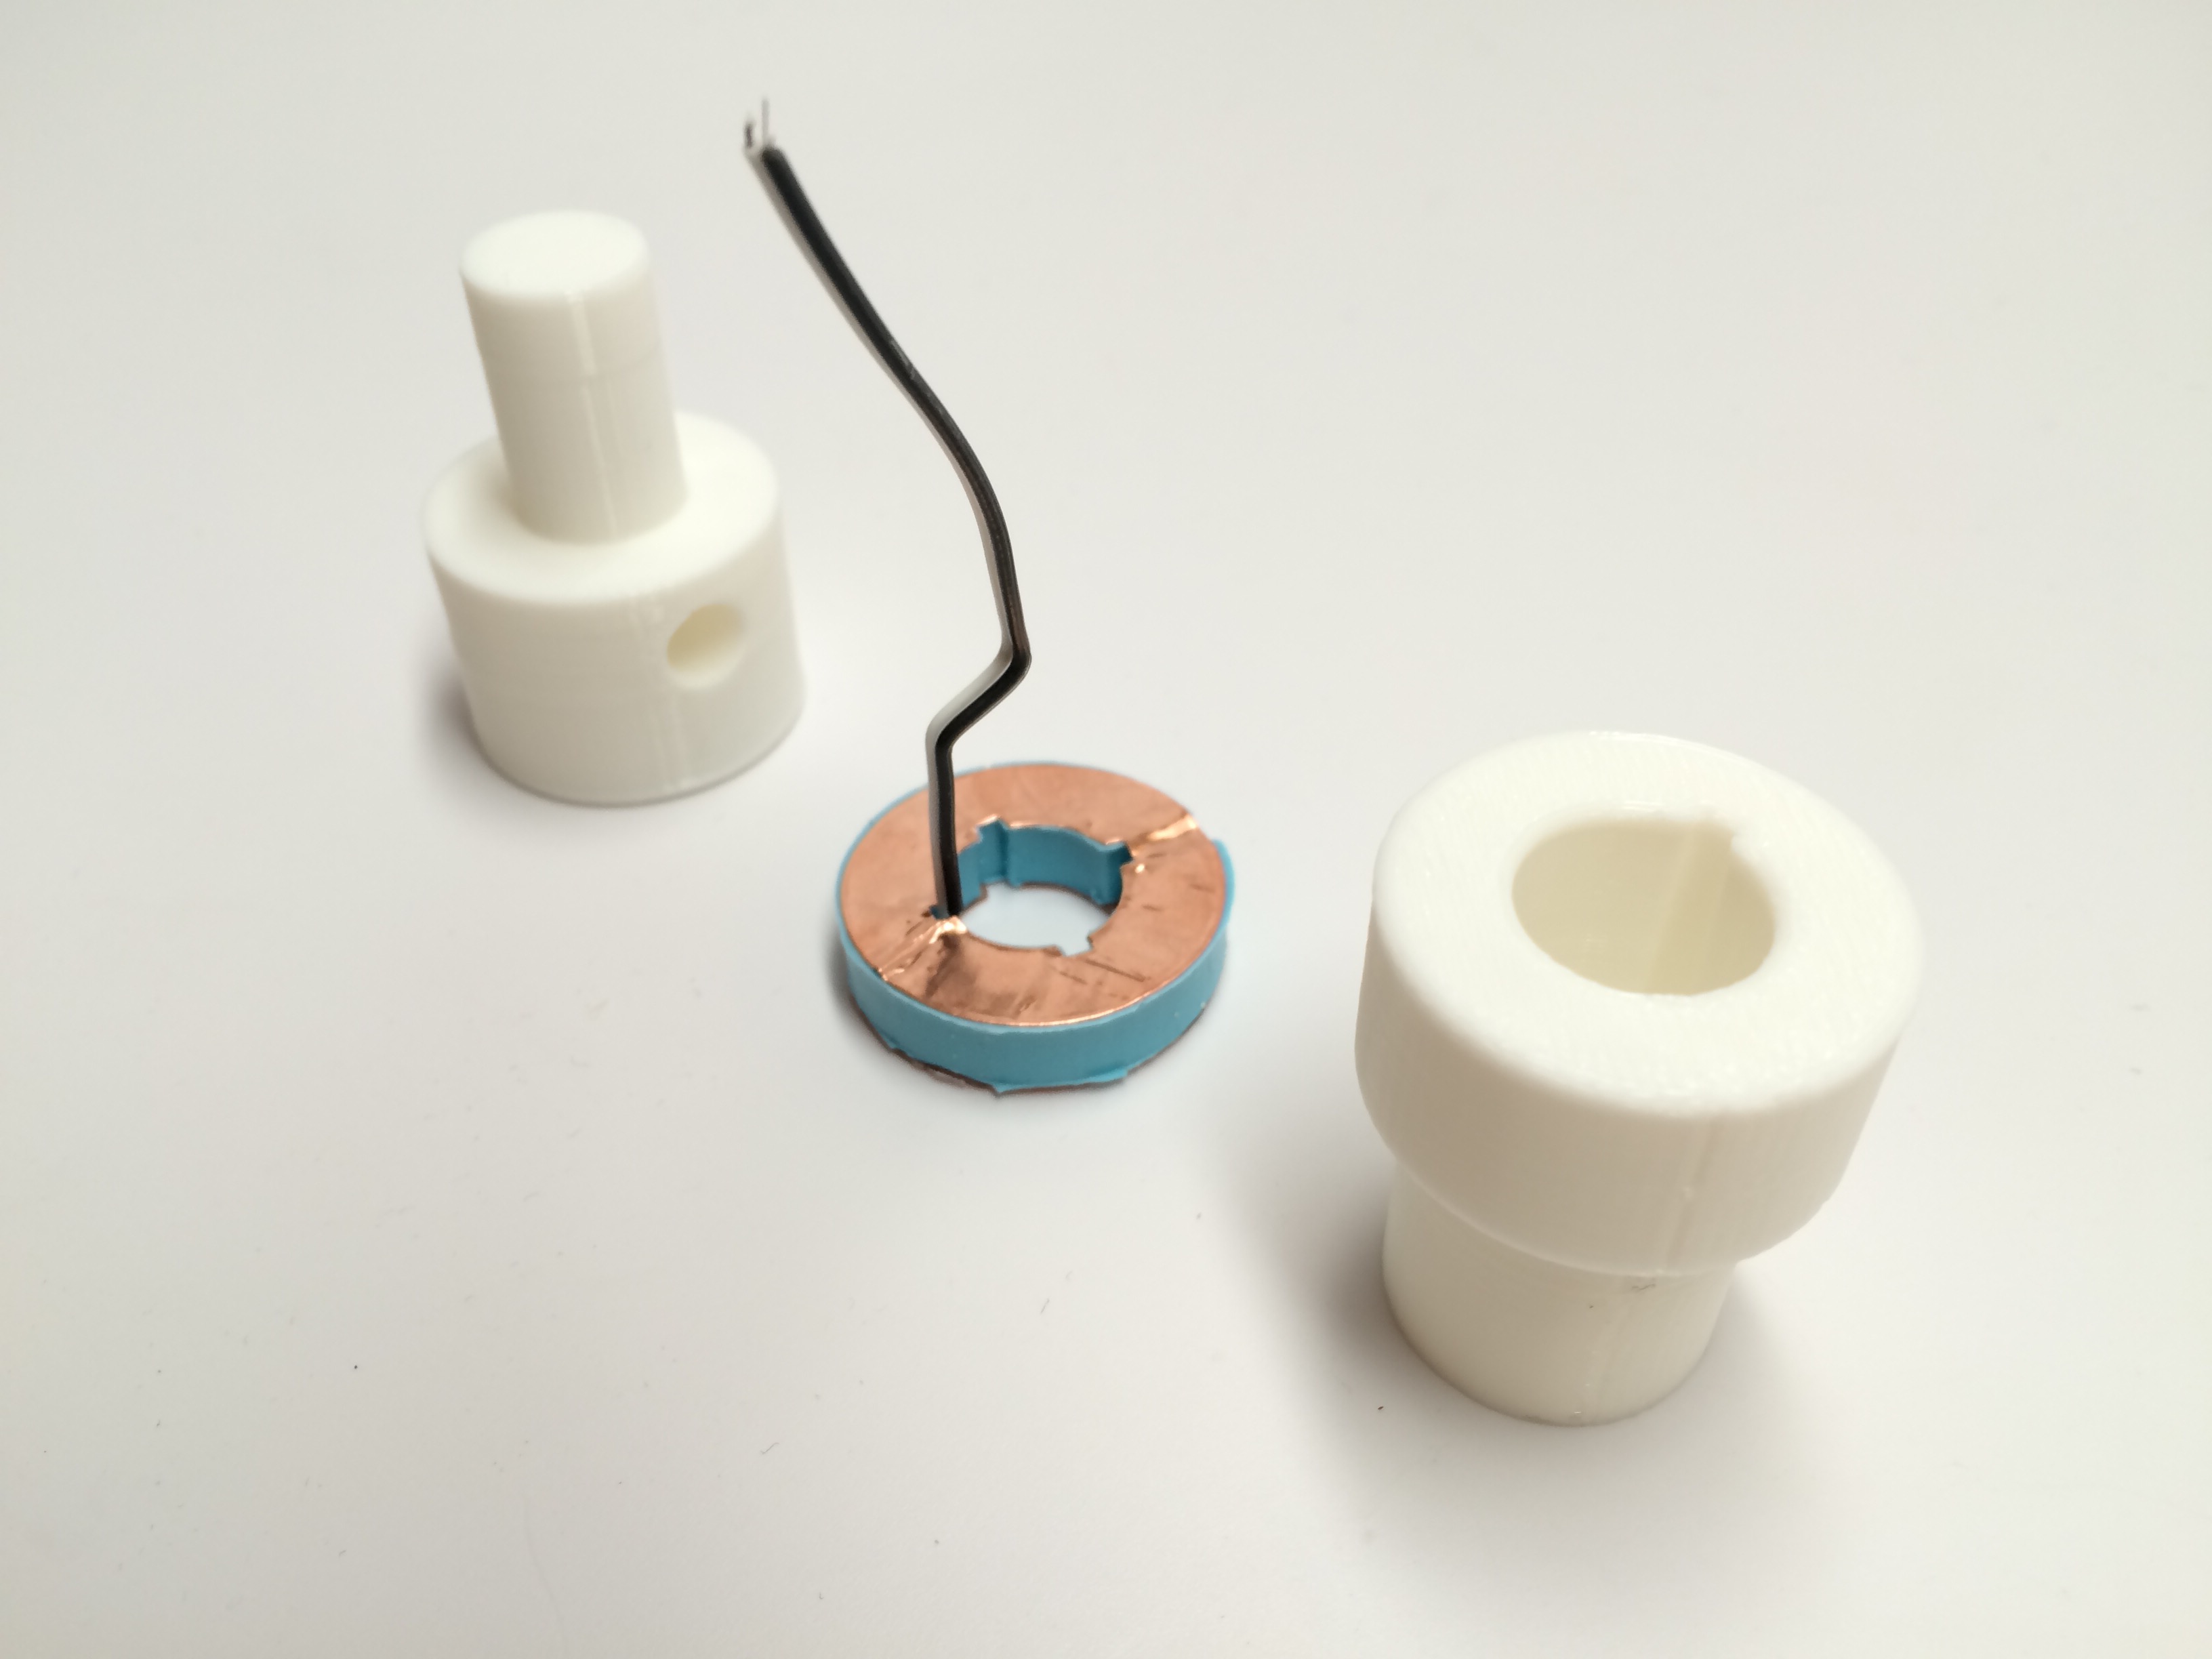
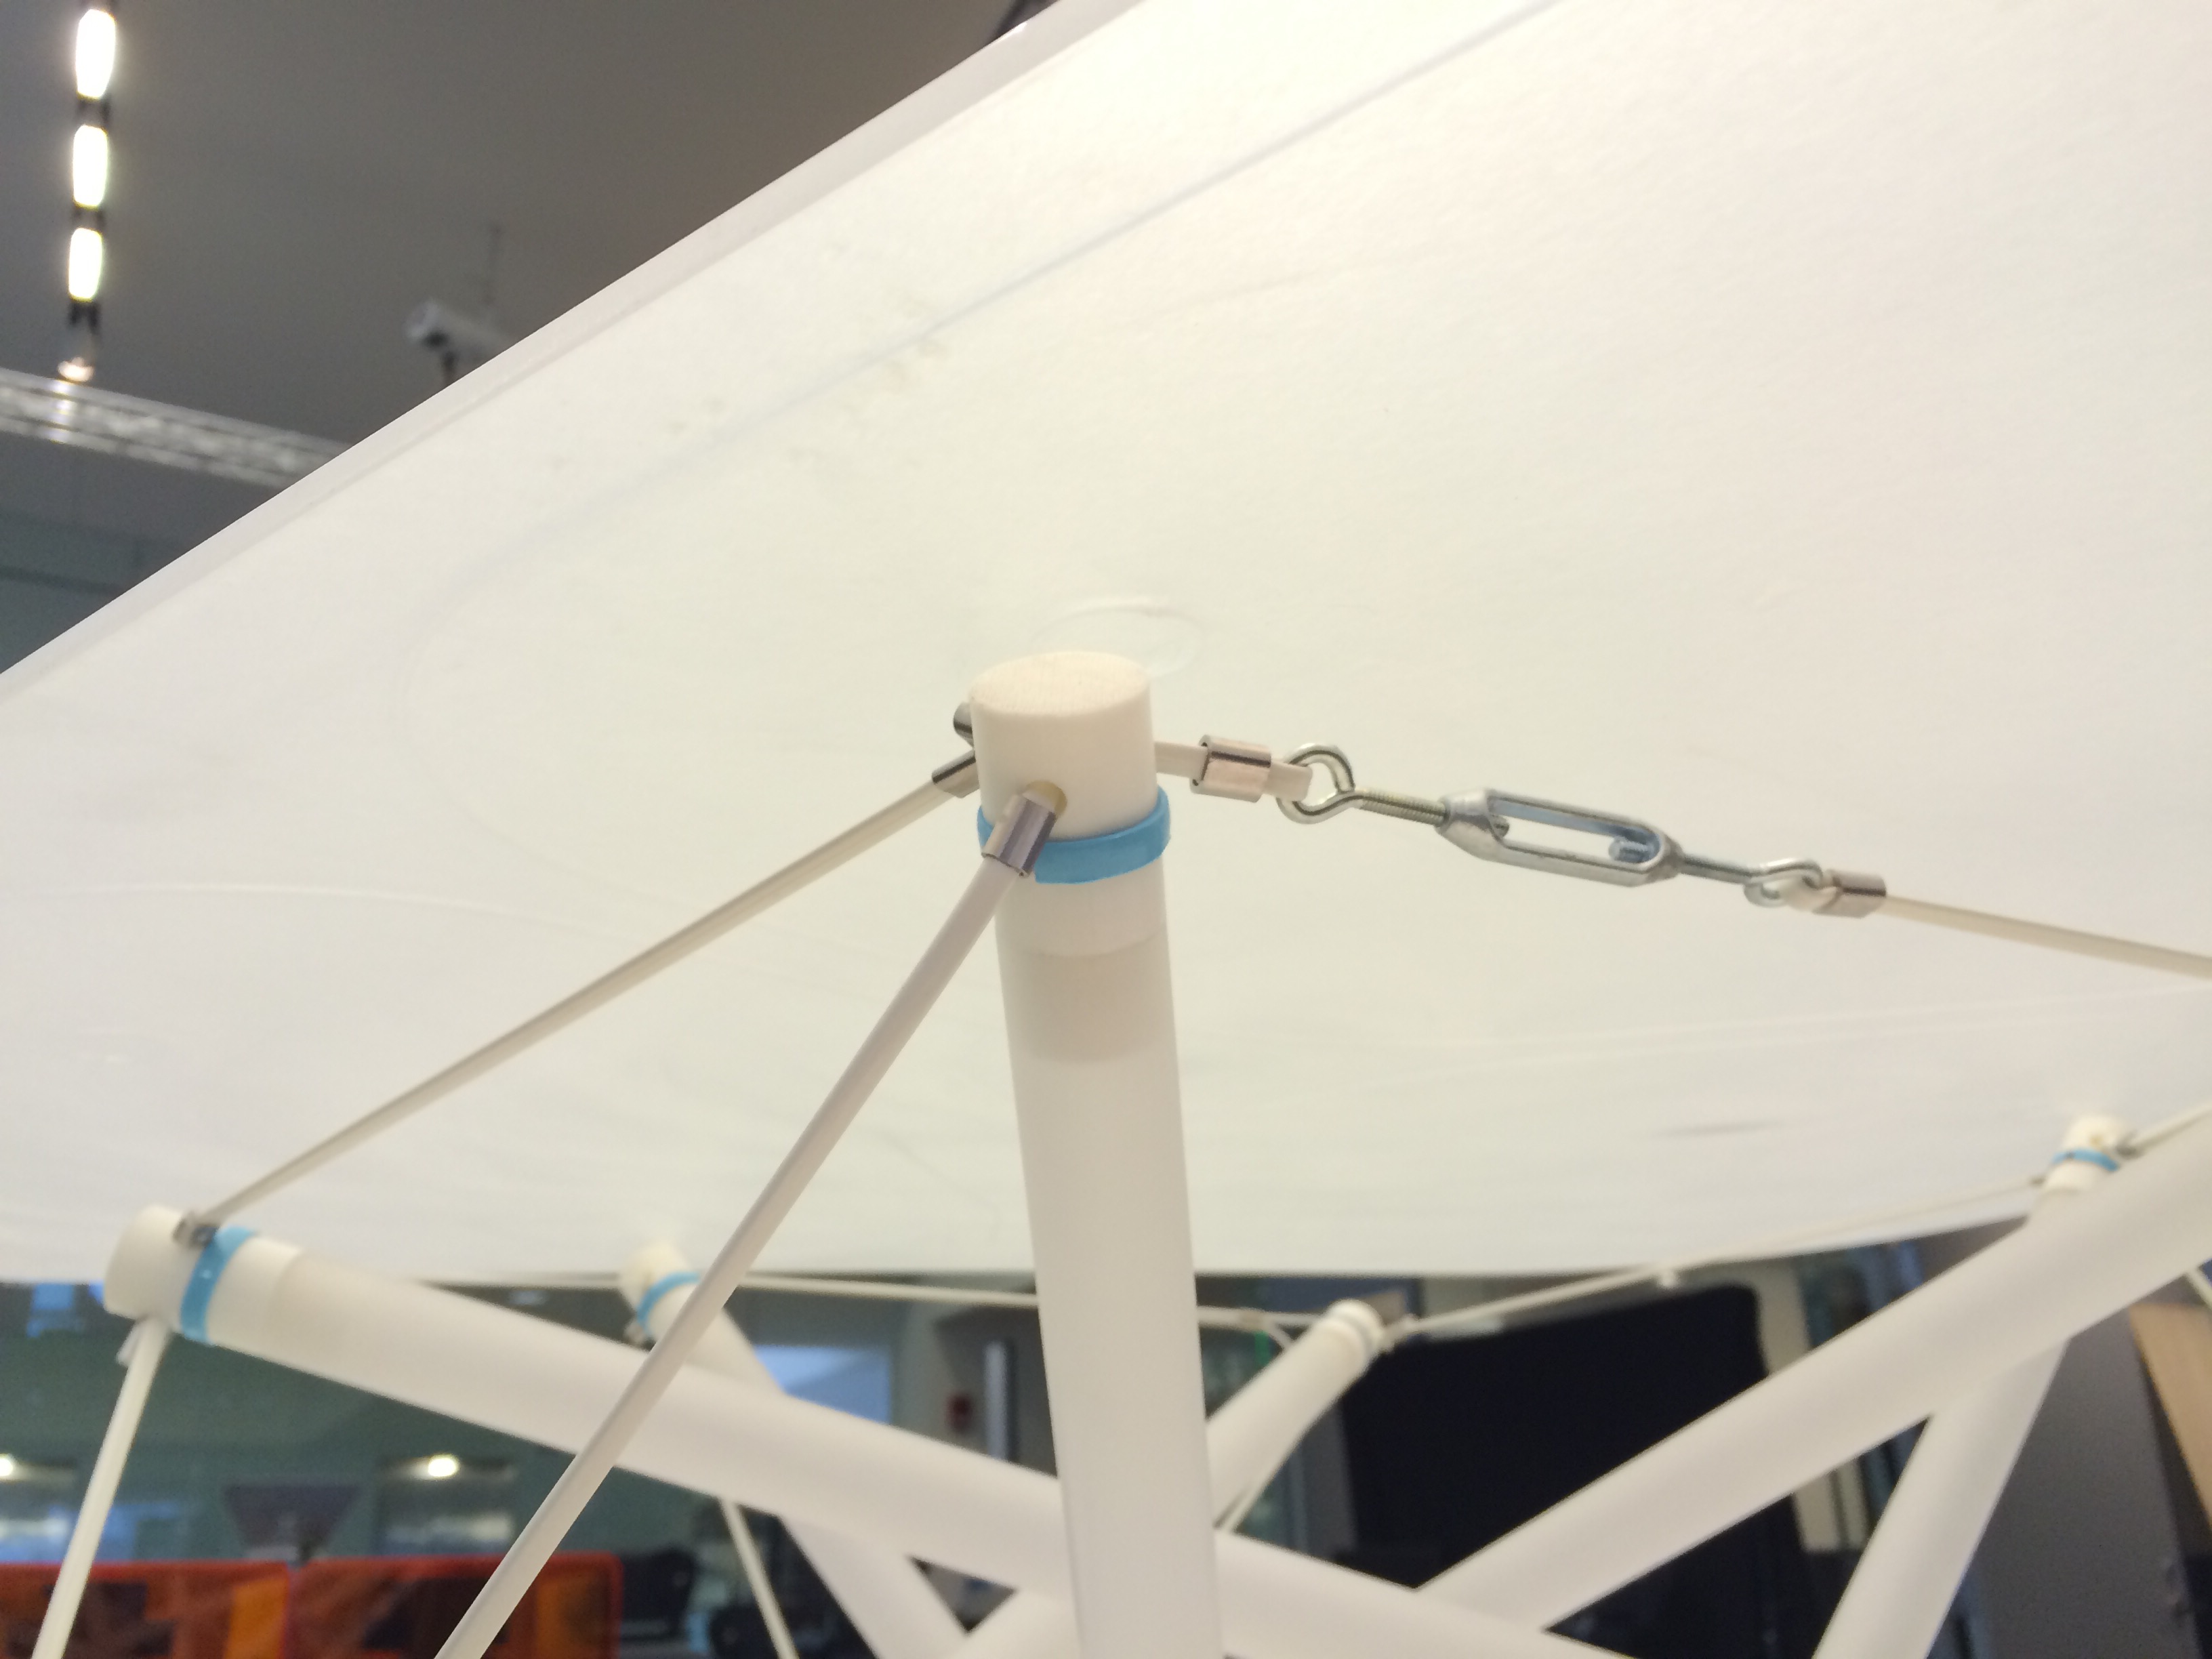
Assembly
Here're the sequence of the assembly process:


Finish


Mistakes
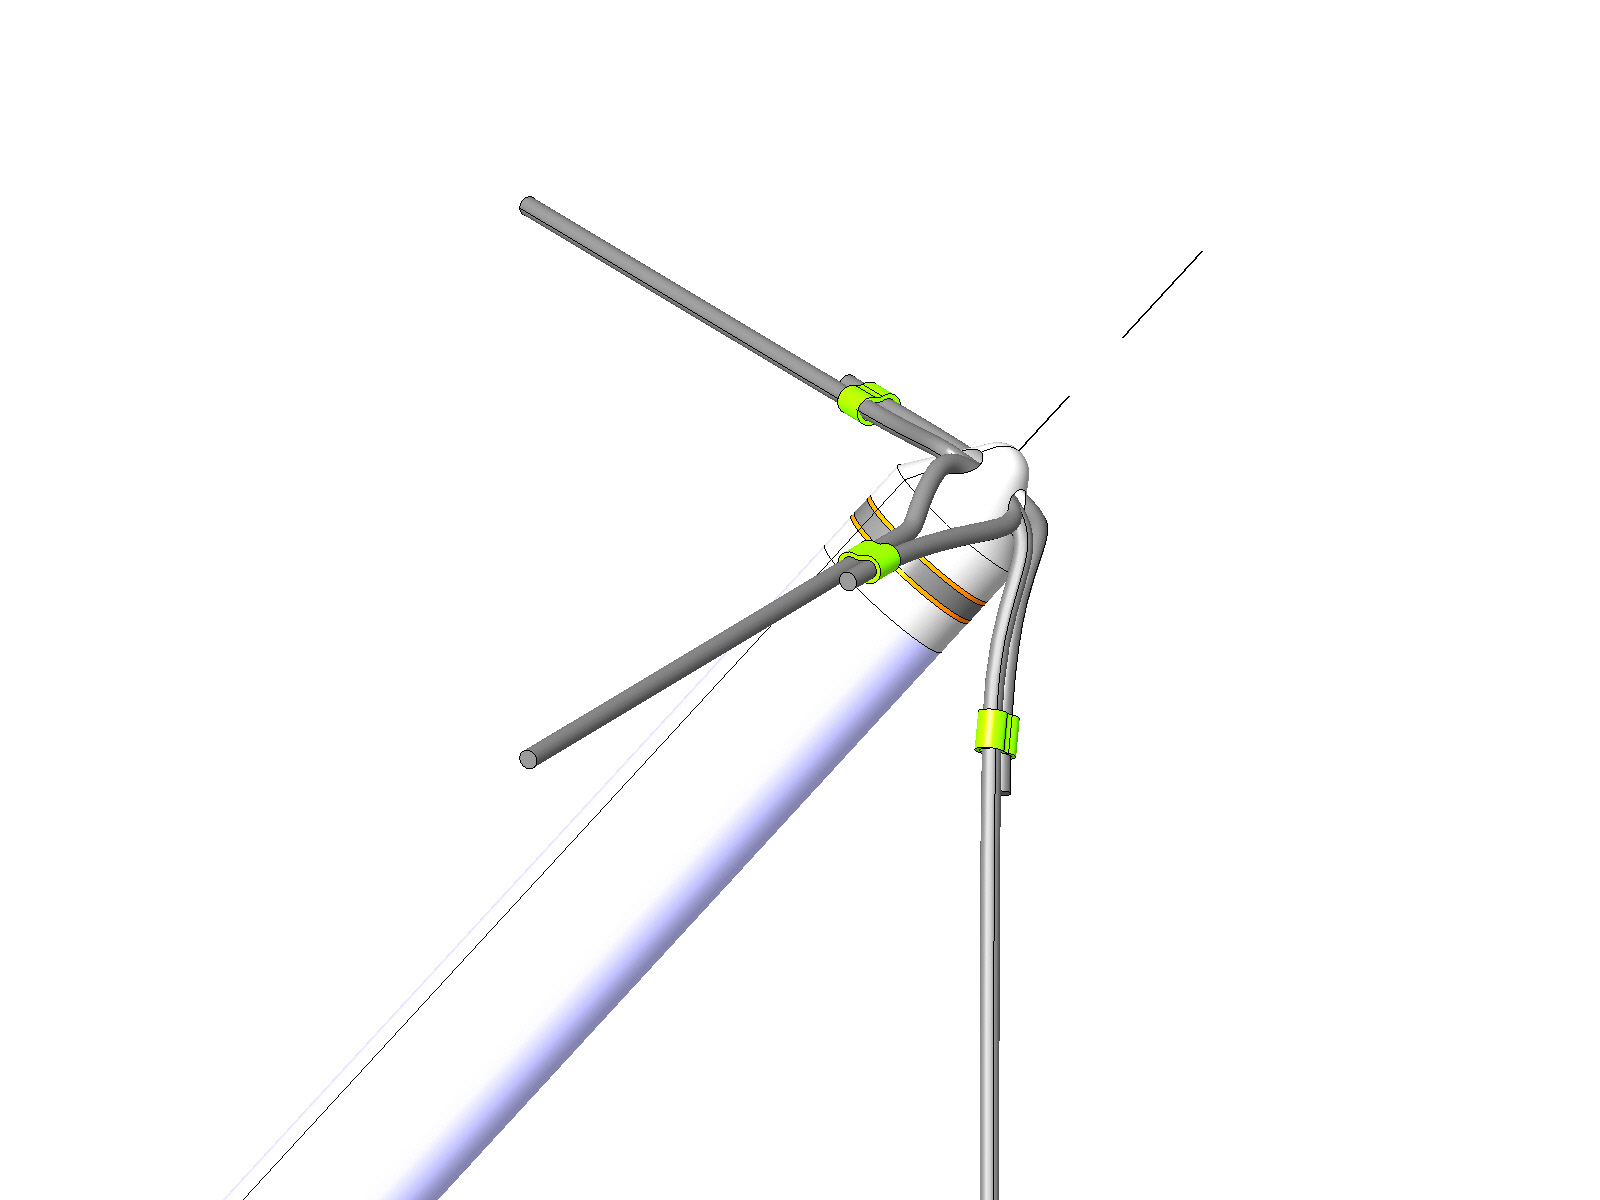
One of the biggest mistakes I made in the assembly process of this tensegrity load cell was that I overconstrained each node and compromised the degree of freedoms for the benefit of making the incremental assembly sequence. I clamped each tension cable with end clamps to help fixing each compresssion member in space. This was helpful in the assembly process, but it ended up preventing the whole tensegrity system to self relax the forces amongst all the tensile and compressive members.
The other mistake I made was the time management and lack of understanding the comprexity and dependencies amongst hardware and software. I was blindly assuming that the pressure sensor would work just as fine when I changed the dielectric material for softer elastomer and simultaneously increased its thickness to leave larger room for the assembly tolerances. This turned out to be a big problem when it comes to setting the right RC time constant that I can actually measure. Given that the capacitive sensor is the heart of this project, I should've calcurated the capacitance and RC time constant before jumping all the way to the final production.
Errors
Throughout the programming phase, I kept having errors with the serial port being locked out. Whether I was writing code in C, Python, Arduino Java, or Node.js javascript, whenever I made a mistake and failed to compile the code, it left the serial port locked up, and I was not able to find the reliable method to release the serial port.
Here are a couple processes I used to unlock the serial port, but none of them were fully reliable:
-
$sudo rm -rf /var/lock $sudo mkdir /var/lock $sudo chmod a+rw /var/lock - $sudo kill -9 PID $sudo killall PID
- toggling back and forth between tty.usbserial and cu.usebserial
- reflashing the ATtiny microcontroller
- rebooting computer
As said, none of the above option was fully reliable, and I always had to try combination of many things to unlock the serial port. This took me in total of over 12 hours here and there during the final production phase. If anyone has the concrete answer to this problem, I would love to heare the solution.
Epilogue
System Integration
The term system integration is an engineering term. Its definition is the process of bringing together the component subsystems into one system and ensuring that the subsystes function togethe as a system. (Wikipedia)
Integrated Design
Coming from an architectural background, the term integrated design was more natural to me. It means that its a design system that integrates elements across disciplines. I was using it almost interchangably as the engineering counterpart, system integration. After going through each week's assignmnet, I come to realize that these two terms are not exactly interchangable, and system integration is what is required to enable integrated design. In fact, I come to know recently that the term integrated design is originated within architectural discipline.
Design
Design is an abstract term. Its a method as much as the end product. In architecture, integrated design often refers to the design being the latter, the end product. This may be bacause the value of architecture is not often the time quantitively evaluated by its fittness and performance. Therefore, the term integrated design is often used in architecture to promote the idea of system integration yet lacks clear methods to evaluate its processes.
How to Make Almost Anything
How to Make was indeed the quintessential course at the Media Lab. I come to realize this during the final stretch of making the final project. We have gone through 14 unique sessions leading to this final project that have covered various aspect of design, engineering, and fabrication across the disciplines from data management, computer aided design, programming, electronics, to mechanical engineering. It's not a FAB course, or at least it's not just about fabrication. It's a course to understand what our world is and learn how it works thorough making things. Honestly, this was the best class I've ever taken in my life, and the whole experience in learning by making was just beautiful...
Last but not least, I would like to thank Neil for the every week of joy and excitement; Jeff, Will, Sam, Matt, Nadiya, and all the TAs for their incredible talents and support; and Tomer, Palash, Jonathan, Cristian, Marev, and Arthur for their friendship and sharing true passion and inspiration throughout the semester. As Neil said, this is not the end but rather the beggining - the beginning to the next chapter of my life in the spirit of "How to Make!"