printing small water turbine
Though my final project is still far away, I wanted to collect some experience with 3D printing of moving and dimensionally stable parts; so I decided to make a small water turbine, which could be possibly fixed within a water tube; to this time it is unclear and not really important how a resulting torque could be used; it’s much more about exploring the possibilities and limits of modern industrial 3d-printers. So one question to think about is, do I really need a 3d-printer for that structure, or can it be fabricated by other tools such as milling; it is the question between subtractive or additive manufacturing. Making something out of one part only is charming, but 3d printing can also be very time consuming.
3d-modelling
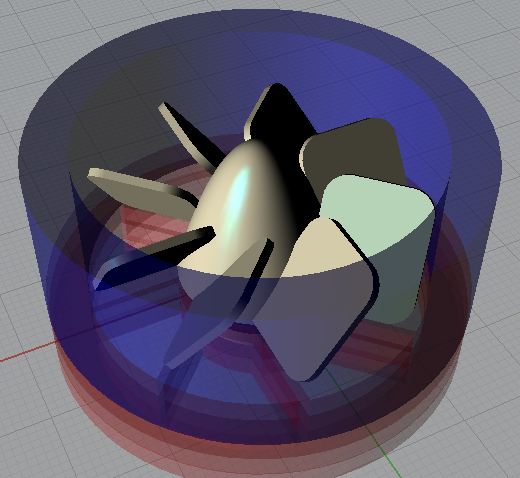
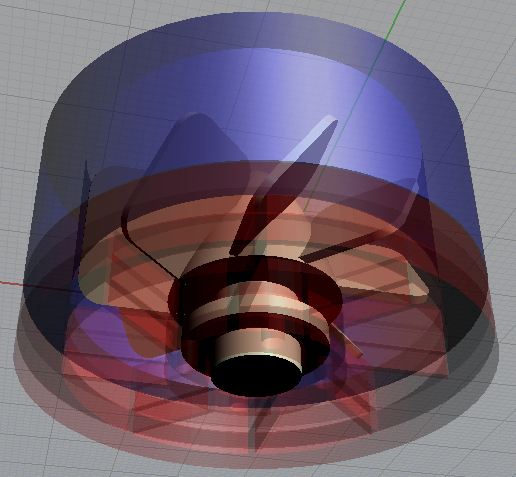
Latest this week you will definitely need a 3d-program; I had to decide between Solid Works and Rhino; At the end I decided for Rhino since it was just straightforward to install on Windows; I was very grateful for the 90-days free trial version of this program; there are nice tutorials on the net, and so I invested some worth spending hours it getting settled in the basic skills.figure 1 shows my first 3d-model (top- and bottom view) of my small turbine; as you can see the turbine blades are very simple and will not fulfill hydrodynamic considerations. However, in the semitransparent rendering you can see that the turbine is held in place and being able to turn by using a small disc, which is fixed to the turbine axes. This disc should keep the axis in place, both in the radial as well as in the z-direction. I used the Invision si2 from 3D Systems (Resolution XYZ 328 x 328 x 606 DPI); it prints with Visijet SR200, an acrylic plastic; you don't have to consider supports; this is done by the printer program automatically and it uses a wax with can be melted afterwards in an oven without affecting the print; however, to allow the wax to flow out of your design, to avoid any limitations of the functionality of your design.
3d-printing
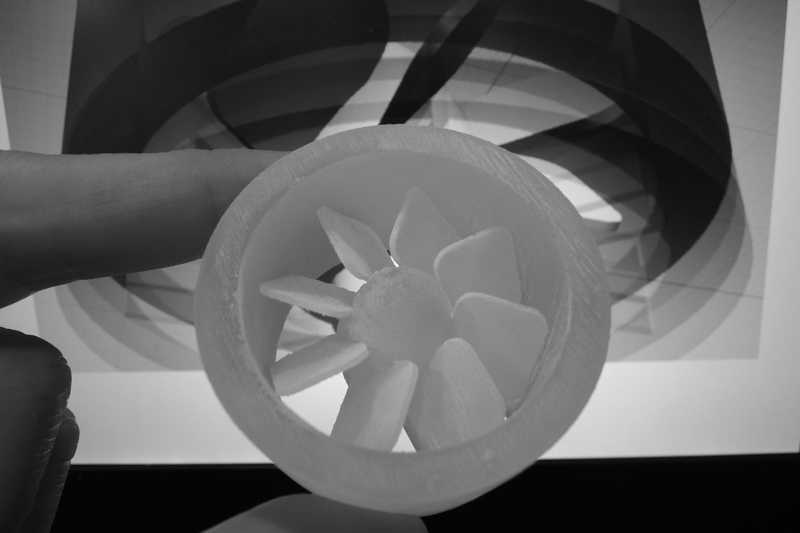
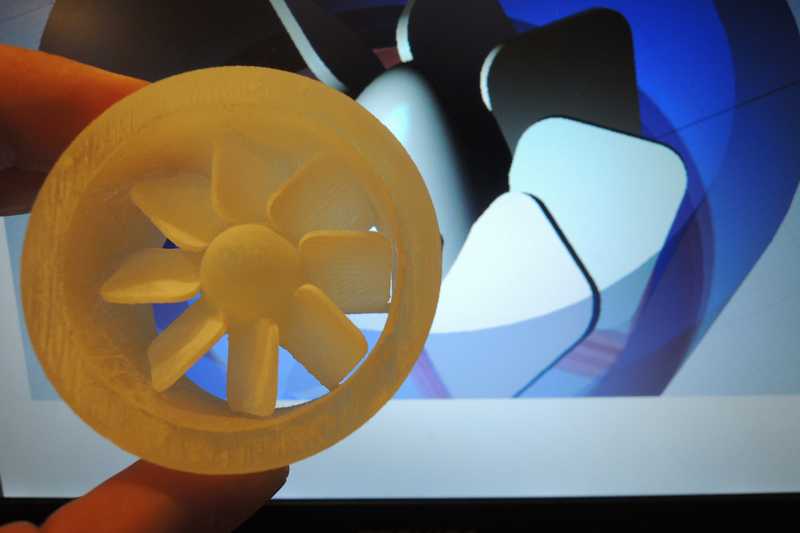
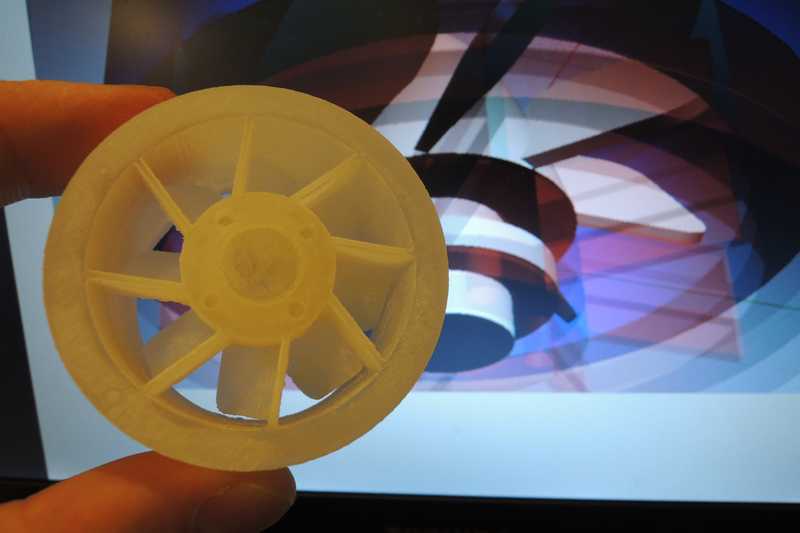
figure 2 shows the printed results after some hours in the oven to remove the wax (70°C);however, I had to remove remaining wax parts by putting the printed part in an heated oil bath - still, I was not able to remove all the wax in the "closed" housing of the disc stabilizing he turbine axis - this has probably two reasons: 1) my release holes might be just too small with regard to the viscosity achievable at this temperature; 2) maybe even more important, deviation tolerance; this is of course critical with fittings, such a rotating discs in a housing.
3d-scan
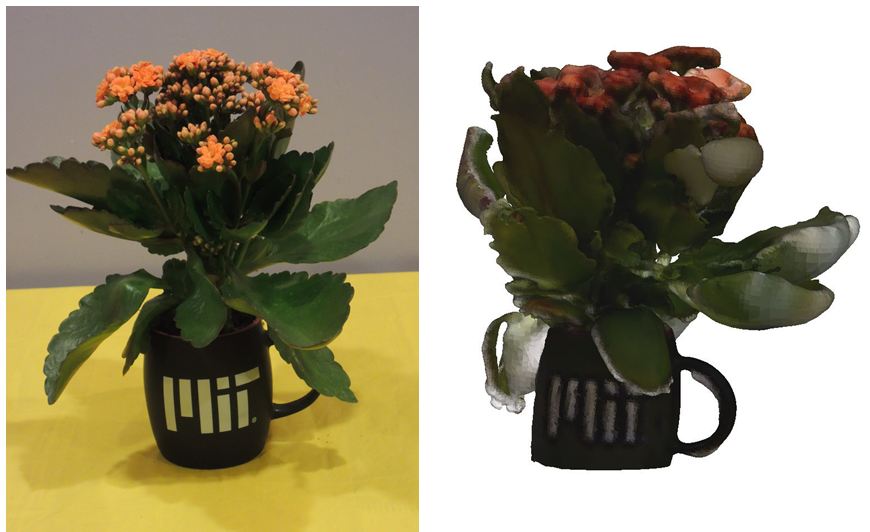
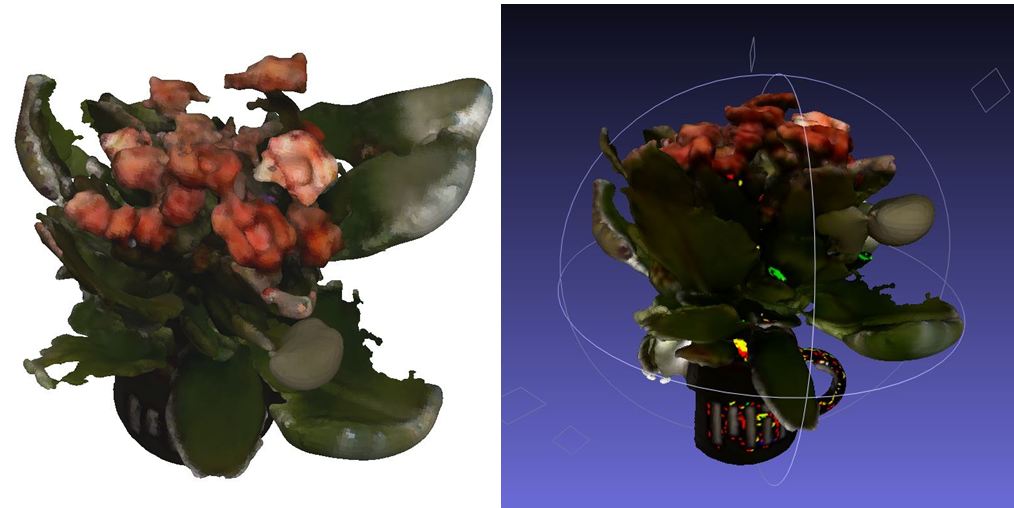
Here I used the hand held scanner which has two cameras in a distance of about 10 inch as well as a build in accelerometer; so you move the scanner very carefully around your object, trying to keep the object within certain limits (indicated by a circle on the screen), so that an algorithm can calculate the 3d-envelope of the given object - however, here the data points detected must somehow correlate with each other - and it can happen quite fast that you lose your scanning track. figure 5 shows my scanning results; the object was a flower in a MIT-cub; I selected this object since I had the feeling it is pretty much a worst case scenario for a scanner of that kind - small tine details, a variety of depth information, even void-angles; taking that into account the result some kind surprised me, though the colors should not distract too much from the comparable low resolution.