I love Escher's drawings. I thought it would be fun to make a construction kit whose pieces are obviously architectural elements, but which has totally strange possibilities for angles, sides and "which way's up."
My chosen architectural elements: the bridge...
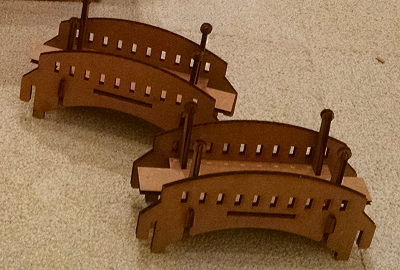
A couple of bridges with coupling tabs on each of their ends, and little lamps on posts to light the way!
...and the cupola.
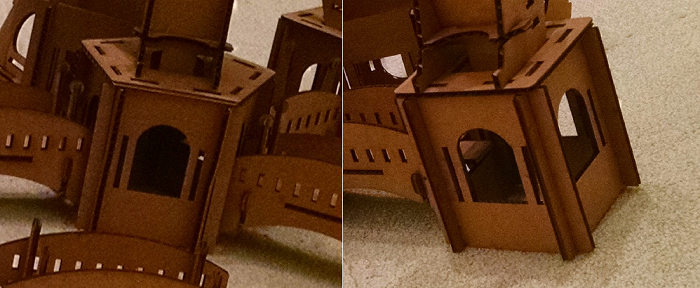
Archways and overhangs define these cupola elements.
The cupolas come in two flavors: square and pentagonal. Both have "bridge ports" in each wall, where the tabs on the bridges fit and lock. The roof was going to be pointed, but then I thought it would be more fun to add one more bridge port to the roof for even wonkier arrangement possibilities.
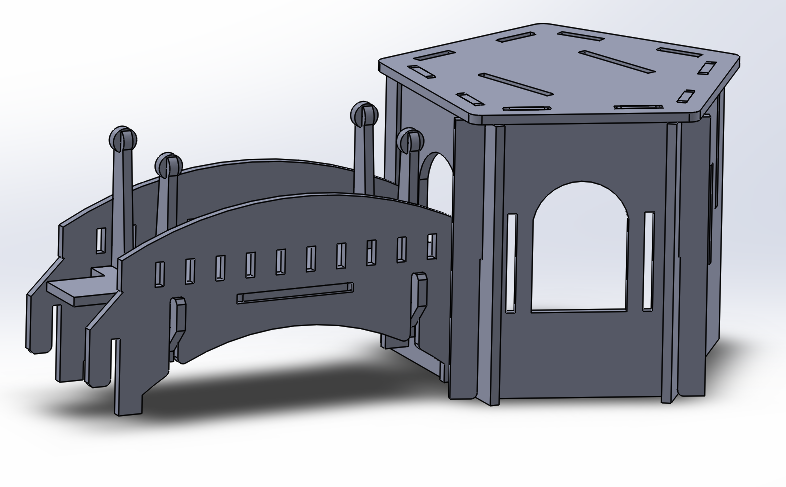
Here's how the bridges fit with the cupolas.
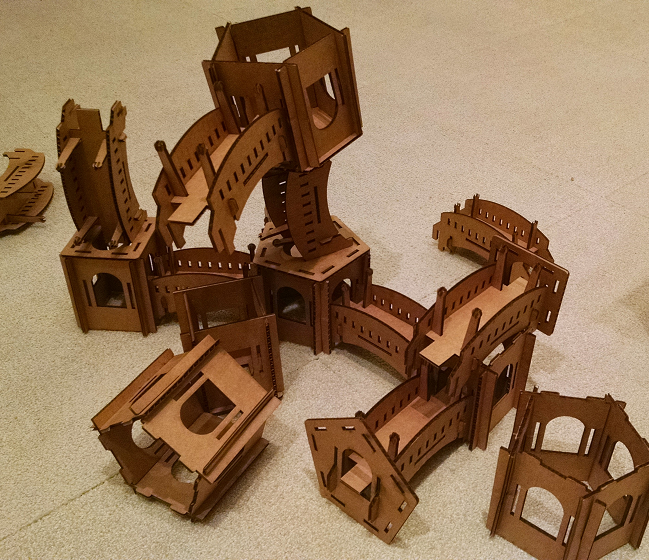
All kinds of weird topsy-turvy landscapes are possible.
My design was in SOLIDWORKS, with parametrically designed slots, so that the tightness of the pressfit could be dialed in on a few pieces but cause global reconfiguration.
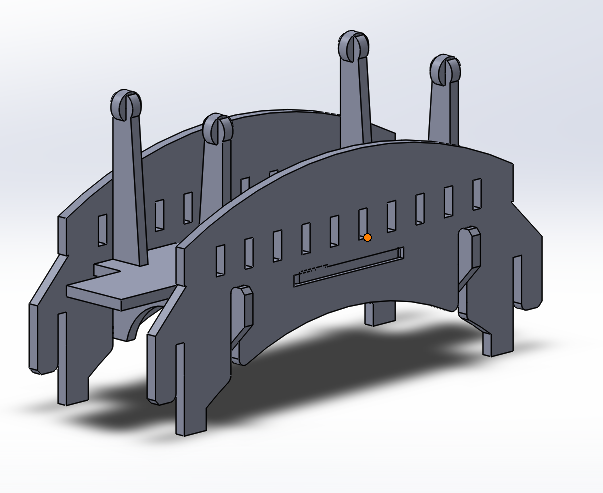
The bridge design
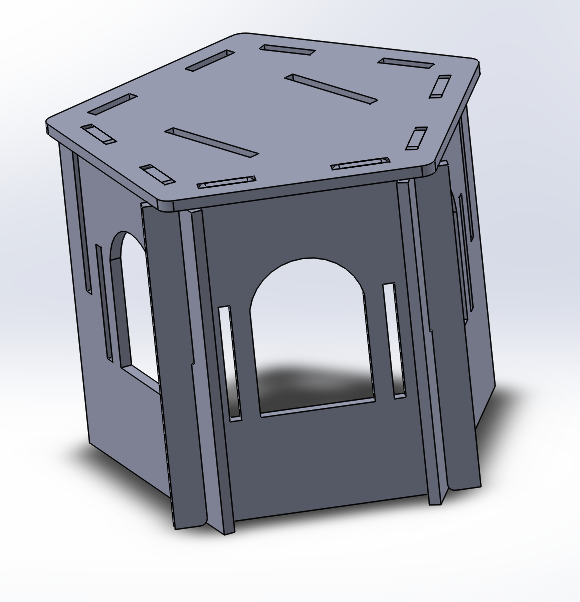
The cupola designs
Here's the process for turning SOLIDWORKS parts into laser cut pieces in the West Section, 2014:
- Save the parts out from SOLIDWORKS as .dxf files. In the menu which pops up during the .dxf "save as," uncheck the "current" view and check only the view on the plane where your sketch lives.
- Move the .dxf files over to the laser cutter computer. Dropbox works great.
- Open a new CorelDraw document and import the .dxf files. You can select them to import all at once; each place you click will place the origin for the next import in the sequence you select.
- Delete the annoying "educational use only" stuff from around the edges of your files. It can be really helpful to group each of your parts (ctrl + G) to keep them from drifting as you move them around.
- Pack your geometry in a nice, material-efficient way.
- Select all of your geometry and set its stroke style to hairline.
- Print the file to the laser cutter. In the dialog, press "Properties" and, under the Advanced tab, load up the Cardboard preset.
- Zero the machine and go. Get trained if you don't know how.
- Before you move your piece, press on it gently to make sure the smallest features got cut all the way through. If they didn't, run the job again, maybe at a slower speed.
Now is the time when you test the fit out on a few pieces, change your global variables accordingly, and try again until you like the way it feels.
I got tired of making these perfectly constrained tabs after a while, and I got lazy when it came to the roof joints--of course, they became the primary failure mode in larger structures made from these pieces.
Lots of fun with cardboard! An amazing and impressively strong material.