Week 4 - Make Something Big
Highrise dog bed with sliding stairsI took this week's assignment quite literally, and decided to make something really big - a highrise dog bed with a staircase that can slide in and out, which is about 50 x 30 x 40 inches with the stairs inside (and about 1.5-2x longer if they're expanded).
The motivation came from wanting to build an extension to our bed, where our dog could sleep next to us, but without actually going on our bed. Something like this:
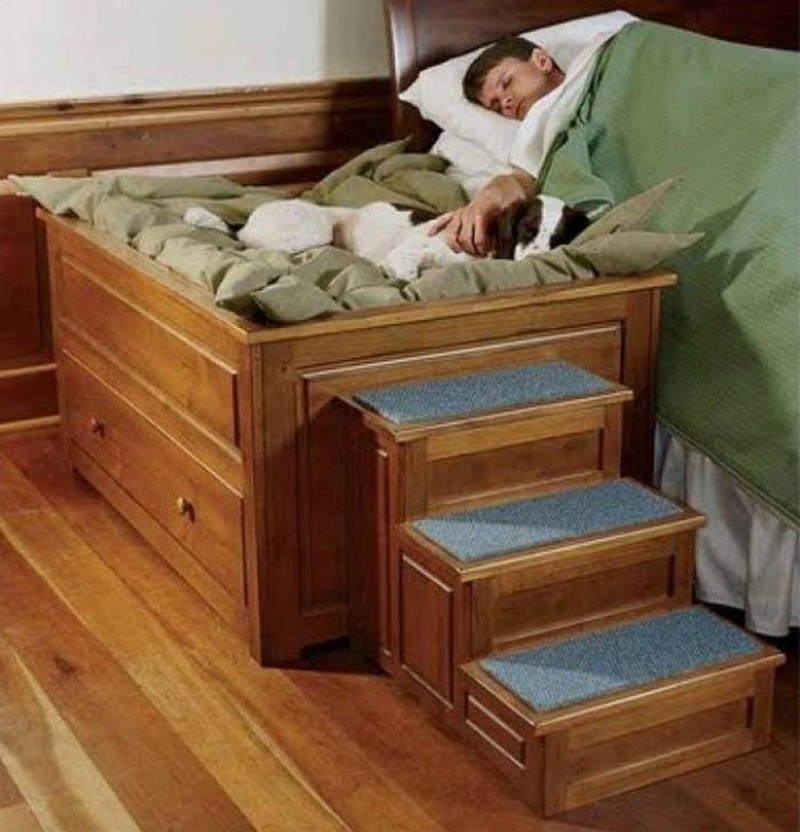
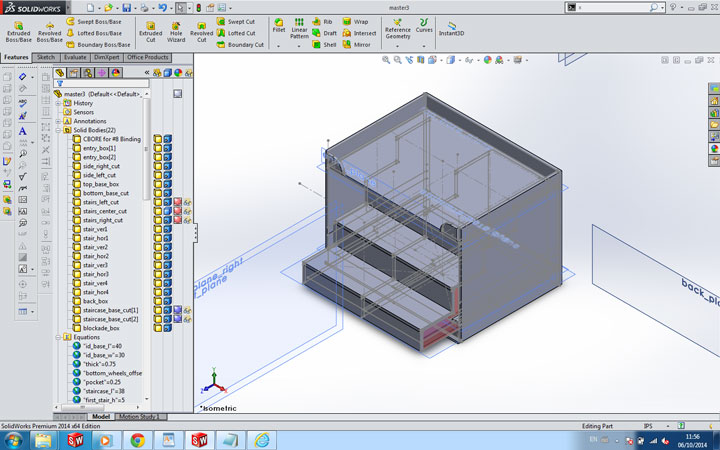
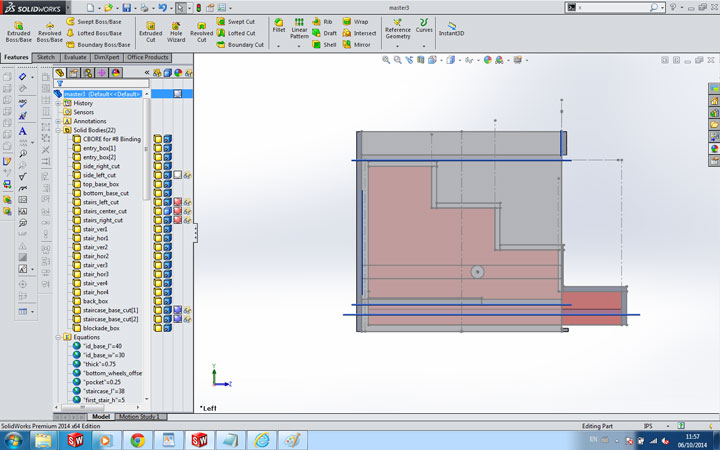
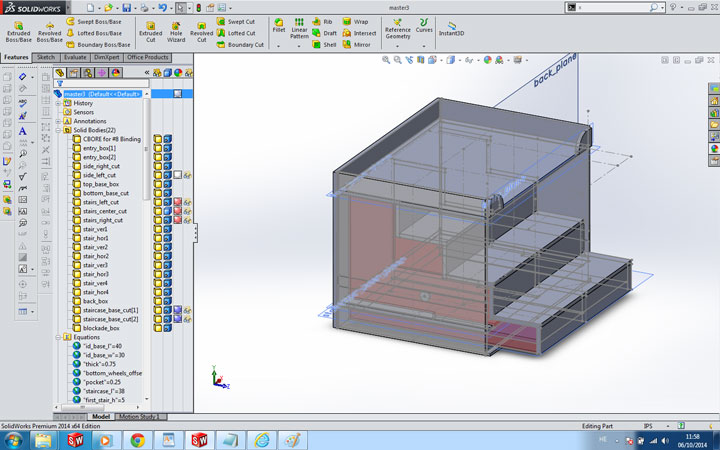
I decided to improve this idea, by adding sliding stairs, which would also save up some space. After fiddling with SolidWorks (which was much easier this time thanks to Matt's section on master modelling), I ended up with the following model:
I got 2x 8-by-4 feet 3/4" birch plywood from HomeDepot, which ended up not being enough, so I also used 1.5 OSB boards for some of the inner pieces.
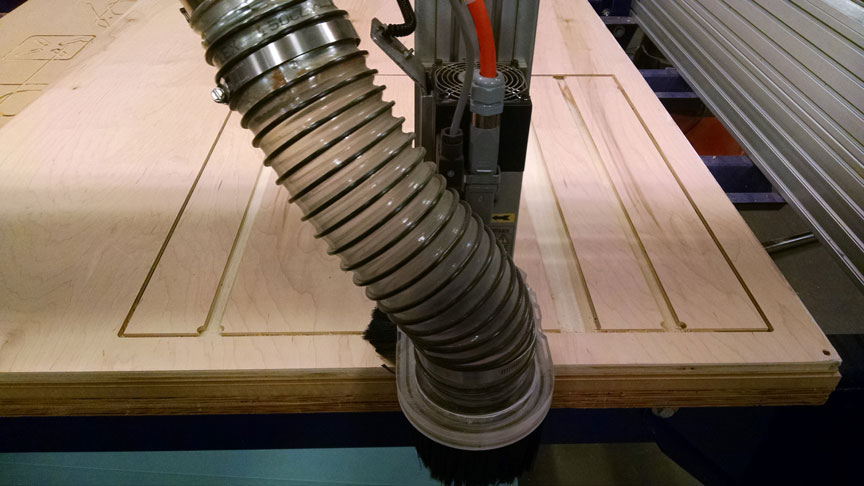
Some tips I learned related to cutting with the ShopBot:
- It takes time to convert DXF to an actual path the ShopBot understands. Come in early (at least an hour if it's your first try) to prepare the files. You will need to manually close all open vectors and then manually define the paths (profile, pocket, etc ...)
- Zero the Z-Axis somewhere around the middle of your board. Yields better results
- Set the profile depth cut to around ~0.05-0.07 larger than the actual size. This would yield smoother cuts and will not hurt the sacrificial layer
- If you're using a higher quality wood, reduce the Feed Rate. I used 120 (instead of 160 for the OSB)
After I followed the tips above, the cutting went smoothly:

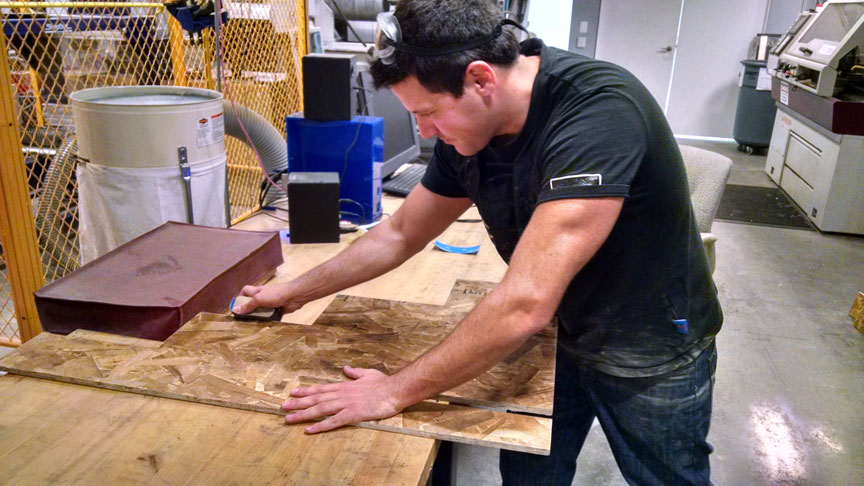
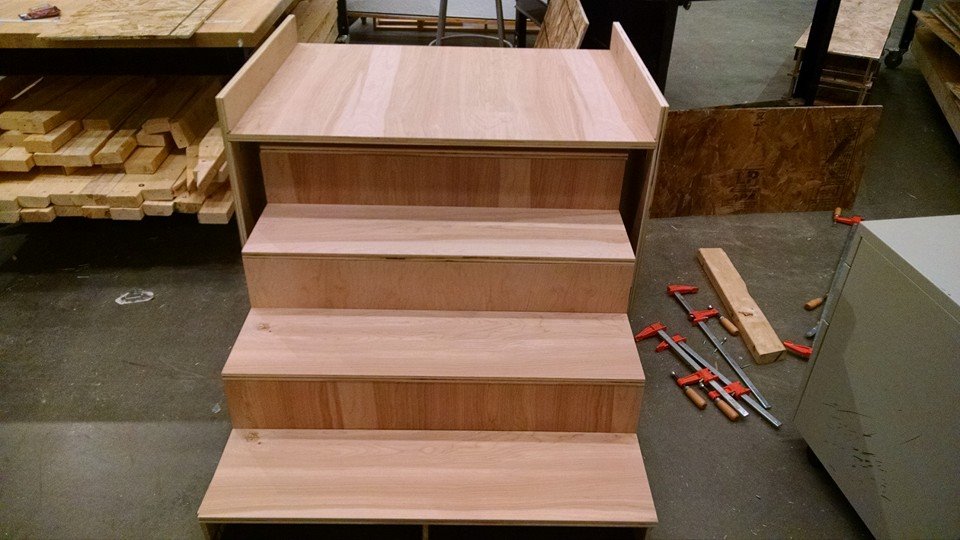
I then spent some time smoothing the edges with sanding paper. For edges, it was more suited than the sanding machines. A great tip I got from Didi (a very experienced maker and a TA) was to attach the sanding paper to a small block of wood that I can grip. This simple tip was surprisingly effective!
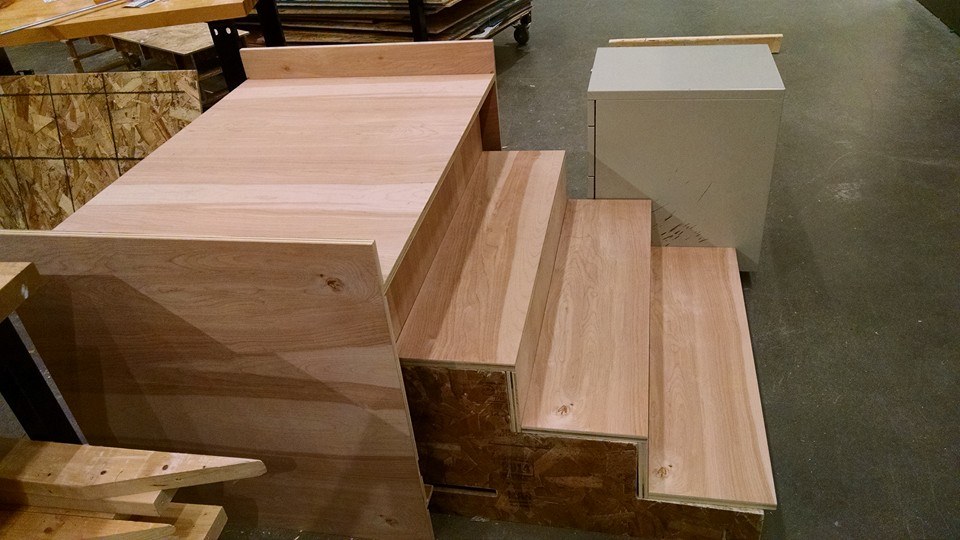
Since I'm making a bed, I needed it to be robust - so I decided to use corner brackets instead of any type of press fit. Due to the many parts, this has turned out to be an extremely long process.
After spending 3 full days at the shop, I have almost finished assembly the major pieces, but I still didn't get to attaching the stairs' base with the wheels, and the sliding wheels along the frame.
Here's the interim result, which I'm quite happy about!
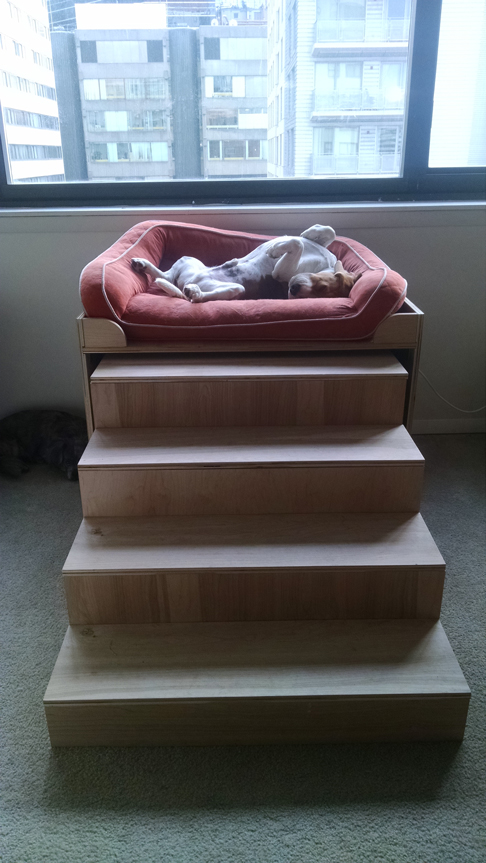
UPDATE: After a lot more work (about a week later), I was able to finish the project. I'm VERY proud of the result. While writing this update, my dog has been using his high-rise bed with the stairs for almost 2 months now, and he loves it!
Here's an image of him sleeping in his fancy bed. He also likes to look down from the window, which he now can easily reach.