
Assignment 1: Make a Construction Kit
A few weeks ago, I got a free coffee table that I decided to use as a desk for the free computer I found not long after (it was a good week). Unfortunately, all the chairs I could find were too tall to comfortably sit at the table. So for my cardboard construction kit, I decided to make a better sized chair!
I decided I'd do this by using pieces of interlocking cardboard to form a strong, three dimensional grid structure.
Solidworks Model
Using a couple of measurements from my coffee table and existing chairs, I designed what I wanted the shape of the chair to be in Solidworks. I wanted the chair to be slightly curved on the seat and the back for it to be more comfortable - however, these details turned out to be a bit of a waste of time. Because the resolution of the final model is limited by the number of cardboard cut outs used, these details were mostly lost but took more effort to make since every single "slice" of the chair was slightly different.
123D Make Model
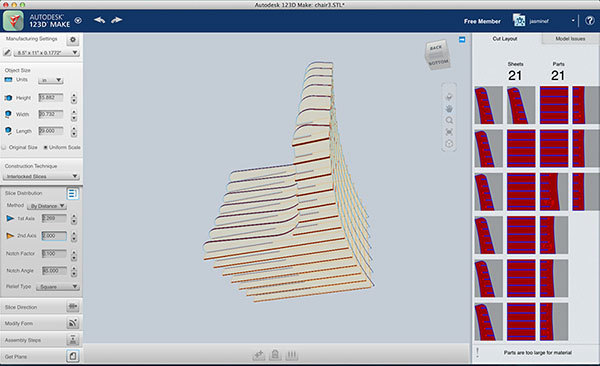
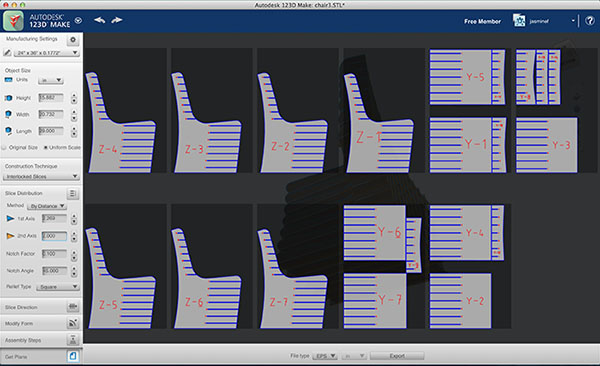
At this point, my initial plan had been to manually create cross sections of the model to figure out the 2D pattern, which would have taken a great deal of time. Fortunately, my labmate told me about Autodesk 123D Make , a free program that makes 2D slices out of 3D models. It was exactly what I needed!
However, there were some difficulties. 123D Make is relatively new, so I had difficulty finding documentation or tutorials. Additionally, there's little ability to customize where the slices go for unusual models. The image below shows my chair sliced up, but the problem is that I want the slices to curve around with the profile of the chair. What I wound up doing to work around this was creating three individual models, with the intention of concatenating them in Illustrator.
 |
 |
One mistake I made at this stage was not figuring out how to adjust the width of the slices - I simply assumed I would want to adjust the tabs in Illustrator or Inkscape later on, since I'd have to use one of these programs to edit the slices in any case. This came back to bite me later.
Illustrator and Inkscape Models
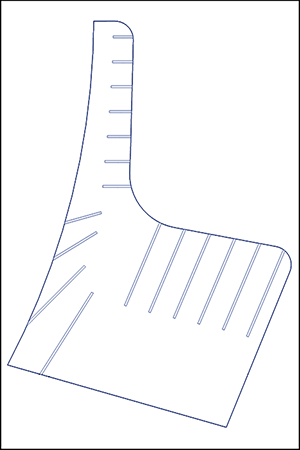
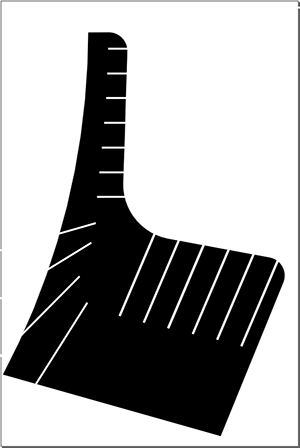
My next step was to modify the files in Illustrator. To get the slices to curve around with the chair, I wound up manually overlaying the different slices from 123D Make. This was not especially accurate, but fine for the purposes of this design. However, in the future, I would probably want to find a better way to do this.
I was unable to figure out how to find the Illustrator equivalent of the "clone" tool in Inkscape, so I decided to give Inkscape a go for adding in the tabs. I wound up manually overlaying the tabs on top of the existing ones from 123D Make. This turned out to later be a mistake, since when I later had to shrink the tab sizes, the old tabs were no longer covered by the new ones. I didn't realize this until I'd cut my first two parts. Then I had to go back and adjust the file by covering up the old tabs.
 |
 |
Lasercutting
At last I was ready to lasercut! Or so I thought. I wound up having to make further modifications in CorelDraw, since it automatically resized my image. Fortunately, this was not too difficult.
Along with Anders, I made a small sample of tabs so I could figure out the size I needed for the press fit. If I were to do this project again, that would have been the first thing I would have done, and then I would have inputted the required thickness into 123D Make. I also decided not to add the bevels to the edges of the tabs for aesthetic reasons, although it made assembly a bit more difficult.
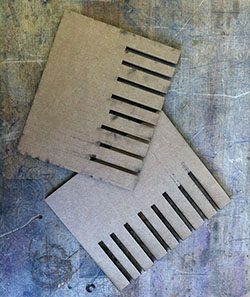
|
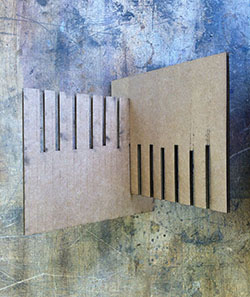
|
Lasercutting so many parts wound up taking a long time - about five minutes per sheet of cardboard (and I used 13 sheets!). However, the biggest time sink was modifying the files on the fly to account for earlier errors.
Assembly
After about half a day in IDC modifying my model and laser cutting it, I finally had everything I needed for the assembly.
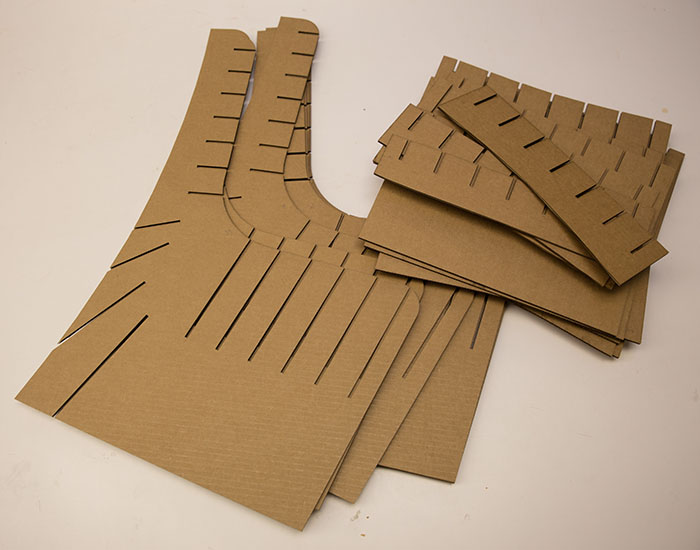
|
|
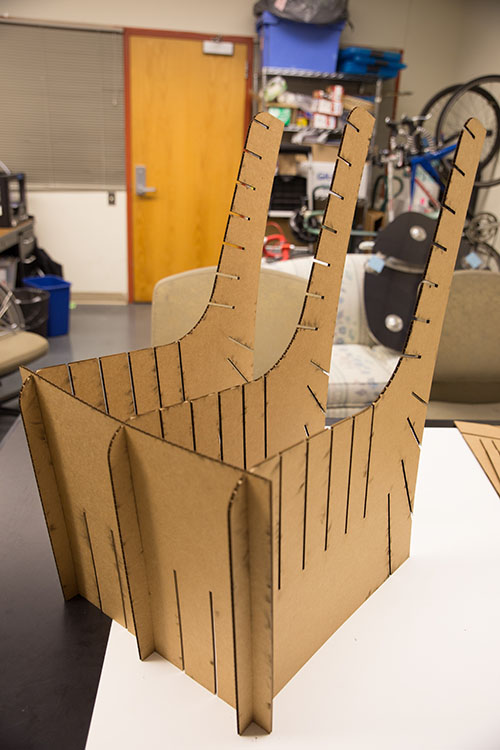
Assembly took longer than expected because the press fits were just a bit too tight. Although I'd tested it earlier, I hadn't thought about the fact I would be trying to align multiple tabs at once. This made pushing the parts in very difficult - and also pretty much irreversible. In fact, I accidentally swapped two of the slices, and now there's no way to undo it because the press fits are so tight!
Fortunately, my mistake is unnoticeable in the final result:
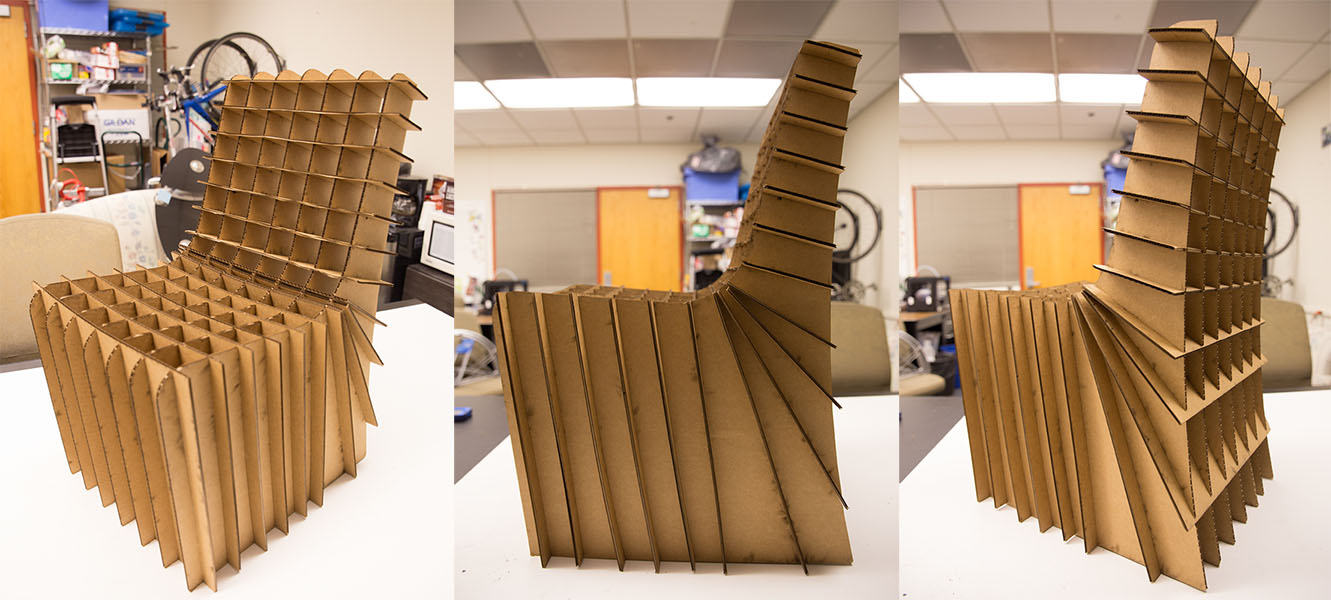
Because I was in a bit of a rush to finish the entire project on time, I didn't actually calculate beforehand whether the chair would be able to take the force of a person and went with the broad assumption that cardboard is pretty strong if the force is in the long axis.
Allison kindly tested and validated this hypothesis for me:

Although I'm pretty pleased with the chair, I made a lot of errors on the way that I had to cover with a variety of work arounds. I wound up using five different programs to create the 2D pattern, which is a bit silly. Additionally, the design is somewhat wasteful in terms of the amount of cardboard used. That said, I now have a chair to go with my coffee table!