
Assignment 4: Make Something Big
This week's assignment was to make something big using the ShopBot CNC router. My original plan had been to experiment with the effects of back lighting plywood by machining it down to a very thin layer. However, I decided to put this on hold in favor of learning how to use the machine at the most basic level before I had to do anything that would take a bit of experimenting and iterating because the machine time was so limited this week.
It turned out to be a good idea to try something that didn't require much iteration this first time using the machine. I had a lot of difficulty with this project, more than any other so far. On the other hand, I made almost every mistake in the book, so the next time I use the ShopBot I feel pretty confident I'll know exactly what to do and not do.
CAD Model
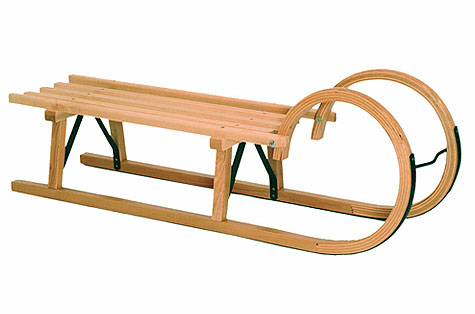
I decided for my project to build a sled. Being from California, I've never actually ridden or even seen a real sled in my life, but I thought it'd be a fun thing to try anyway. I based my model off the horn-style sleds I found on Google.
|

|
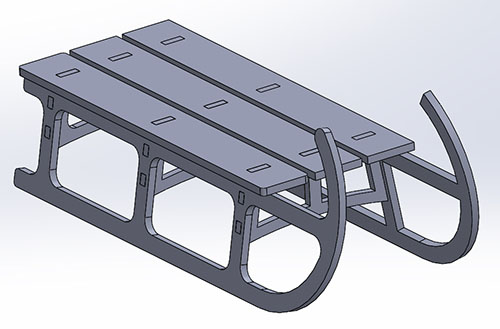
I decided to make the plywood for the skids 3/4" and the struts and slats 1/2" to cut down on weight. This was a somewhat arbitrary decision based on what seemed thick enough, and I wish I'd taken the time to put a bit more thought into the design. It turned out to be very lightweight in the end, so I could have made it a bit beefier.
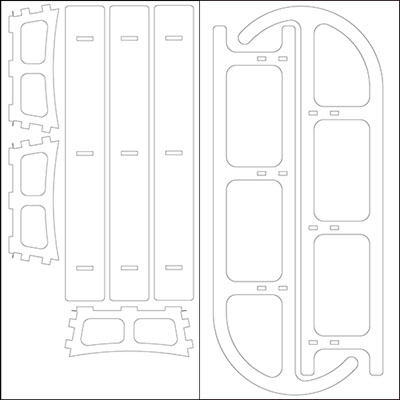
I exported my files to Adobe Illustrator and used that to arrange them and export them to the ShopBot (which can read Illustrator files).
Buying Plywood
I didn't think this step was so important, but it was. I decided to buy my own plywood rather than using the OSB provided, since I thought that material would be too flimsy for a sled. However, I didn't really know what I was looking for going into Home Depot. Originally I'd planned on getting the birch plywood because I knew it was fairly nice. However, an employee there recommended I go with something a bit cheaper, since he said the veneer would peel off the furniture quality birch and I'd have to paint it with something waterproof anyway.
Although this made sense, the plywood I used had so many surface imperfections I wound up spending a long time later trying to fix all of those. I'll get back to that later, but I think now that I understand how to use the ShopBot, next time it would be worth investing a bit more on better plywood. For this first project, it was probably a good idea not to.
I bought two 2'x4' sheets and manage to just fit all the parts on those sheets (it was a bit snug). The actual thicknesses of the two pieces were closer to 0.72" and 0.45", but they varied widely - enough so that I didn't think that designing for a perfect press fit would make sense. So instead, I made the slots for the plywood about the average thickness with the intention of sanding where it was too thick and glueing where it was too thin.
Machining with the ShopBot
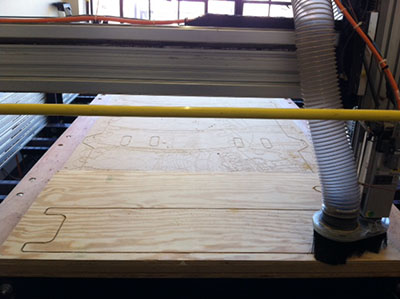
This is where things started to get difficult. I started on Sunday evening with a partner, set up all the toolpaths in V-Carve, and manually fixed the part down using the hand drill. Because the plywood was a bit warped, I put in a few extra screws in the center of the part. I measured the location of these screws using a measuring tape rather than programming the ShopBot since it was only two holes. However, what I didn't catch until after I'd drilled those holes was that the origin in the program had an offset. Fortunately I caught this before starting the machine and fixed it - and luckily the holes didn't intersect the parts, but they came very close, so I redrilled them.
At this point I was almost ready to go. However, when I tried using the ShopBot program to jog the machine out of the way so I could reach the last two holes, the machine began to jitter and vibrate horribly. A few of us looked at the machine and couldn't figure out what was wrong. So we sent an email to Charles, and I give up for the day.
The next morning, I came in and this time the machine jogged with no problem. I never did figure out what the problem was, because Charles wasn't the one to fix the machine, and I don't know who was. I suspect that it was on some unusual lock setting that we just hadn't been taught about.
Once again, I refixtured my part and thought I was ready to go. I'd set up the toolpaths, fixtured the part, put in the 1/4" downcutting tool (I wanted a nice finish), put the muffler back on and hit "Go". The ShopBot started, but as soon as it touched the plywood, it stopped, left a horrible mark on the plywood, and told me to quit the job.
I was using the machine during on-hours so although there were people in the shop, there was no one from our class. In fact, after asking around, there was no one who actually knew who to use the ShopBot. I didn't want to try running the machine again, so I decided I'd just have to wait the few hours for Charles to come in and help.
A few hours later, Charles hadn't yet showed up, but another classmate had. We decided to try running the machine again - and this time broke the tool. However, after going over everything step by step again, we figured out what the problem was. We forgot to hit the green button to actually start the spindle - and neither of us had noticed because the muffler blocked the end mill from view. Lesson #1: Make sure the spindle is actually running!
So we went to run the machine again (this time with the normal upcutting 1/4" end mill), and this time had a new problem - the ShopBot thought my piece of plywood was oriented differently than it actually was. This is worth something keeping in mind - we solved this problem by setting the size of the canvas in V-Carve to the size of the entire table, which avoided any confusion. Unfortunately, we'd already made a first cut on the board, so we had to reposition everything to avoid it. Lesson #2: If you're unsure of how the parts should be oriented, cut air to check first!
At some point during this process, David Costanza came up to make sure we'd gotten things working and gave us some really useful advice. One bit of advice he gave us was the zero the tool at easy to remember numbers, and WRITE THOSE NUMBERS DOWN. This was a great bit of advice that I forgot to do on the second piece of plywood - I'll get back to that.
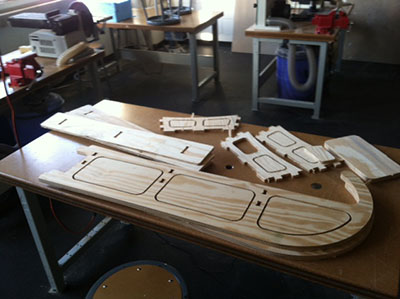
So, after many hours of failure, I finally managed to get the first piece of plywood cut. Huzzah! For the second piece, we fixtured it down same as before, set the toolpaths, etc. However, this time, the piece was fixtured in a slightly different place than the last one, so we rezeroed it. I forgot David's advice about writing down the X,Y coordinates. This wouldn't have been a problem except that...
As we ran this second piece, one of the already cut parts popped out of its tabs and began vibrating somewhat alarmingly. While I went to get something to weigh the part down, someone else hit pause on the machine. And then when I went to unpause, I forgot Lesson #1 and didn't hit the spindle button! The machine tried to start machining, and then immediately quit. In the process of aborting, it lost the X,Y coordinates for where it had zeroed. This was part of the way through the part, and so we wound up having to re-zero by eye. We were very close, probably to about 1/5-1/10" in each axis, but enough off to make the tabs slightly misaligned, and to leave a kind of ugly step in one of the cuts where the machine recut that area. Lesson #3: Write down your X,Y zeroes.
But at least, I finally managed to cut the darn thing.
|
|
Fixing the Plywood
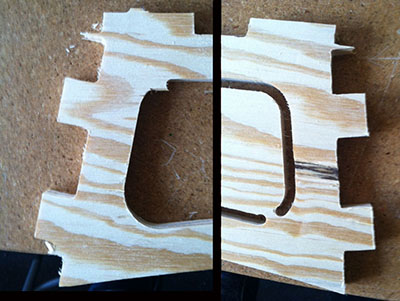
I'd mentioned earlier that the plywood I used had a lot of surface imperfections. Well, after cutting it, there were even more from where the wood had pulled up, and then I was sloppy popping the parts out from the tabs, which pulled up more wood. (I'd used tabs that were 0.15" which was fine, but just thick enough that I really should have used a saw to get the parts out). Lesson #4: Be careful when removing tabs.
In addition to these surface imperfections, I spent about an hour simply filing away the remaining pieces of the tabs, and also filing the inside corners of the tabs to be right angles. I'd created dog bone fillets for the slots, but the corners of the tabs were still rounded and had to be flat to fit all the way into the slot. I also had to do a bit of filing for the tabs that were misaligned to make sure everything fit together right.
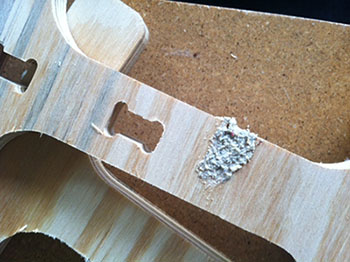
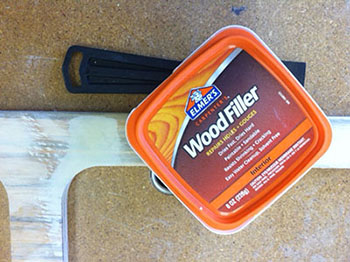
I tried filling in surface holes/pockets in the plywood by using a mix of sawdust and glue. It was somewhat effective, but not fantastic, and eventually I just caved and bought some wood filler which worked great. That said, I would saved a lot of time if I'd just used nicer plywood to start with. Lesson #5: If you're pretty sure you aren't going to screw up the part, use nice plywood rather than trying to fix up low quality stuff.
|
|
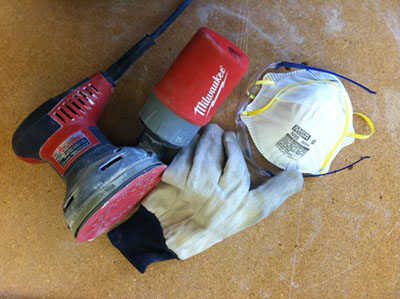
After all that, I sanded everything down with a handheld orbital sander. For anyone who's never used one - you should wear goggles, a mask to protect from the dust, and a glove on the hand holding the part down so you don't accidentally cut yourself.
One thing I didn't think of was that sanding the surface slimmed the tabs down a little - so some of the tabs actually wound up being a bit loose in the slots.
Putting It All Together
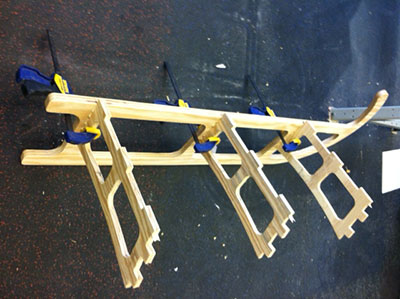
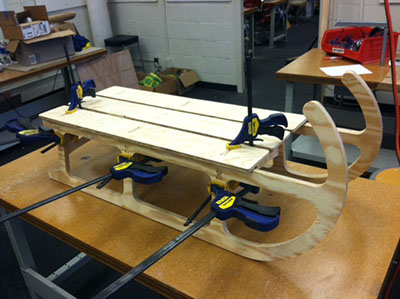
Finally, the whole thing was ready to be put together (yay!). I used wood glue to secure everything, especially where the tabs/slots were a bit loose. I used a rubber mallet for tabs that were harder to get in (with a sheet of paper under the mallet so I didn't leave marks on the wood - this didn't matter too much though because I plan to paint the whole thing). I used clamps to hold everything in place while drying.
|
|
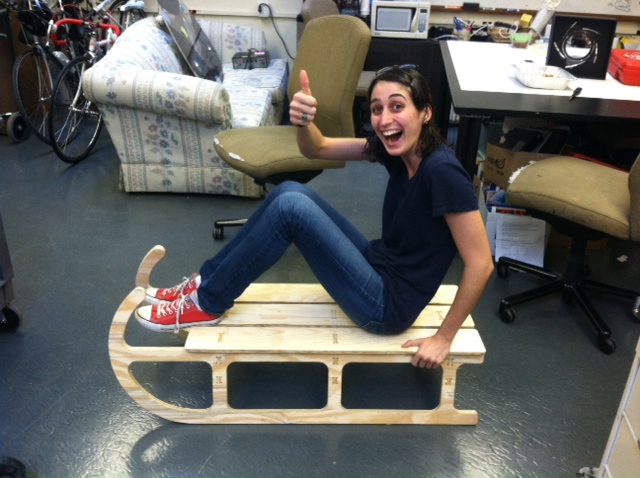
Here's the sled! As you can see, it holds my weight just fine. However, I don't know how it'll hold up to crashing - the horns a bit flexible moving side to side. To be fair, I don't think I'd hold up well to crashing either.
What's Left
The sled isn't quite finished. I still need to paint it with a waterproof varnish, and put either metal or PVC rails on the bottoms of the skids. And then of course, I need to test it out once it snows. Finally, Sarah Falcone and I need to have a race!