Project 05
Electronics Design
This week I focussed on learning how to use Eagle. A seemingly difficult application, which I then quickly determined was very simple, and then hours later settled on it being unfortunately difficult given its simple design tasks. It is clear that the real benefits of Eagle are not in its ability to draw components and connect them, because in all honesty, there are much better ways to do so, but the real value is in its ability to be your checks and balances. Design rules such as trace width or how many traces you allow to run under an IC can be specified for its autorouter and it will do its best to find a solution given your constraints. So is autoroute your best tool? NO. It can be useful, but more often then not, it can create a time consuming mess to clean up. Don’t be afraid to start a new many times to get an arrangement you are happy with.
Here is a wonderful tutorial on Eagle, which covers much more than I will cover here. I am happy to share the quick and dirty way to get in over your head with Eagle, but it is enough to start, and that is handy.
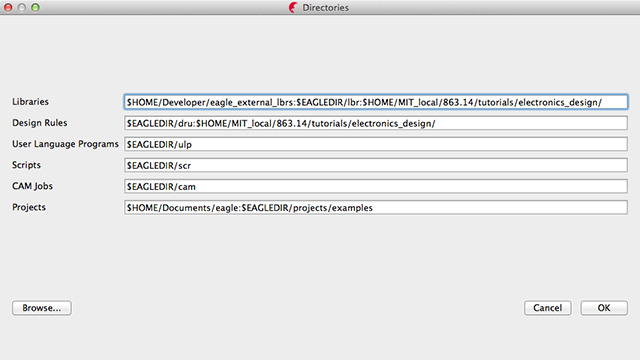
Directories
To keep things organized in my file system, I added the paths for the shared class library as well as a folder of my own for external libraries, like those from sparkfun and adafruit.
Shortcuts
Since the interface is a bit cryptic at first glance, here is a little cheatsheet. Note: After using the software for an hour, you will type the tool you want instead of clicking on the tool you want. Simply typing move (or even “mov”) will change your tool to the move tool. These were my most used commands. (including add)
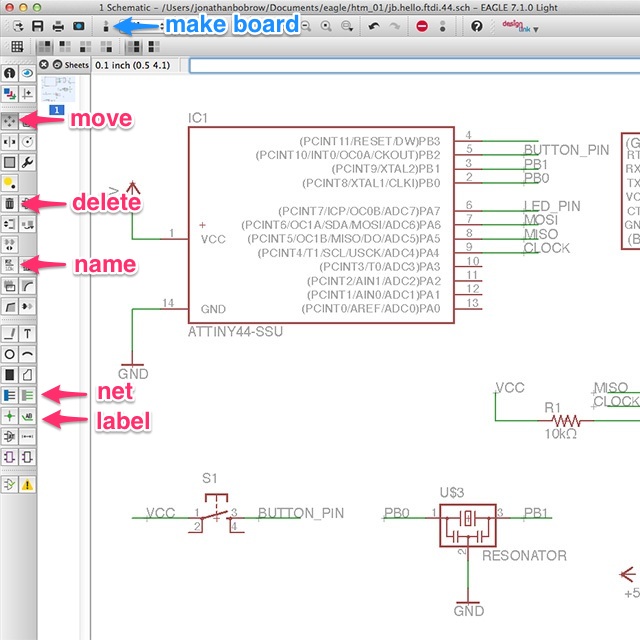
My most used commands:
Schematic
- add
- move
- net
- name
- label
- delete
Board
- route
- rip
- show
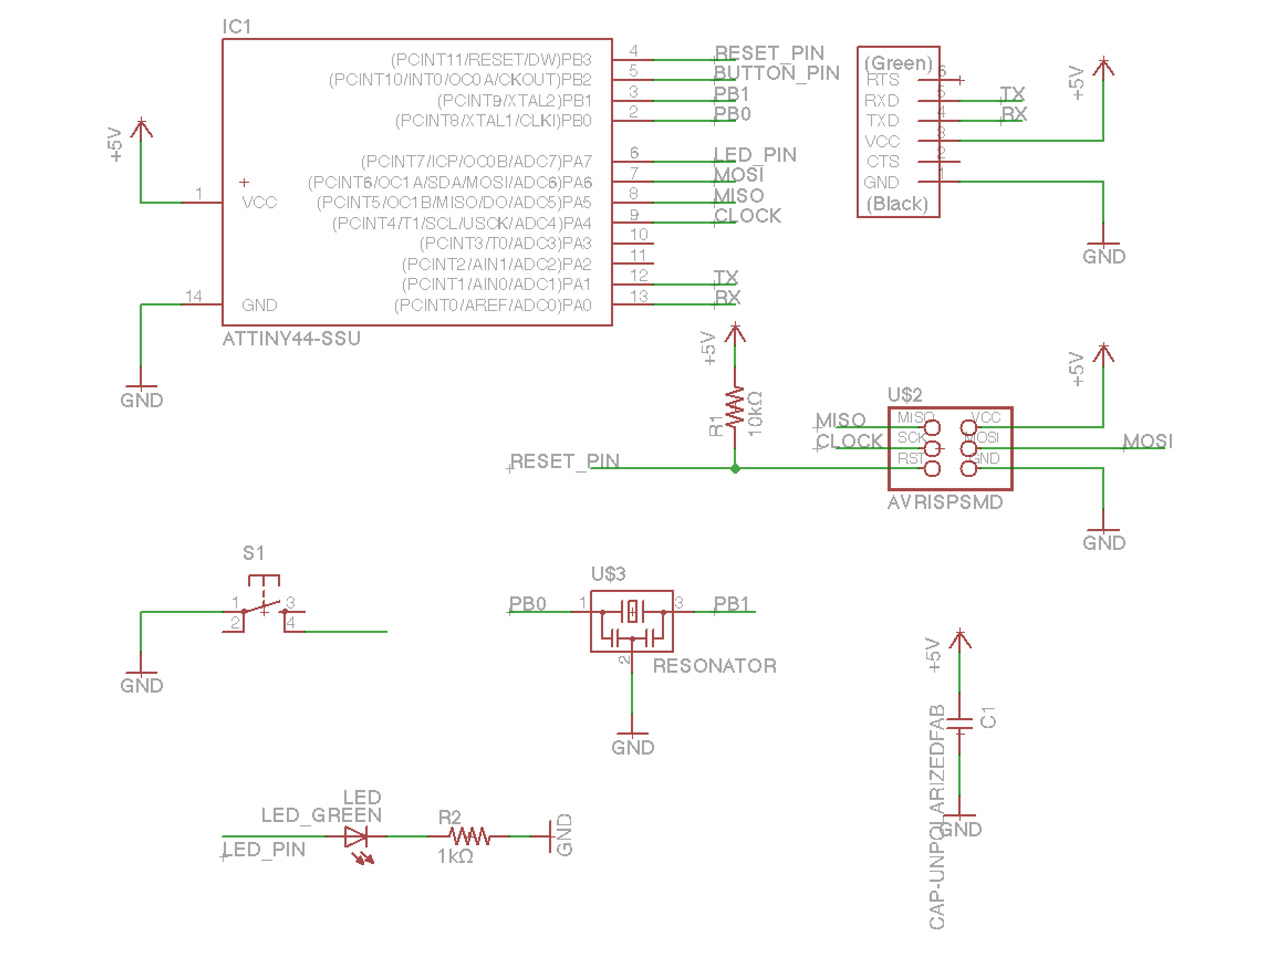
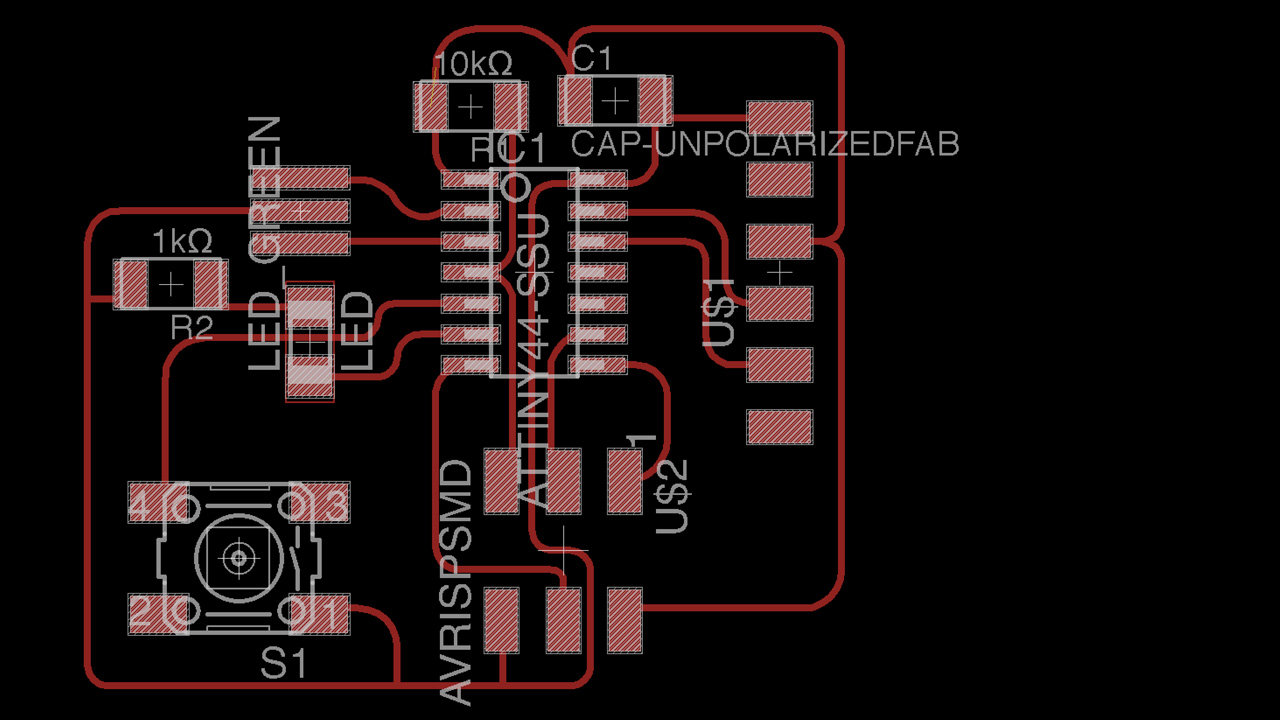
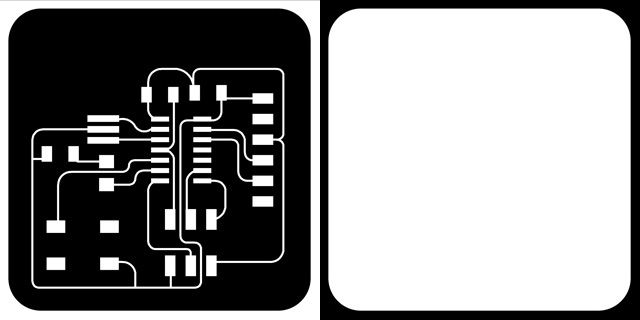
Final PNGs @ 1200dpi
Making the board
Since the fab modules are now supporting multiple machines, it is important to load the proper settings before milling. Here is an image of the path ready for milling.
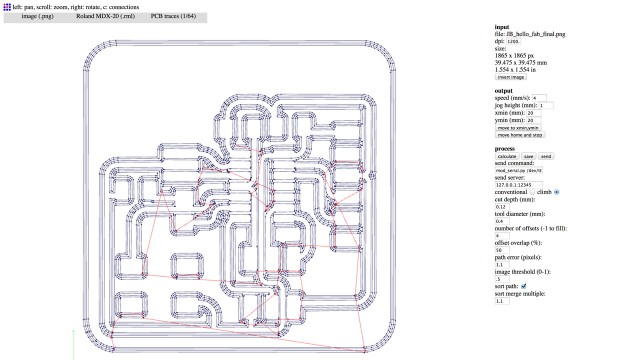
Note: there is a sending protocol over USB and the one the Modela uses is Request To Send, Clear To Send… aka: rtscts this suffix is necessary to get the modela to listen properly.
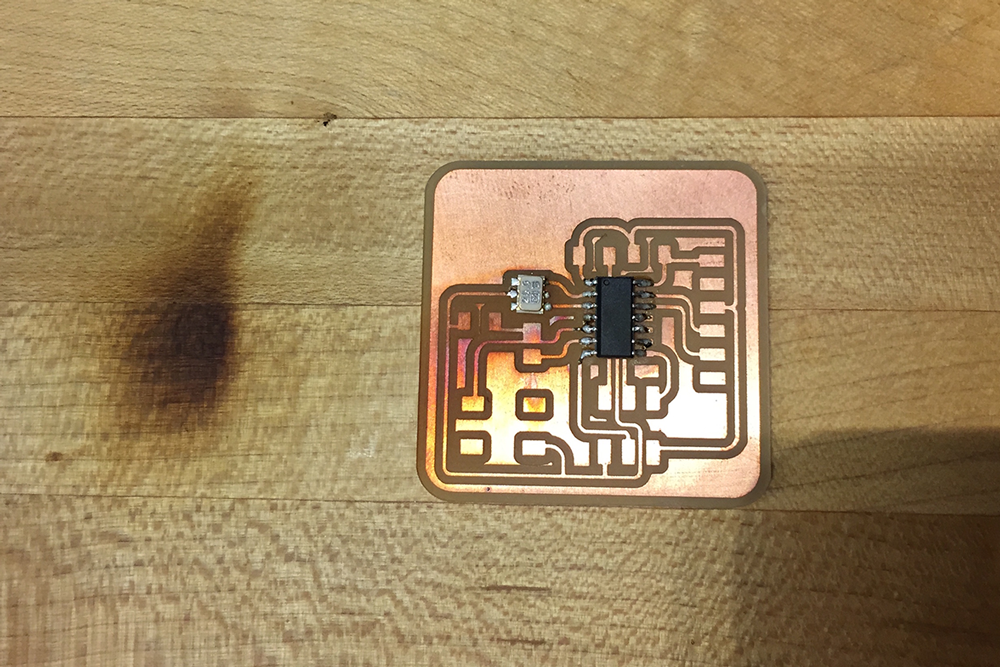
Stuffing the board
Since the resonator was such a pain to solder last time, I tried the hot air gun to keep all of the solder wet while I placed the resonator. Note: Hot Air Guns produce very HOT AIR. Do not burn your tables, and definitely don’t burn other stuff. This happens relatively quickly, so be cautious and think about the surface you are doing this on.