I noticed that Dan Chen had a pretty sweet animation from Sketchfab, so I decided to include one as well. If you'd like to make them too, you need to install the SolidWorks plugin. You can find instructions by clicking here
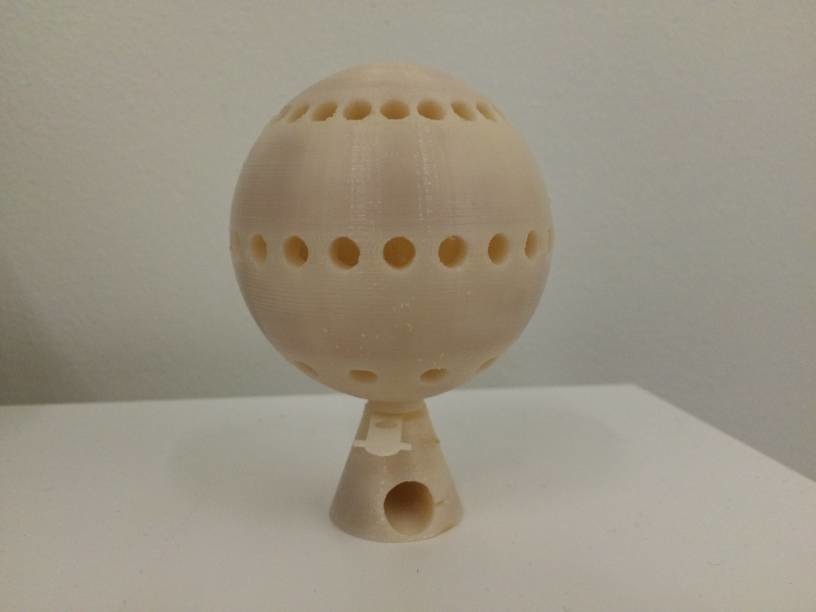
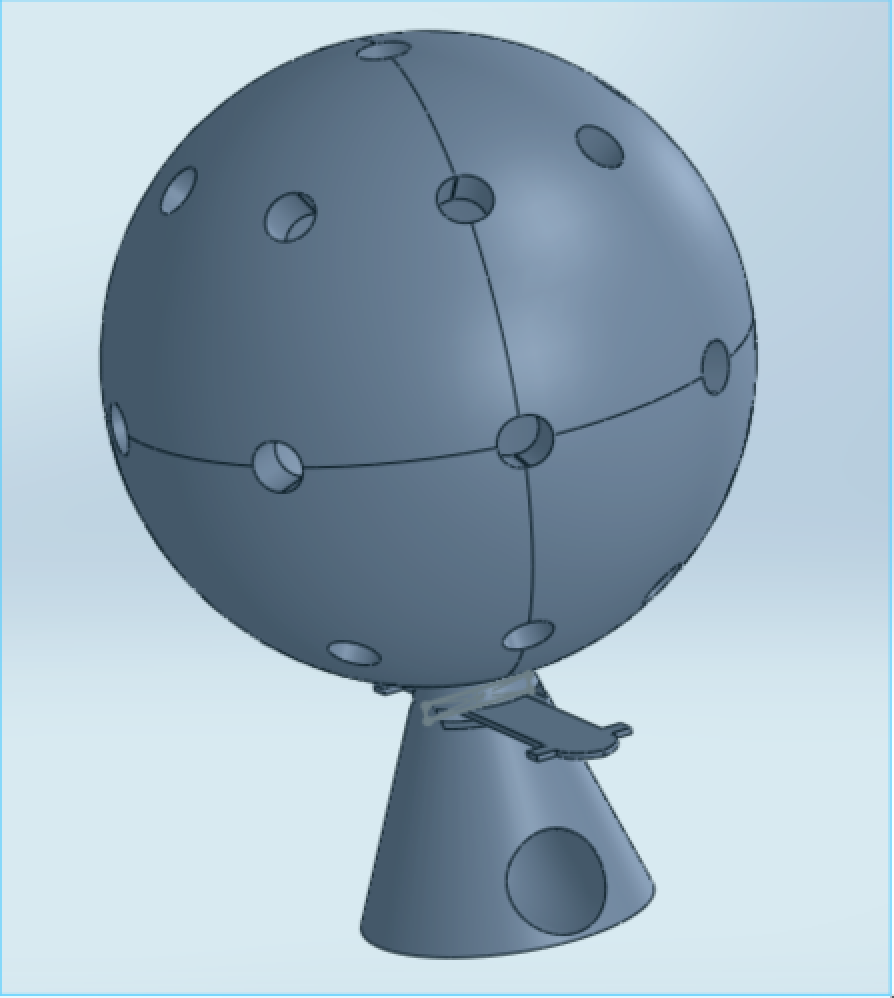
This week, I decided to focus on improving my skills working with curved surfaces in SolidWorks. I originally thought it would be cool to 3D print an object that is fully enclosed (impossble with standard design tools). I followed [this tutorial] for designing a thorny sphere, and using the techniques I learned for split lines, reference planes, and linear patterning, I was able to create a sphere with many holes in it. I made a base cone and figured out how to do a swept cut through the cone for the candy to roll out. In order to do a swept cut, you must draw a shape that is contained on a surface, draw a line along which you want the cut, project the line onto the shape using the splitline feature, and then select the shape as the base shape and the line as the path. I was also able to cut a slot for a slider on the cone in a similar fashion.
Some things to watch out for:
- Don't make the object size too large! Mine was originally 4inx3inx3in, which would have taken 29 hours to print. I had to shrink things last minute by increasing the space around the slider, shaving off a lot of the cone base, and then shrinking the entire assembly to 75%.
- If you want any part of your object to move, make sure to leave sufficient space (.015in) on all sides of the object in the assembly. If in your assembly you place the object in the right spot (with some concentric mates, perhaps), the STL file will output appropriately

Originally, I wanted to scan a small compressed air engine I built a few years ago. I thought that I'd sequence together a few scans to create a 3D animation of the object moving. However this proved extremely difficult for two reasons: firstly, part of my machined model was transparent, which (obviously, in retrospect) was not well detected by the laser used by the Sense Scanner. Secondly, the image clarity was only ok, making me skeptical how well an animation would have turned out. I took someone's advice from a previous year to use a lot of reference objects scattered around my primary object to help orient the scanner, but eventually gave up. Here's a view of the transparent elements of my original object that caused the scanner to fail.
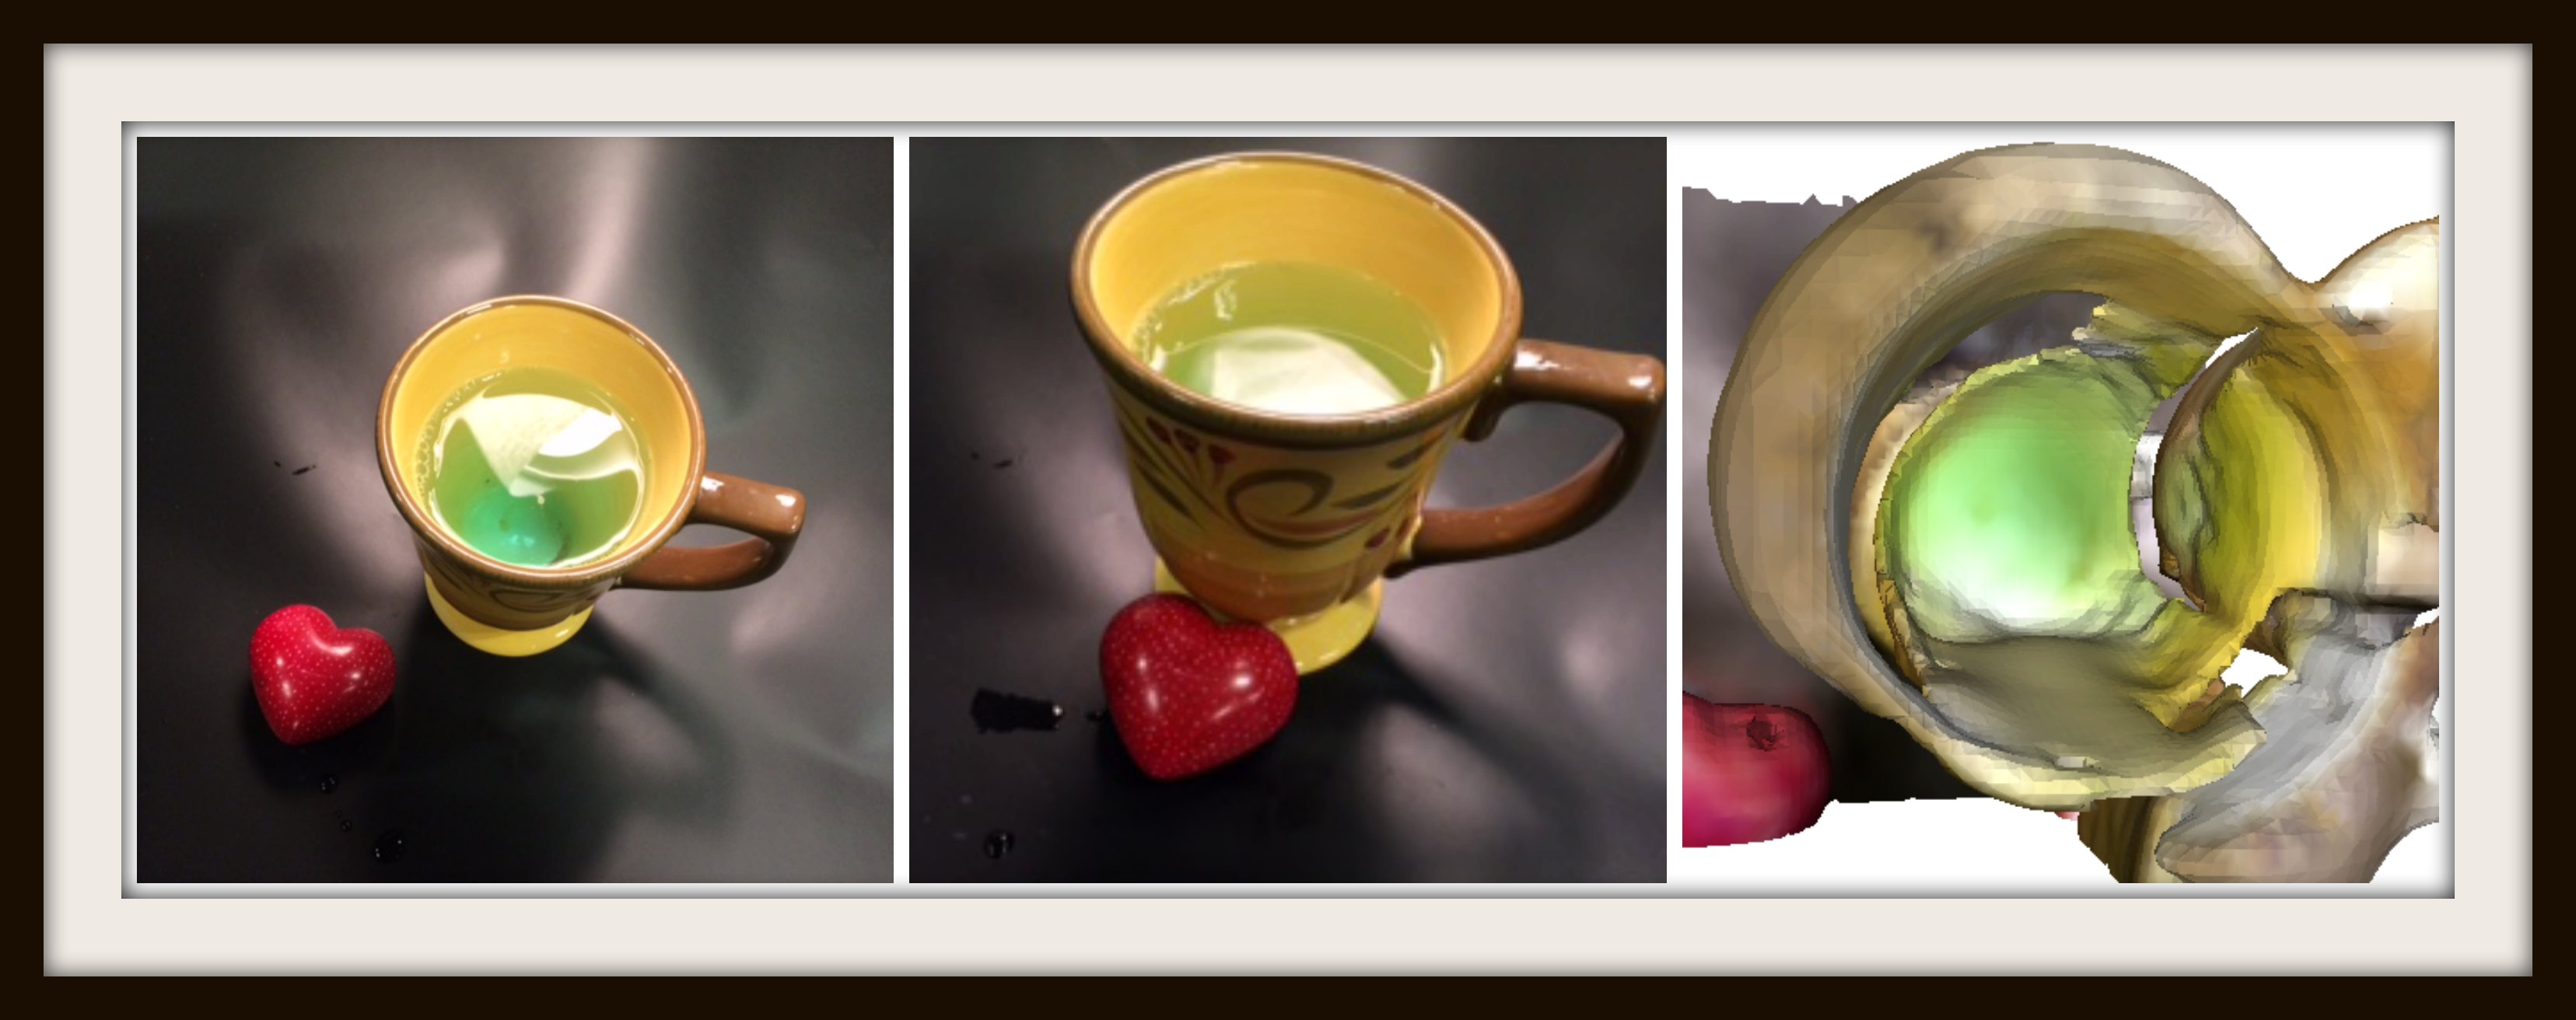
In my quantum computation course we have been discussing time travel of photons in singlet states around loops. My professor drew timelike wormholes as mugs this week, (where the handle is the loop with timelike separation causing particles to travel back in time). I tried my second round of scanning right after class, and mugs were on my mind so I thought I'd scan a mug.
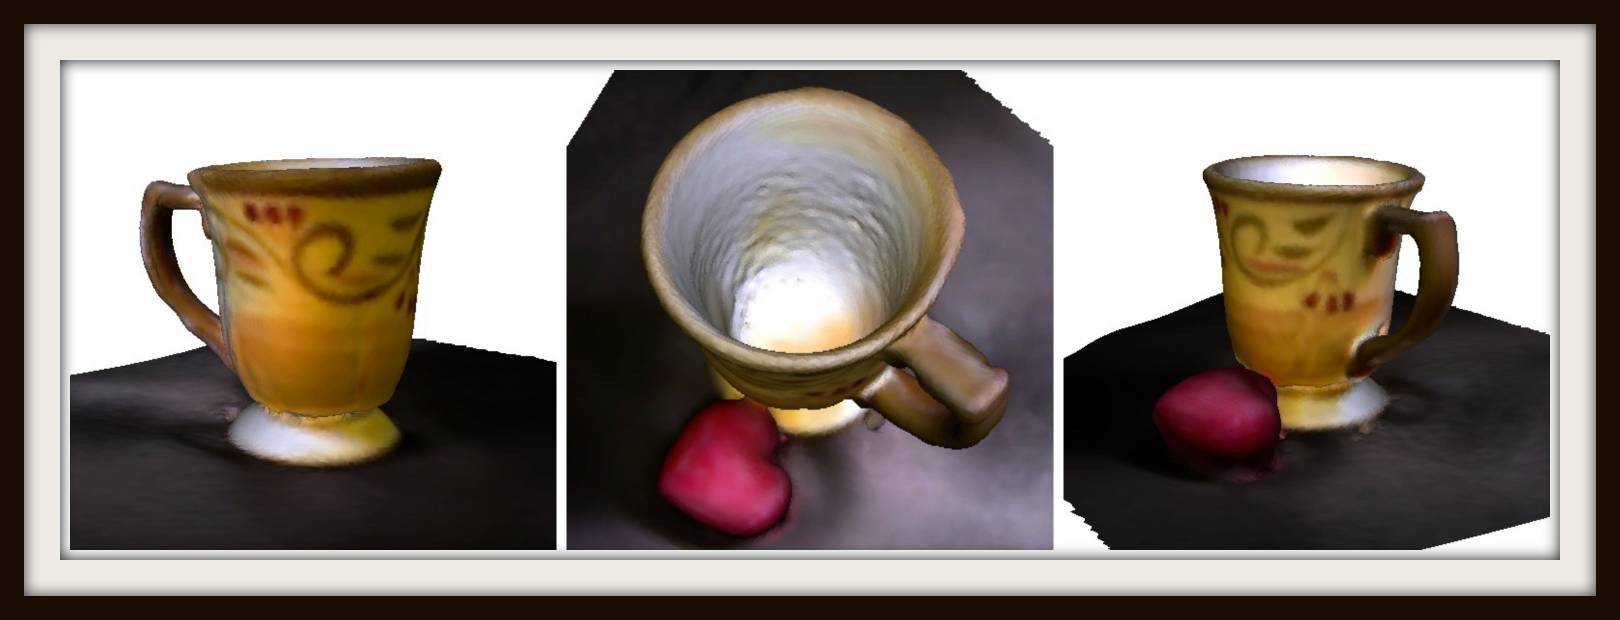
Based on my failed attempt to scan something transparent, I also figured I'd explore how water is captured as more color (soap) is added. I was able to get a pretty nice scan of the mug (and a heart, an old present I got for myself. I figured hiding an object in the image is a benefit of 3D imaging!) When adding water to the mug, the water was not captured in the image at all (as expected) When adding a bit of color to the water, the color appeared to be projected onto the inner surface of the mug, and the scan wasn't as clear (possibly do to some scattering as the laser hits the water?)