Juliana Cherston

How To Make Almost Anything

Circuit Board Fabrication

For this week's project we all built microcontrollers based on premade designs (I used Valentin's design) Therefore, I'll focus this page on challenges I encountered and overcame in the process of printing, soldering, and testing the board.

  • Project: Circuit Board Design
  • Date: September, 2014
  • Skills: Circuit board design, soldering surface mount components, programming board
Project 01a
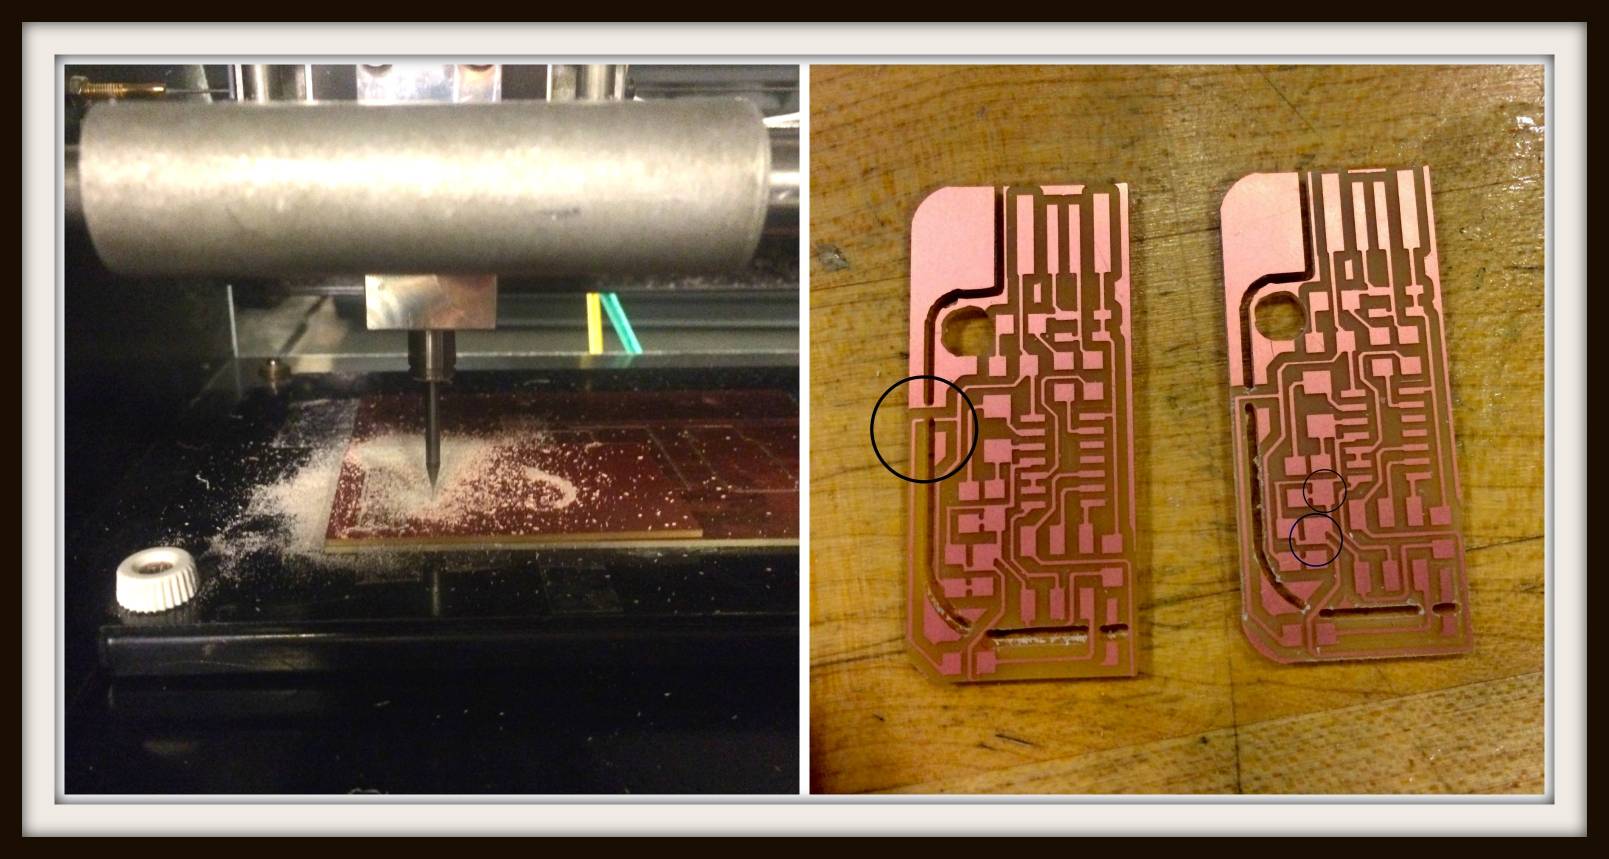
First, I milled my board based on Valentin's design. After replacing the 1/32 milling tool with the 1/64 milling tool, it appeared from my vantage point as though the milling tool was going over all of the 1/32's milling job! I got nervous about this, stopped the machine, and removed the board, only to find that it appeared to be doing what it was supposed to. I tried my best to replace the board and continue the job, but couldn't place the board back precisely enough, and wound up cutting through certain traces such as the one circled in the image to the upper left. Lesson: don't remove the board mid job! I then milled the board again, and thought everything had gone smoothly this time around. I'd later learn that there were at least 2-3 shorts on this board caused by improper milling of the design (two of them are circled in the upper right). Lesson: once your board is printed, take a GOOD few moments to examine the board next to the schematic and make sure everything is printed as anticipated!
Project 01b
I went on and soldered all the components onto the board. At one point, a helpful fellow gave me some soldering pointers: I had been putting solder onto the iron, holding the component down with tweezers, and attempting to rub the solder onto the metal. Once you've got some solder in place, he showed me how helpful flux pens are, and told me to put the iron on the copper trace instead of on the component. This helps to reflow the solder and make it look nice and smooth on top. It also improves the reliability of the connection. I thought all was well, and went on to attempt to program the board. Problems galore! Palash helped quite a bit over the weekend (thanks, Palash!) He and Madeleine identified one short on Valentin's board which we cut out with an exacto knife. My board continuously seemed to program successfully on Macs, only occassionally program successfully on Ubuntu, and in both cases would subsequently *not* be recognized as a USB device when running LSUSB on Ubuntu or when navigating to the USB page on my Mac (Apple menu->About this Mac->More Info->System Report). I hoped that my 3x2 pin and chip were all connected appropriately and that maybe there was an issue with the caps/diodes/resistors that helped interface with the USB port. I checked all the connections with a multimeter, tinned the copper traces that were interfacing with the USB port (in order to get a more stable/reliable connection)...but more or less my board continued to only be programmable. Finally, Andrew helpfully noticed the shorts hiding under my components (circled in the milled circuit image above, but I didn't notice it then!) I removed the components and attempted to scratch out the shorts, checking everything with a multimeter. I placed new components in, replaced my chip as well for good measure, and attempted to program again with Jonathan. All three of our boards seemed to fail with my ISP programmer (with some flavor of a 'could not detect usb device' error). I stopped there. I still have some hope that my board is indeed functional, but given all the modifications I had to make along the way, may still just reprint the whole thing at a later stage. Or, perhaps I'll try once more to program it and it will miraculously work!