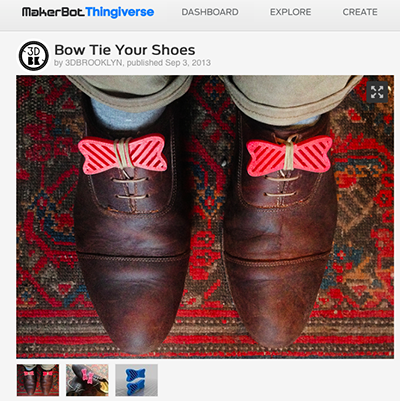
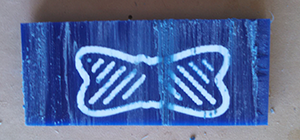
Step 1: Find/make a stl file.
This can also be a png file…but I went the stl file route. I first found a
downloadable .stl file on Thingverse from 3DBrooklyn (thank you!). Once again
Jose and I worked together.
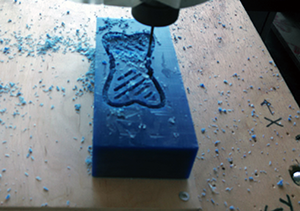
We first tried the modela to mill our machinable wax. The fab modules
weren’t communicating with the modela properly so we moved to the shopbot.
As Charles said, it can be just as accurate as the modela if you
slow the spindle speed. We didn’t do slow the spindle speed and it worked fine.
We kept it the same speed and followed the directions as we had used on the “Make Something Big” week.
The only difference: you glue the machinable wax to a scrap board and then mount
the board onto the board that’s installed for the shopbot. Also - use PartWorks 3D
or the fab modules - as you prefer. I found PartWorks3D to be a pretty simple format
to use. Again - refer to the directions if you have questions.
Step 2. Get the Shopbot ready.
Note: If you use PartWorks3D - be sure the X and Y on the software match the X and Y
on your Shopbot. I know it sounds obvious - but it’s easy to mix up. When the X and Y
was finally fixed, the Shopbot was off by 1” in the x and y directions for some reason. We
recognized that quickly, stopped it and started it again.
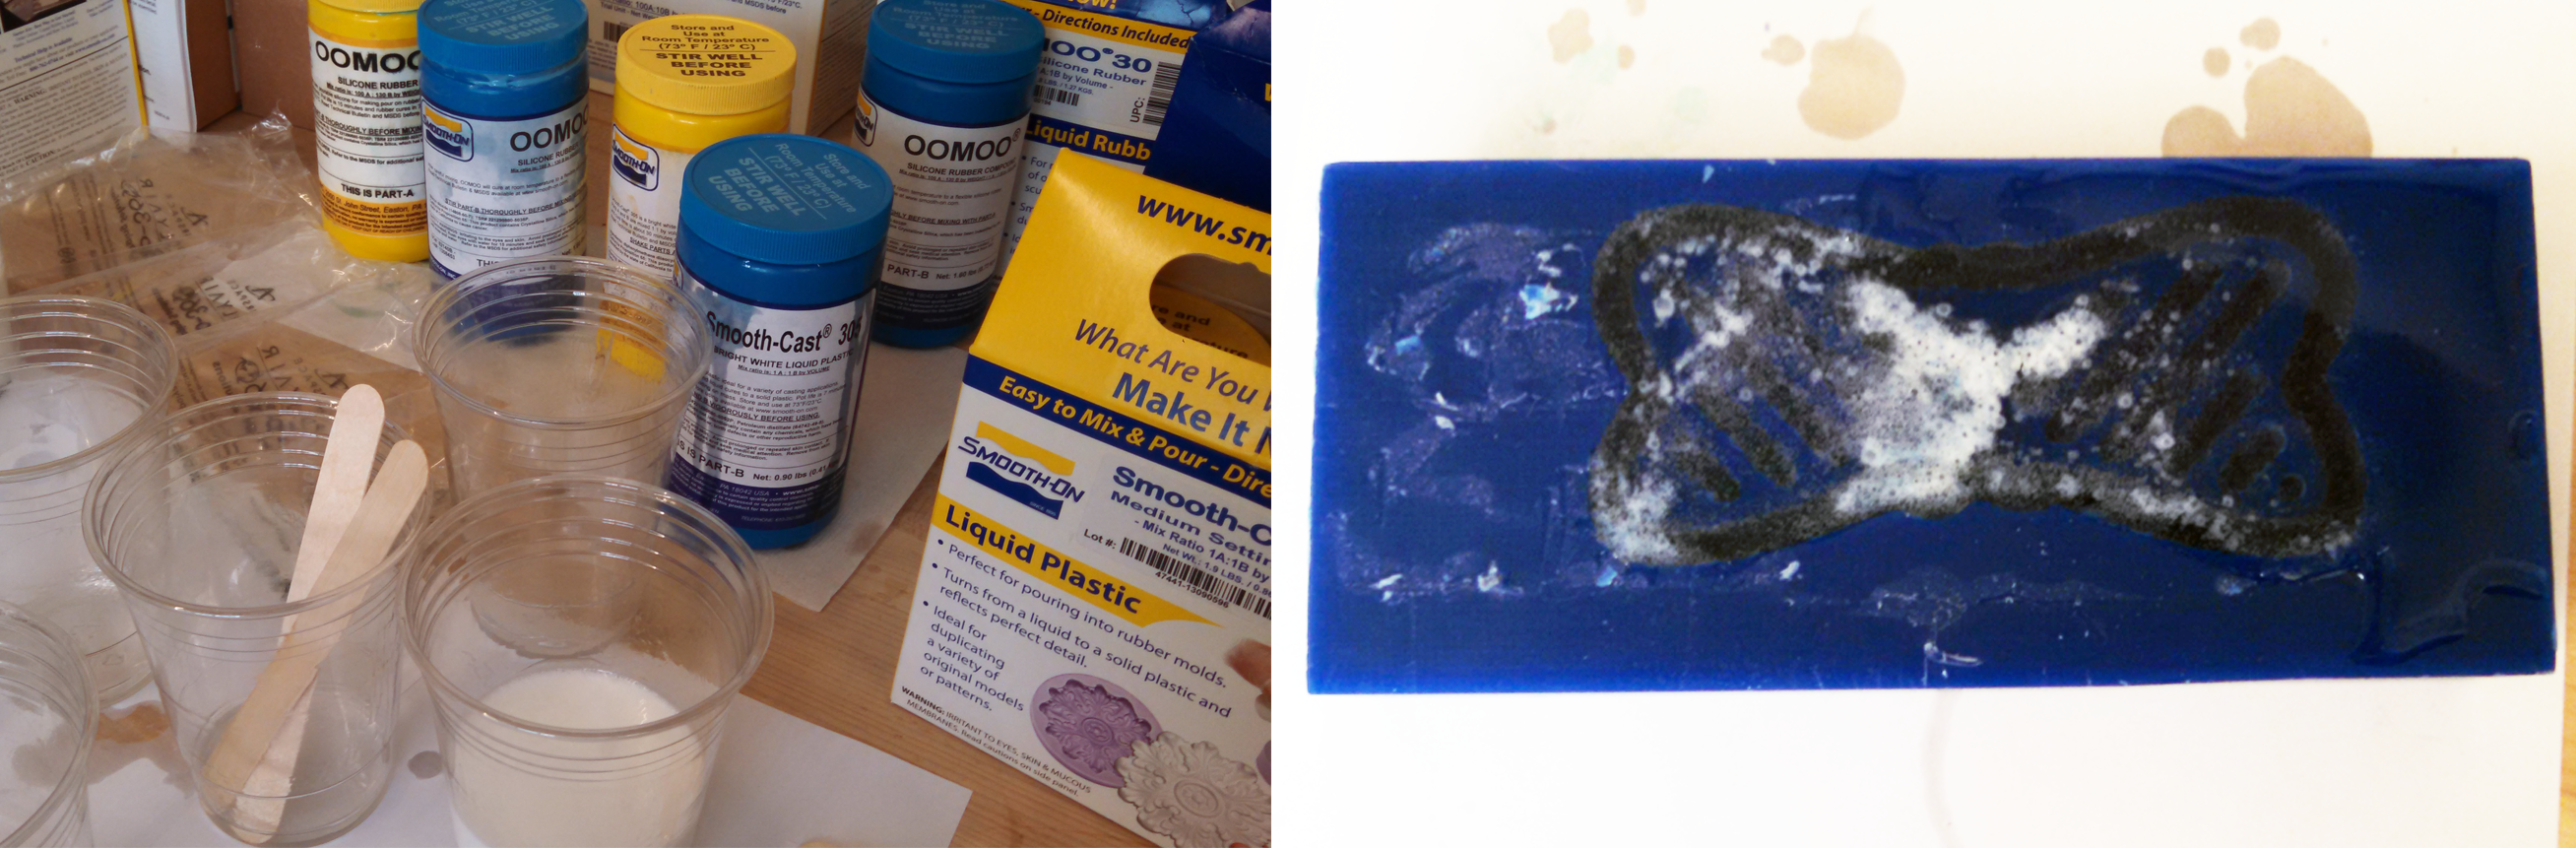
Step 3: Set up the Mixing station and mix the OOMO.
This part seemed easy enough. Set up the station. Ensure safety. Shake Part A and Part B
of the OOMO — and pour into Machinable wax mold. The OOMO that Jose was using ran
out - so I grabbed another part of the OOMO - or what I thought was the OOMO. It turns out it
was Smooth-on, which is liquid plastic — solid plastic! This threatened
the hard-soft-hard-soft rule of molding — i.e., generally it’s best to not put a hard material
in a hard mold.
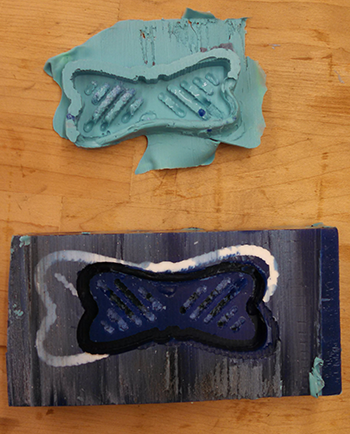
We thus rendered our first machinable wax mold useless.
Step 4: Fix the broken mold by cutting it in half.
Thankfully, there was still space on my block to cut another bow tie.
Once again, the shopbot helped in the carving. I fixed
the dimensions so that they would fit the half-depth — hoping they wouldn’t
cut a previously attempted bow tie.
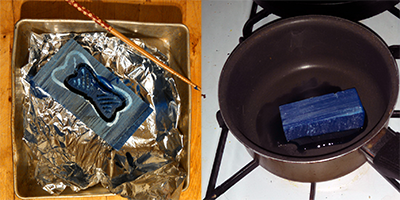
Step 5: Patch holes with melted wax.
Unfortunately, the new cut just barely sliced the old cut — meaning
there were gaping holes in my mold. Thankfully, machinable wax is
forgiving (sort of). It lets you melt it back into shape. I took the machinable
wax pieces home - sawed off an extra piece, melted it down and poured
into the holes. I tested the patch with water - no water leaked.
It looks like it worked.