 ]
]
Step 1: Make the Boards.
The first step was to develop and stuff two boards. For simplicity, I wanted to focus not on developing two different board designs - but using a single board design to test the network.
Step 2: Use arduino to code and connect boards
This is my first round at using the arduino platform online and using the arduino uno as the programmer for my boards.
I found using this mode a lot simpler for me to use.
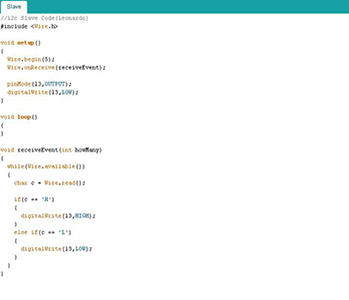
The lights on each board lit up so I knew the boards were working. I first tried what I thought was the right code - and it didn’t end up working right. Then Will pointed out I was using the Wire library. I’m still a beginner enough at this point to not really understand the language enough to be able to analyze when I’m doing something right or wrong.
Will pointed me to the arduino serial library
(http://arduino.cc/en/Reference/softwareSerial).
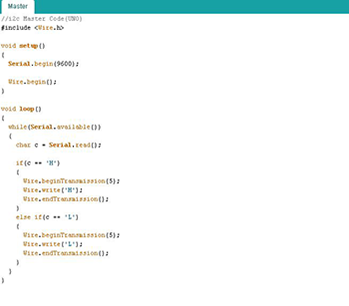
Key note on connecting both boards:
TX of master should be connected to the RX of slave device
And vice versa: RX of master = TX of slave device
This was helpful in thinking about code: http://jamesreubenknowles.com/arduino-i2c-1680
Step 3: Test code
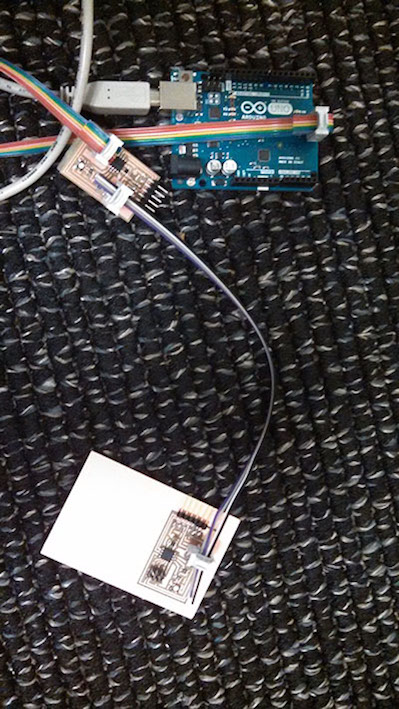
I then tested versions of the arduino serial library. The slave lit up after the master was sent code. I was powering both ends with my computer, for a power source.
Unfortunately, I didn’t end up getting a photo of both ends lit up at the same time and haven’t had a chance to go back to trying it again yet.