HOW TO MAKE (ALMOST) ANYTHING_MAS.863/4.140
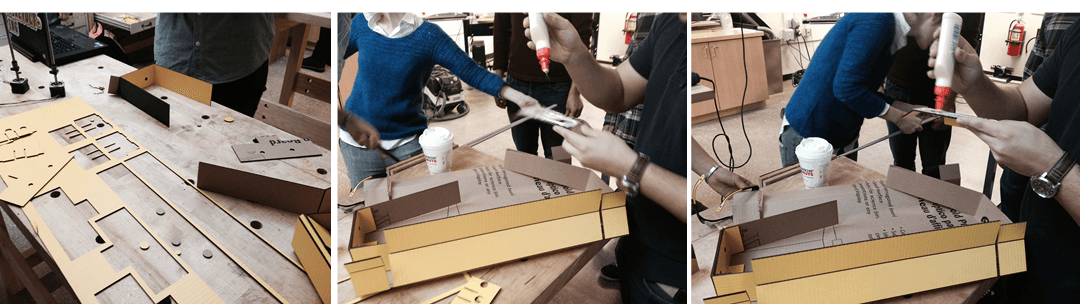
Machine Design_The Magic Table_(Full documantion of the project can be seen under 'Projects' tab) We started by cutting and assembling the laser cut cardboard pieces given to us by Nadya and James
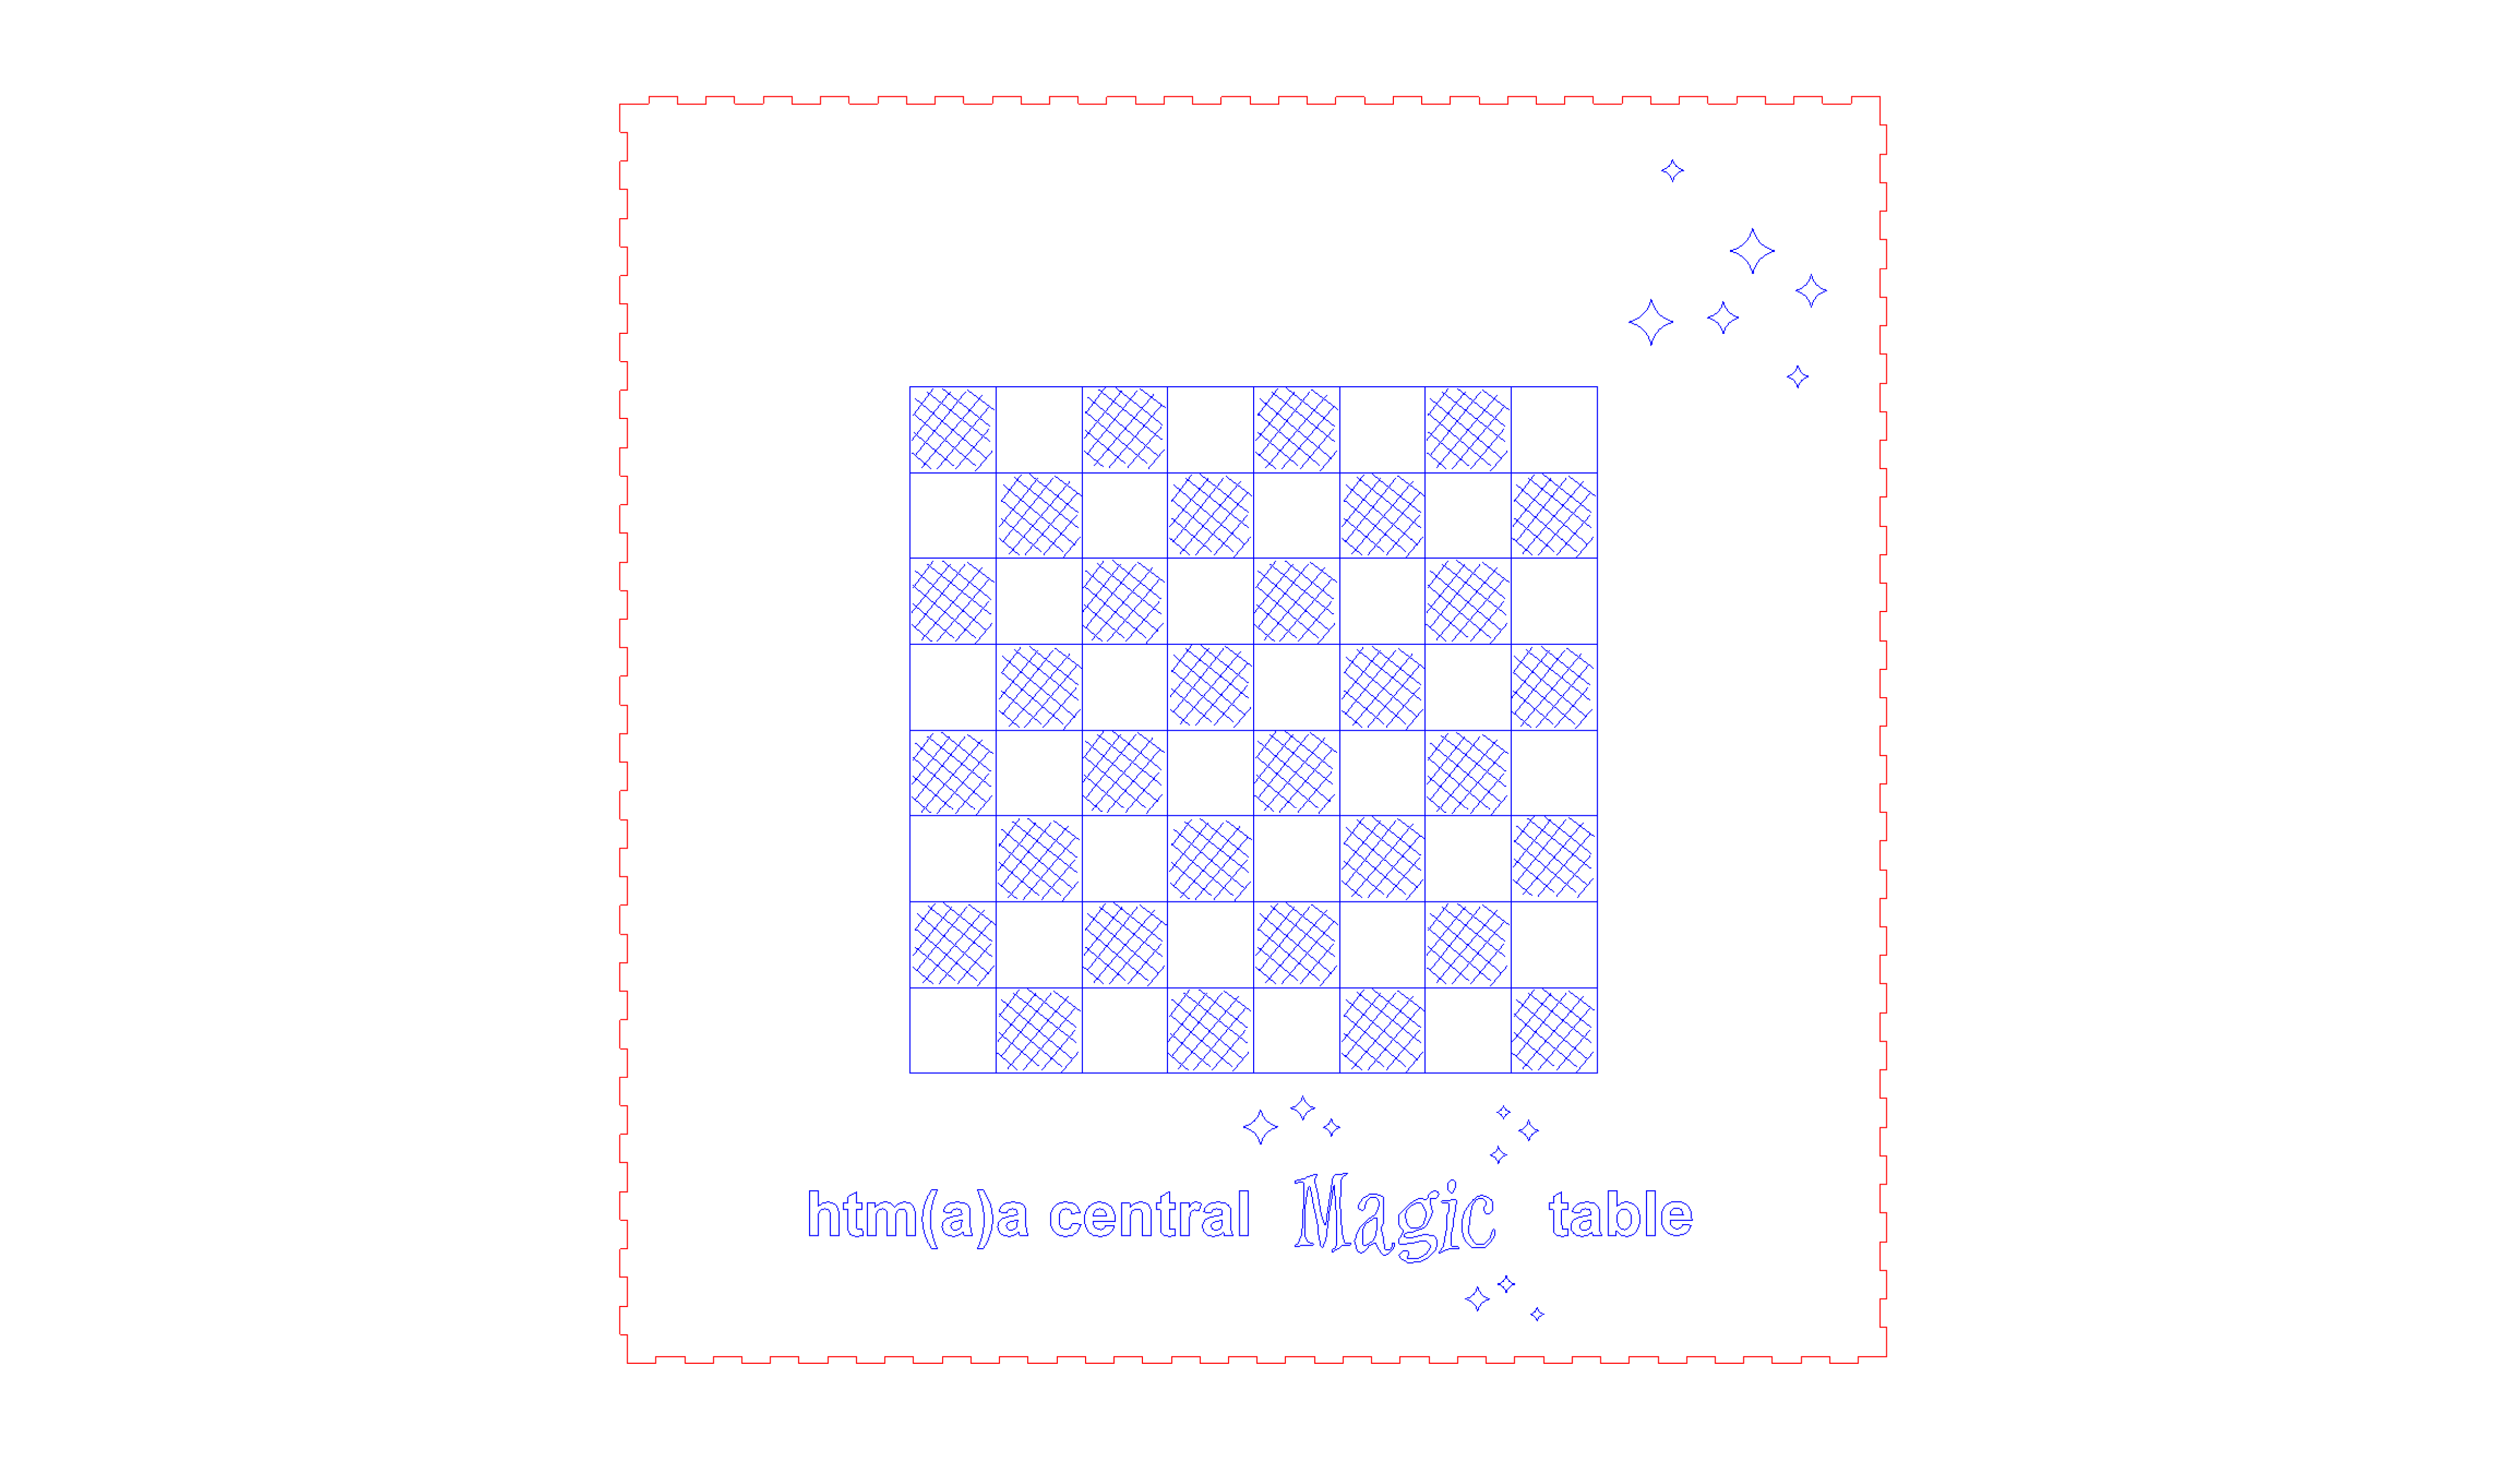
Designing the Table (Ines,Holly, and I)_We measured the maximum distance the machine could move in the x and y directions. The maximum distance is approximately 12 inches along both axes. This gave us the constraints for the board. A chess board is 8 spaces by 8 spaces, so we decided to make each space 1.5 inches by 1.5 inches (making the spaces span 12 inches by 12 inches) . We decided to use masonite as the material for the board because it was available and it is suitable for a magnet to be controlled across the width of the board. The board design was scored by the laser cutter into the masonite.
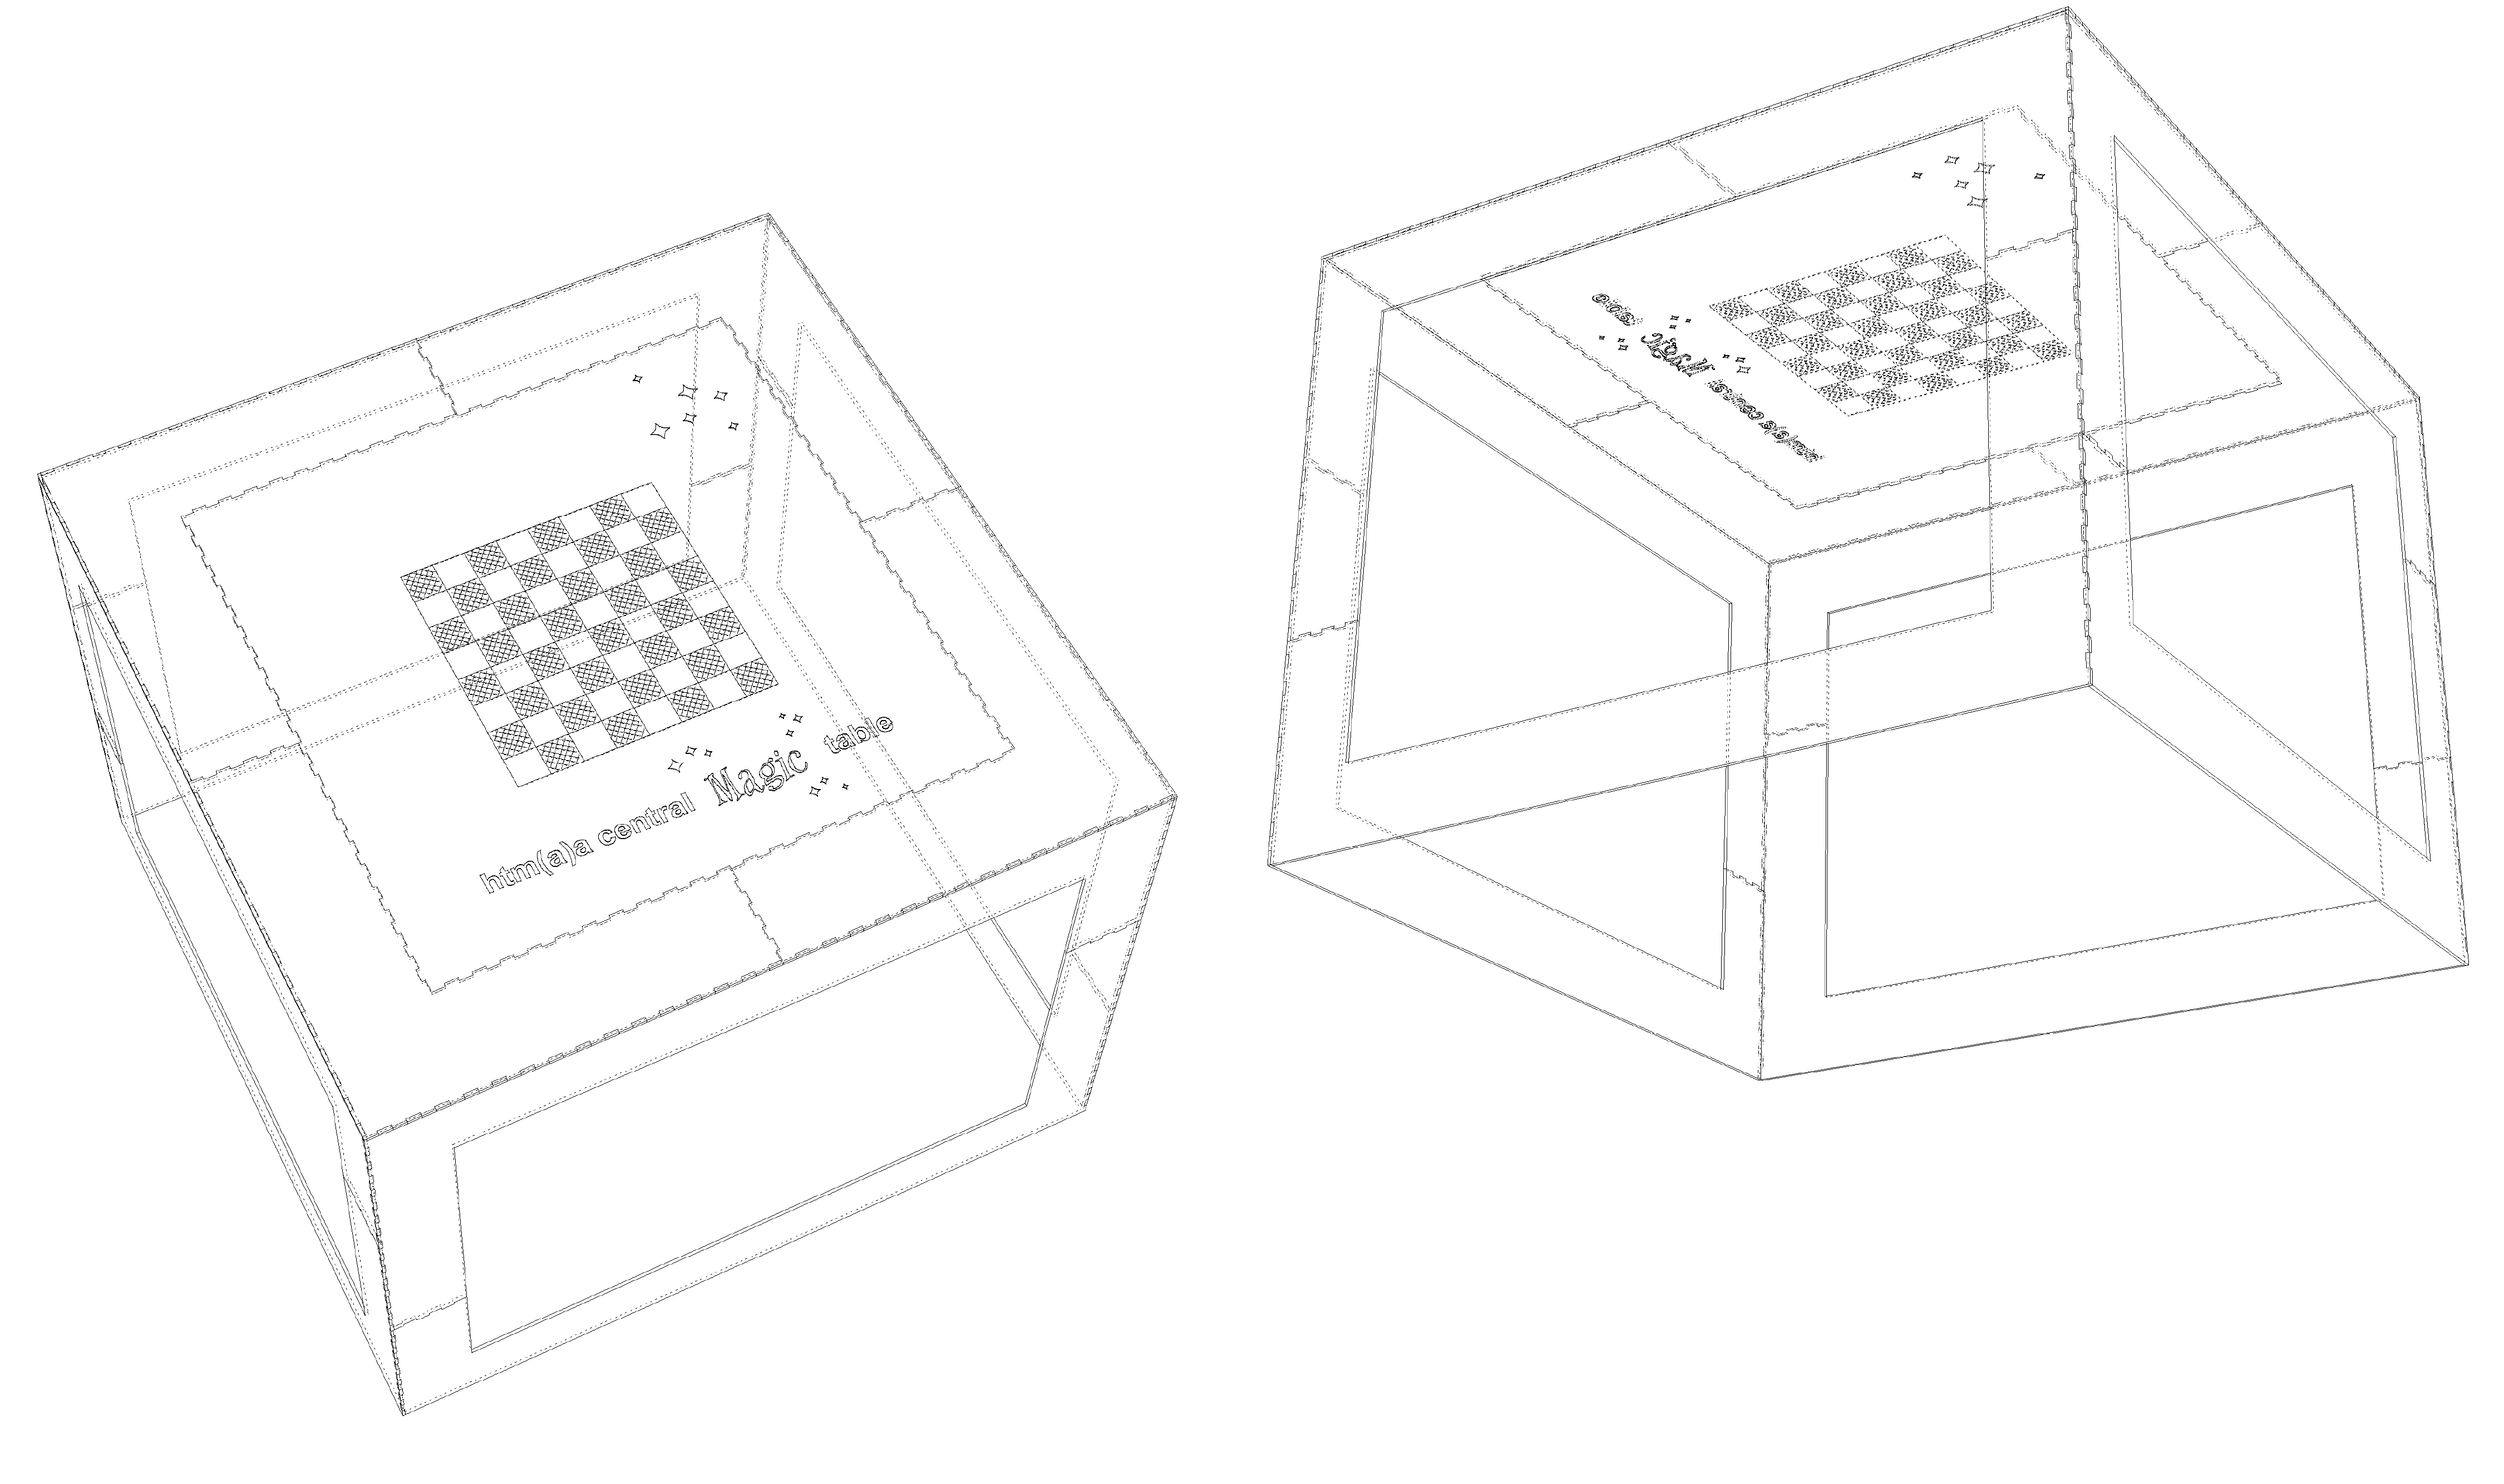
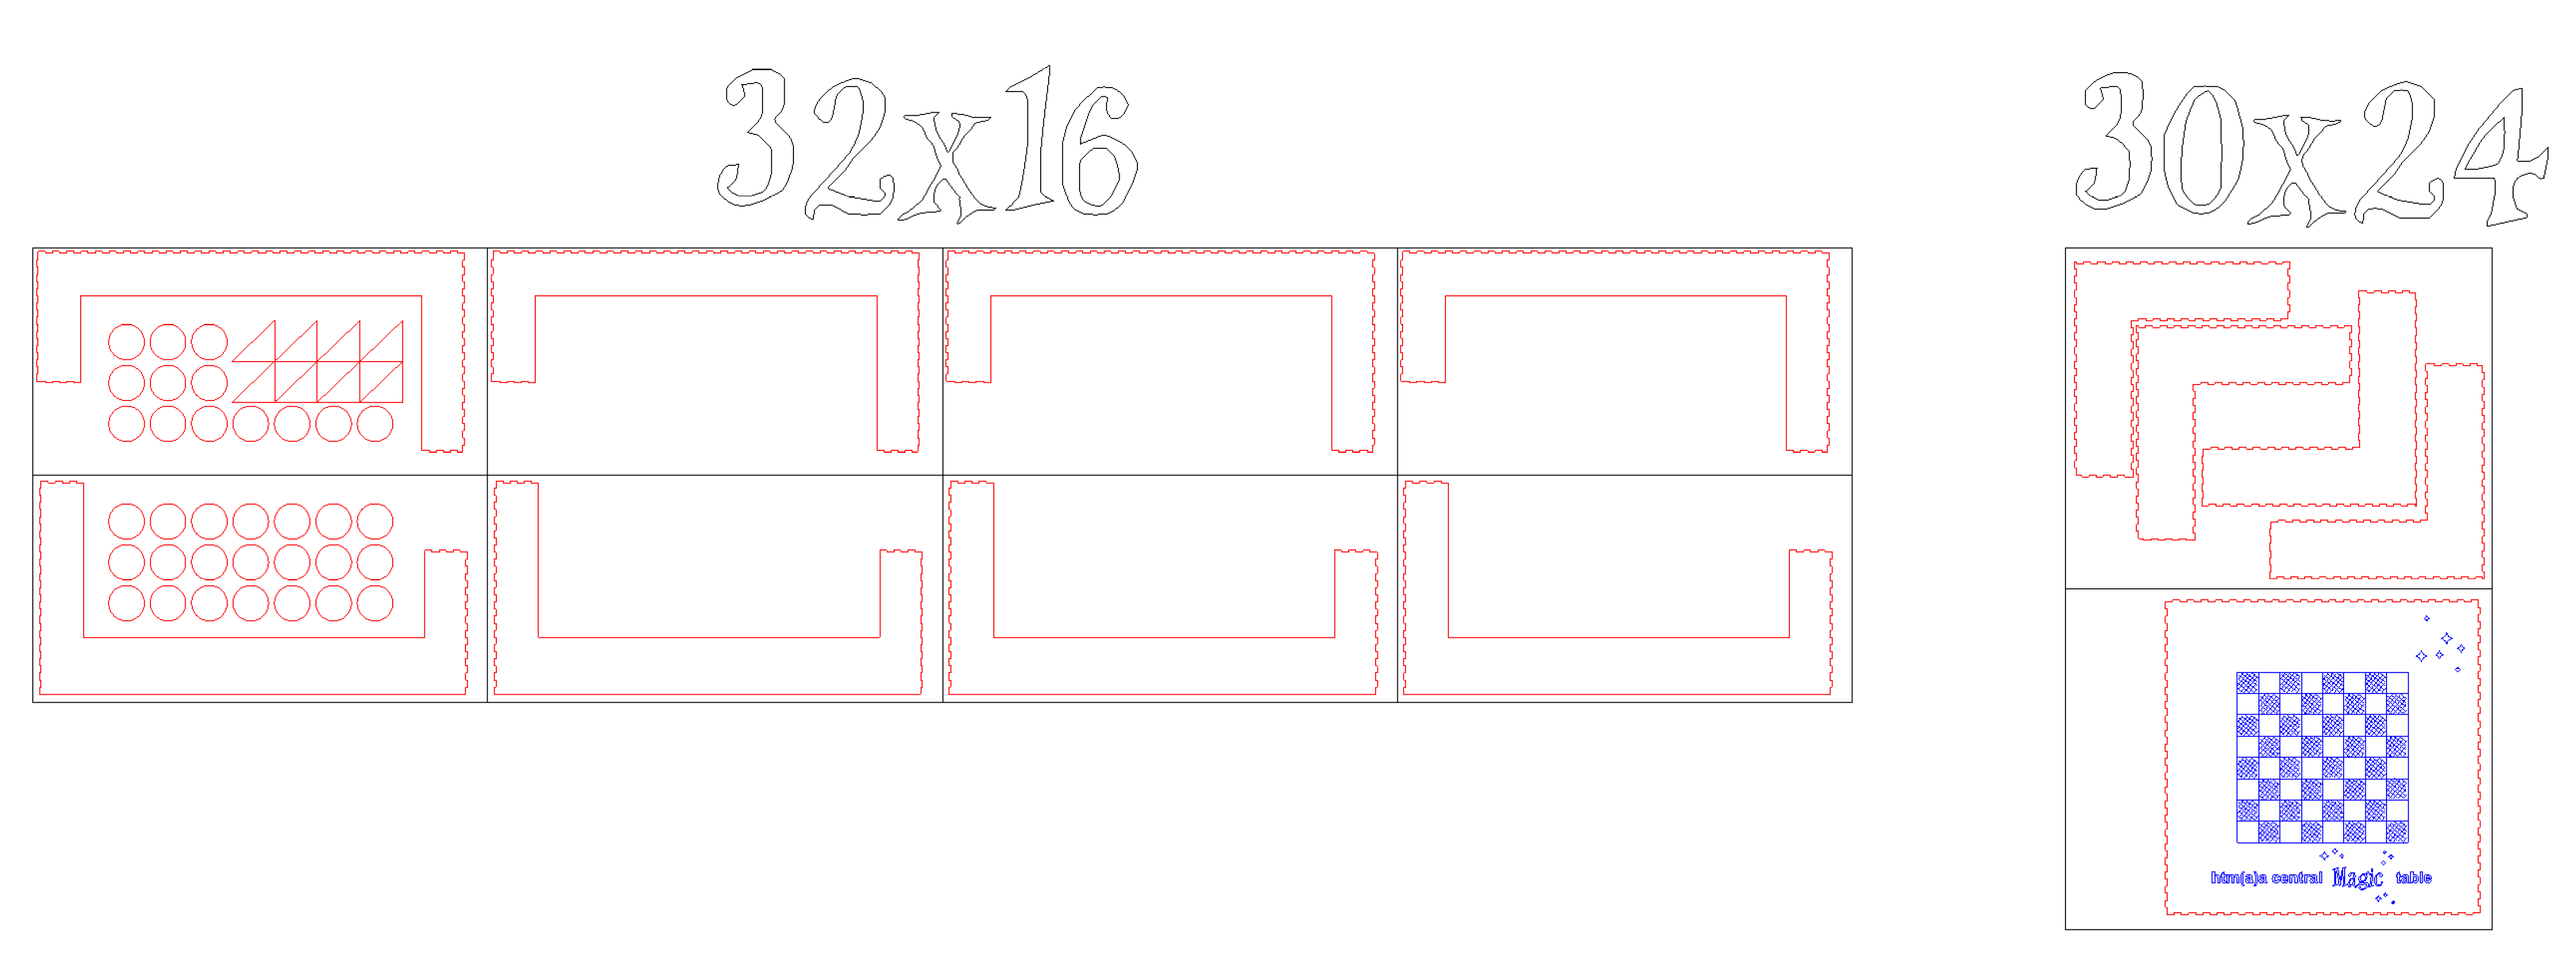
The next consideration was how to place the board above the machine. We decided that it would be cool to have the machine enclosed inside a box so that it would not be seen as the game of chess was being automatically played. However, due to material constraints, we ended up choosing to design only the edges of the box with a flat surface on the top for the board. Using the machine size as a constraint, we decided that the box would be 31 inches by 31 inches by 31 inches. The masonite pieces we had available were 32 inches by 16 inches. So, we decided to design teeth for the pieces of the table to press-fit together. The depth of the teeth were designed to be the width of the masonite.
The upper surface press-fits into the table perimeter
Laser cutting took me a while because each laser machine in the shop had some kind of technical problem due to over use by architecture students before their finals... (The lenses were dirty, auto focus didn’t work, The machine stopped cutting in the middle of the job, etc..)