The objective for this week was to add an output device to a
microcontroller that we design and then program it to do something.
I tried to make an LED array with a speaker that would be triggered
to do something after I press a button.
Designing the Board
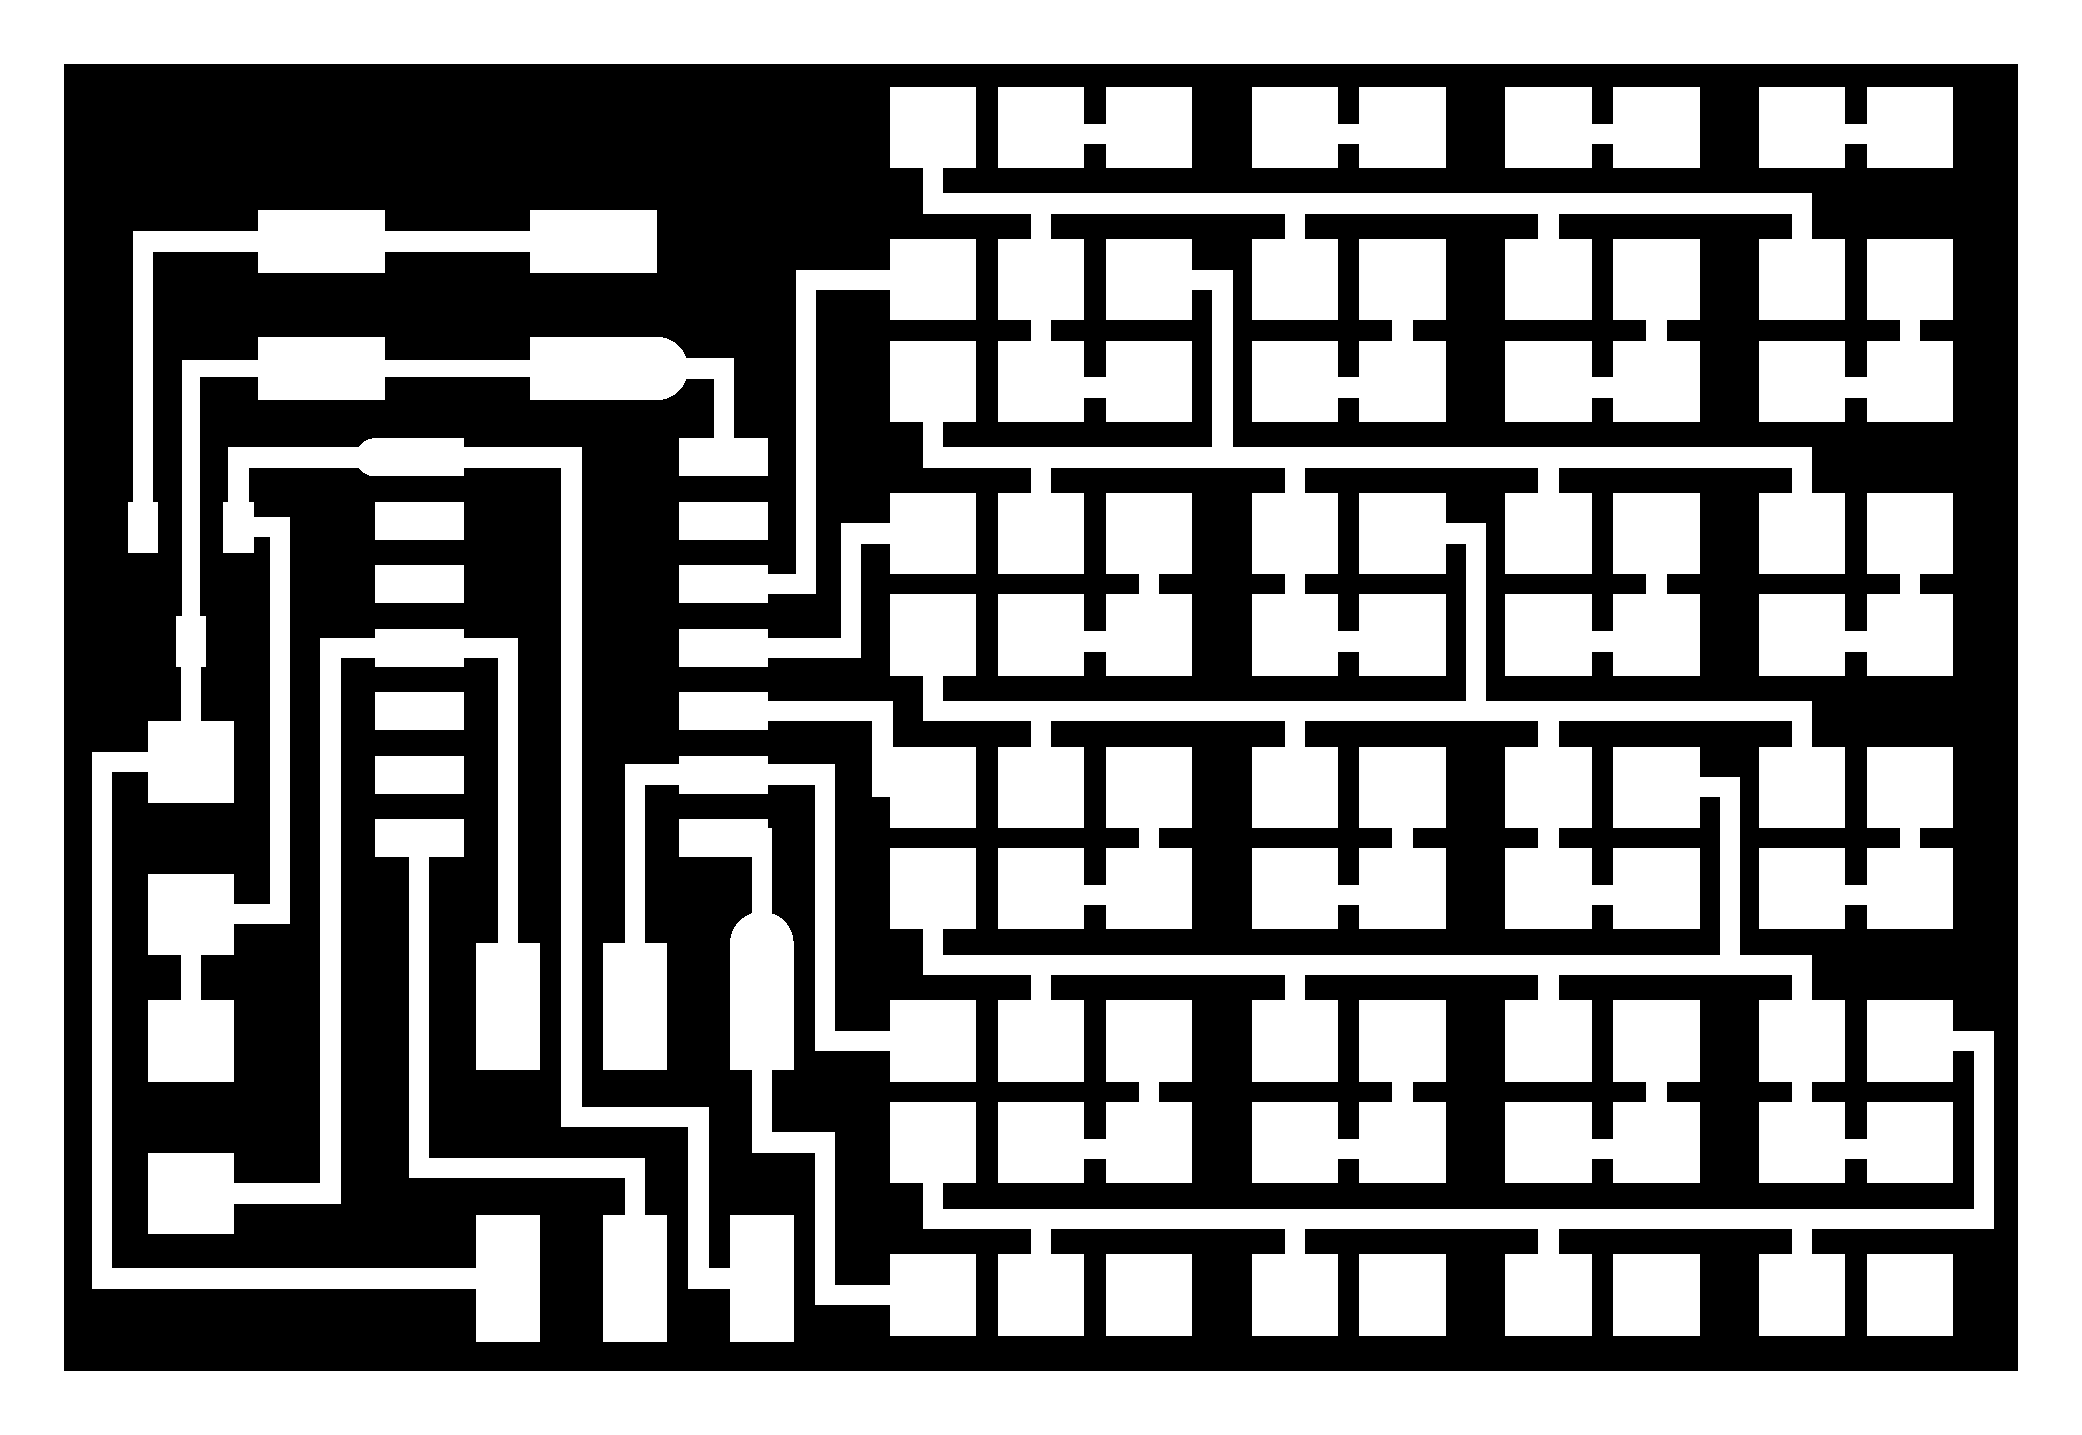
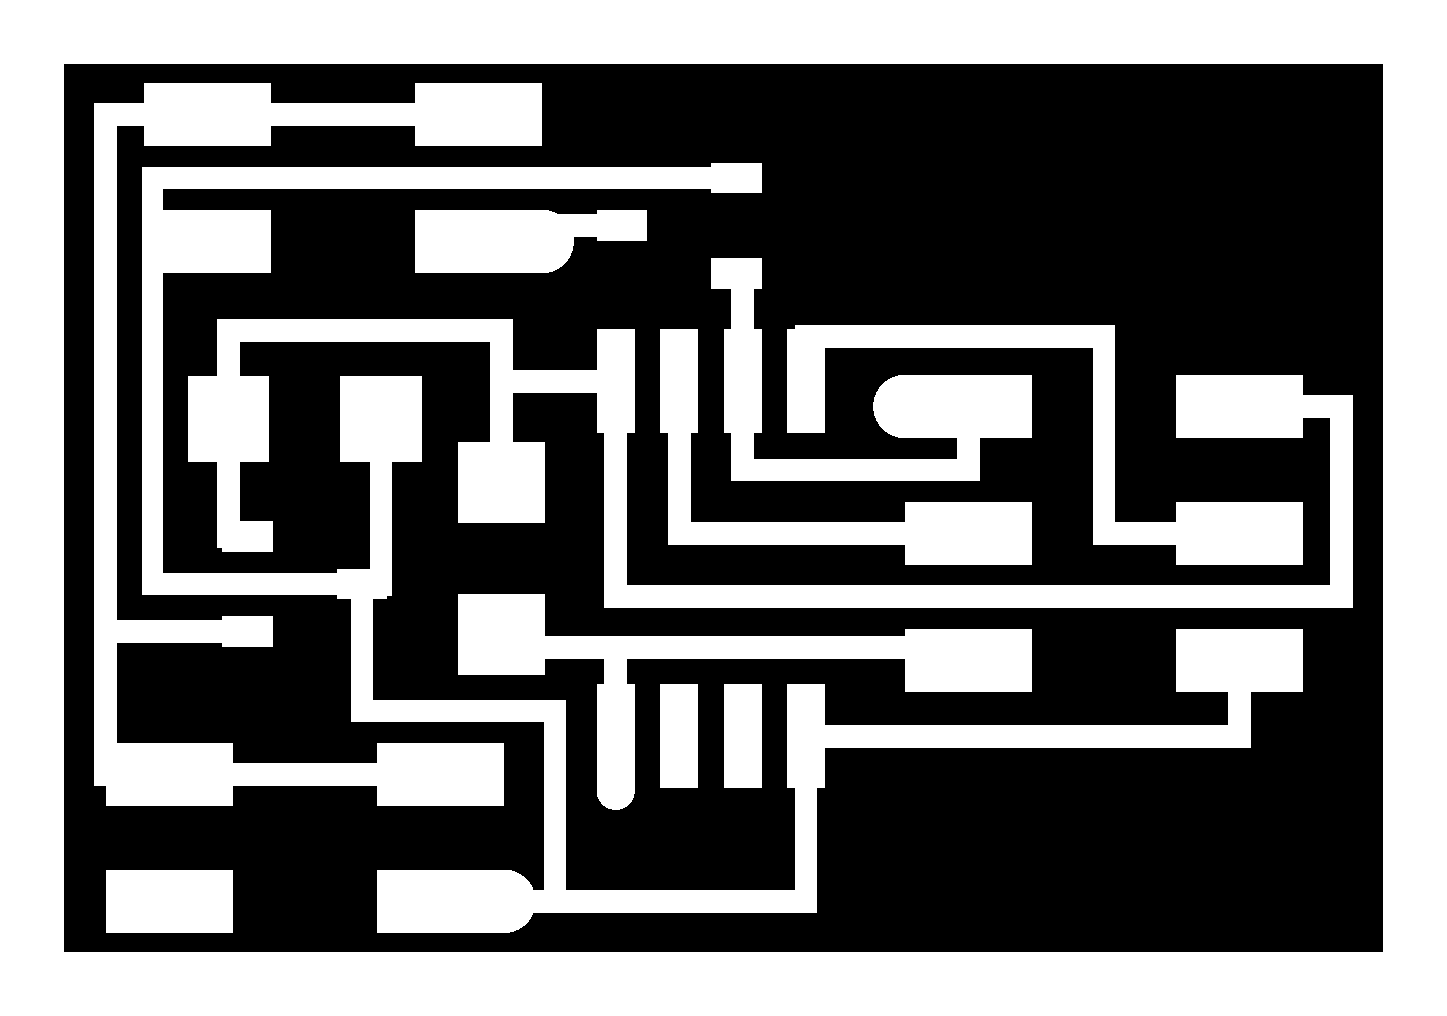
I really ran short on time this week so instead
of totally redesigning a board in Eagle I thought I'd try to combine
two of Neil's boards (LED Array and Speaker) since this is very
applicable to my final project.
To save time I just edited the two schematics in Microsoft Paint.
This probably ended up taking more time than just doing it
in Eagle because I ended up changing the boards more than I had
anticipated.
I made three main modifications to Neil's boards:
1. Combined the two power jacks into one
2. Added a button to trigger the speaker and LED array
3. Added pads to unused pins in case I wanted to use them in the
future
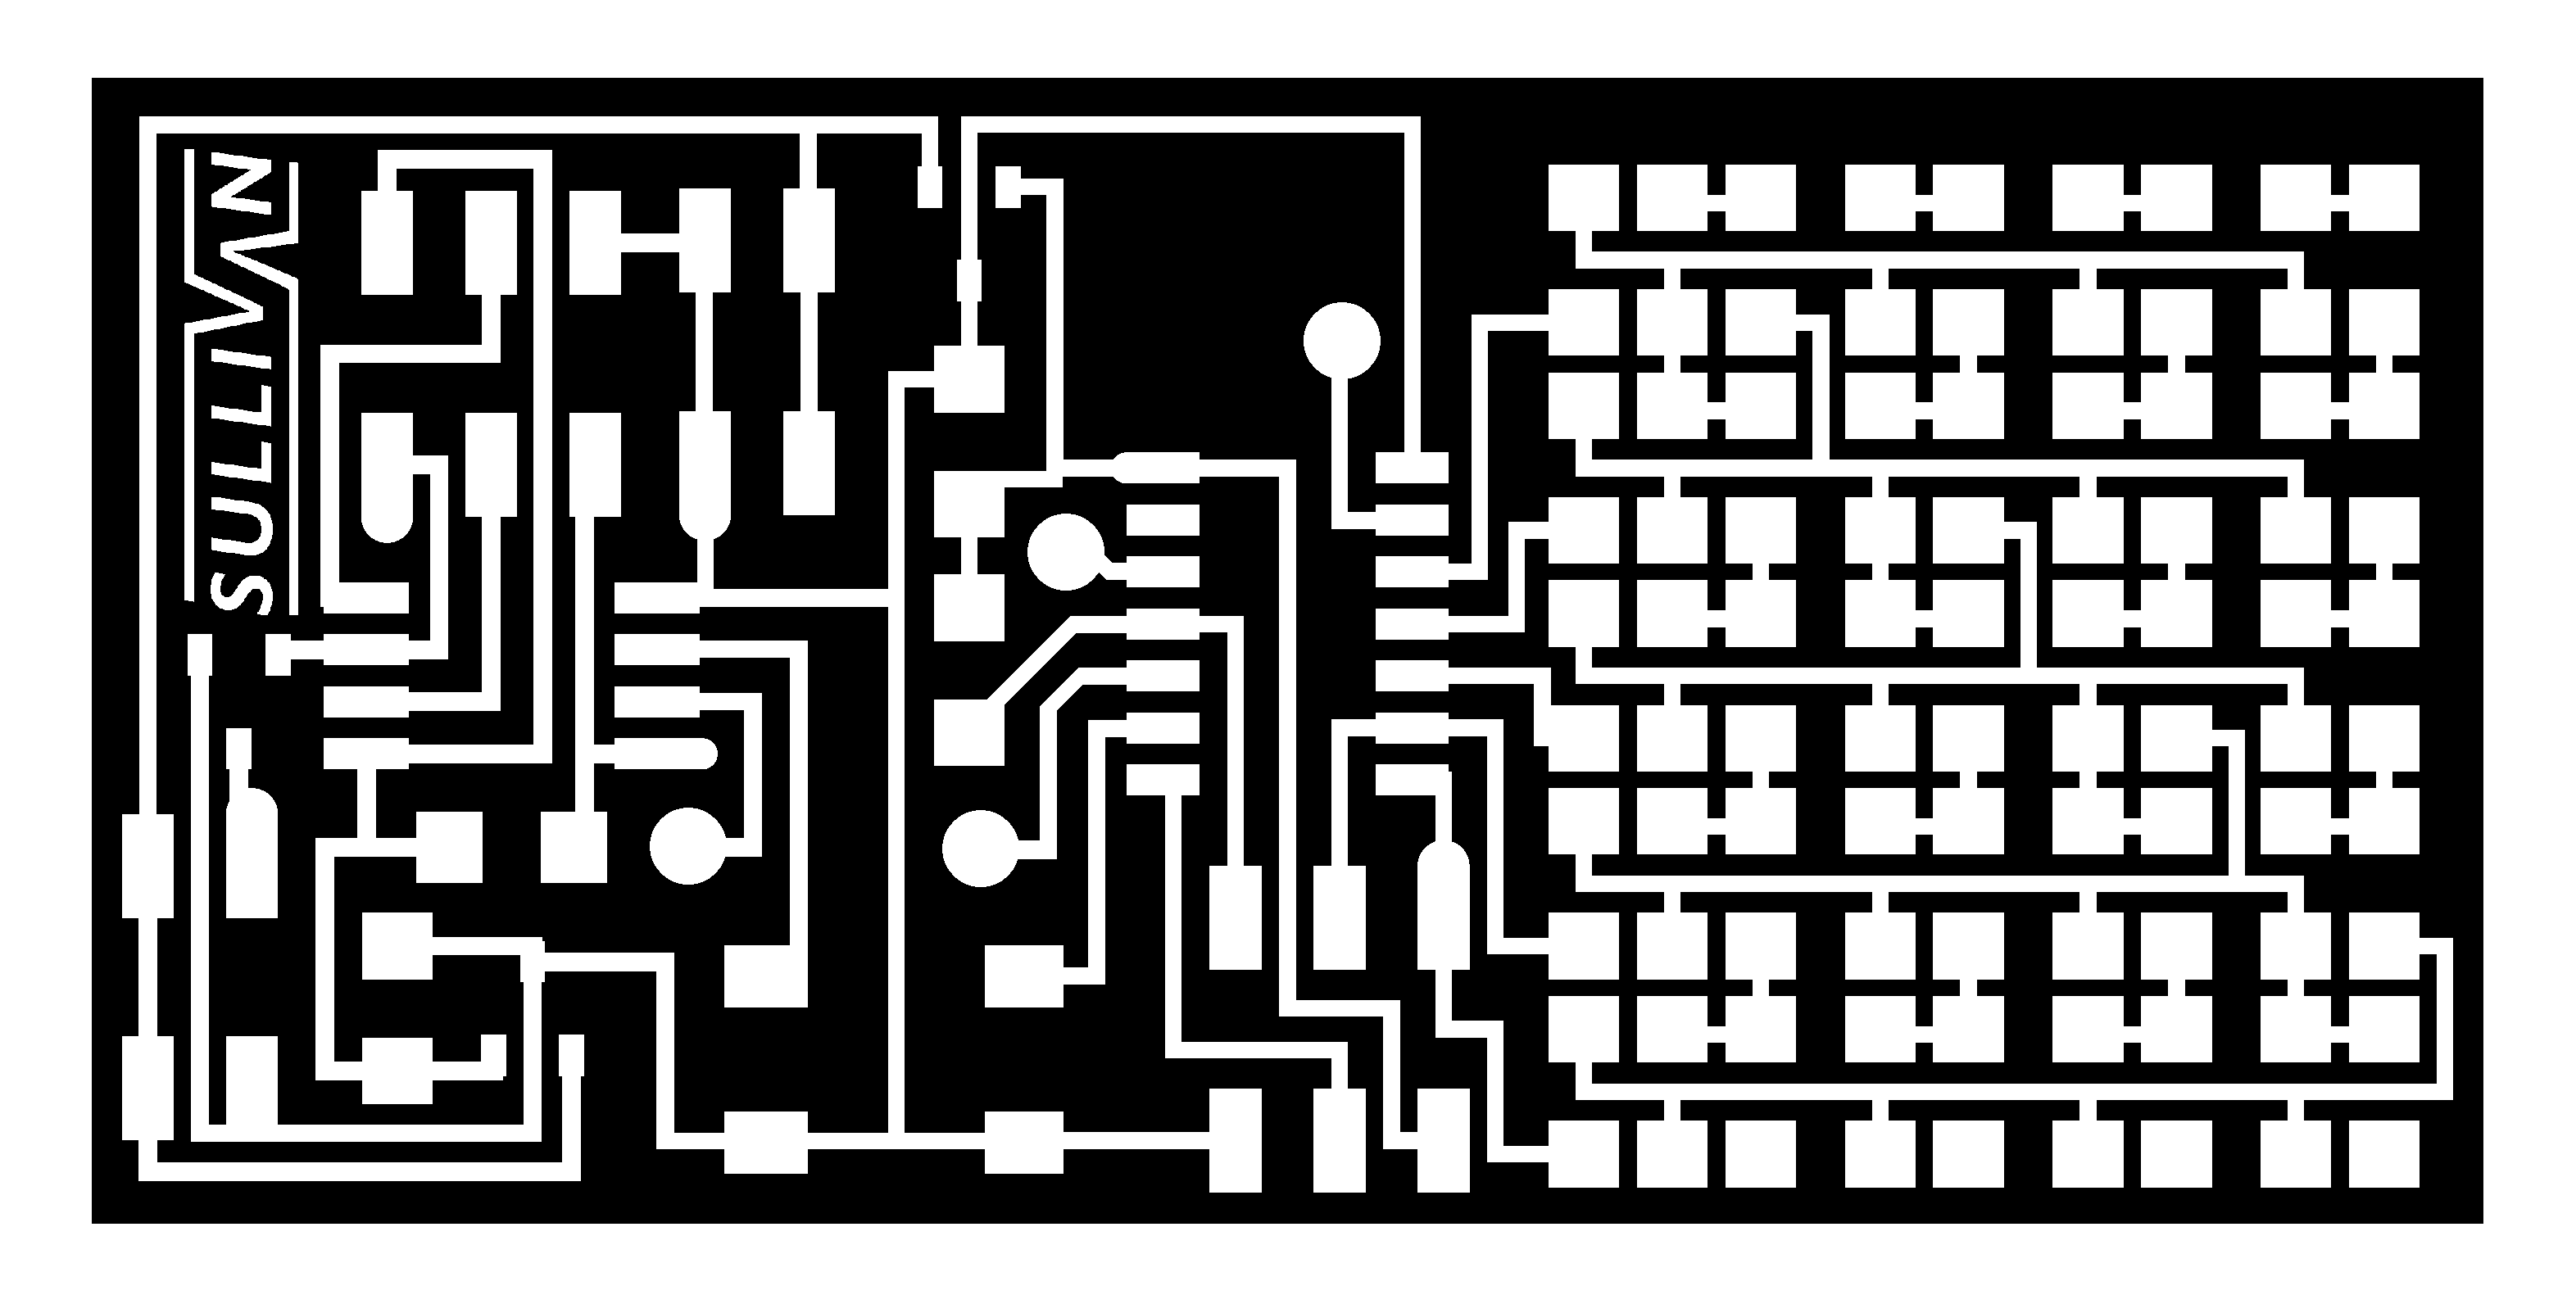
The one mistake that I made in the design was placing the 2X3 header
and 2x2 power jack too close to one another which prevented them
being used at the same time.
Milling and Stuffing
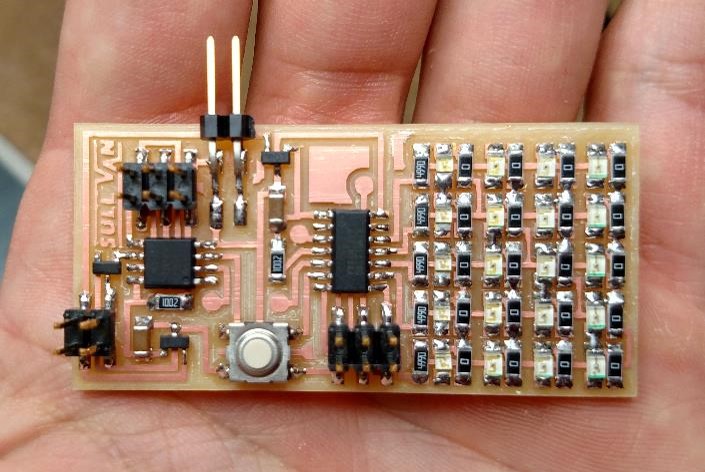
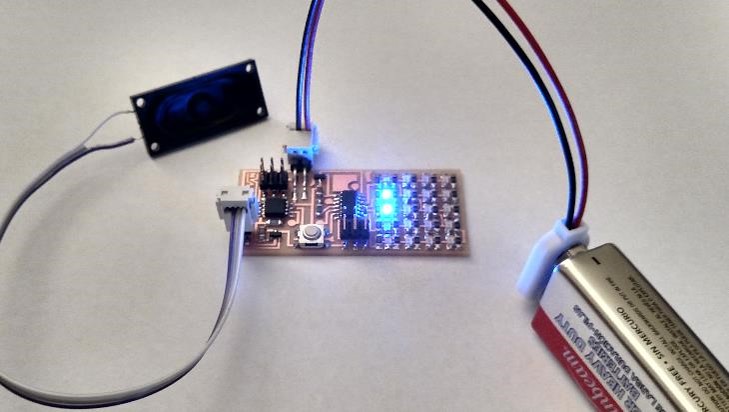
The only issue I had with milling and soldering was
that I designed the power jack too close to the ATtiny's 2x3
header so cables couldn't fit on both at the same time. So
I just switched the 2x2 power jack with a 1x2 horizontal
one which you can see at the top of the image.
Soldering all the LED's and 0 ohm resistors took a pretty long time
too!
Programming the LED Array
I used Arduino to program the Charlieplexed LED array. I used the
following Arduino code to help understand how to use Charlieplexing:
Once I understood how to actually control the individual LED's I
then created the display in the video at the top of the page.
Programming the Speaker
Programming the speaker was a little more difficult than programming
the charlieplexed array. Initially I used the "Melody" example that
comes with the Arduino environment.
Each time I tried to upload the program to the board the speaker
would make a very brief sound before the entire board (including
the LED's) would turn off. I thought that maybe the 9V battery
didn't have enough power to handle the the two microchips and
regulators so I switch my power source to the FTDI cable hoping this
wouldn't conflict with the regulators.
After switching the power source I was finally able to upload the
program to the ATtiny but the result was horrifying. The speaker
was supposed to play a simple tune but instead it made this
extremely loud screeching noise. It scared the hell outta me and I
immediately unplugged the speaker.
After doing some research online I found the following Arduino code
that worked on the first try!
I can't really explain it but I didn't even change the pins and it
still worked. I'm also not sure why the original "Melody" code
didn't work. I have no proof that the speaker plays the song
because every time I try to upload a video my computer likes
to ruin the audio...but I promise the speaker is working!
Mistakes I Made
The only real problem I had was designing the power jack too close to the 2x3
header but it turned out to be a minor issue.