Week 6: Molding and Casting
The objective for this week was to design and machine a 3D mold
and cast parts from it. Since time was short this week I decided
to keep it simple and make a mold of Texas.
Modeling
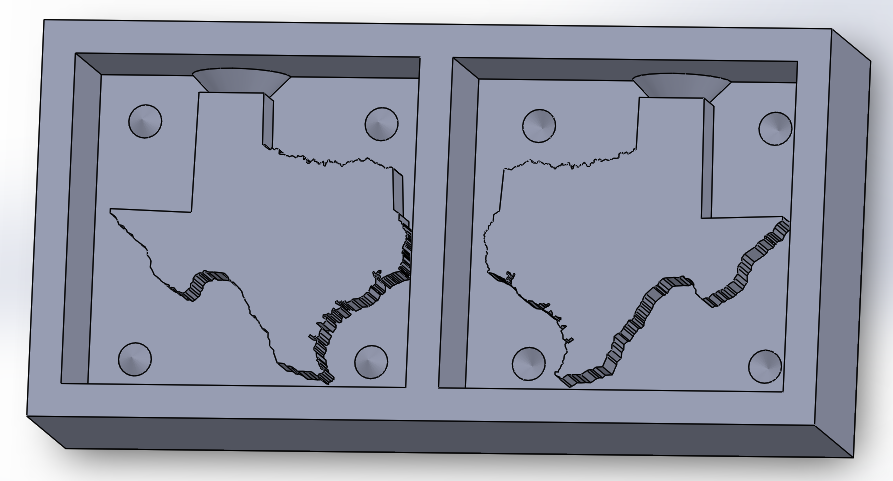
I used SolidWorks to design the 3D mold. To make the intricate
shape of Texas I simply used the "Sketch Picture" feature in
SolidWorks under the "Tools" menu:
Tools > Sketch Tools > Sketch Picture...
This allowed me to import a .png of the outline of Texas as a sketch
which I just manually traced. This was very easy and worked out
great. This process kept my SolidWorks model extremely simple and as
a result I had no problem at all opening it in Mastercam.
Mastercam
By far Mastercam seemed to be the most difficult part of the
assignment for most people including myself. Luckily I had a ton of
help from
Austin Smith.
Before getting Austin's help several of us were in the architecture
shop for hours just trying to get our models ready in Mastercam.
Milling
In order to get Austin's help it meant working in the Architecture
Wood Shop with the large Onsrud mill.
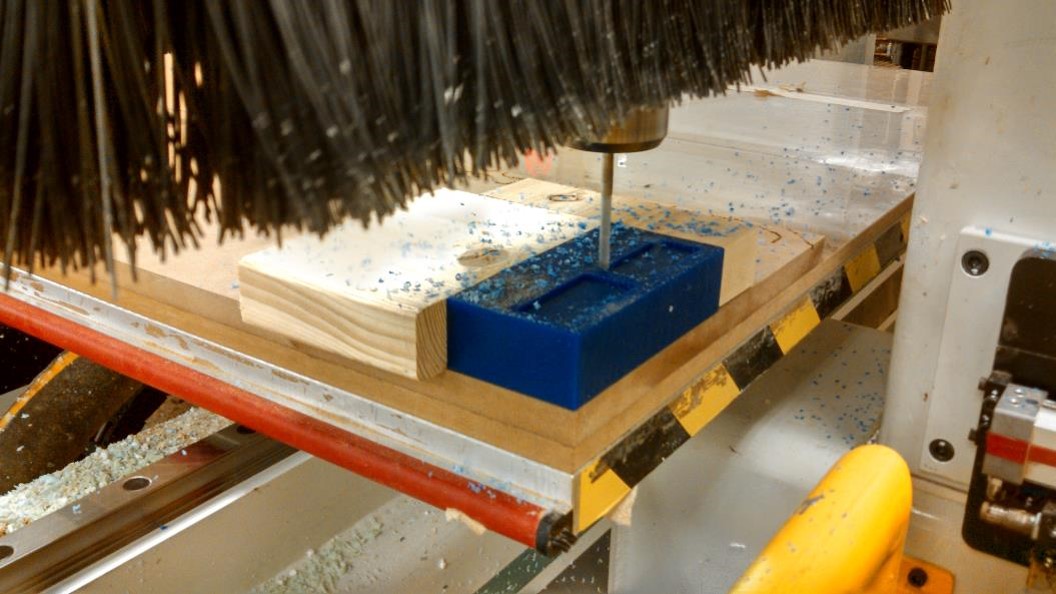
Since the wax block is so much smaller than the bed of the Onsrud we
had to fix it to a larger piece of scrap wood which you can see in
the above image. This extra surface area allowed the vacuum to work.
We hot glued the bottom of the wax and then surrounded it by small
blocks of wood to keep the material fixed.
In the end the Onsrud was much faster at milling than the Shop Bot
or Modela but still took about 30 minutes to completely mill out the
mold.

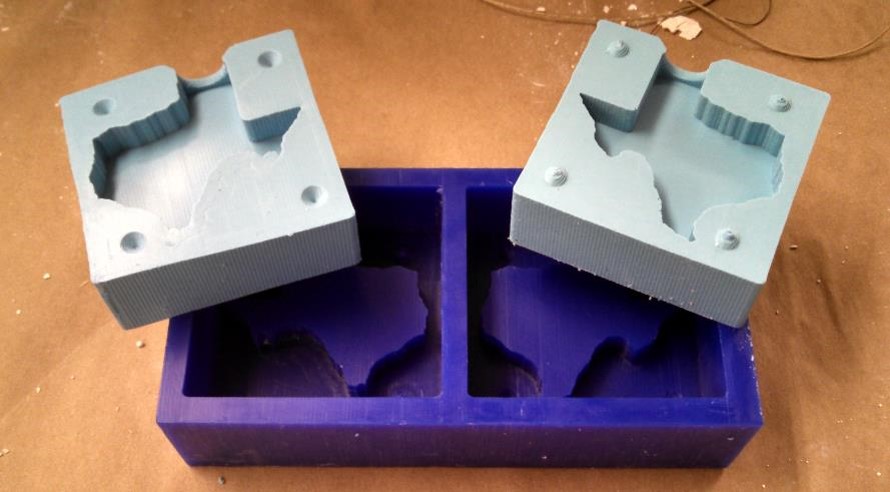
Everything went great until the last minute of milling where, for
some reason, the Onsrud began to cut into the Mexican border of the
Texas mold, which you can see on the left side of the image above.
Luckily we noticed this quickly and stopped the machine before
it could continue to mess up the shape.
Creating the Negative
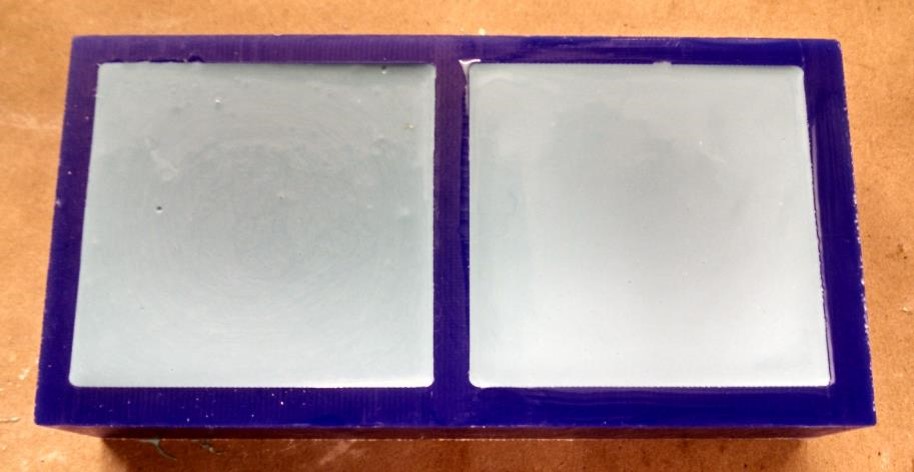
Once the wax was totally machined I started making the negative with
Oomoo. I simply followed the directions on the box which were
very simple and straightforward, although I would suggest waiting
longer than the recommended 75 minutes for the Oomoo to cure. I
waited about 85 minutes and the Oomoo came out a little tacky. I
would suggest waiting about 2 hours for the Oomoo to fully cure.
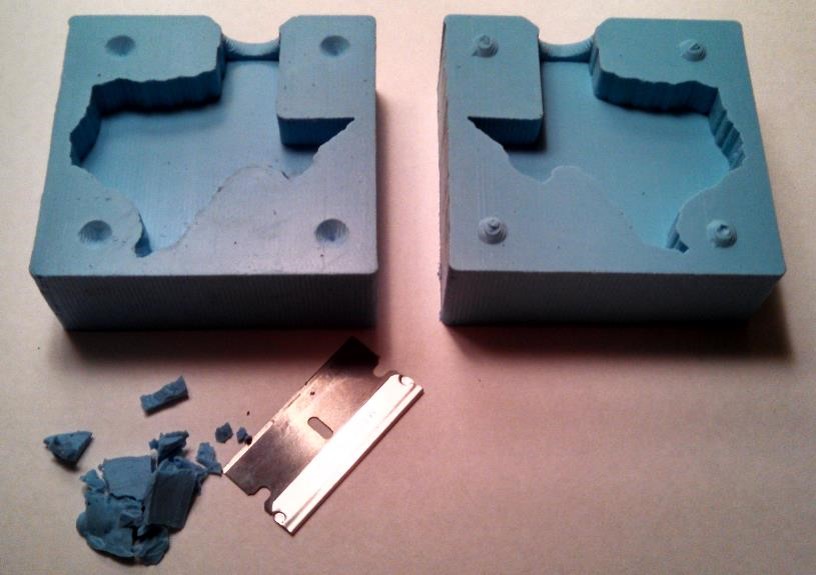
After I took the Oomoo out I decided to try and fix the part where
the Onsrud had cut into the border using a razor blade.
As I expected this wasn't very easy to do aesthetically. After
cutting the Oomoo it came out pretty jagged and ugly. I would
suggest fixing any mistakes on your wax mold before making the Oomoo.
Casting
Unfortunately, since I started this assignment so late I ran out of
time and never had a chance to cast any parts out of my mold.
Eventually I plan on casting some parts but since half of my mold is
messed up I will most likely just use the good half, making the part
half the thickness.
Mistakes I Made
By far the biggest mistake I made was starting this assingment too
late. This assignment is extremely time consuming and even more so
when there are several other people also trying to get their parts
machined.
The second biggest mistake I made was trying to use the Shop Bot. If
the Onsrud is not being used I would highly recommend making your part
with it because it's much faster than the other mills.
Like I said before, another mistake I made was removing the Oomoo
while it was still tacky. This seemed to be fine but just in case I
would suggest waiting 2 hours before extracting the Oomoo.
Finally If I could have a do-over I would have figured out why the
Onsrud cut into my design and tried to fix that, and if I had more
time I would have tried to actually cast a part from my mold.
