Week 8: Composites
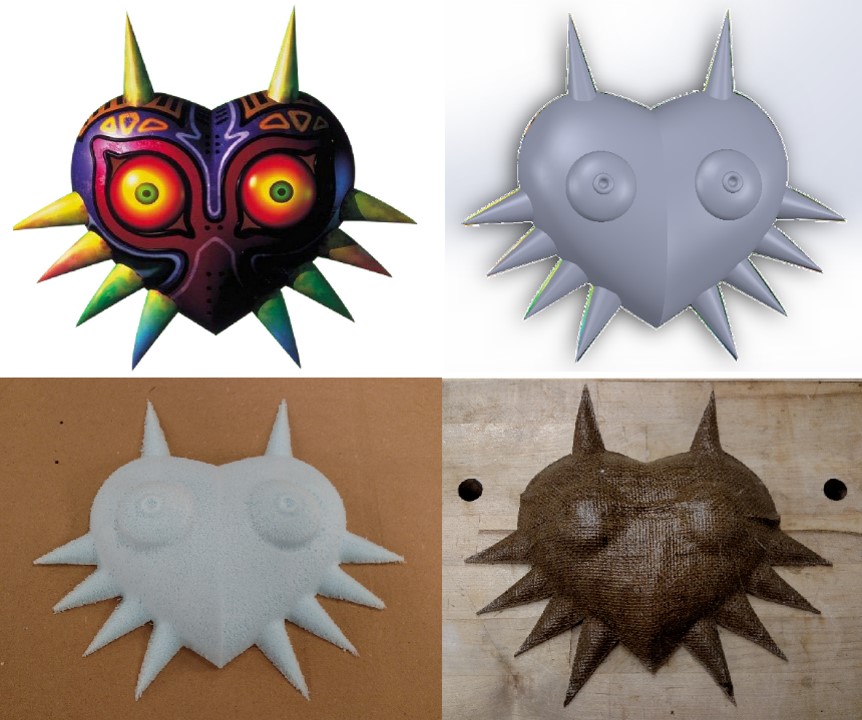
The objective for this week was to design and make a 3D mold and
produce a fiber composite part from it. I made a replica of Majora's
Mask.
Background

My brother is a video game developer and he asked me to make a
replica of Majora's Mask for him.
Majora's Mask is a Nintendo 64 video game
that was released in 2000.
Surprisingly, replica's on the market sell for hundreds of dollars!
Modeling

I used SolidWorks to model the mold. In order to get an accurate
representation I used the "Sketch Picture" feature in SolidWorks
under the "Tools" menu:
Tools > Sketch Tools > Sketch Picture...
This allowed me to import a .png of the image which I traced over
with splines. I just eye-balled the depth and created a solid body
using the "Lofted Boss/Base" feature.
Once the main body was complete I added the spikes by creating a
series of planes with extruded cones extending from them.
Once the features were complete I mirrored the object making a
symmetrical 3D representation of the mask.
Milling
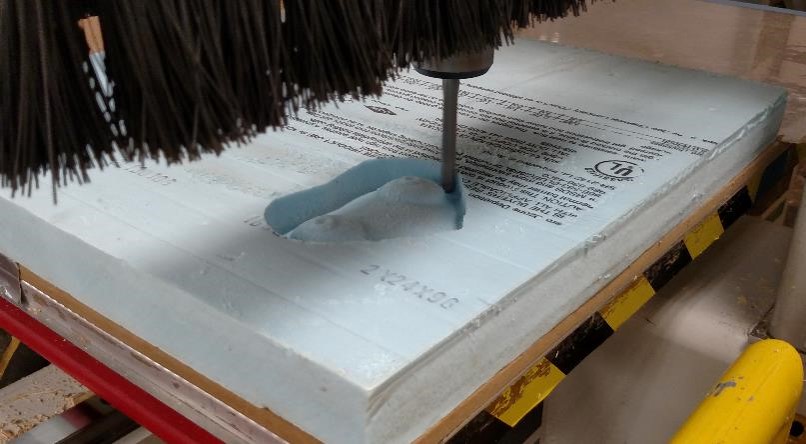
Milling on the Onsrud with the blue foam is extremely fast and easy.
This is a huge contrast to Molding and Casting Week where the most
tedious and painful part was milling the fine details out of the wax
blocks.
The entire process only took about 20 minutes. I only used a 0.5
inch ball end mill for the entire cut. The foam didn't require any
roughing cuts which significantly reduced the time.
The mold came out very clean. All I had to do was clean up the outer
profile of the mold with scissors which was trivial.
Preparing the Composite
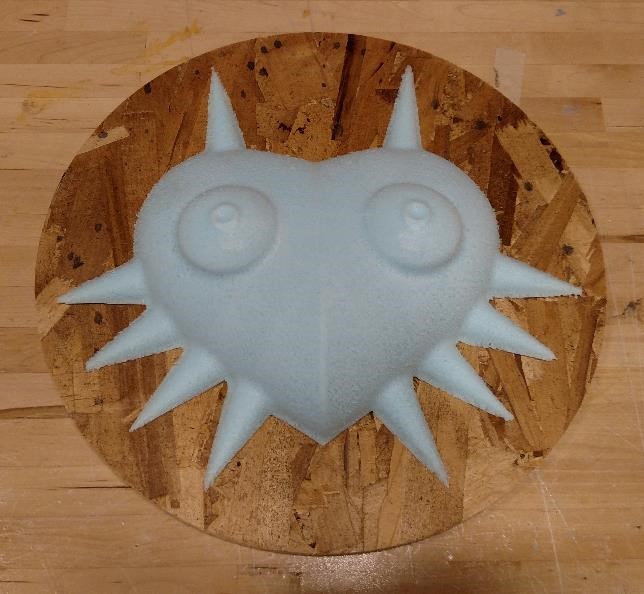
The first thing I did to prepare for making the composite was
glue the foam mold to a wooden support. I did this because the
spikes seemed to be pretty fragile. I used Guerilla Glue and found
a round piece of scrap OSB in the Architecture Wood Shop.
Once the glue had cured I sprayed the mold with "Mold Release" to
help make sure that extraction wouldn't be difficult. Here are the
layers I used on top of my mold:
1. 1 sheet of Saran Wrap
2. 6 sheets of resin coated burlap
3. 1 sheet of pink perforated film
4. 2 to 3 layers of bleeder padding
Vacuum Bagging

In order to save time
Tim Fallon,
Jeff Clayton
and I combined our projects into one vacuum bag and allowed it to
cure for 4 hours. This seemed to work very well.
Since my mold had small radii of curvature, I wanted to make sure
that before I put the layers in the bag I prevented any wrinkles
that could occur.
I laid one ply of burlap over the mold and noticed stress points at
the top and bottom of the design. To prevent wrinkling I cut small
darts at both points which seemed to work pretty well.
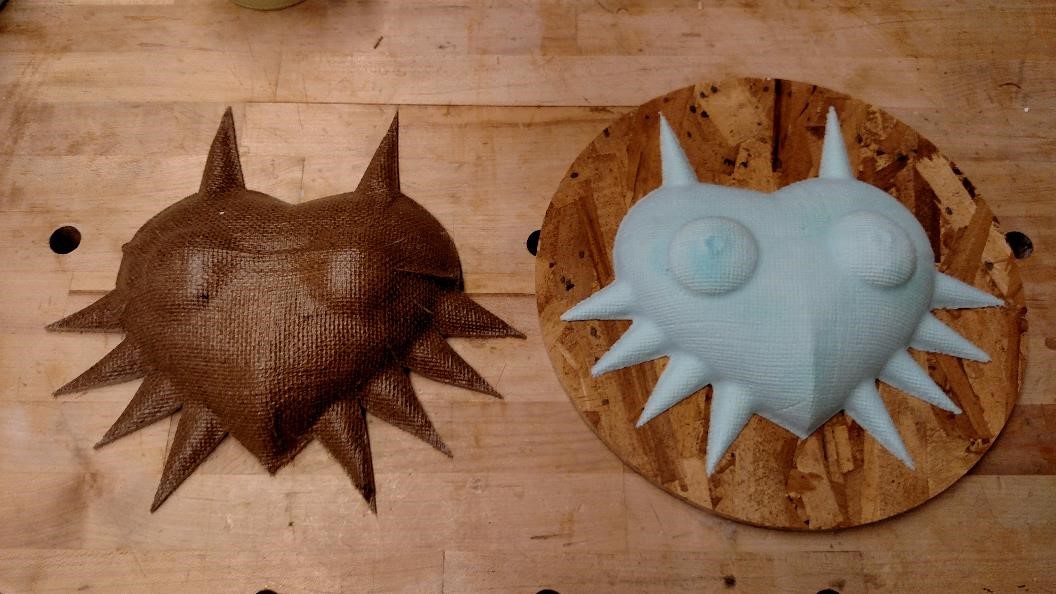
Extraction
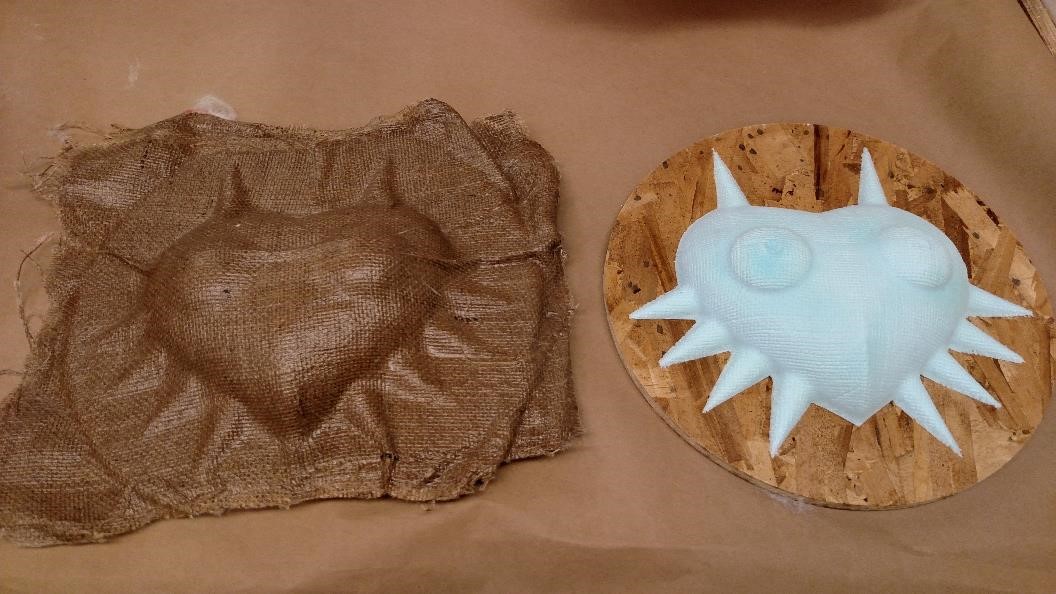
Extracting the part was extremely easy. The bleeder and perforated
layers peeled right off and the Saran wrap did a great job of
keeping the burlap from sticking to the mold.
When I took the part out I noticed a few wrinkles and the detail on
the eyes got smashed by the vacuum but over all the part turned out
better than I expected.
Cutting the Excess
I tried a bunch of methods before I was able to cut out the mask:
First, I tried cutting the excess with scissors which weren't strong
enough.
Then, I tried wire cutters but they were too stubby to make
good progress.
Next, I tried a hacksaw but the material wasn't rigid
enough for the saw to make accurate cuts.
Finally, I decided to try the bandsaw which worked great! I was even
able to cut between the spikes.
Mistakes I Made
The biggest mistake I made this week was not making the scale
of the mask correct. Initally I had planned on gluing two layers of
foam together to get the depth I needed to make the mask large enough;
however, I thought it would be too much down time to wait for the glue
to set so instead I just scaled down the mask. I thought it would
still be a good size but after everything was done, it seemed to be a
little too small.
Other than that everything went very smoothly!
Bonus Project!
After I felt more confident with composites I decided to use what I
learned to replace two resistance thermometers (RTD's) that had
failed on the machine I work on for my research.
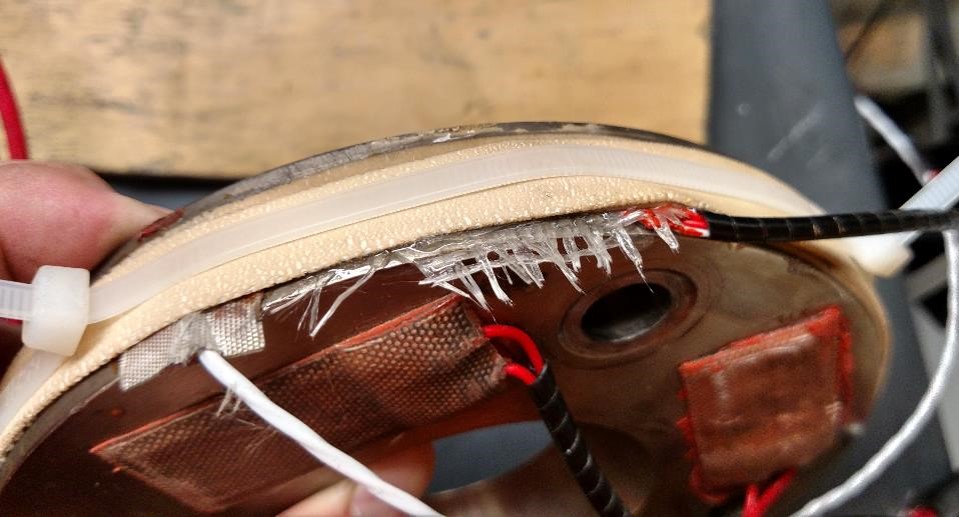
The RTD's have to be adhered to the surface of the machine so I used
one ply of fiber mesh coated in epoxy and hardener and pressed
tightly to the surface with zip-ties and rubber bands.
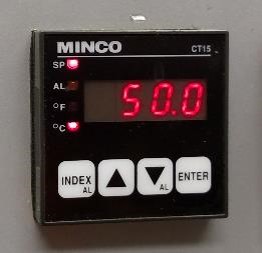
The typical cure time for the resin is three days; however, I was
able to control the temperature since the RTD's acted as feedback
sensors for temperature controllers. As a result, I kept the
temperature at 50
oC which reduce the cure time to a
matter of hours.
After the resin cured I cut off the excess mesh and removed the
zip-ties. Now the machine works better than it ever has and produces extremely
consistent data!