Final Project: Elektara
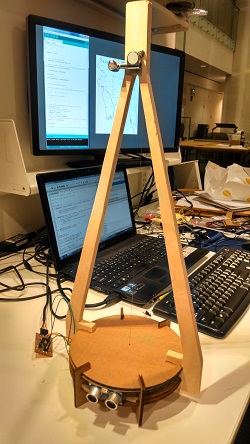
As promised in the final project plan in the 0th week, I made an electronic version of the instrument Ektara (the "one string", as known in the villages of Bangladesh). This is what the original instrument looks like:
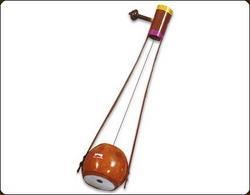
I always dreamed of making my own instrument, having no knwoledge of building one previously. Elektara (Electronic Ektara) consists of a string that can be plucked, and a proximity sensor to control the scale and chords played by the instrument. It uses a vibration sensor to pick up the onset of oscillation, and sends serial signal to the computer through an FTDI cable. In the computer, there's a python shell that recognizes the messages, and plays midi music.
In the following sections, I will explain in detail how I made this instrument. Here's how the story goes..
Experiments
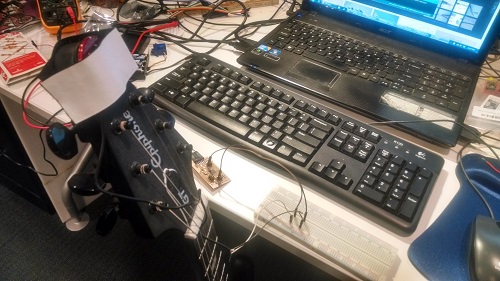
I started by doing some experiments. What kind of material would be suitable for picking up the vibration? What length of the material should I use for my instrument? Is the piezo vibration sensor good enough to pick up a string pluck? To answer all of these questions, I set up an Arduino circuit, and tested out a few Piezo sensors I collected from various sources. It turned out that the vibration signal they produce was pretty low in amplitude, so I went ahead and ordered a $6 contact mic which have better piezo sensors according to Amazon reviews of the product.
When my contact mic arrived, I tried it out on my guitar. Guitar string plucks would be well received by the mic, so I became hopeful about starting this project.
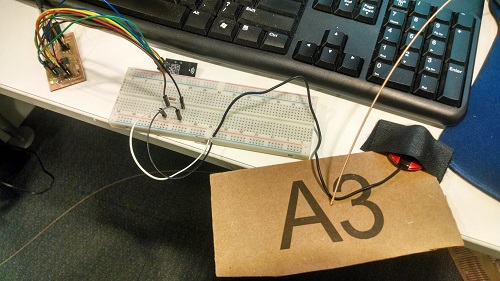
Next, I tried out a piece of cardboard, perforated to let a guitar string pass through, and tested out the mic by plucking the string. The vibration amplitude picked up by the mic was even better this time, so I decided to use cardboard for some part of my instrument so that the vibration can be retained by its body.
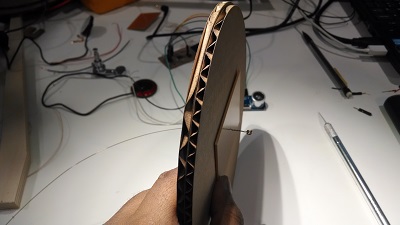
I also cut out a cardboard version of my design to check if the body can hold the string tension. But it turned out that it can't. So I knew I had to resort to a plywood and cardboard combination.
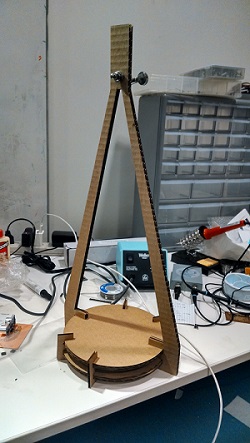
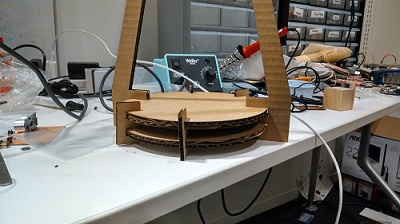
A bunch of cardboards (layered together) bent very easily when tension is applied
3D and 2D Modeling
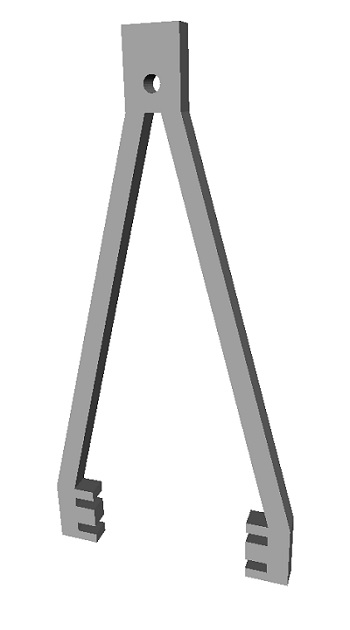
I started out the actual project by building a 3D model of the Elektara body in Autocad Inventor.
Next, by exporting faces from the model to dxf files, I arranged some 2D components (cardboard) in CorelDraw X7 to cut out using the laser cutter.

Cutting Materials
I used the shopbot to cut a 0.5" thick plywood board that I bought from a local plywood store.
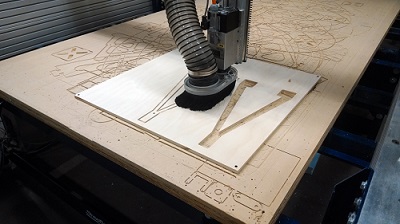
I had to cut two copies. The first copy had a problem with the tuner peg hole. It was cut out too large. When troubleshooting in the Partworks software, I discovered that my profile for creating the tuner's hole was outside/right, whereas it really should be inside out. I fixed the issue and did a second cut, it seemed fine.
There wasn't any problem cutting out the cardboard using the laser cutter.

Finishing Touch on the Body
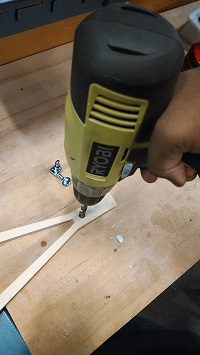
The tuner hole was still not the right diameter for the guitar tuners I bought, even though my model was made according to the guitar tuner measurement. It was a little off so the tuner wouldn't go in. So I had to manually drill with a 3/8 endmill to make space for the guitar tuner.

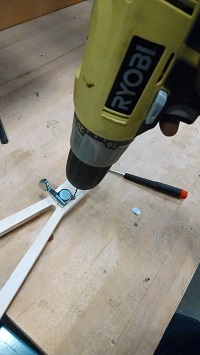
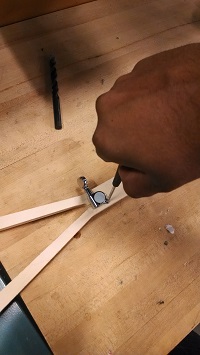
Once the tuner went in, I used the drill with a very small endmill to create an incision for the tuner screw, and screwed it in with a star screwdriver.
I also used sand paper to make the edges smoother.
Assembly
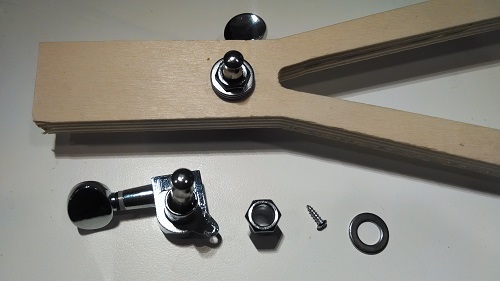
Now comes the interesting part -- assembly. The tuner was assembled using a set of showers and a through-hole screw.
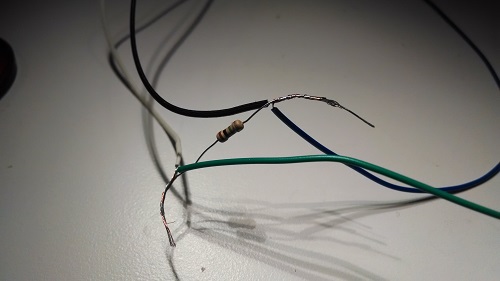
I cut the contact mic's 1/4" mono output, and stripped off some of the plastic sheath to get some copper wire out. The mic will be in parallel with a 1 mega ohms resistor, so I gathered all parts together.
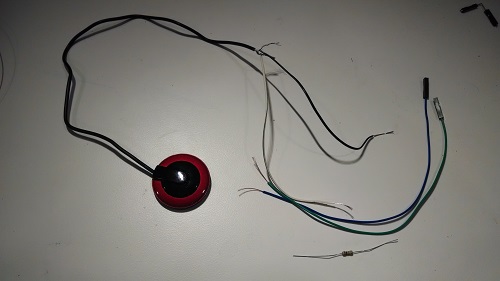
And wrapped the strings and applied a little bit of solder using a soldering iron on the contact points to ensure that the contacts are well-connected.
Then it's ready to be put together with the electronics board. (more on electronics later).
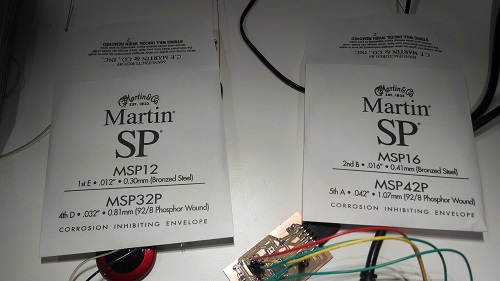
To install the string, I experimented before to understand what kind of guitar string would produce good amount of vibrations. My experiments suggested that I use the 2nd (B) string, which is just strong and thick enough to guard against the tension, while maintaining a good amount of vibration on the rest of the body when it's plucked.
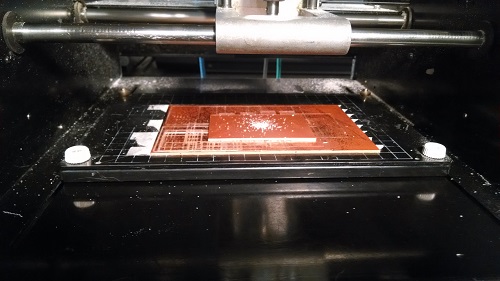
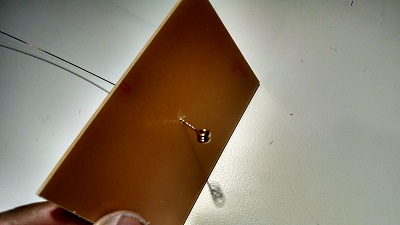
Next, just so the base cardboard does not start bending due to the string tension, and also to prevent the string from going through the cardboard when I tune it a little tight, I needed a stronger support before the string goes through the cardboard. I was in the machine shop and looking at a few copper boards, and I thought, why not!
I milled a copper board using a 1/32 endmill, creating a small hole enough for the string to pass through but not the circular ring at the back of the string.
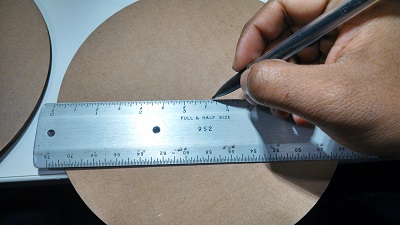
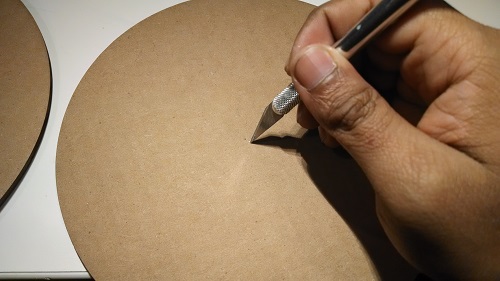
I made a small incision in the cardboard base by measuring the center point (approximately) and using a small knife.
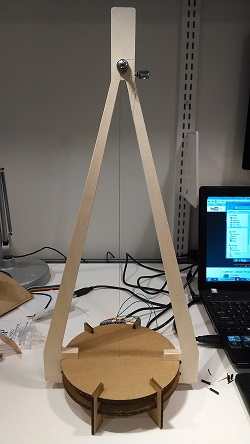
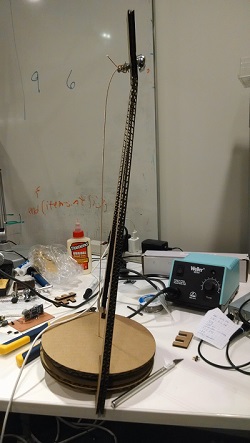
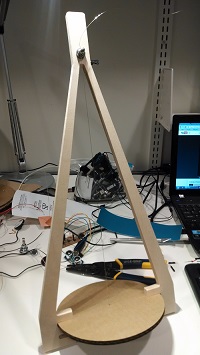
Then it's all ready to bear the string!
Next, I put the string on the tuner and I had the first part of my assembly done!
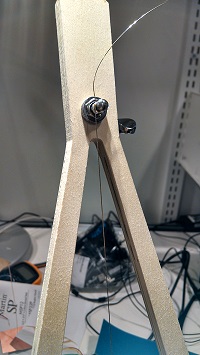
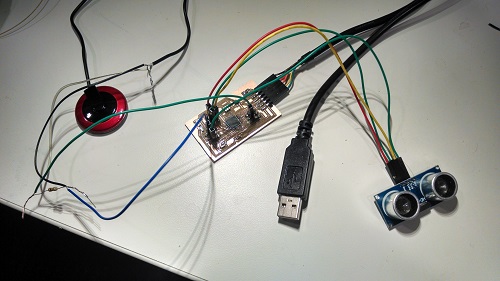
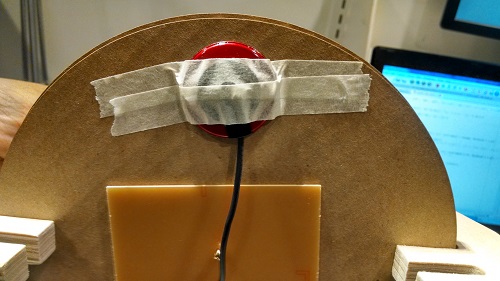
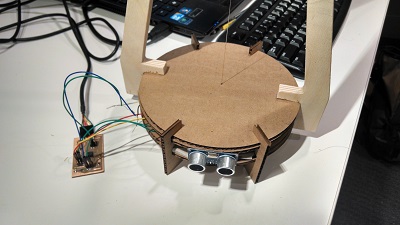
For the next part, I had to install the essential sensors in the base station. I started with the contact mic.
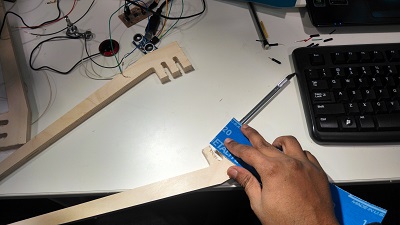
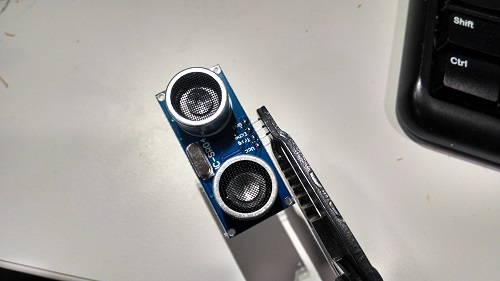
Next was the ulstrasonic distance sensor.
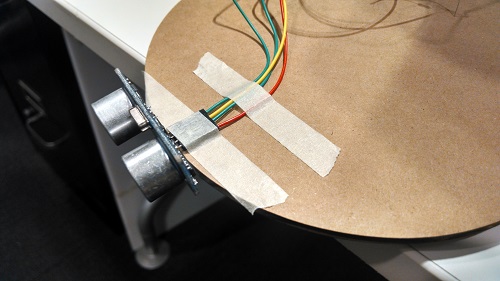
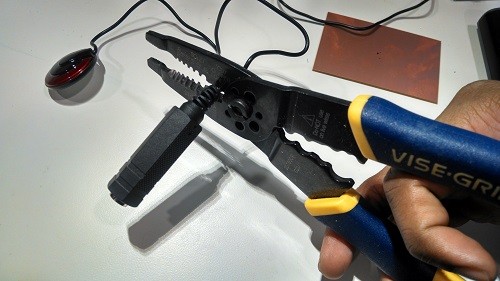
Since the HC-SR04 module has vertical pin orientation, I had to use a plyer to straighten the pins.
Now I have the assembly complete.
Electronics Design and Manufacture
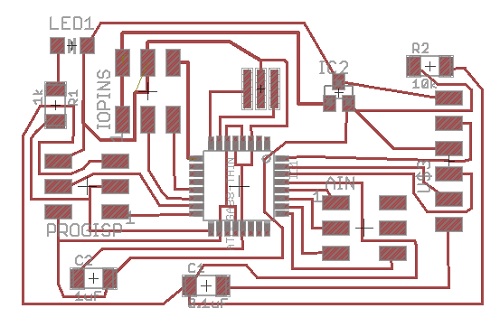
I needed an atmega328 circuit with analog input for the contact mic. I also added a 3.3V regulator with it. I basically wanted to have my own version of arduino with lesser number of pins and bulky-ness. I designed the following in Eagle.
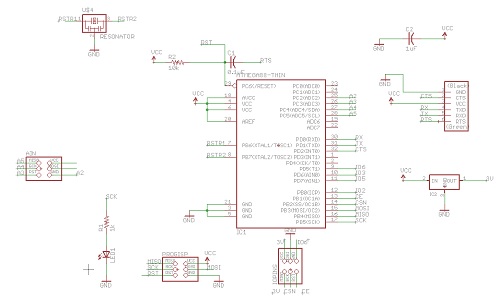
The routing took a little bit of time, but I got better at it over the semester so it was less of a hassle than before.
Milling and stuffing went smoothly, so nothing to show from there!
Programming the Board
I used an Atmel AVR ISP programmer for burning the bootloader. I also changed the boards.txt file to use the correct hex file for the external resonator to take account of.
Firmware Code
The code has two parts to it. One is the firmware code, which filters vibration amplitudes and collects and sends distance sensor data to the computer via my board. The other code is a software interface written in python to recognize the serial input and analyze and play MIDI according to the input. Both code files can be found in my final project directory in the class archive.
The firmware code is the following:
		#define echoPin 10 // Echo Pin

#define trigPin 9 // Trigger Pin

#define LEDPin 13 // Onboard LED


int maximumRange = 100; // Maximum range needed

int minimumRange = 0; // Minimum range needed

long duration, distance; // Duration used to calculate distance


// these constants won't change:

const int ledPin = 13;      // led connected to digital pin 13

const int vibSensor = A4; // the piezo is connected to analog pin 0

const int threshold = 0;  // threshold value to decide when the detected sound is a knock or not


int sensorReading = 0;      // variable to store the value read from the sensor pin

int ledState = LOW;         // variable used to store the last LED status, to toggle the light


const int bufsize = 10;

int buffer[bufsize];

int bufcount = 0;


void setup() {

 pinMode(ledPin, OUTPUT); // declare the ledPin as as OUTPUT

 Serial.begin(9600);       // use the serial port


 for (int i = 0; i < bufsize; i++)

   buffer[i] = 0;


  pinMode(trigPin, OUTPUT);

  pinMode(echoPin, INPUT);

}


void loop() {


/* The following trigPin/echoPin cycle is used to determine the
 distance of the nearest object by bouncing soundwaves off of it. */

 digitalWrite(trigPin, LOW);

 delayMicroseconds(2);


 digitalWrite(trigPin, HIGH);

 delayMicroseconds(10);


 digitalWrite(trigPin, LOW);

 duration = pulseIn(echoPin, HIGH);


 //Calculate the distance (in cm) based on the speed of sound.

 distance = duration/58.2;


 if (distance >= maximumRange || distance <= minimumRange){

 /* Send a negative number to computer and Turn LED ON
 to indicate "out of range" */

 distance = 1000;

 //digitalWrite(LEDPin, HIGH);

 }

 else

 {

   distance += 1000;

 }


  // reset bufcount if needed

  if (bufcount >= bufsize) bufcount = 0;


  // read the sensor and store it in the variable sensorReading:

  sensorReading = analogRead(vibSensor);


  if (sensorReading > threshold)

  {

    bufcount++;

    // add to buffer

    buffer[bufcount] = sensorReading;

  }


  //Serial.println(sensorReading);

  /*

  // check the buffer history for multiple threshold crossing

  int ct = 0;

  for (int i = 0; i < bufsize; i++)

  {

    if (buffer[i] > threshold)

      ct++;

  }

  */


  // if the sensor reading is greater than the threshold:

  if (bufcount > 4) {

    //if (sensorReading > threshold) {

    // toggle the status of the ledPin:

    ledState = !ledState;

    // update the LED pin itself:

    digitalWrite(ledPin, ledState);

    // send the distance value back to the computer, followed by newline

    Serial.println(distance);


    bufcount = 0

  }

  delay(100);  // delay to avoid overloading the serial port buffer

}
The code basically listens for vibration sensor amplitude, and if it crosses a threshold value then it sends the current value read by the distance sensor. there's a history buffer maintained by the program so the programmer can be decide whether to send the vibration immediately or to hold off for a while until a few vibrations are sensed. This is important if the vibration sensor is sensitive enough that it keeps picking up smaller amplitudes of vibration when the string is plucked. This code acts as a signal filter.
Software Interface Code
I wrote the software interface in python. The code uses the pygame library's midi package to turn on or off midi signal. It also uses pyserial library to listen for serial signal arriving at the serial port.
		# -*- coding: utf-8 -*-

"""


@author: saquib

"""


import pygame

import pygame.midi

from time import sleep

import time

import serial

import numpy as np


g_piano = 0

c_organ = 19

dist_guit = 30

rain = 97

crystal = 99

newage = 89


notedict = {'C': '72', 'C#': '73', 'D':'74', 'D#':'75', 'E':'76', 'F':'77', 'F#':'78', 'G':'79', 'G#':'80', 'A':'81', 'A#':'82', 'B':'83'}


ntstate = {'C': 'off', 'C#': 'off', 'D':'off', 'D#':'off', 'E':'off', 'F':'off', 'F#':'off', 'G':'off', 'G#':'off', 'A':'off', 'A#':'off', 'B':'off'}


# G, D, C, E

distdict = {'5':'G,B,D', '8':'D,F#,A', '12':'C,E,G', '15':'E,G#,B'}


veldict = {'5':'30', '15':'70', '25':'127'}


#settings


dieout_time = 3


def midion(note, outport, loudness = 127, instrument = newage, duration = 1.0):


        outport.set_instrument(instrument)

        outport.note_on(note,loudness) # 74 is middle C, 127 is "how loud" - max is 127

        #sleep(duration)


def midimultion(notes, outport, loudness = 127, instrument = newage, duration = 1.0):

        # notes is coming as string, convert to int

        outport.set_instrument(instrument)

        for note in notes:

            outport.note_on(int(notedict[note]),loudness)

        #sleep(duration)


def midioff(note, outport, loudness = 127):

    outport.note_off(note, loudness)


pygame.init()

pygame.midi.init()


port = pygame.midi.get_default_output_id()

print ("using output_id :%s:" % port)

midi_out = pygame.midi.Output(port, 0)


ser = serial.Serial('COM7', 9600, timeout=0)


sdists = np.sort(map(int,distdict.keys()))


vibon = False

vibt = 0

key = None


try:

    while True:

        #char = sys.stdin.read(1)

        bytesToRead = ser.inWaiting()

        incoming = ser.read(bytesToRead)

        #incoming = ser.readline()

        #print incoming

        if len(incoming) > 3:

            print incoming

            vibt = time.time()

            vibon = True

            # get the distance sensor value, then decide scale to play

            val = int(incoming) - 1000

            if val == 1000:

                continue

            else:

                for k in range(len(sdists)-1):

                    if val >= sdists[k] and val < sdists[k+1]:

                        key = distdict[str(sdists[k])]

                        print key

                        break

            if key == None:

                continue

            # otherwise play the notes

            midimultion(key.split(','),midi_out)

            for i in key.split(','):

                if ntstate[i] == 'off':

                    #midion(int(notedict[i]),midi_out)

                    ntstate[i] = 'on'

            #ntstate[ntstate.get()]


        #after sometime, turn all notes off

        allnotes = notedict.keys()

        passed_time = time.time()

        #print passed_time - vibt

        if passed_time - vibt >= dieout_time:

            for nt in allnotes:

                if ntstate[nt] == 'on':

                    midioff(int(notedict[nt]),midi_out)

                    ntstate[nt] = 'off'

            vibon = False

        #sleep(0.02)

except KeyboardInterrupt:

    del midi_out

    pygame.midi.quit()
The code defines a a list of notes and chords, and a few functions to play those chords. The main loop listen to incoming signal. If the message is valid (as passed by the length of the message), then bins the distance value and looks for which note/chord it should play in the dictionary, and asks a midi function to turn those notes on. After some time (die_out = 3s), the notes die off automatically. A for loop searches though all the notes in the notes dictionary and turns off the ones that are already on. The program takes account of keyboard interrupts to stop listening to serial port and exit.
Demonstration Video
The following are two videos of the demonstration. The first one shows the main components and process, and the second one shows what happens when the buffering (filtering) code is not used in the firmware. The sounds are more spontaneous, but we get many notes easily because of no check on vibration.