Week 5: Computer Controlled Machining
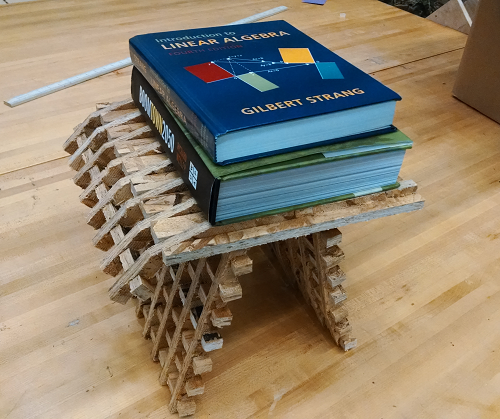
This week, we were asked to use the Shopbot for making something big. I decided to make a book holder and/or wooden casing in the shape of Pi.
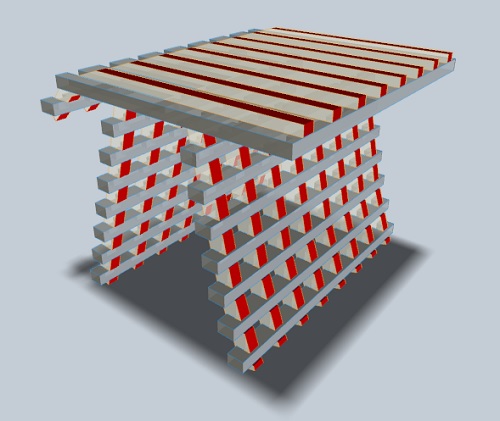
The idea was pretty simple: create a 3D model of the number Pi in Autocad Inventor, export .stl file and open it in 123D Make (by Autocad), create an interlocking mechanism (tool provided by the software), generate a vector file for all the pieces. Then, create a toolpath in the Partworks software and run the shopbot on a piece of OSB board.
Process
The 123D Make software can directly load a stl file and approximate the 3D model using a bunch of 2D planes.
I had to make sure that I customized the material type and properties for the kind of OSB board we were provided.
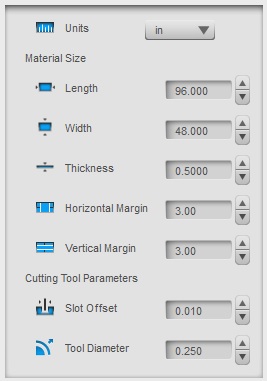
From the vector file output from 123D Make, I created a toolpath (.sbp) file (after editing the placement of the cuts). The space usage by 123D Make output wasn't optimal, so I moved around pieces in Partworks to use the board efficiently.
I used a 0.25" endmill, and the cutting took around an hour.
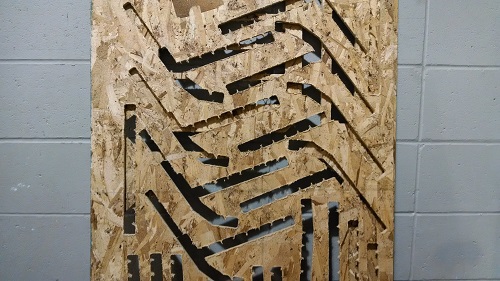
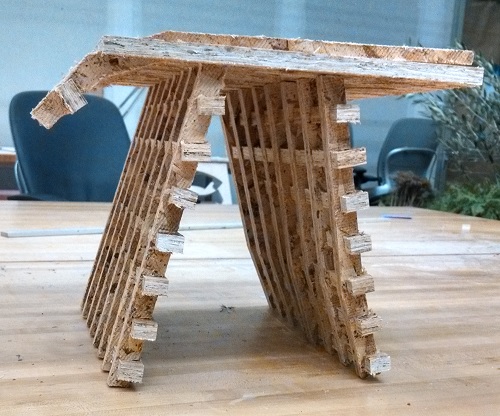
And the pieces were nicely cut too. I wanted to sand the pieces to make them a little smoother, but there were too many pieces so I had to be content with the quality of cutting.

Next was assembling all the pieces together. I had to glue one leg of Pi, as I didn't plan ahead to create some holes for them to hold together.
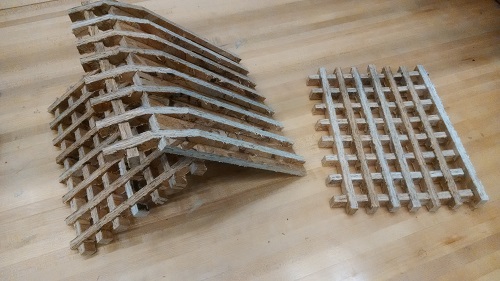
After gluing, the structure was strong enough to hold together, and carry some good amount of weight too!