Yet Another DIY Sous Vide
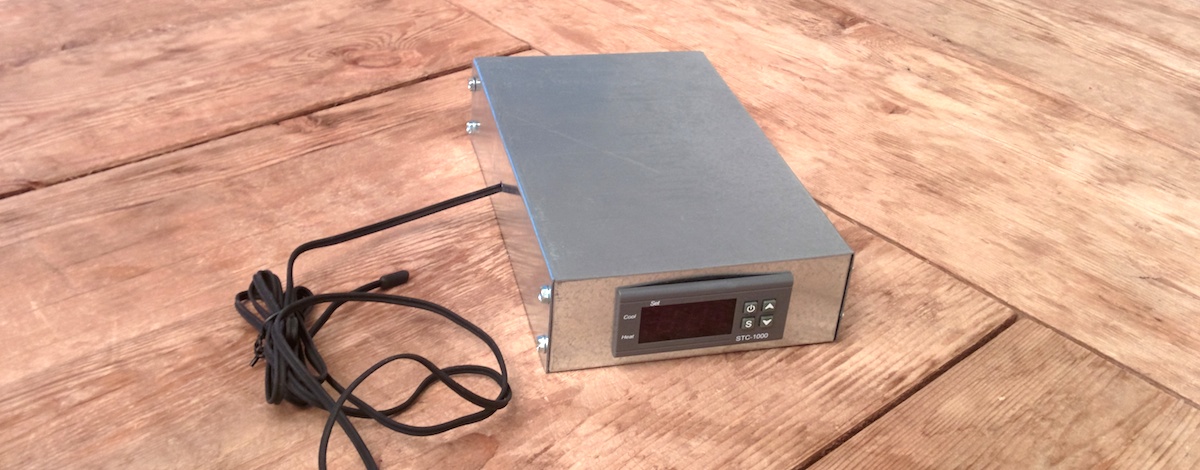
I don't like having lots of kitchen appliances believing that with sufficient skill and a couple of good cookwares, one can cook about anything with a stove and an oven. However, one lazy sunday morning, I found myself craving a poached egg and realized that I can't make that just creamy yolk reliably. So I decided to suck it up and make a sous vide controller (again). Last one was a PID controller which is unfortunatley stuck in storage on the other side of the country. This time I went with a simple cut-off temperature controller based on this instructable. While it didn't hold the temperature as accurately as my old PID controller, the results were fine. I hadn't worked with sheet metal before so I took the opportunity to make a case out of some scrap aluminium we had in the lab. All together it came out to $30 in parts.
So if you want to make one, follow along. Of course, we are talking about mains AC current, home made circuits, water and raw food. Death in the family can ruin in your whole day so don't follow along unless you know what you are doing.
Parts
For the guts:
- Lerway Temperature Controller aka The Brains ($14)
- C14 Power inlet aka computer plug thingie ($4)
- NEMA 5-15 Power Socket aka household socket ($6 for 10pk)
- 18 guage wire (I cut open an extra power cord for wires)
- Wire-nuts (must be able to join 3 18 guage wires)
For the case:
- 0.025" thick 6061 aluminium sheet. Needs about 2sq ft of it.
- #6 sheet metal screw with pointy end
- 6-32 nut and bolt for grounding the case
If you are in the lab, you should be able to salvage most things except for the controller and maybe the C14 inlet.
Wiring
Wiring is pretty straight-forward. Here is a handy diagram:
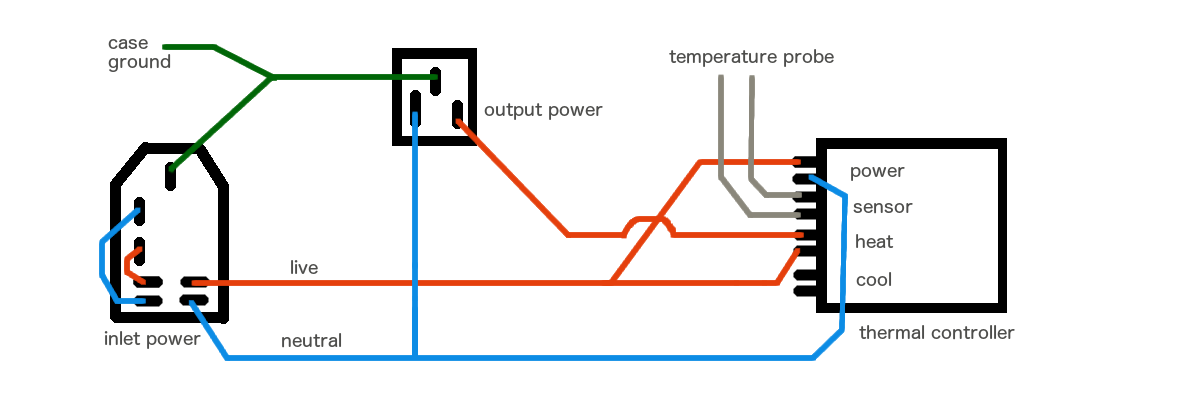
Output is standard US socket which is NEMA 5-15. For output ground pointing down has neutral to the right (bigger socket) and live to the left. Inlet socket is the IEC320 C14 socket or computer power thingie. The part listed above has a fuse built-in and comes with a lit up switch. The switch is double throw, that is to say both wires are connected or disconnected with the switch. Here is a close up of the C14 wiring.
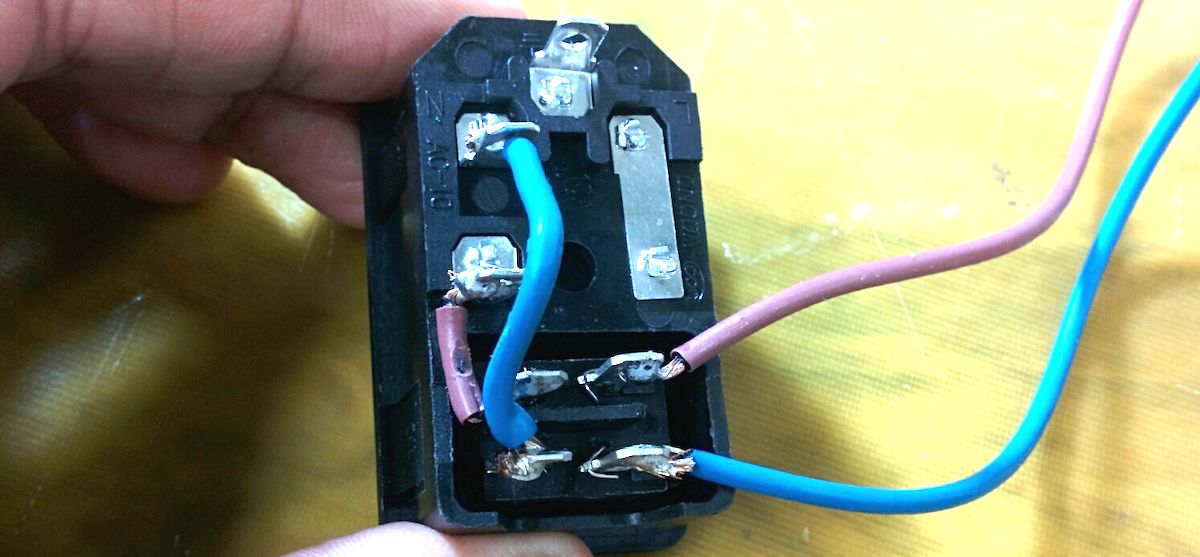
I used wire-nuts to do the 3 wire junctions instead of soldering those. This allowed me to easily take the components apart. At this point, you are good to go to try your sous vide machine. Plug in some water heating device. I used a manual crock pot. Cover up all exposed terminals with electric tape, use GFCI wall outlet, wear insulated shoes, stand back, and flip the switch. If you hear a loud beep, press a button to reset the controller. You did read the controller instructions, right?
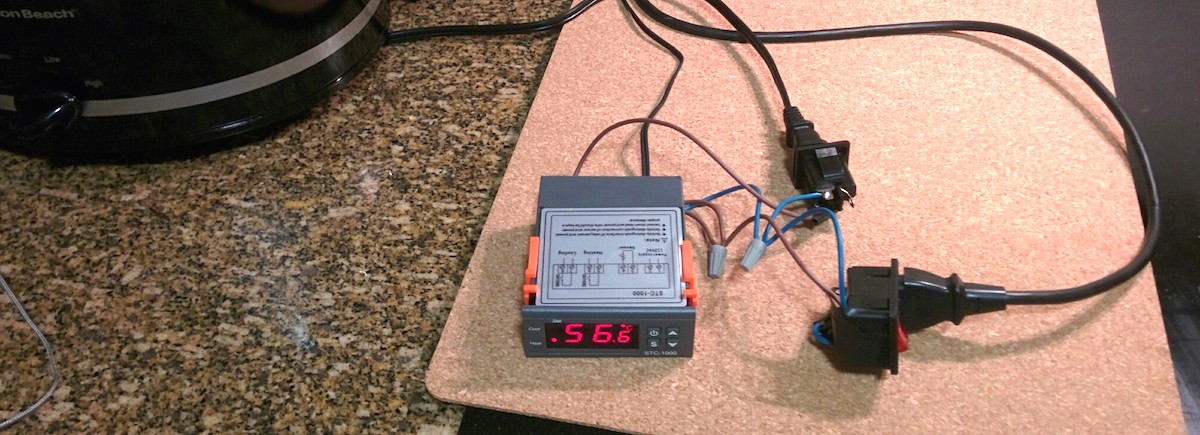
Cooking
To set the temperature target:
- Press 'S' for 3s. Controller will say 'F1'
- Press 'S' again to see target temperature
- Hold 'S' down and use arrow keys to set temperature
- Press the power button (wtf) to lock in the temperature
RTFM for the rest. Set temperature to 62.8 and throw in some eggs in their shell for some creamy deliciousness.

Takes about 45 mins at the right temperature.
The other classic is of course the medium rare steak. Here is a NY Strip steak about 1.25" thick cooked at 57.2 for an hour 20 mins.
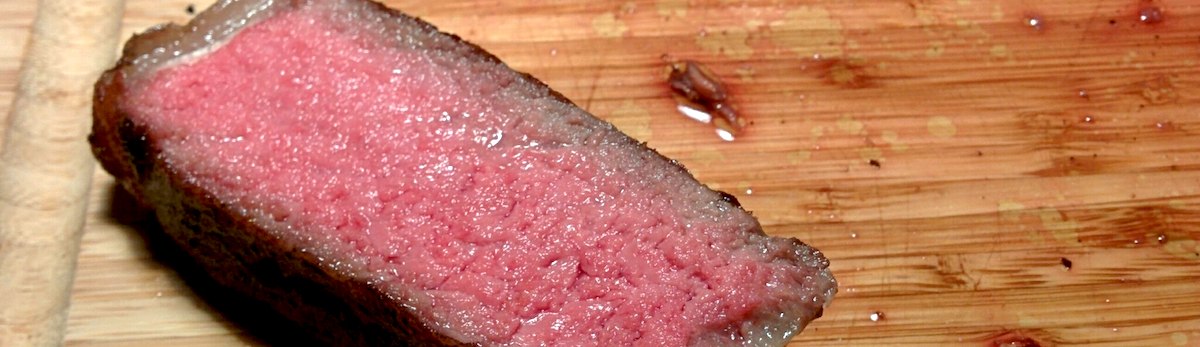
The sides are seared 1min on one side and about 3 mins on the other.
Case
Exposed mains electronics is no fun so you will want to make a case. If you want to remake the same case I made, just to skip to the cutting
Designing
I used Solidwork's sheet metal tools to design the case. I found this video to be a helpful introduction to sheet metal. The case is in two pieces: a tray that provides base and the front and back plates where the components will go; and a lid which provides the top and the left/right surfaces. The bottom tray has flanges coming out of the front and back plates which the lid screws into.

Roughly, here is the process if you want to design your own:
- Measure all the parts to get the cutout sizes. note that the clips take up more room than you expect.
- Leave some room so you don't have to be scraping sheet metal when you are jamming them in.
- Go check out the brakes you will be using for bending sheet metal. you will want to design your case so that a brake will fit inside the flanges when you are bending the tray.
- Create a part in solidworks which will be your master sketch
- In the master, make a simple extruded box which will be the platonic ideal of your case. (mine was 5"x2"x12")
- I lied. I set the width to 5" + 2 x material thickness. This is to fit a 5" brake in.
- Add in sketches for cut-outs, screw-holes. Add a hole to pull the sensor wire out and one for an earth screw. For #6 sheet-metal screws, I created holes that were 0.1065" in diamter. For #6 bolt, I think it is 0.145"
- Now create a part for the top lid.
- Insert the master part
- On the front face of the box, create a sketch
- Choose the left, top and right edge and convert them to lines in the sketch. (I didn't do this but adding a slight offset is probably prudent)
- Now in sheet metal tools, choose Base Flange and extend the flange to the back of the box. Check to make sure that material is on the outside of the box.
- Use cut-extrude to cut the cut-outs (screwhole, sensor wire hole)
- Create a third part for the bottom tray and insert master part
- Create a sketch on the left surface of the box
- Base Flange that sketch but reverse the direction of the sheet metal so the material is on the inside. This way the top lid will go outside the bottom tray
- To create the mount point, create edge flanges off the 4 edges off the front and back surfaces extending in for 0.5". Check to make sure that the edge flange is inside the box
- Do all the cutouts (components, ground screw hole, screws holes)
- Flatten. The tricky bit is that edge flanges are foldable without an additional cut. Why not, solidworks?
- Anyway, add in arcs of material thickness radius at each corner of the flanges to be able to fold them in.
- Select face and export to DXF
- Flatten and export the top lid
Cutting the case
Here are the DXF files if you just want to cut the case I made:
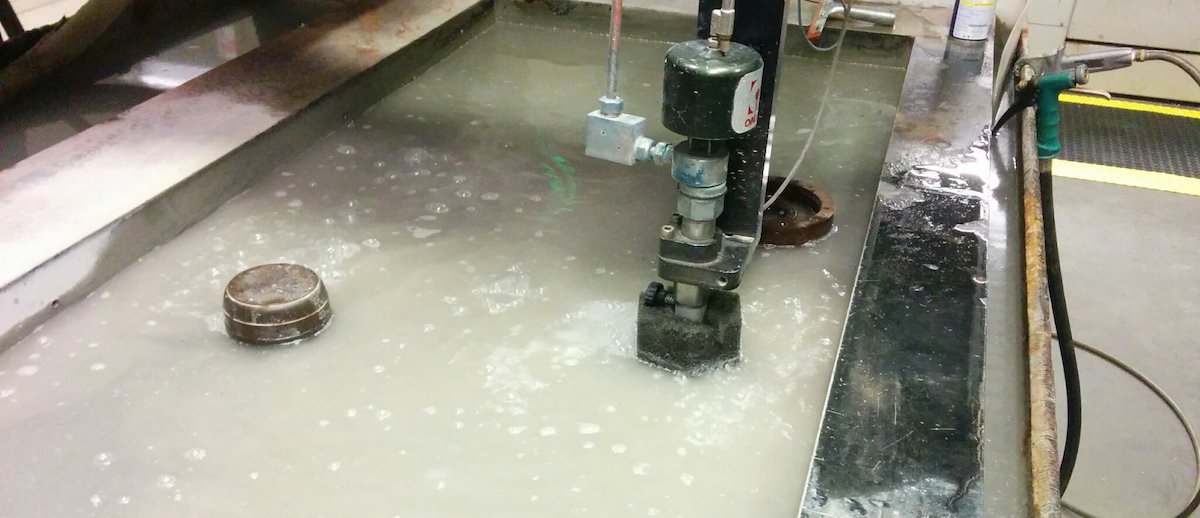
On the OMAX water jet:
- Open up the files in two separate window (no to not convert to metric)
- Select all in one window (right click select)
- Copy and paste into the other window
- Unselect all
- Right click quality, select all
- Choose quality 3
- Right click lead-in and choose Autopath quick
- Save path
- Set material. clamp it, weigh it down. zero z-axis (turn, block lifts, turn back + half a turn)
- Open up path
- ???
- Machine
btw, if you hit e-stop on the water jet, you will have to turn water pressure back on with the switch on the left.
Bending
The sheet metal bender uses small handles to clamp the metal under the brakes and the big handle to do the actual bending. Screws on the back move the brakes in and out to set radius of curvature. This part is unfortunately shoddy and requires extra care to not screw it up.
If you are bending my case:
- Bend the edge flanges from the outside of the arc cutouts so that they are inside the edge of the tray
- Bend the front and back faces by placing a brake within the edge flange
- Bend the sides of the top lid by placing the brakes on the corners of the overhang
Putting it together
If you had wired the components together already then this is pretty easy. Undo the wire-nuts, jam the components into the case and redo the wire-nuts.
This is also a good time to put a nut and a bolt into the case which you can then wire to the ground pin.

Mistakes
- Didn't get a shiny finish on the solder in the first pass. I think it was the non-leaded solder and my lack of knowledge of how to use it correctly
- I designed the case to have the top part fit tightly over the bottom part. Howver, hand-bending and bend radius introduced errors that made the fit hard. Would recommend adding some gap between the two strapiece flexes in.
- Sheet metal is really flexible. The long bottom tray flexes in. The front panel bends in as well. You can see that in the picture above. Recommend adding some flanges to stiffen the long pieces
- Forgot to add bolt hole for case grounding.