Week 4: A CNC Chair
The Problem
There wasn't a problem. There are easier ways to get a chair. However, it was a lot of fun to make one and I learned more about solidworks than I thought I would.
Design
The gist of the design is I used two surfaces to define the volume of the chair and created slices out of that volume. Add some legs and you have a chair.
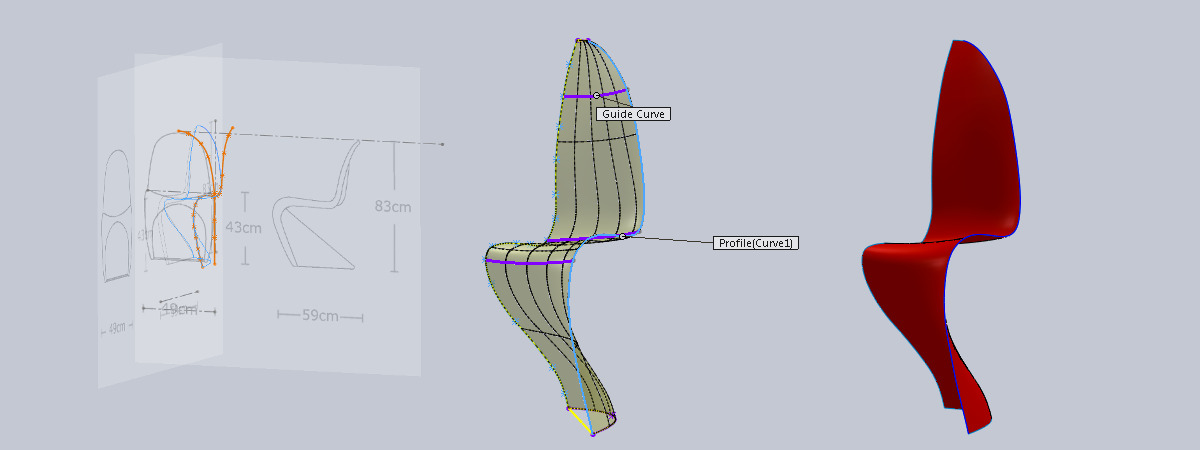
I came across an excellent Panton chair tutorial while trying to figure out how to design organic shapes in solidworks. Here is how I made the chair: First I made a surface roughly following the panton design. For this I started with 2d sketches of the panton chair and traced outlines. The two 2d outlines combined to form a 3d curve which defined the outer edge of the chair. The middle profile was a simple 2d curve. I then lofted a surface between two these two curves. To give it more roundness, I added splines with 3d sketches as guide curves. At the end of this I had half a chair surface.
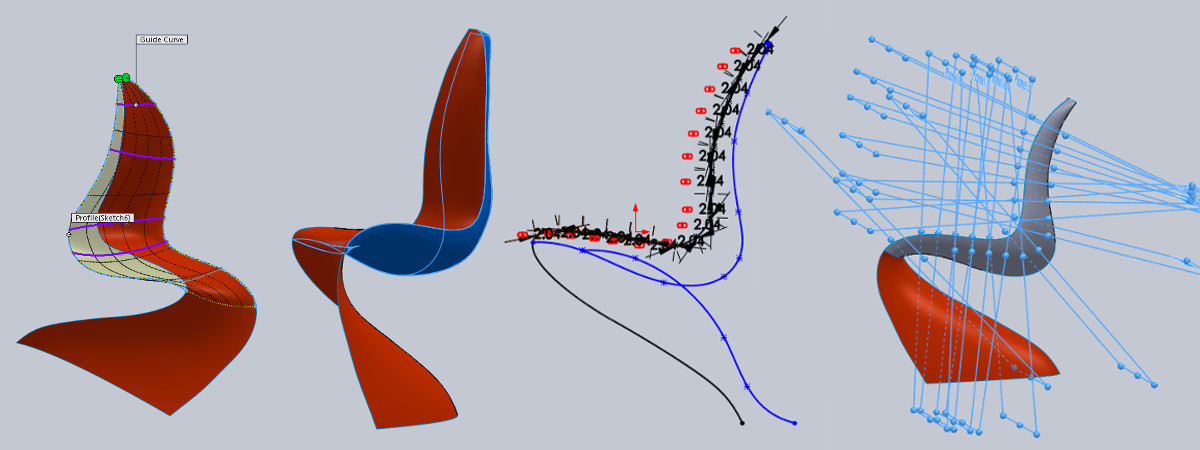
Once I had the surface, I needed to give volume to it. I imported the surface into a new file as a part. Then I extracted the profile curve of the surface (same one I had drawn in the first step). The idea being the surface will define the rest of the chair ala Master Sketch. Now using the outside profile of the chair, I created a new lofted surface that gave the chair volume. Then I took the outline in the middle of the chair and added equally spaced points along this curve. At these points, I dropped in reference planes that are perpendicular to that spline. These will be used for slicing up the volume of the chair.
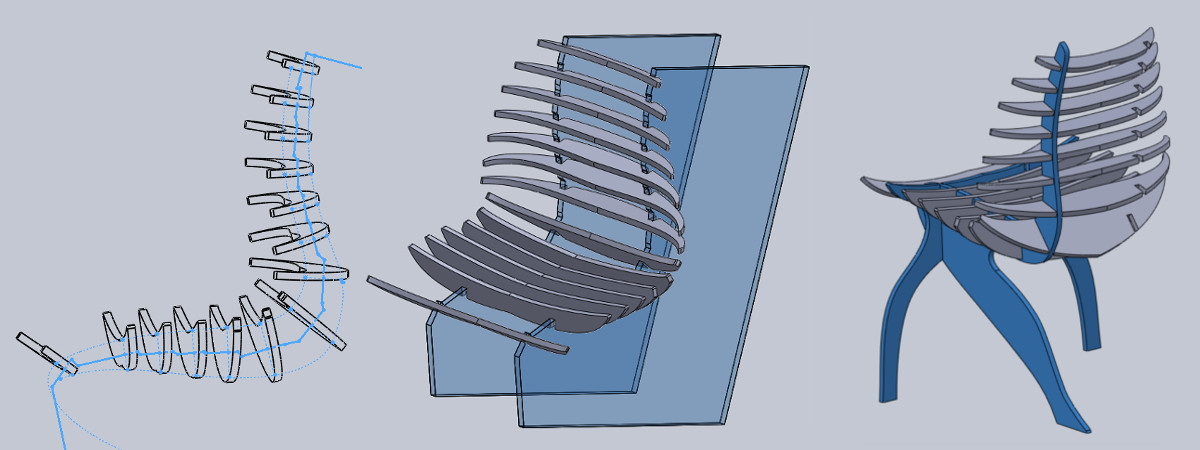
Now comes the tedious part. On each plane, I took the intersection curves of the two surfaces and mirrored across the center line which defined a rib for the chair. Once I had all the ribs I could Boss-Extrude them. Instead of creating separate files by hand for each part, I extruded them all and then saved the bodies which automatically generated an assembly of these parts. I still had to do the legs. I sketched the legs in by hand. Inspired by the kerFchair design, I have 3 legs two of which are parallel and orthogonal to the one in front. The legs follow the surfaces already defined where possible and the rest is made with hand sketched splines.
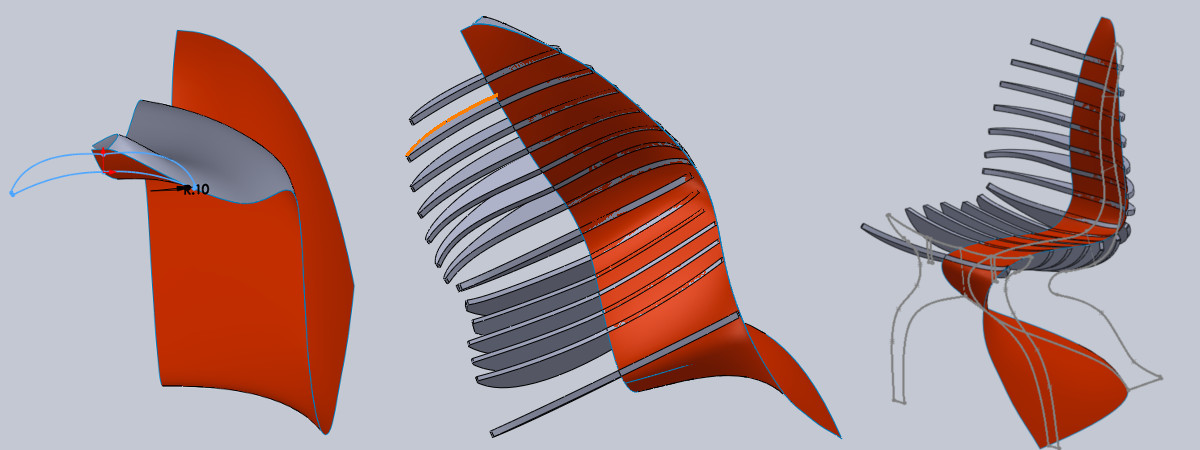
Last step creating the slots for press-fitting. For this, I created a single cutting piece that I subtracted from the slots. THe outline of the cutting piece roughly follows a spline that is midway between the two surfaces of the chair and is perpendicular to the plane of the ribs at each point where they intersect with the splines. Using the mold cavity tool, I cut out the slots from the ribs and then use the ribs to cut out the slots on the main legs.
Preparing to cut
I exported the parts out of solidworks using an assembly + drawing trick. I created a new assembly with all the parts mated to one surface, the face of the first part added to the assembly. Note to self: The first part in the assembly should be one which is parallel to one of the 3 starting planes (eg. front). If not, the drawing will show a projected view which will create double lines on the edges. Once I had the assembly, I created a drawing which has only the view of the assembly in it. From the drawing I can export a DXF
I then opened up the DXF in PartWorks for tool path planning. In PartWorks, I first joined all the vectors and then added t-bone fillets to all my slots and cleaned up a couple of bad lines. Picked a 1/4" end mill. It showed up as up-cut while I was using a downcut bit but wasn't an issue. Set RPM to 10k, feed rate at 150 and plunge rate at 60. I set the cut depth at 0.6 for a 0.49 material. Then I created a profile toolpath (tool on the outside) with 4 tabs per part and exported it as a shopbot file.
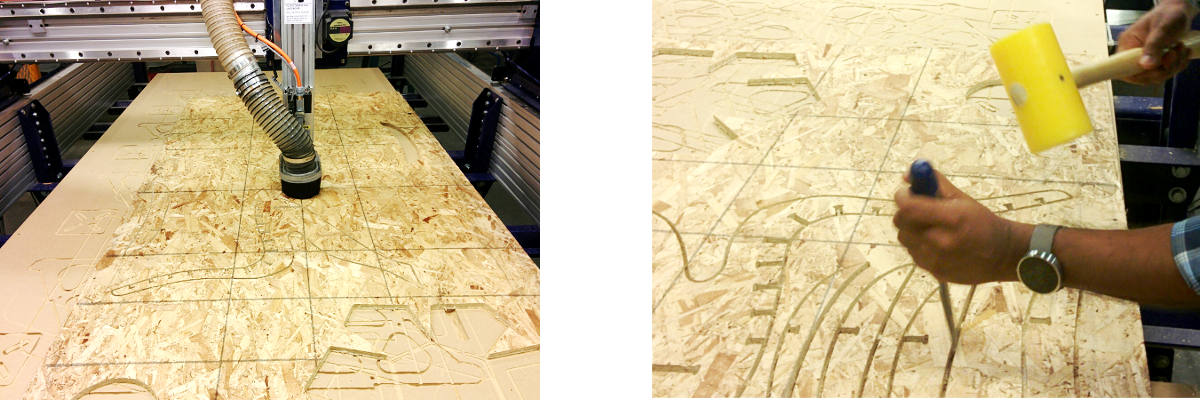
Cutting
Jonathan B's help was invaluable in this part. We used the shopbot of course. In my case, the cutting went smoothly except for a minor heart attack along the way when I realized that I had configured my slots for 0.45". Anyway, cutting done we chisled out the tabs to get at the parts.
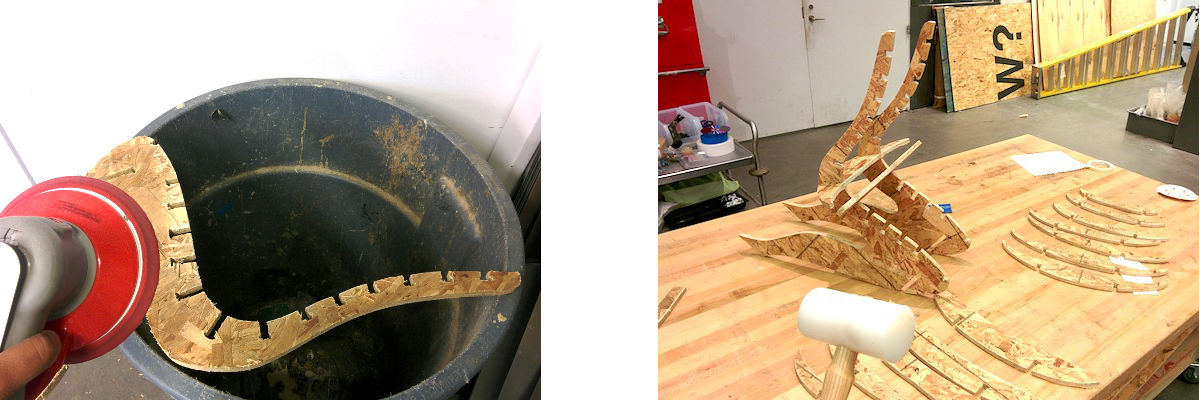
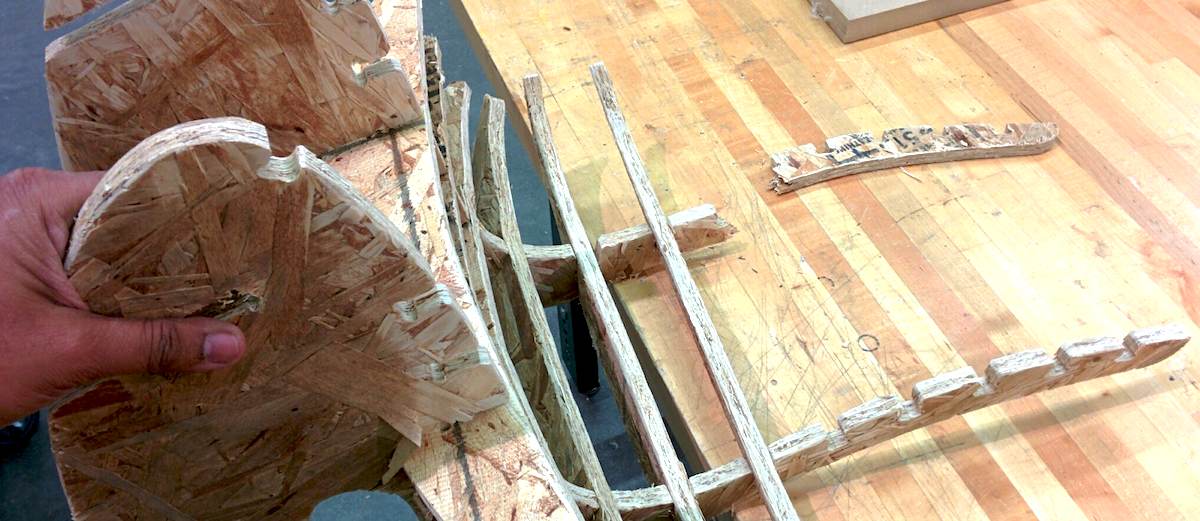
Assembling
The cutting process had left the backside and the edges rough. I spent a good amount of time with a pneumatic orbital sander smoothening out each piece. I also added the fillets on the corners by hand. Then hammering them in starting from the thickest piece first. Hammering was necessary since I had made the slots narrower than the material thickness. With hindsight and the benefit of Santiago's advice, I should have chisled the slots bigger.
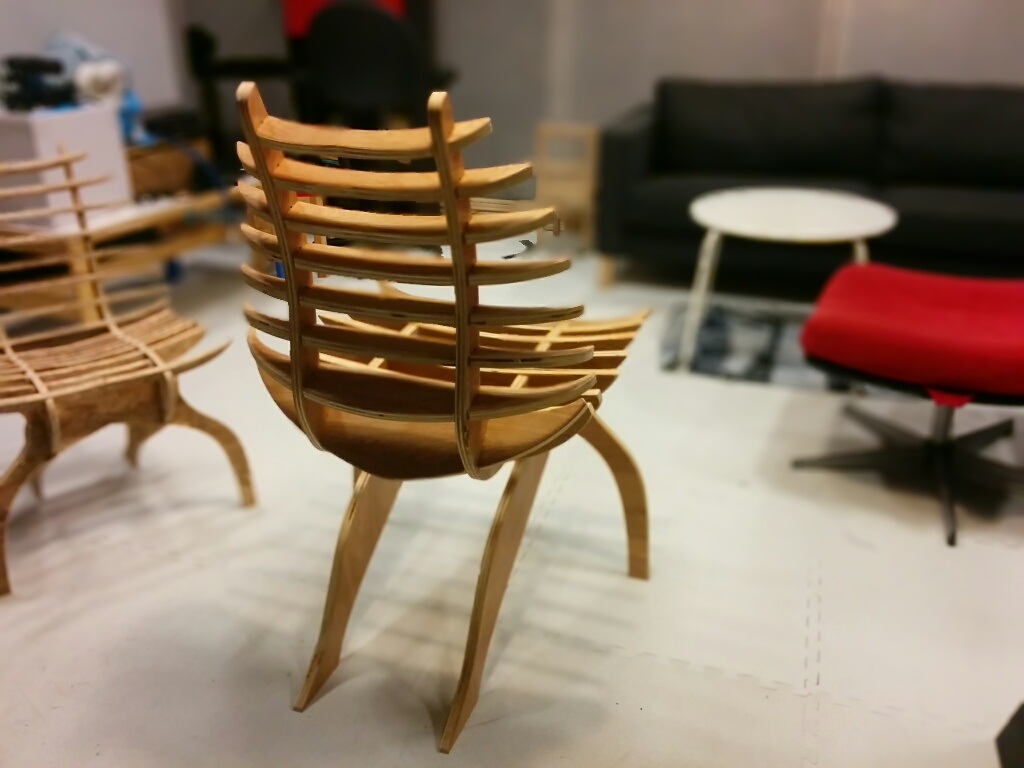
well shit
The fit was tight enough that I could still hammer all the ribs in and it holds up the missing spine. Leaning back is of course out of the question. The front leg is also beginning to crack from the hammer but good enough for a photoshoot:
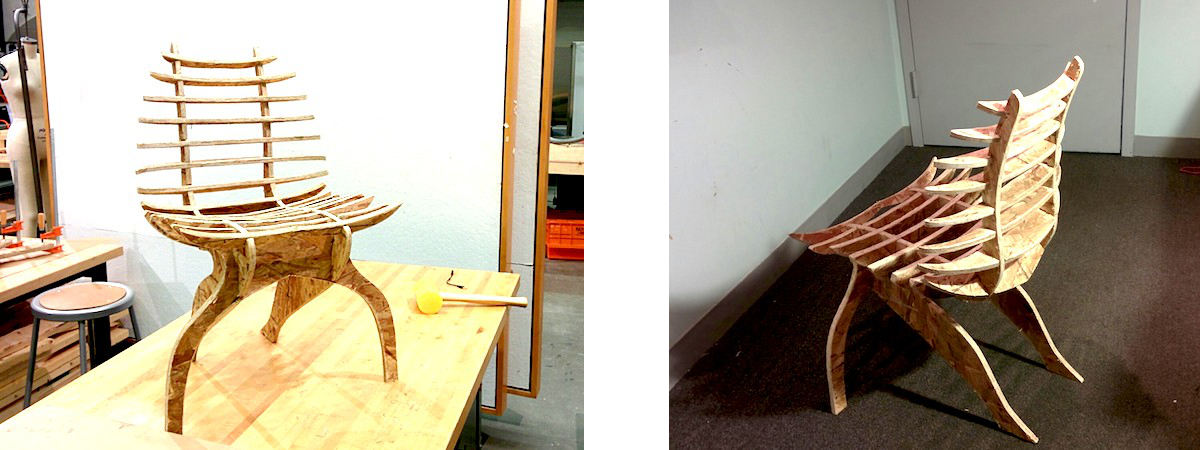
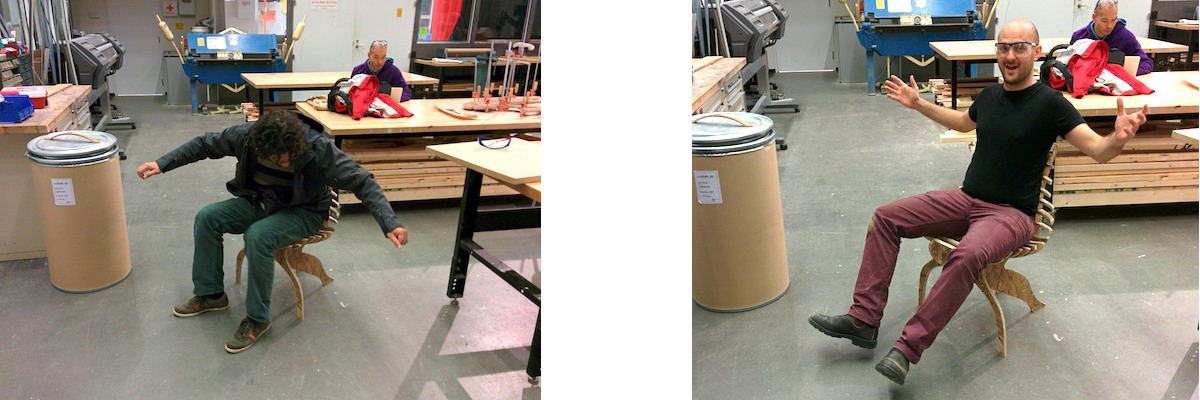
Given the state of the chair at this point, we decided we will have Bianca try it. :) Here is the first test ride where we expected the chair to collapse in a pile of splinters.
Some happy customers:
Checklists
Partworks Checklist
- Import file. Make sure 0,0 is lower left corner
- Check vectors to make sure no double lines
- Select all and choose Edit> join vectors
- Select all and check for duplicates Edit > Select All Duplicate Vectors
- Bring up Tool Path menu (from the left). Pin it.
- Choose profile toolpath
- Choose bit (1/4" Up-cut Bit) Pass depth .25, stepover 0.1/40%.
- For 3/4 plywood, set spindle to 10k, feed rate to 120, plunge rate to 60
- Choose cut depth (material + 0.1")
- Check Passes
- Choose OUtside/Right (otherwise it cuts on the inside)
- Choose Conventional cut (Climb maybe smoother but harder on the machine)
- Select vectors to cut
- Select Add Tabs (length 0.25in thickness 0.25in)
- Click Edit Tabs to add and move tabs (protip: put tabs where you can sand easily later)
- Calculate (should complain about cut depth > material thickness)
- Verify tool path by inspection
- Close
- (add more paths if needed)
- Save toolpath (disk icon)
- Click red X to delete tool paths
Material Setup
- Lay down board
- Make sure it is roughly parallel to the bed
- Screw it down to the sacrificial layer
- Figure out from drawing where screw holes can go
- Use tape measure and pencil to mark screw holes
- Use a drill bit whose diameter is between the threads and the head of the screw to drill through material
- Add screws (1.25" for .75" material )
Shopbot Checklist
- Change tool head if needed
- use special wrench on collete holder (turns from right to left to loosen if I remember correctly) and another wrench on top part
- change tool (using downcut 1/4in)
- Turn on red switch
- Open shopbot v3
- Hit yellow button to get keypad controls
- Use keypad to zero x,y (helps to lower head)
- In menu Zero > Zero X, Y
- Place metal plate under head
- Choose Cut > c2 (zero Z with plate)
- Remove plate
- Check to make sure spindle power in on in the beige box next to power switch. RPM reads 10.00
- Turn on vaccuum
- File > Load part file
- Click Start on screen
- It will pop up a window asking you to hit the physical green button. Hit it
- Hit okay to start cutting
After Cutting
- Turn off vacuum
- Turn off red power switch
- Use chisel and hammer to cut out tabs
- Use shopvac to vacuum the sawdust
- Unscrew and ditch material
Chair: Part Deux
I remade the chair in plywood and scaled it up by 25%:
Useful links
- Open source furniture
- Various CNCable joints
- Laser-cut curved surfaces (from Amanda)
- Breakplane construction (from Seth)
- Folding Techniques for Designers (book) by Jackson (from JB)
- Origami Door! (from JB)
- Shopbot File Format if you need to hand edit (keep the header)