week8.md
Week 8: A Composite Boomerang

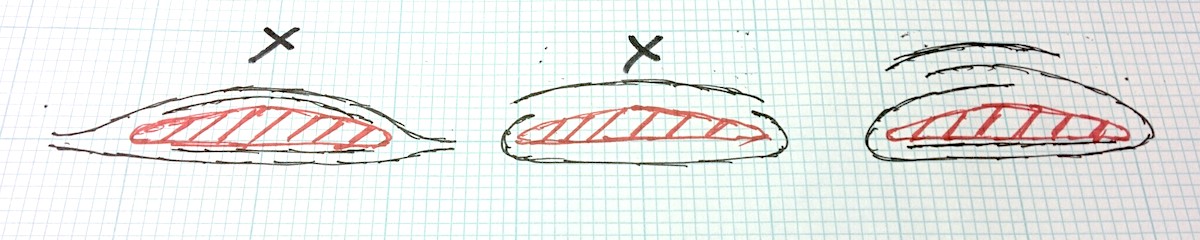
The plan was simple. Make a composite boomerang with the mold inside the composite structure to give it shape. I followed an example boomerang design off the web. The main trick of the boomerang is to have the two legs of the boomerang have opposite airfoil shapes. That is to say that as the boomerang spins the leading edge of each leg must always be the thicker edge.
Design
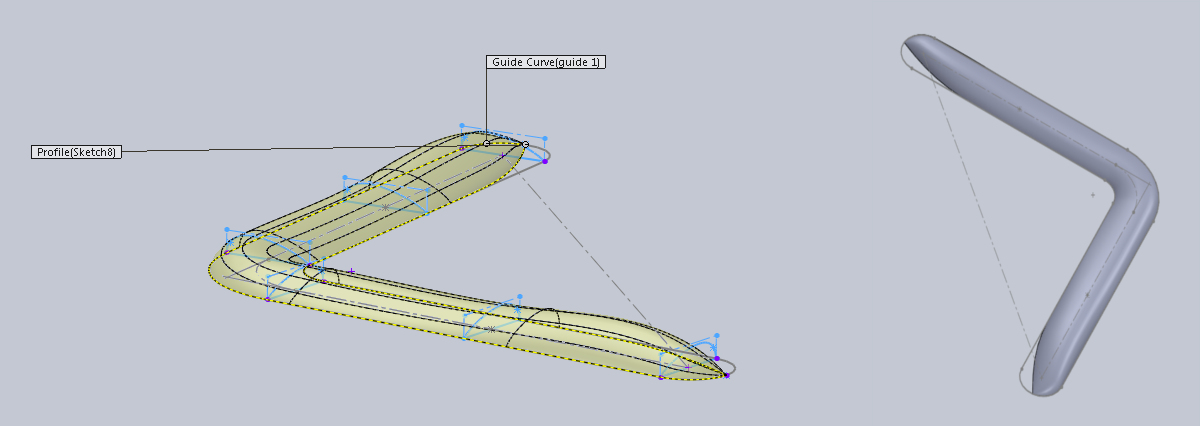
This was a job made easy and frustrating by solidworks. For the main shape, I defined a triangle with two legs at 12" and the third at 18". Offsetting this by an inch on either side and capping the ends gives me the outline of the boomerang. I then defined a few planes along the triangle and drew the airfoil sketches on it. Neat bit about solidworks: you can cut paste a sketch from one plane to the next. Next step is lofting these airfoils together along with some end points to create the boomerang. This is bit where solidworks got frustrating. Without any guide curves the shape balloons out between the profile curves. However, I couldn't quite get the loft to stick to the two guide curves of the profile. It was boomerang-y enough though.
Milling
The shopbot reliably doing its thing. Here are the parameters for path planning (partworks 3d):
- End-mill: 0.5" ball nose
- RPM: 12,000
- Feed rate: 250 inch/min
- Plunge rate: 70 inch / min
- Stepover: 50% (rough cut), 17% (finishing cut)
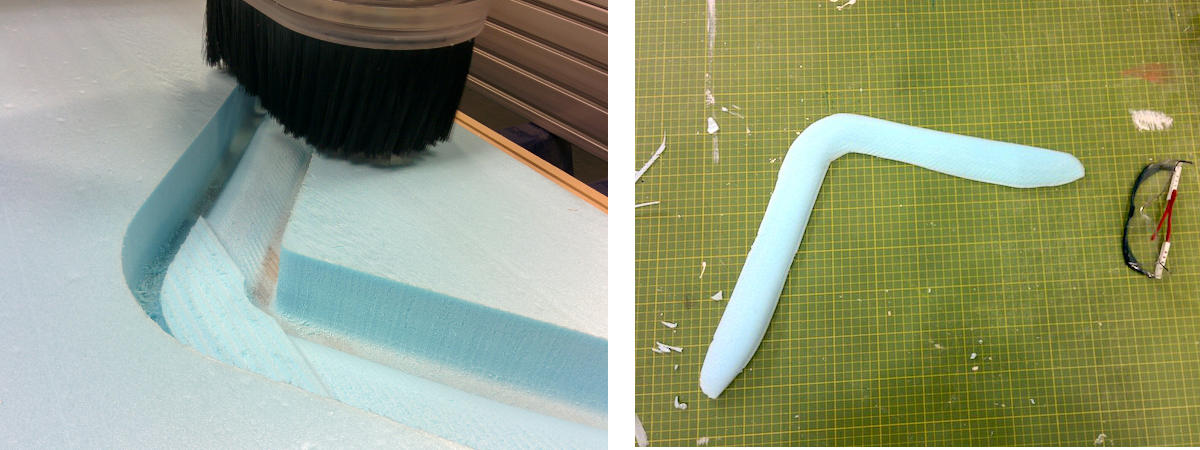
In partworks, I sunk the part so that it was flush with the bottom of the material. This way, I could cut out the mold with an exacto knife. However, the shopbot spent a good 10 mins digging through the 2" foam to get to the right level for my part.
Note to self: Heat gunning to smoothen out the surface did not work. It smoothened it out however because the part was very thin it started to shrink in size as well.
Laser Cutting Fiber
The main difficulty I faced in this project was figuring out how to lay out the fiber to cover the piece. I didn't want any wrinkles but the double curvature of my part meant that the fiber would either have to stretch or I would have to make darts. With Chikara's help I tried unrolling or squashing the surfaces in Rhino but we couldn't get it to work. In the end I just offsetted the silhouette of the part in solidworks and cut it using the laser cutter.
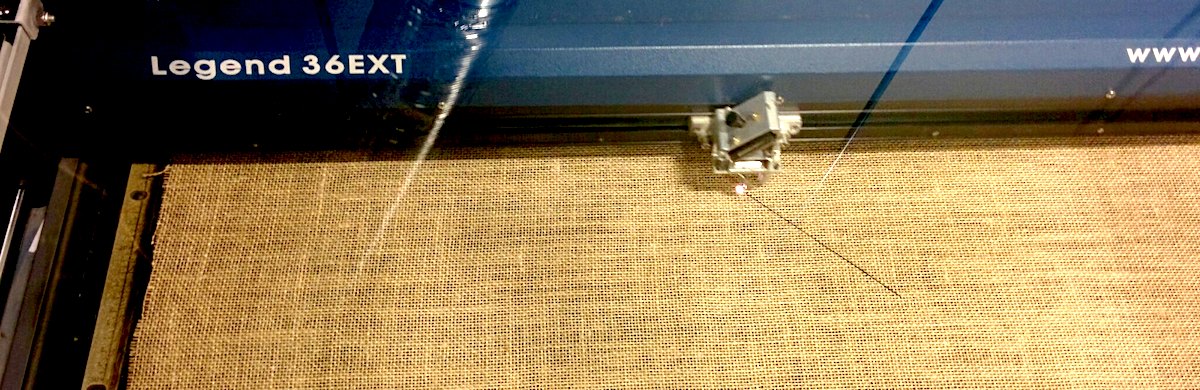
For the record laser parameters (Epilog machine 120W):
- power 50%
- speed 50%
- Freq 2500HZ
worked nicely for both the linen and the burlap.
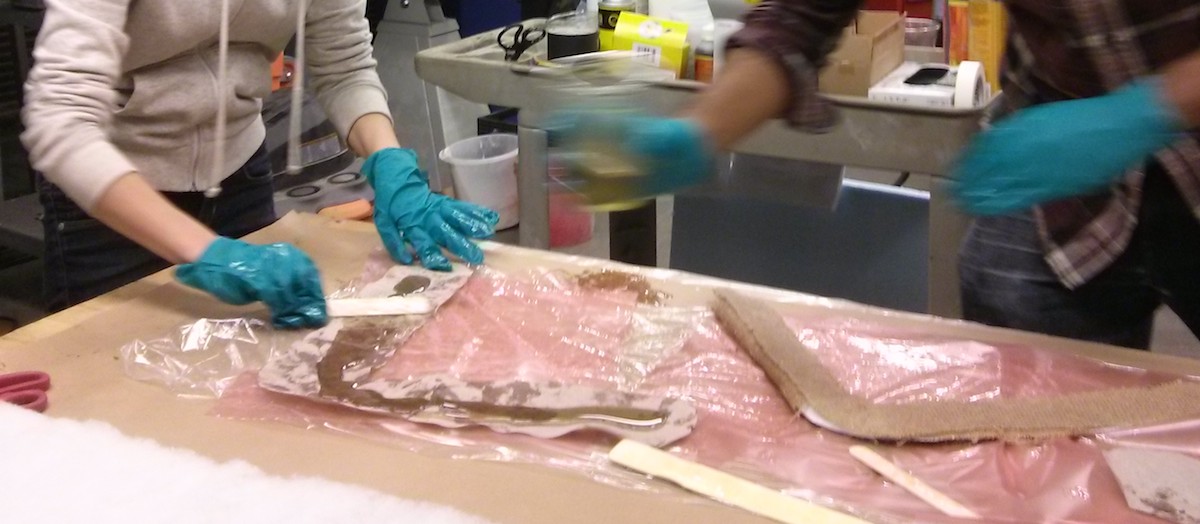
Layup
This part is messy and a bit complicated. Here is the lineup of all the materials needed.
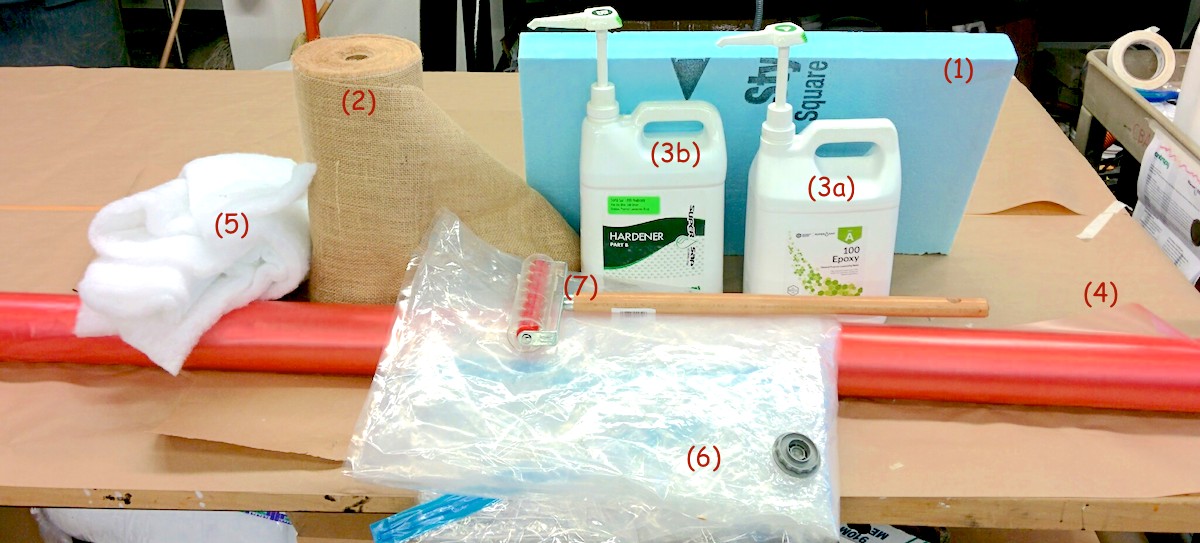
- (1) Blue Foam for making mold
- (2) Burlap
- (3) Epoxy + Hardner
- (4) Pink Release Film as release film and also for bleeder
- (5) White fluffy breather material
- (6) Vacuum bag
- (7) Rolling spikes aka torture device to puncture release film to make bleeder.
Not shown:
Here are the layers for the layup
- boomerang foam mold on the inside
- burlap soaked in two part epoxy
- linen soaked in two part epoxy
- mold release film punctured to make a bleeder
- white fluffy fabric to make a breather
- vacuum bag
Note that I didn't use release fabric between the foam and the first layer of burlap as the mold stays put.
Huge thanks to Alexis for helping out with the process of the layup and Julie as well.
Here it is all tucked in for the night and you can see the extra epoxy soaking in to the breather.
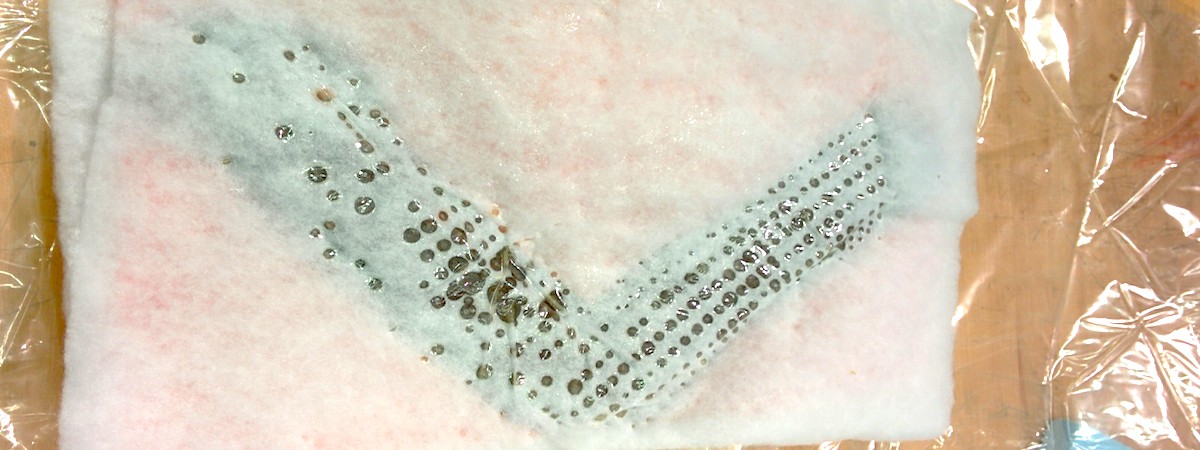
Unfortunately I must have folded the fabric up by accident when I bagged it and it is pulled off the mold.
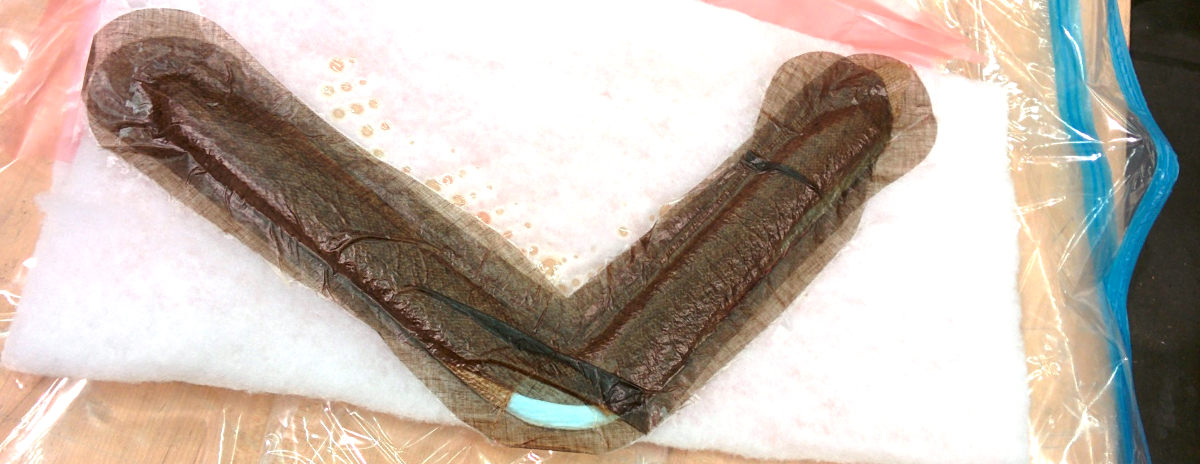
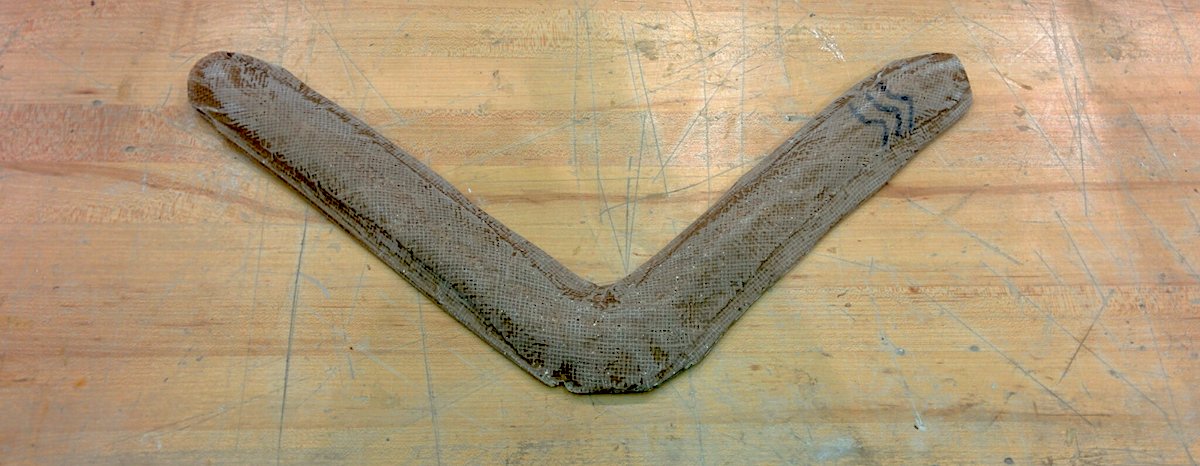
well, shit. Still for the hell of it, I went and bandsawed the edges off and tossed the boomerang around. First hit against a hard object the boomerang broke in two along the middle. If it had to break that was the most likely spot.
Here is the broken edge:
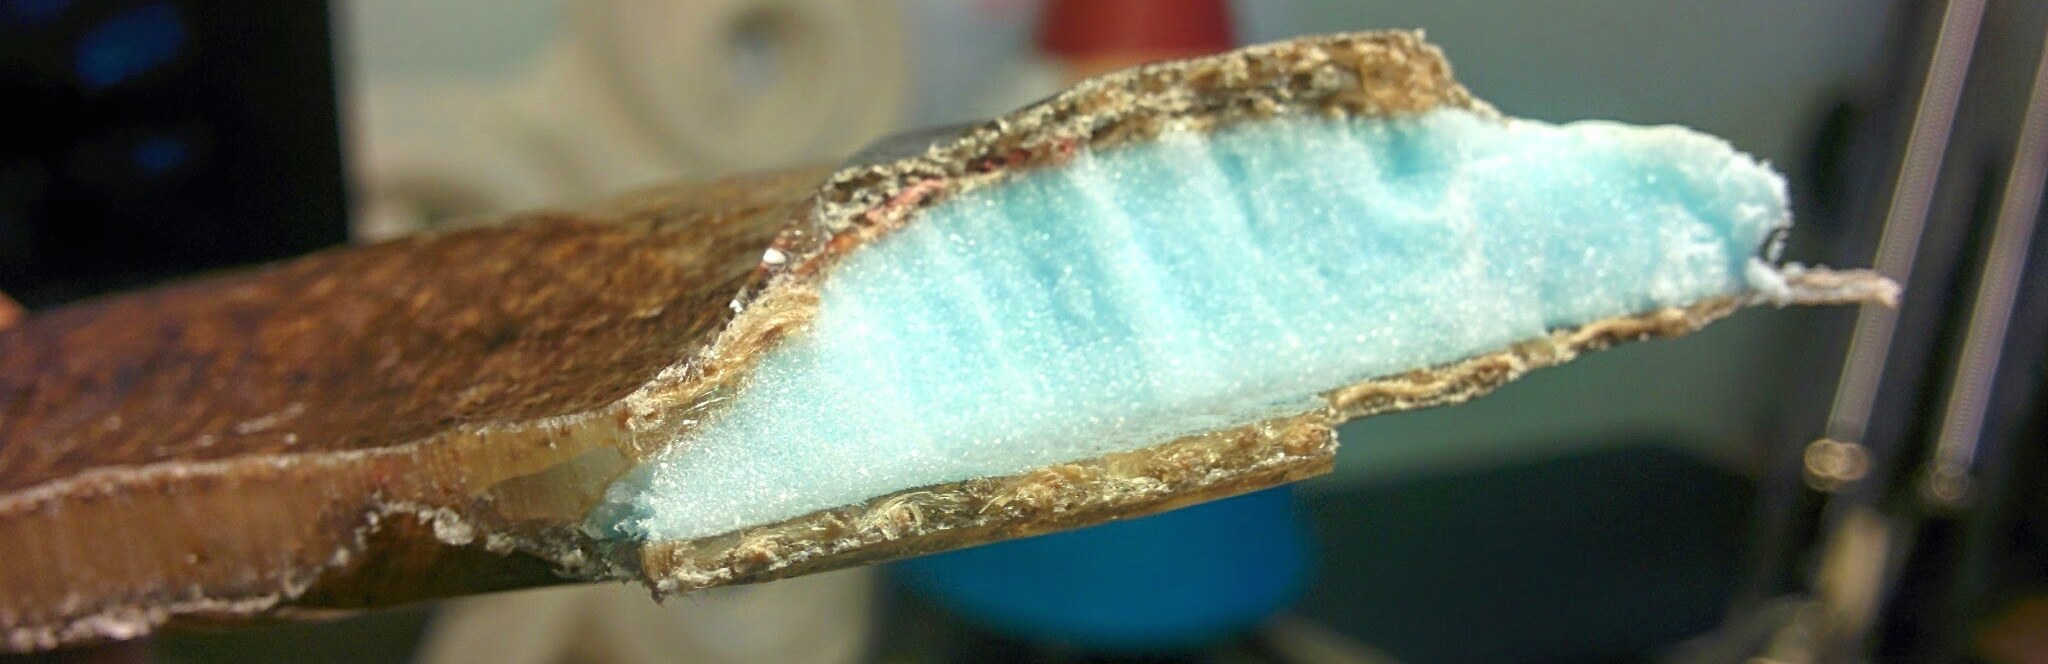
Also note that the bandsawed off edge on the left shows epoxy without fiber. Sandwiching the foam between two pieces of fabric definitely wasn't the way to go.
What I learned:
- linen doesn't provide structural support. use only for surface finish
- one layer of burlap does not a matrix make.
- Neil thinks two layer isn't sufficient strength.
- the fiber behaves very differently when wet
- David C: you can cut the fiber during the wet layup. use acetone or rubbing alchohol to clean the scissors.
- doing top and bottom layup and flipping the part is hard. the fiber tends to stick to the floor
- layup the bottom fibers, then put part on top, then wrap it up. don't flip the part during layup.
- tight radius of curvature and burlap are not friends
- if you have seams, plan for large overlaps
Take 2
I remade it burlap thinking that if I don't use the laminate method and don't screw up bagging it, I will be fine. However, I made the mistake of cutting the burlap only 0.5" more than the body. This was too little burlap to bend over the boomerang edge and have it stay there just by the stickiness of epoxy. I realized it midway through the layup and cut burlap out by hand that was almost 3 times as wide as each leg of the boomerang and then folded it over on itself.
I was cutting the wet burlap as I was laying it up per DC's advice. This got epoxy on the scissors but I could clean it with isopropyl alchohol before the epoxy hardened
This whole affair took a bit of time so the epoxy was starting to cure by the time I bagged it. Third problem: first bag had a leak so I rebagged it in a new bag which also had a leak. Just slower. Anyway, here it is:

Some sanding later:
Sharpie designs on burlap diffuse in the epoxy which is a neat way to get some patterns on the drap fabric.