|
|
MAS.863 How To Make (Almost) Anything
– Fall 2014 Richard Li CNC Machining Week 4 This week we explored large-scale CNC machining to build something
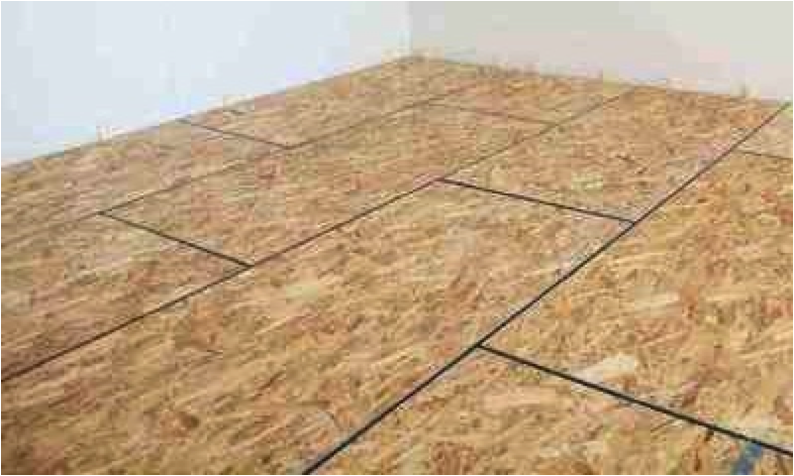
relatively big. We were given one large 4’ X 8’ X 7/16” sheet of oriented
strand board which is very low cost and typically
used as a base layer for carpeting. This material consists of chopped of wood
chips and as a result has a degree of transverse isotropy (in-plane). A key
challenge of working with this material is that it chips and flakes off
easily, thus care must be taken during machining and post processing to
delamination of chips.
Lately I’ve been finding many wine bottles floating
around the apartment, as my new roommate is quite the wine enthusiast and
connoisseur. We’ve been having guests over for dinner rather frequently, so
it seemed like the right time to start considering a functional organization
method for the bottles. Therefore, I embarked on the endeavor to build a new
piece of furniture for this apartment: A wine rack! However, after talking
with my roommates, it was not clear how large we wanted it to be, and where
we wanted it placed. Did we want a small rack that can fit in between
shelves? Or does it work better right on the countertop by our kitchen table?
Or should we do something bigger and standalone? Our indecision left me think
of designing adaptable and
reconfigurable furniture. Thus, I decided, the best way to tackle this
was to make a modular and expandable wine rack that can fit almost anywhere
in a small apartment!
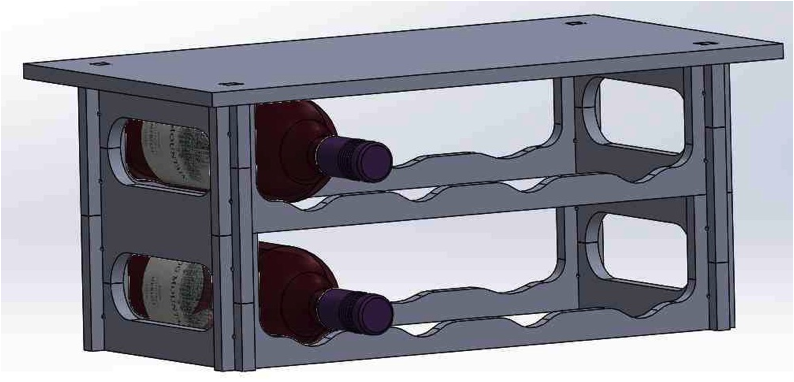
Above is the Solidworks
assembly that I ultimately designed. I downloaded and imported a nice Solidworks part file of a wine bottle from http://grabcad.com/library/wine-bottle--2
(which apparently has a huge collection of other random 3D files!) in order
to help me dimension things – particularly the actual round grooves
that hold the bottle, which have wider radii for the rear of the bottle, and
smaller radii for the neck. I ultimately envisioned some stackable and easy
to assemble press fit rack that could be made and capped off elegantly at any
height. A key challenge is to make the furniture be functionally pressfit and interlocking without looking like it! This
meant making sure all the ends butted up against each other flush. Another challenge is to enable as many
stacks as possible while still allowing quick access for bottles. Here, I
made the shelfs as compact as possible with OSB,
and really try to take advantage of fillets to make slolums
that would easily allow bottle entry. With the base of the bottle being a
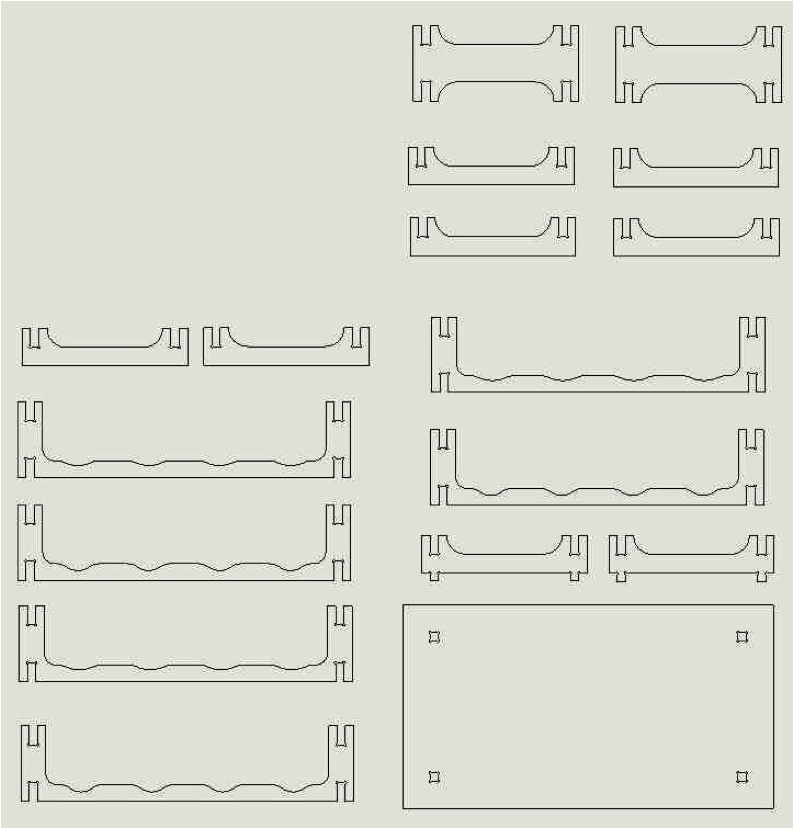
little over 3” in diameter, I was able to make each shelf be 4” high. A .dxf drawing file was then exported out of Solidworks with all the parts laid out. Note the holes at
the corners of each interlocking part. These were intentionally drawn in
order make sure pieces would actually mate flush. Otherwise, since this will
be machined with a endmill,
it would be impossible to machine out the right angle corners (the endmill radius would have to be virtually 0 to do this!).
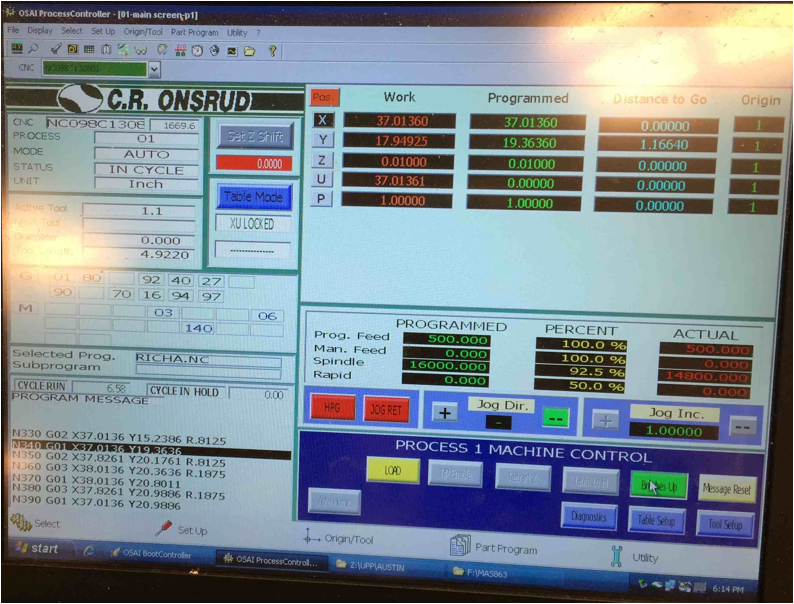
The large ONSRUD 96C18 was chosen here to cut out my
4’ X 8’ sheet, so I first had to orient the drawing right with axis of the
machine, which was quickly processed in Rhino (this step could have been done
in Solidworks too!) and saved as a 3dm file. To
plan out the tool path of the machine, MasterCAM
was then fed the 3dm file. Several key things are to be considered in
planning out the paths here. To cut the pieces out, it is necessary to take
at least three passes: On the first pass, the hole will be drilled out at the
corners. Since the smallest endmill available on
the machine was 1/8” diameter, the drill holes were dimensioned accordingly.
On the second pass, a compression endmill such as
3/8” diameter will be used to make a rough cut and remove material on the
contour of the part quickly. However, because this is a large diameter, I’ll
leave a lot of material particularly at the corners of the grooves for
interlocks. Therefore, the third “remachining” pass
is needed in order to clean up the corners and really get into the corners of
the part. However, a key challenge is that if the second pass mills out the
contour of the material, small parts may actually come loose and
unconstrained before the third pass. Therefore an “onion skin” techniques is
employed in which the second pass does not completely mill out through the
full depth of the material – but rather leaving .005” of material on
the bottom so the part is still constrained in the plane of the sheet. Then,
the third pass of the small endmill will come sever
the thin layer and make cleaner passes along the contour. The ONSRUD machine
is attractive at can change tools quickly on its own, and already comes
preloaded with several tools on its holder so in MasterCAM,
it’s important to just specify the tool number corresponding to its holder
for each of the three passes. Once the passes have been verified in MasterCAM, I exported g code out of the program, and
loaded it into the ONSRUD machine to start. Another nice feature about this
machine is that the table is connected to a vacuum and allowed my OSB sheet
to be sucked onto the bed without any fasteners that may potentially collide
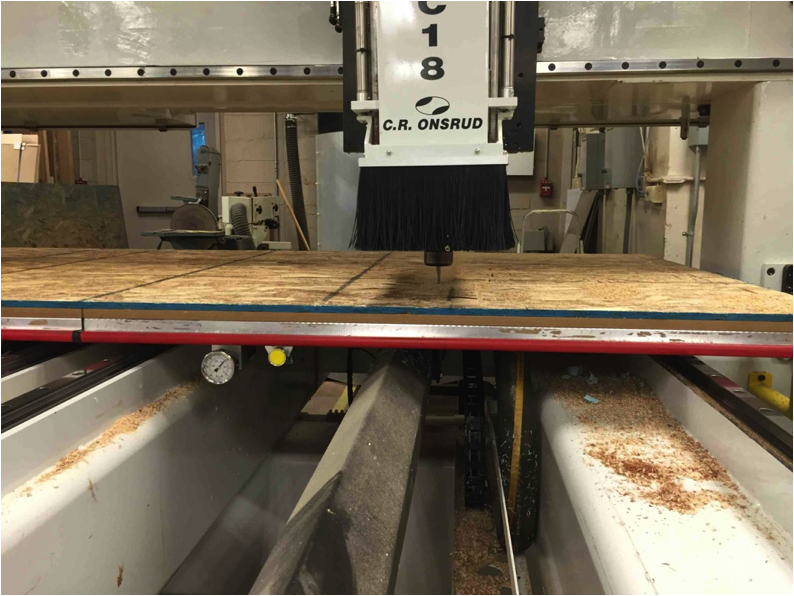
with the machine. Here is the ONSRUD interface:
The milling operation in progress:
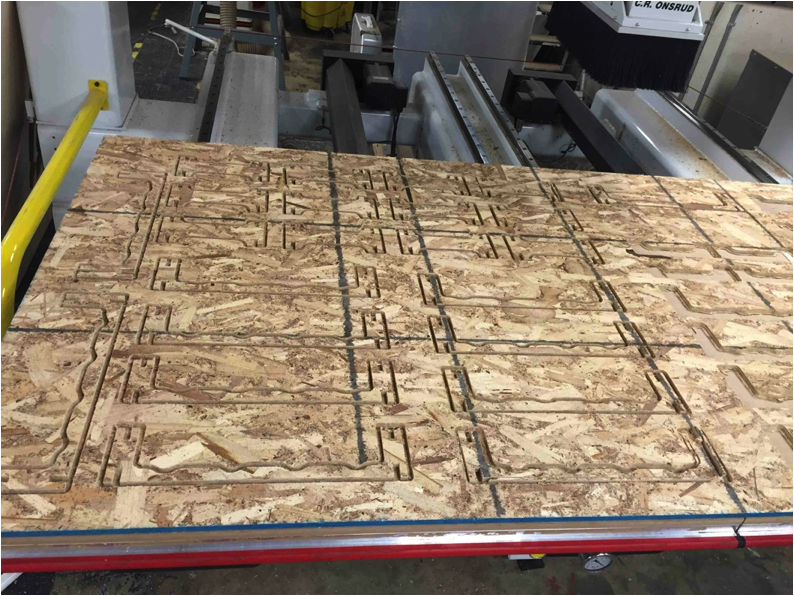
After the job was done, pieces could be pulled off
of the sheet:
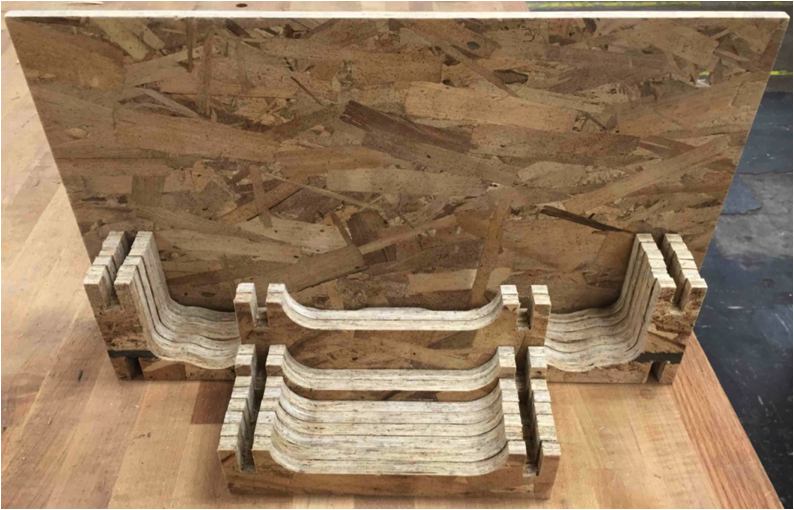
The pieces still needed some post-processing. Many
of the edges still had flaps and material on the corners. A 400 grit sanding block and small file were used to lightly
swipe the edges at an angle at a direction going INTO the material to remove
the flaps. It is absolutely crucial not to sand outwards, as that would
result in opening stresses and delamination of the chopped wood chip layers!
The sanded materials look like this:
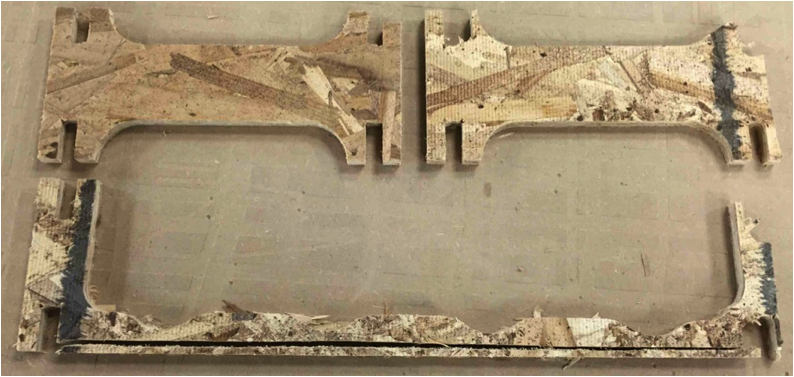
There were several part failures that should be
noted. The grooves of these parts looked wider than they should be, and
reveals what happens when the onion skin job was
omitted or not done right (perhaps because the sheet was not perfectly flat
in that particular region). In this case, the second pass milled away enough
of the contour that the part was unconstrained, and the remachining
pass was free to push the part around, resulting in destroyed notches:
Test pieces were also cut to ensure the cut notch
widths matched up well with the thickness of the pieces for a snug fit.
Pieces can together really easily, and a wine rack could be assembled in
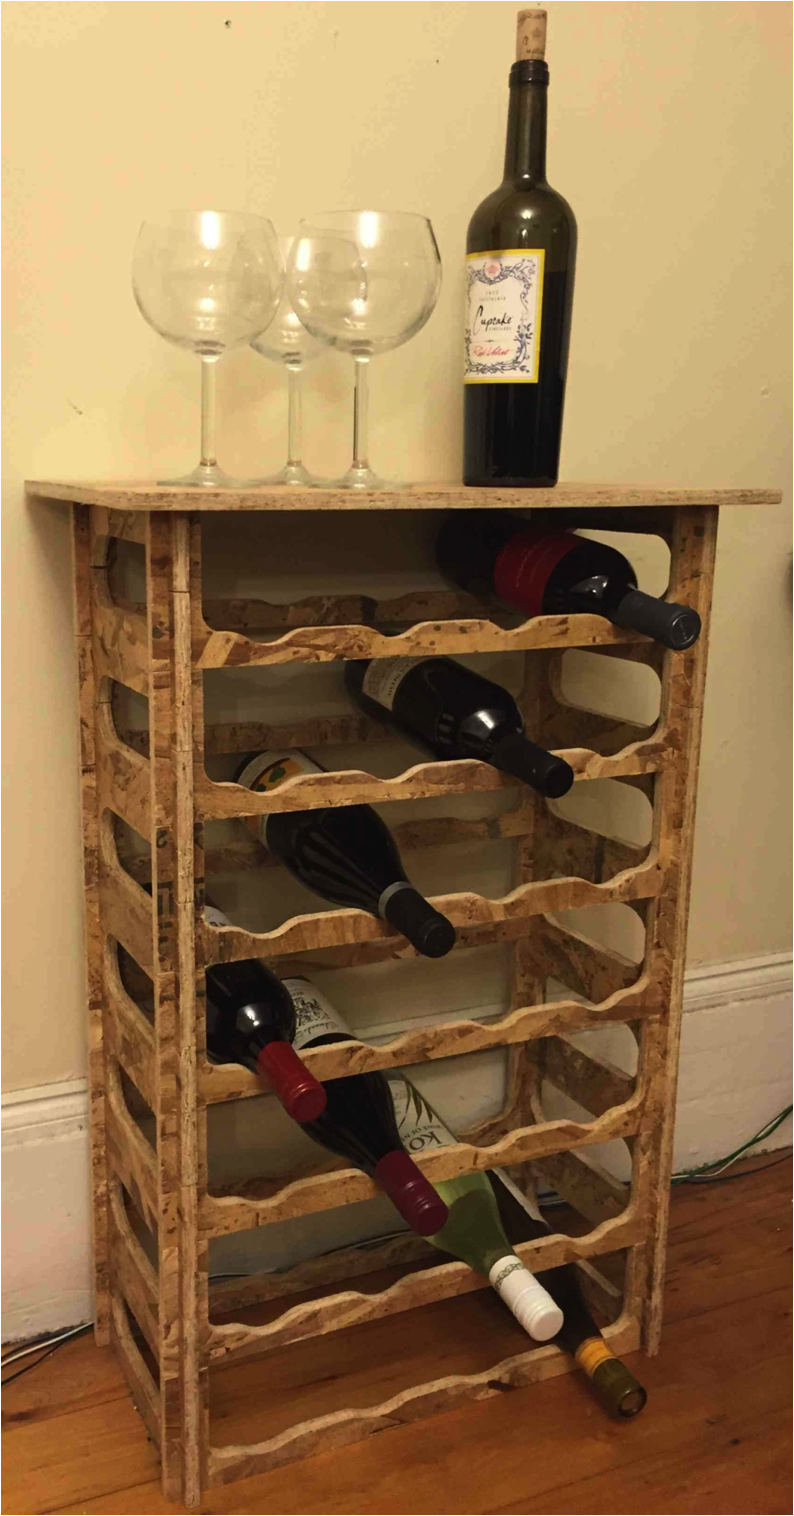
under a minute! A key advantage of this design it is really stackable and
modular with different tops that can be placed on. I first assembled
something small with only two levels of wine storage (as in the CAD design),
but easily went back onto the machine to mill out more pieces to create a
much large rack! My roommates and I ended up playing around with the
different configurations possible with this design. And yes, it successfully
holds wine. It can be a nice standalone unit in the living room:
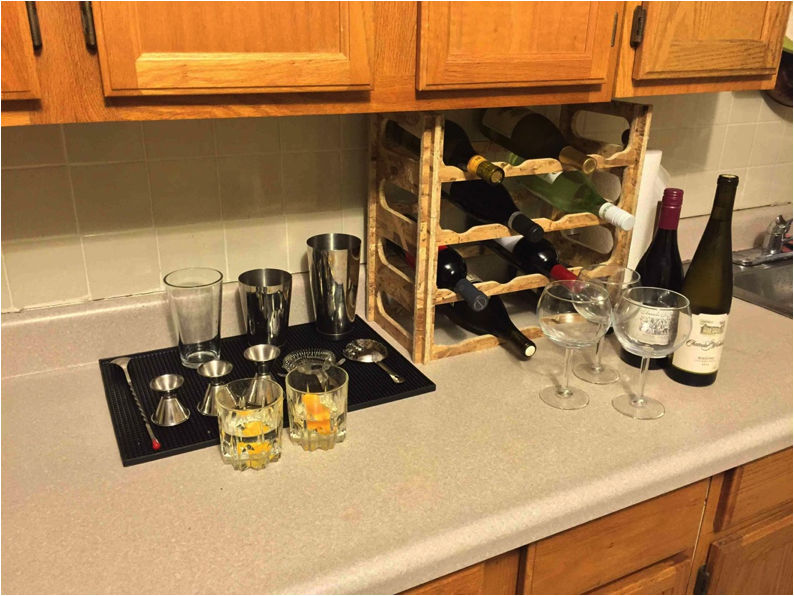
It can sit on a counter top right next to the bar in
the kitchen:
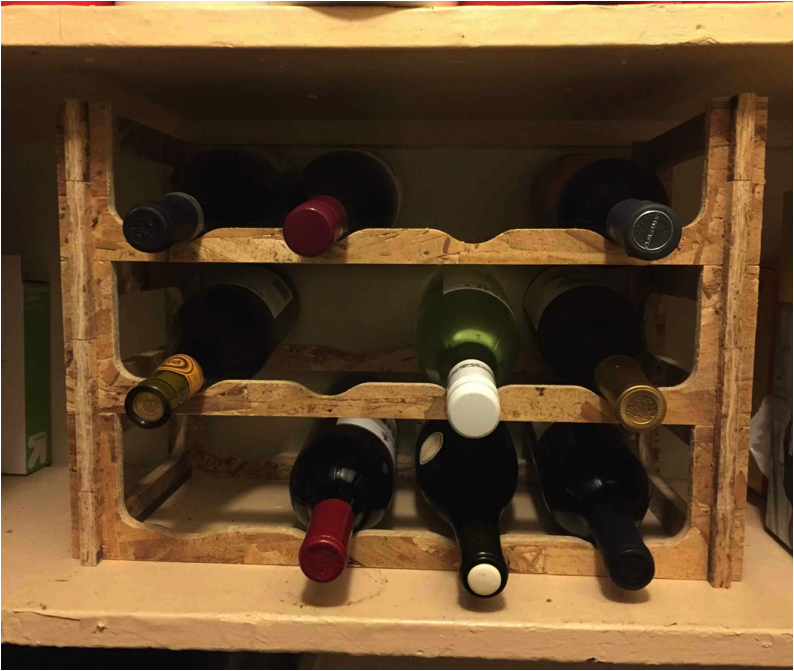
It can be fit easily in between shelves in our
pantry:
The modularity here allows a lot of flexibility and
reconfiguration within minutes without any glue or adhesive, and the OSB adds
a nice recycled texture to the sight of expensive bottles and wine glasses.
Looks like we’re going to have to expand our wine collection. |
|
|
|
|
|
|
|
|
|
|
|
|
|
|
|
|
|