Week 12: Interface and Application
Programming
This week, I decided to learn more Python
language and create GUI interface. Therefore, I've been reading
Python tutorials, taking an online class at Codecademy and
practicing with small exercises.
--
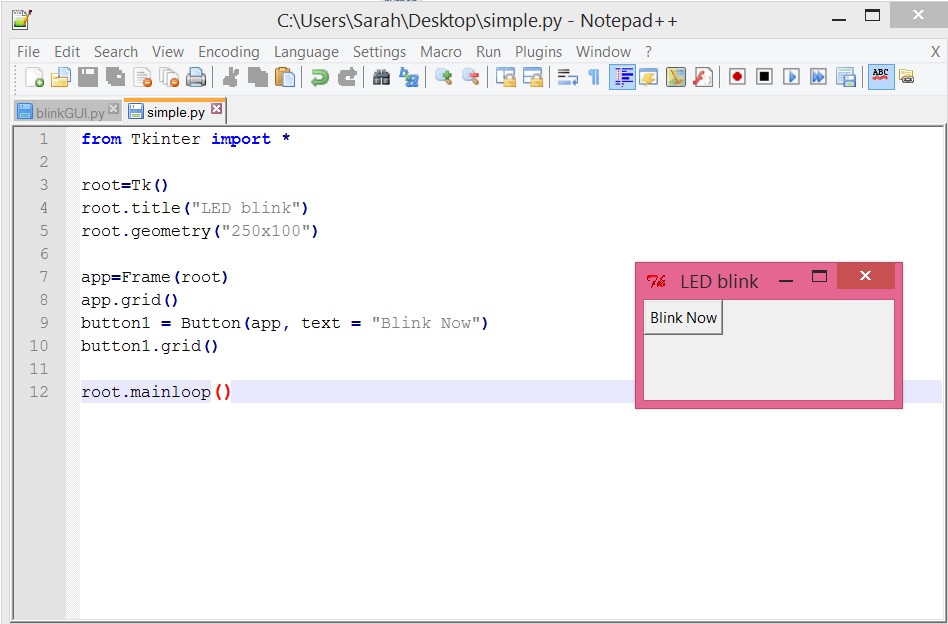
The first thing I did was to create simple GUI interface with Python,
which can be eventually used to trigger blinking of LED from a PC.
Below is the code and output.
--
Next, I came to understand the major concept in using Python apps
to control a board is communication between Python and the
computer's serial port.
To blink an LED via Python, we can send a character to the board
via serial so that the board can perform the routine written in c
code. "Hi Python, send a character 'a' to serial port 6 (i.e. to a
board that's connected to serial port 6). Below is code and I saved
it as Blink.py.

Then, we define the onboard ledPin is digital pin 13. Setup Serial
Communication to receive data from Python. Match the baud-rate
with baud-rate in Python code. Since Arduino reads incoming data
in ASCII. I found a=97 in ASCII. So the code says execute blinking
when incoming serial equals to 97.
int led = 13;
void setup(){
  Serial.begin(9600);
}
void loop(){
  if (Serial.available() == '97'){
    digitalWrite(led, HIGH);
    delay(1000);
    digitalWrite(led, LOW);
    delay(1000);
  }
}
Compile and upload this code to an Arduino
board.
Now, when you run Blink.py from command line, Arduino board will
start blinking.
--
Finally, I tried to connect dots to trigger LED blinking from GUI
written in Python.
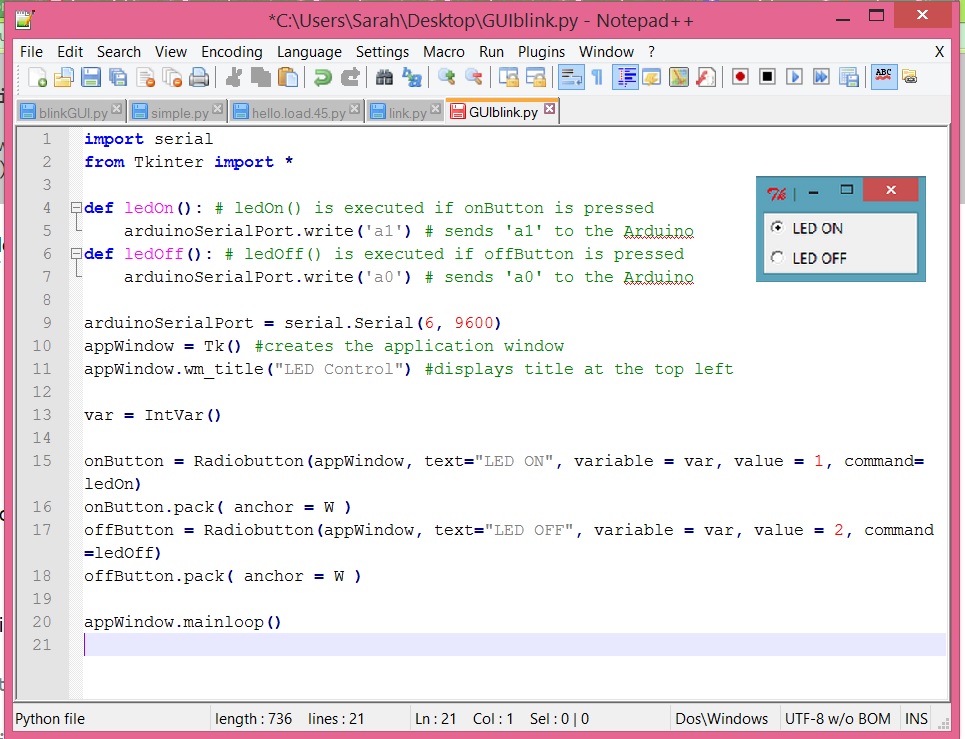
Then, modify Arduino code as follows:
int led = 13; // give a name to our LED
int ledStatus; // status of the LED. It's either HIGH or LOW (0 or 1)

void setup() {
  pinMode(led, OUTPUT);  // initialize the digital pin as an output.
Serial.begin(9600);  // begin serial communication at 9600 baud
}

// main loop begins
void loop() {
  if(Serial.available() > 0) { // see if there is incoming data
    ledStatus = Serial.parseInt(); // parse the data and store the first integer, if available, into our variable.
    digitalWrite(led, ledStatus); // Turn ON or Turn OFF the LED as per user input
  }
}
Here, serial.parseInt() returns
integer and rejects any character in the data.
Now, compile and load the code to Arduino. We can control LED
blinking on and off via a GUI on desktop.