How to make (almost) anything

by Thrasyvoulos Karydis

Intro: Molding and Casting

This week we learned how to mold and cast. We can choose among a variety of materials, both for the mold and the final object. The procedure comprised of three steps: creating a positive (sample object) either by milling wax or by 3D printing, casting a rubber-like material to create the mold and finaly casting the material for the actual object.

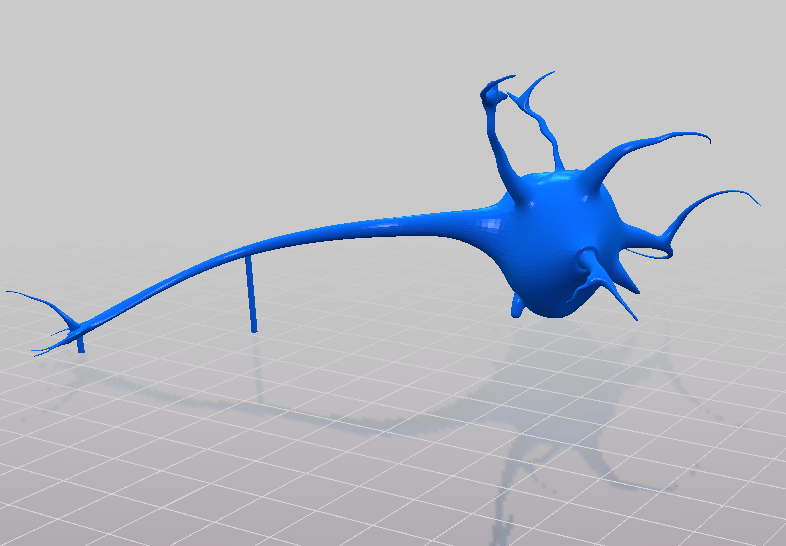
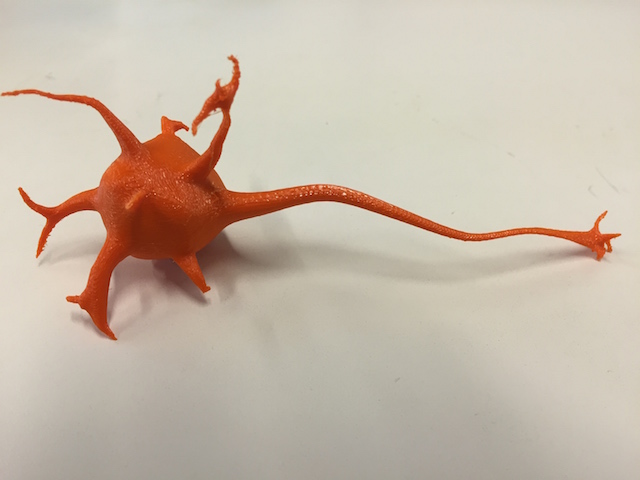
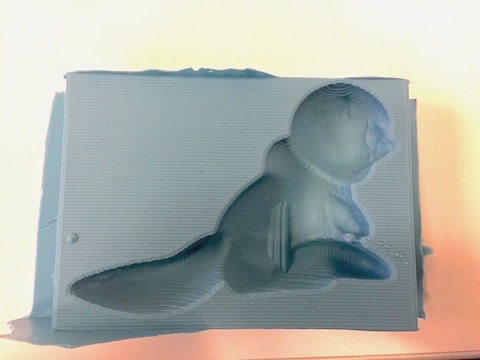
My project for this week is to mold and cast a neuron cell prototype, which I will use for my final project. I found a nice 3D neuron cell model in Thingiverse (see image) which seemd like a good place to start.

As the neuron cell is a fairly complex object with many vertical structures protruding of the main body, it is too difficult to mill it of the wax. So, I decided to proceed as follows:
  1. 3D print the model
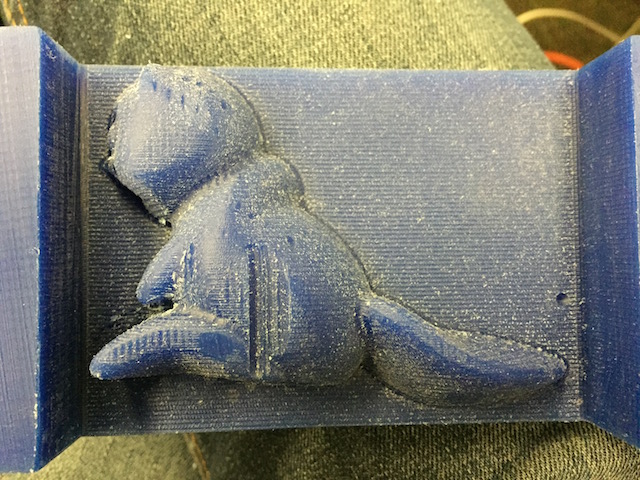
  2. Submerge the model into a hot wax bowl and let it cool.
  3. Cut in pieces the block of wax with the 3D printed object inside, using the bend sawje.
  4. Remove the object from each wax piece, and use them as a multi-part mold to cast the neuron cell.

Lastly, I was looking through the materials for a flexible transparent one, ideal for my neuron cell as a part of my final project. The one I found that matched best is the Clear Flex® Water Clear Urethane Rubber from Smooth-On. Yet, it is not safe for home use, and I should consider the safety precaustions before proceeding.

Update: 3D printing

Unfortunately, I had troubles with the 3D printer, and had to change my weeks project. I decided to make a ... TIM the Beaver! Not only Tim is the official MIT mascot , but beaver is my scout-name, so lot's of motivation to create an awesome beaver from hydrostone. In order to speed up things (possibly by an infinite amount of time) I downloaded a beaver 3D model from thingiverse.com and processed it for molding and casting, i.e. made its profile mill-able by the desktop Shopbot machine by extruding any inaccessible features.

**UPDATE: The 3D printer (Makerbot Replicator 2x) was eventually happy to work again and I managed to print my neuron. I used both rafts and supports, and the result looks... like a neuron!**

Step 1: Creating the positive mold

To create the negative mold, I would use the desktop version of the Shopbot. To start with, I imported my 3D model (.stl) to Partworks3D in order to generate the toolpaths. This time the toolpaths will be 3D, as the spindle will move in full 3D motion to mill the object.

The first step in the 3D milling guide of Partworks3D is about the dimensions of the object and the material. I have the options to place the object anywhere in the material space, i.e. I can mill one (profile) side. In the case of symmetrical objects like the beaver model here, there is no need to create 2 different positive molds, as the same mold can be casted twice to create the 2 part negative mold for the final cast.

The material I used is machinable wax, which is easy to work with. Nonetheless, in order to create a smooth surface, the milling process is devided into too cuts: the roughing cut and the finishing cut.

The roughing cut is usually done with a larger diameter endmill as it's not when the small features of the object will be milled. The cut is done in a raster fashion, opposite to the one of the finishing cut. I prefered to do the roughing cut in the y-axis as the height changes were more steep in that direction and the larger endmill can machine deeper in fewer steps. A spindle speed of 6000rpm is fine for a soft material like the wax.

The next step is to generate the toolpath for the finishing cut. In my case, as I chose the roughing toolpath to be in the y-axis direction, the finishing toolpath will be on the x-axis. I used a 0.094 inches endmill, regardless the time it would take to finish the cut, as I was afraid that the 0.125 endmill would not allow enough detail.

At every step of the toolpath generation process, I could see a preview of the machined material, which helped me a lot on choosing the right size of endmill, clearance gap and stepover. In the end, I save the .sbp files and opened the Shopbot application to start the job.

On the right you can see the positive mold after the rough and finishing cut. The surface looked quite smooth, but unfortunately, my wax block had a scratch on top, which I thought would not affect my object, but I was wrong. I decided not to make another one, as I could cut the excess material on the negative mold and make the top surface uniform again. Using double sided tape, I attached cardboard pieces on the sides to complete the housing for the material of the negative mold.


**CLICK on the image to see more images of the positive mold!**

Step 3: Casting the negative mold.

As my final cast will be hydrostone, a hard material, the negative mold should be a flexible rubber. The one I used is called OOMOO and it is a flexible silicon rubber. It is prefered among other alternatives as it is really easy to use, has ~20 minutes working time (read below) and requires minimum ventilation. The curing time is a couple of hours in room temperature.

It consists of two rubber compounds, part A and part B, which should be mixed in a ratio 1:1. After the compounds are mixed, there is a certain time before the mix starts to solidify - the working time. After this time, the rubber will not flow smoothly on the positive mold and you would have effectively created a huge blop of amorphous rubber mass.

During the mixing process, I tried to steer in a way that would not facilitate the formation of bubbles, but to no avail! As you can see on the right, after 2 minutes of mixing thoroughy there were many bubbles in the mixture. I taped glass on the table for 2 more minutes to bring the bubbles towards the top surface and break them, which proved to be quite effective! An alternative to this process would be to insert the mixture in a vacuum chamber and suck the air out, which will effectively destroy even the smallest bubbles. Nonetheless I decided to give it a shot as it was.

I poured the OOMOO onto the positive mold slowly, trying to have a small diameter pouring beam so that the big bubbles would break from sheer pressure. I started from the bottom left edge (near the legs) and filled first the smallest cavities, like the hands and the eyes. After having poored all the material, I still had many bubbles arriving at the top surface. I literally made the purpose of my life to destroy every little bubble that would show up. I taped the mold hard on the table in order to bring the bubbles from the bottom upwards, and then broke them once more. I de-bubbled for over 10 minutes, until the mixture became solid enough that no more bubbles could come on top. I left the mixture to cure overnight.

Ta daaa!! The de-bubbling process paid off! The OOMOO detached easily from the wax and the result was very detailed. All the features of the beaver were imprinted and even the endmill paths were clearly visible. I iterated the whole process to create the second part of the two part mold. I didn't design any explicit registration points on the two parts, as I can align the rectangles and patch clamp them together. In retrospect, it would be nice if I had designed the holes to pour the hydrostone and let the air come out, but in order to finish in time I cut them manually.

Step 4: Casting the drystone.

Text to be ported from older version.