In mathematics, the Klein bottle is an example of a non-orientable surface; it is a two-dimensional manifold against which a system for determining a normal vector cannot be consistently defined. It was first described in 1882 by the German mathematician Felix Klein. Informally, it is a one-sided surface which, if traveled upon, could be followed back to the point of origin while flipping the traveler upside down.
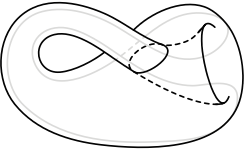
The intersection between the returning neck and the base (see image) is a four dimensional crossing ( 4th spatial dimension, not time), i.e. you can traverse it only from one direction. Of course, in order to design and print a solid model of a Klein bottle we have to make it either exist or not exist. In my case, I decided to make an opening, such that a liquid could freely flow towards the inside.
Step 1: 3D Modeling
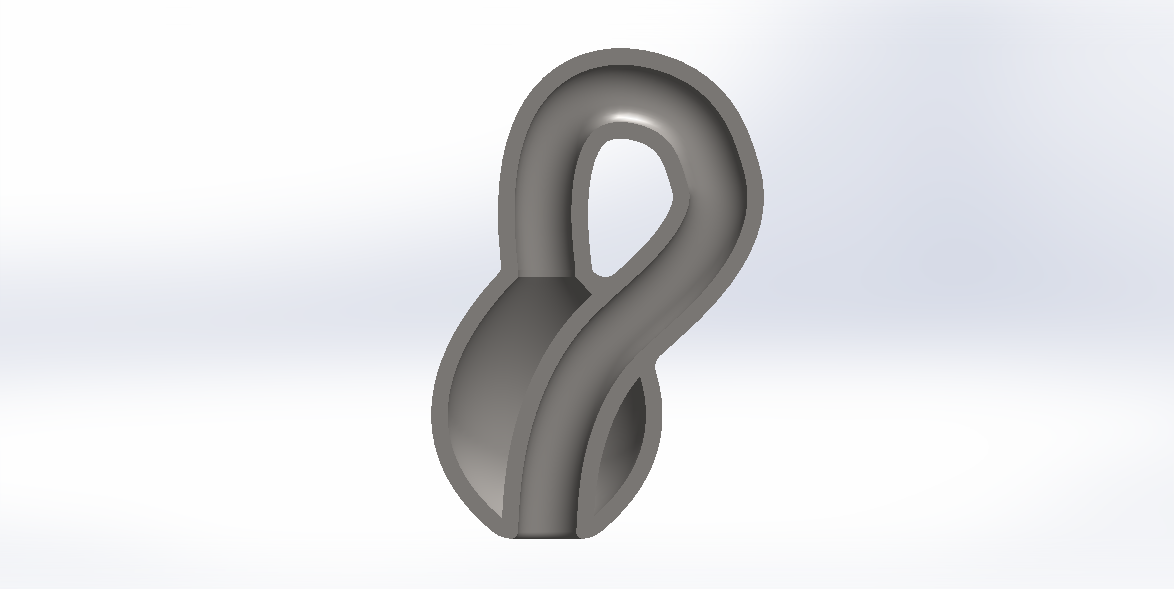
To create the Klein bottle 3D Model I used Solidworks 2014-2015. I split my design into two parts: the base and the neck.
As you can see in the image on the right, I used a bezier curve to create the
curvature of the bottle's base. I left the curve under-defined, such that I can adjust it
after I see the final 3D model. I used the Smart Dimension tool to define the height of the bottle
considering the limitations of the 3D printing machine. Finally, I used the Revolved Boss feature to create
the three-dimensional base.
Next step was the creation of the neck, which turned out to be more tricky than I thought.
I planned to use the Sweep tool, using as a sweeping surface the upper surface of the base and
a bezier curve as a path. The path should start from the top surface and come all the way tothe bottom,
as shown in the image.
After a lot of frustration with the parametrization of the bezier curve , I ended up with a sketch that was seemingly what I wanted. The path I drew extended a bit below the bottom surface, such that I could define a horizontal finish. I cut the excess part using the Extrude tool with a downwards direction from the bottom base surface.
You can see the result in the section view on the left. I used the Fillet tool on practically every connection between the neck and the base to make the transition between the surfaces smoother. This was
a many steps procedure as I had to readjust several times the dimensions of the neck and the base such that the fillets could produce a fine result.
The trickiest part was the point when the neck entered back to the base, as it splitted the
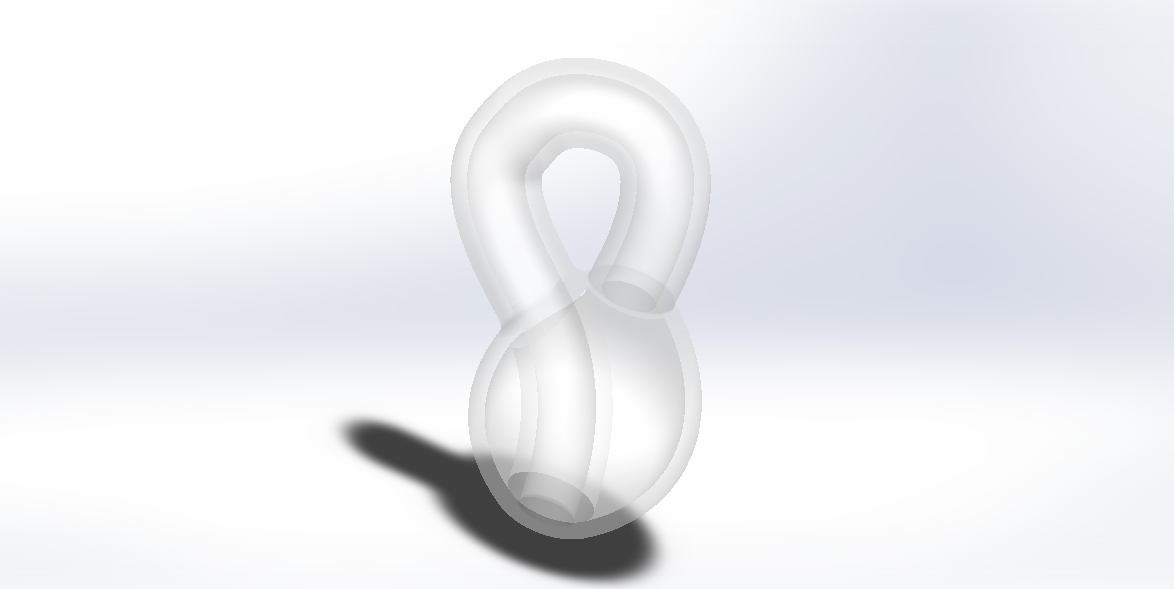
inside of the base to two chambers, each of which had 2 filleted lines. If you click on the image, you can see a see-through glass view, where the final structure closely resembles that of a Klein bottle ! Success :)
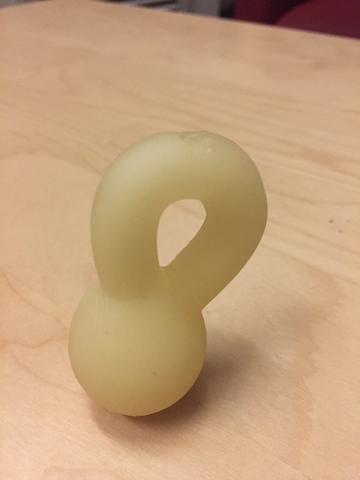
Step 2: 3D printing
I printed my model using the Dimension ABS 3D printer. After ~5 hours of printing (time affected by other class projects prineted together), the Klein bottle was ready, but with a lot of supporting material still on it. Thus, I put the bottle into hot wax (90 degrees Celsius) for 2 hours. The result was a smooth surface both outside and inside the bottle, which allowed water to freely flow inside and outside the base chamber (with a 360 degrees rotation!).
**Click the image to see more images of the final 3D structure.**
Extra: 3D Scanning
As a part of this week's project, we had to 3D scan an object and create a clean mesh (hopefully not mess!) of it.
After experimenting with different 3D scanning facilities in the lab, I decided to use ... none of them! My 3D scanning tool
was my i-phone and the awesome 123D Catch app from Autodesk. With the 123D Catch app, you have to take ~40-70 pictures of the object you want to scan and send them to their server for reconstruction. The app has a nice interface which uses accelerometer and gyroscope data to guide your shots. The reconstruction time for a typical size object (4x4x4 inches) and 50 photos is about 1 hour and the results look promising.
After expermimenting with various objects and backgrounds, my best scan was the camel you can see in the image below. The feedback I got from the previous attempts was:
a. The background has to be the same in all the shots, because if it changes the reconstruction program reconstructs the background too. Hoewever, it should not be smooth or single colored, textures from the background can provide registration points for the consecutive photos.
b. The photos should be equally distributed over the different orientations. It is highly probable that the auto-orientation of the 123D Catch app will not follow exactly your hand movement around the object. In that case you should pay attention to evenly space the consecutive photos, as you can very easily reach 50/60 photos without having completed a circle around the object.

