I was pretty excited about this week’s project- I had seen a friend cast stackable “stones” for another class and I wanted to try it for myself (with my own twist of course).
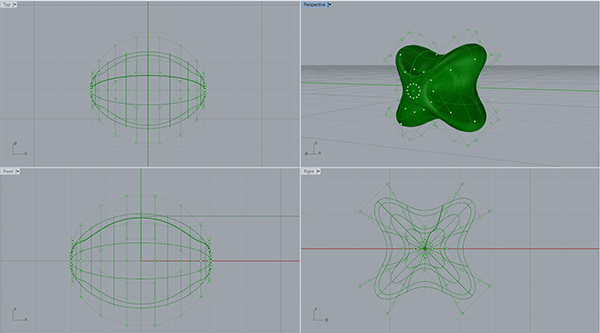
I settled on a star-like object that would *hopefully* be stackable with other objects of it’s kind. Making the model for this was fun albeit time consuming to get just the right shape.
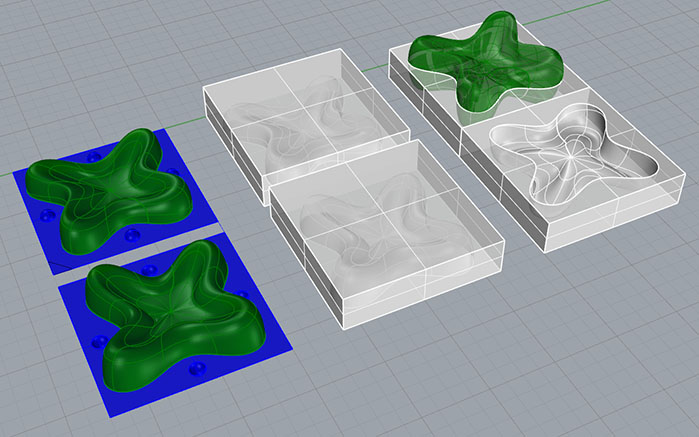
I’m paranoid, so I virtually went through the steps of making a mold then “casting” it in Rhino to make sure everything was in the right orientation. My biggest fear was that the pour holes and air holes wouldn't actually work.
I exported the file (as an STL) and was ready to set it up for the shopbot! This was my first time 3D milling anything, which was pretty exciting.

When I initially set up my wax to be milled, I hot glued the wax to some wood and then screwed that onto the bed. The rough cut (on a Ľ” endmill) went through without any kinks.

Then, when the finishing cut was just beginning, the tool plunged into the material and dragged to the side. I panicked...and then set the wax back up to try again.
During take 2, I shaved off a bit of the top of my model (since it seemed like the tool was going deeper than it should). I also braced the wax with a wood block and soem MDF I found lying around so that it would stay in place.
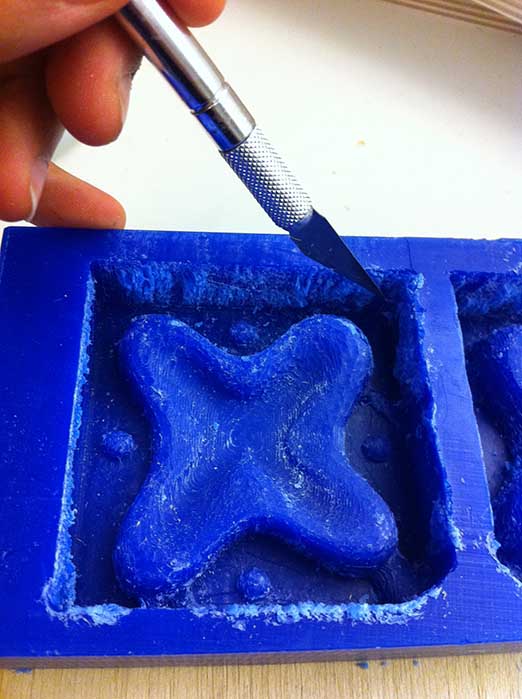
The second time around all went well! There was still extra wax in there so I cleaned it up with an exacto knife.
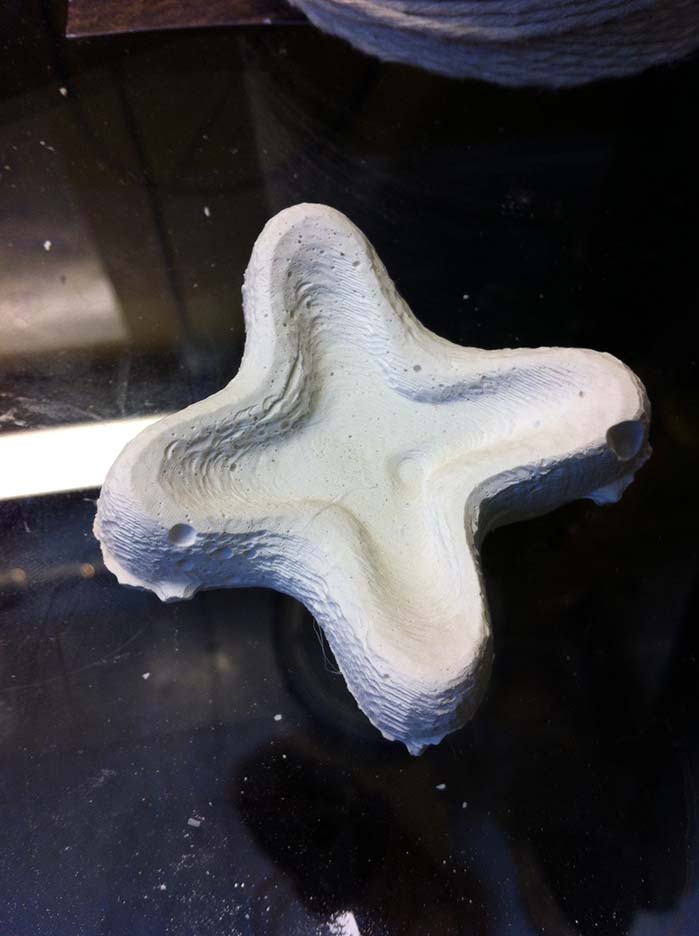
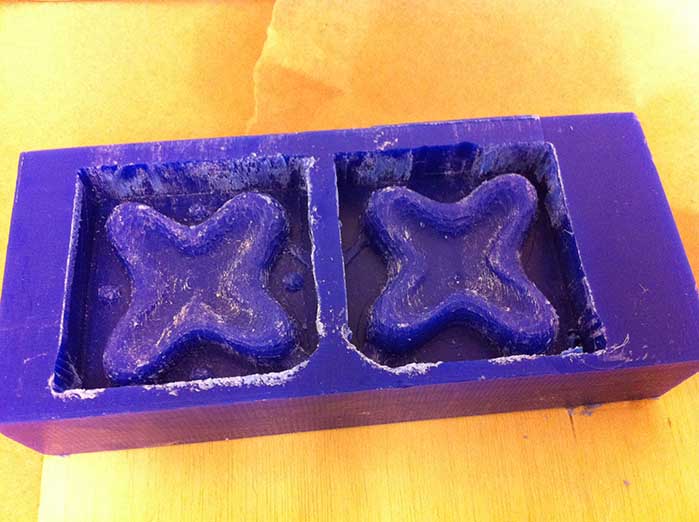
Unfortunately I realized (after removing the wax from the bed) that the indents intended to make sure the mold would line up hadn’t been milled on one side. Alas, the show must go on and I decided to leave it as is.
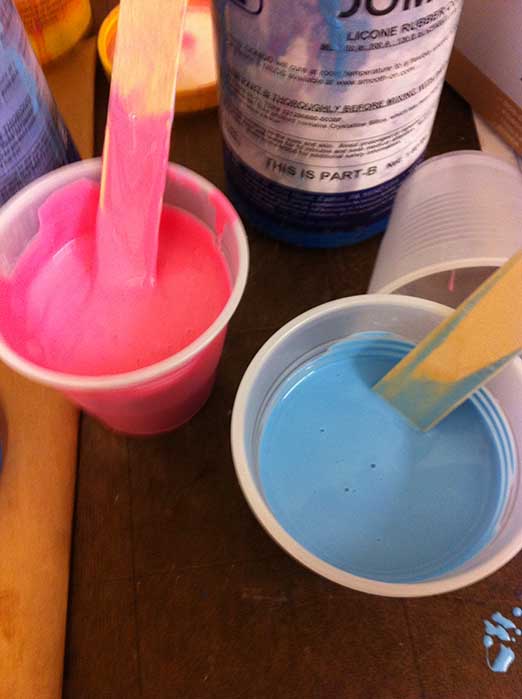
Now came time for the oomoo (to make the mold). When using oomoo, you measure out equal parts in two separate cups. You then spray the wax with mold release, and then combine the oomoo components.
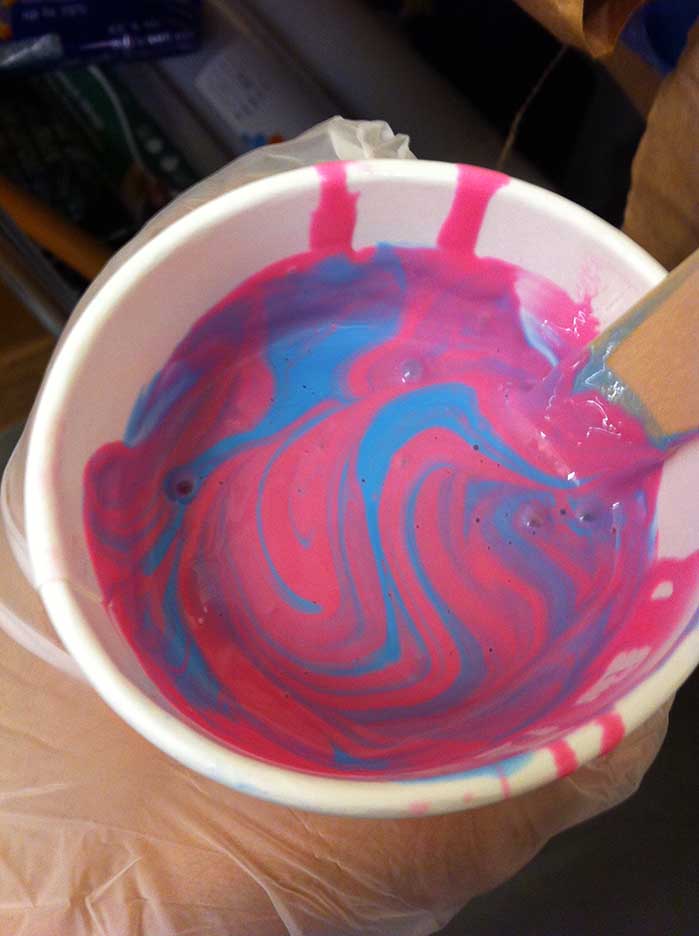
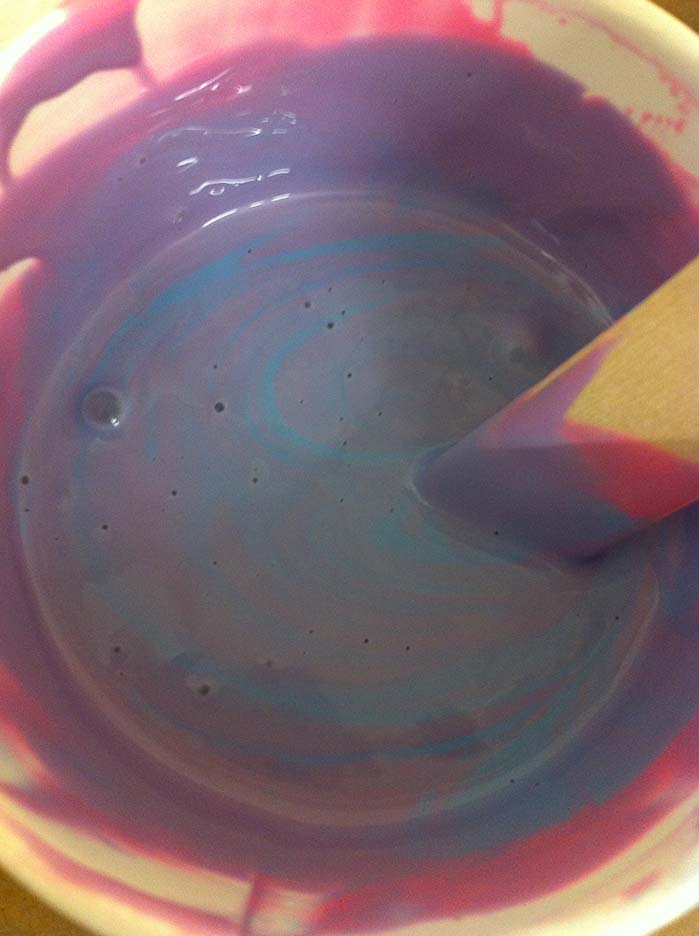
Pro tip: pour from very high up to let air bubbles escape, and stir slowly.
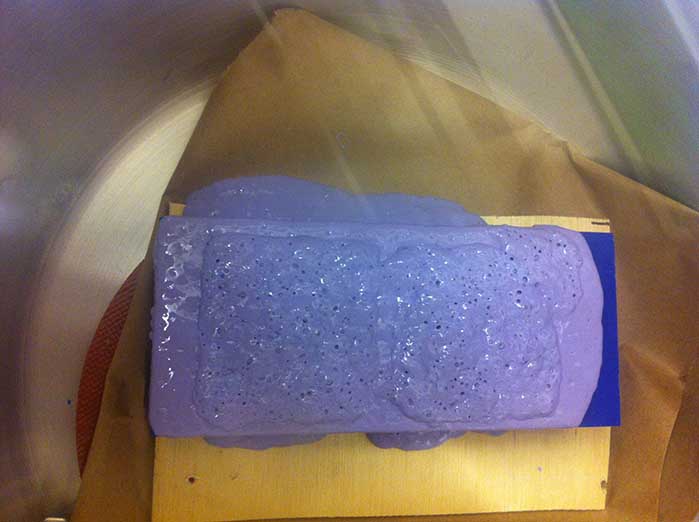
I still had lots of bubbles, so I used a vacuum chamber to get rid of the excess bubbles. It made a bit of a mess, and I forgot to smooth out the top once the bubbles were removed, so this was my result.
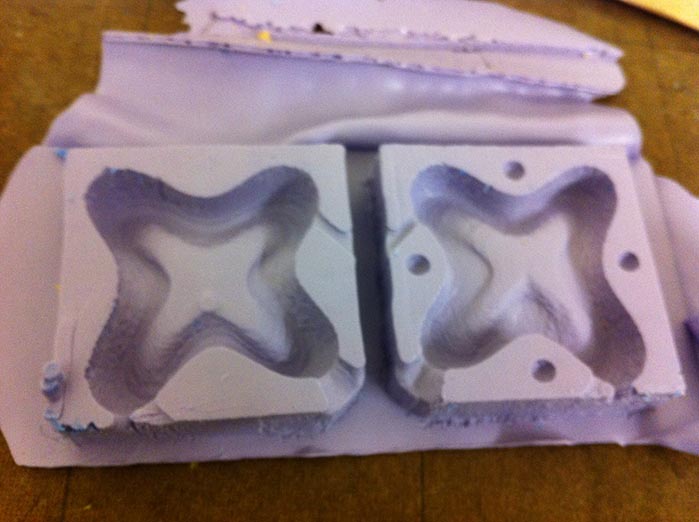
Six hours later I had my first soft mold ever! Aww yeah!
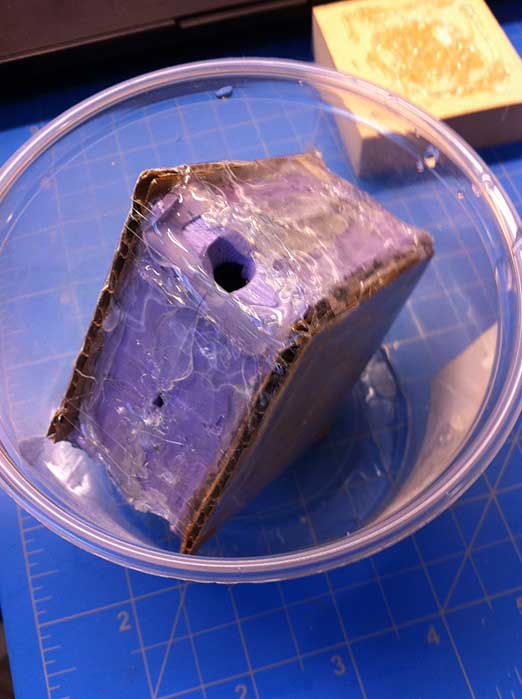
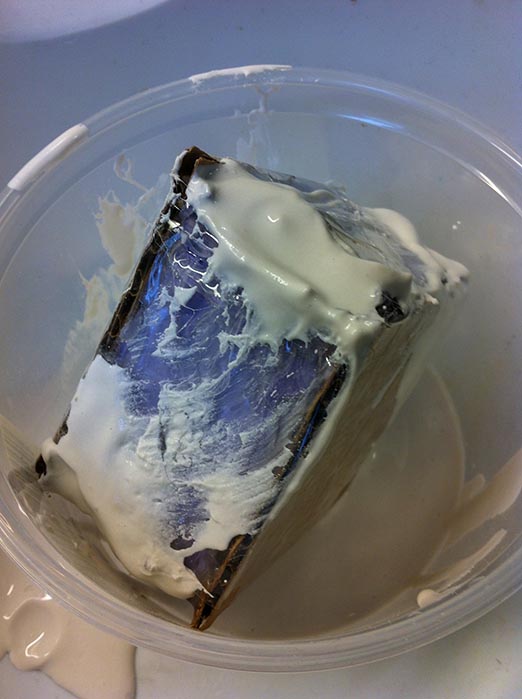
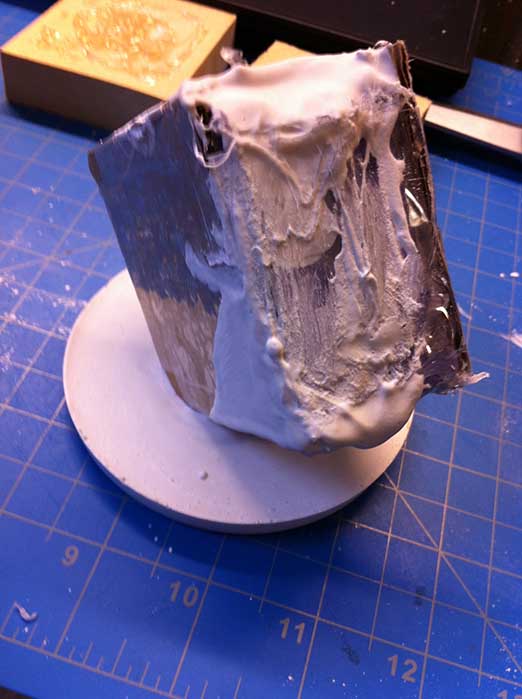
I decided to cast in Hydrocal White (which I had leftover from an old studio project *coughskylarcough*). To seal the mold from leaking, I used tons of tape and hot glue and cardboard. It was a little excessive, but in previous experience excessive leakage is not pretty. The oomoo was very hard to hold in place but eventually I secured it.
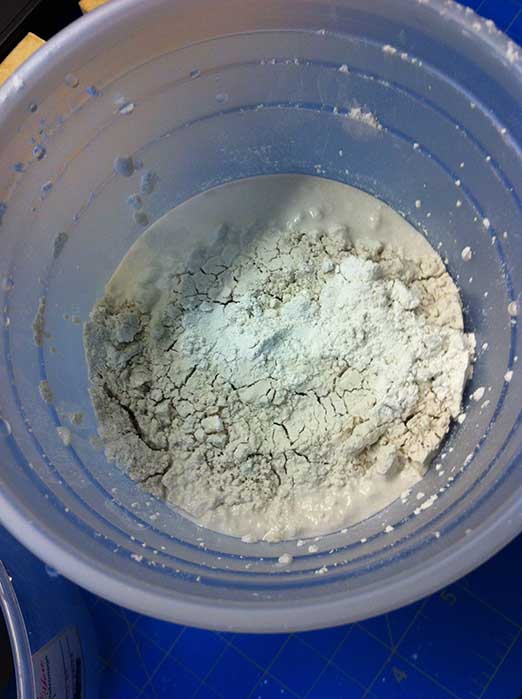
For mixing Hydrocal, you use lukewarm water and sift in the Hydrocal until the water stops soaking up the powder.
You then let it set for about 5 minutes WITHOUT STIRRING(or longer, up to 15 minutes if you want a longer pot life and smoother mixture).
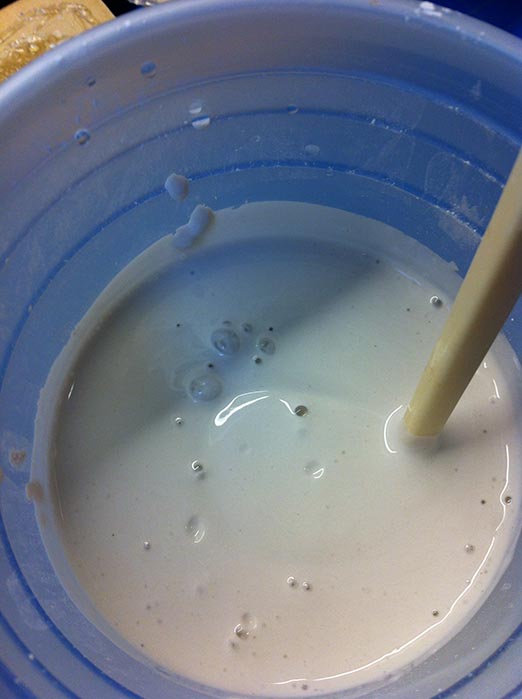
Then you mix it a bit and begin pouring! I casted twice and they stayed in the mold for about an hour each. I would have made more but the pre-hydrocal taping and hot gluing was pretty involved.
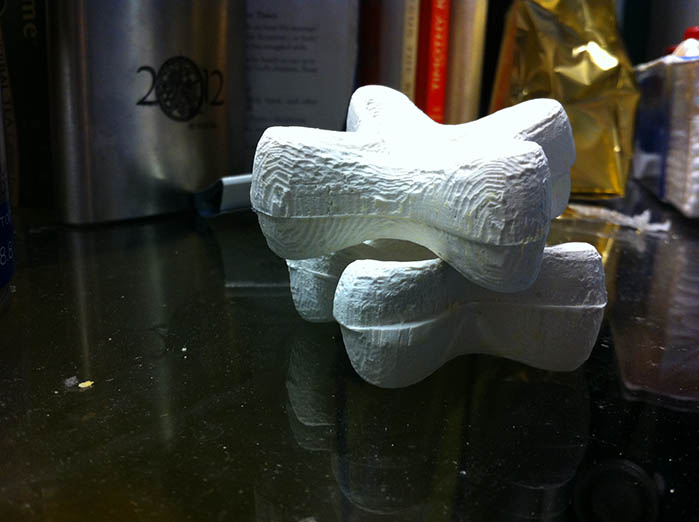
After a little bit of sanding I had my (semi) stackable objects! There was still a visible seam since there was no way to perfectly align the mold, but considering that I think they came out pretty well (except for all the bubbles).