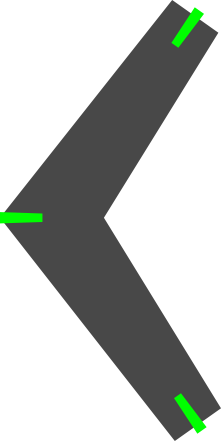
Inkscape model - revision 1
Thinking about how to get a tetrahedral geometry from 2D space was a bit tricky. First I sat down with some cardboard and a razor to try and make a quick physical model, and started to sketch it out but couldn't figure out a simple way to do it. Thankfully I was inspired by a previous year's project, and saw that I could have the backbones join at 90° and make the tetrahedral geometry I needed. My first revision consisted of said backbone, which I then put slots (colored in green) into using the Inkscape clone tool. Getting the slots correctly placed required judicious use of the snap to grid, object rotate, and align features of Inkscape. Nonetheless in the end I was able to force Inkscape to do what I wanted, and like Neil showed, I could modify the original slot and have it propagate to all the existing slots. This came in quite handy later in the process. Notably I set up Inkscape from the start to use physical units, and was designing thinking that would be the actual size of the parts, however actually getting the laser cutter to do the correct sizing never quite worked out.
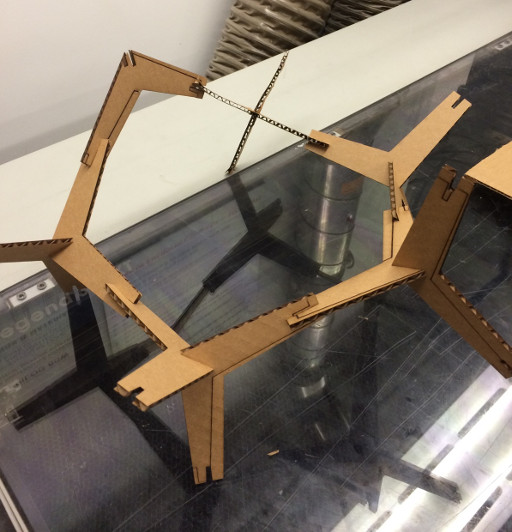
Revision 1 assembly
In cutting my first revision, I ran into some real issues. There were two pathways for getting the laser cutter to cut: Rhino and the print dialog, or the fab modules directly. Rhino doesn't import SVG directly, so I decided to try the fab module instead. In my hands the fab module SVG importer just hung, and never produced a valid path. By exporting my .svg to a raster .png from Inkscape, I was able to get fab modules to correctly calculate a path and upload it to the laser. I used the 60W epilog laser in the architecture shop, and used the default power settings in the fab module. These apparently were pretty weak settings, as I needed to make 3 passes to cut through the cardboard entirely. This was fine as I was somewhat terrified that the whole setup could burst into flame at any time. Unfortunately even though I had specified physical units in Inkscape, conversion to PNG and then conversion by fab modules to a path confounded any attempt at exact design of sizes. Changing the resolution parameter in fab modules changed the ultimate size, but I had no idea how it related to my initially specified physical units. In the end I was able to get a 3D shape of sorts, but the geometry was all wrong. I went back to the drawing board for a second revision.
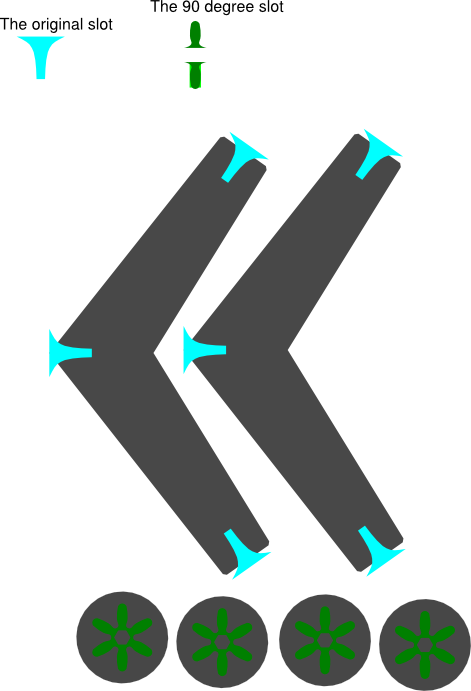
Inkscape model revision 2
In making my 2nd design, I had two main ideas. First, I needed to add chamfer (beveling) to the slots, as I noticed in revision 1 that the sharp angles of the slots were very prone to becoming bent/damaged. Since all the slots were cloned, this was straightforward. Secondly, the geometry of the molecule was mostly wrong and I needed to fix that. When I looked down the "carbon-carbon" bond axis of the molecule, I saw the problem. Typically in organic molecules these angles settle into low energy positions, which is usually a 60 degree angle between substituents, instead my angles were at 90 degrees from the slot joining. I designed a circular adapter, which could sit between two "molecules" and enable a 60 degree angle. The width of the slots on the circular adapter were designed from physical measurements of the cardboard.
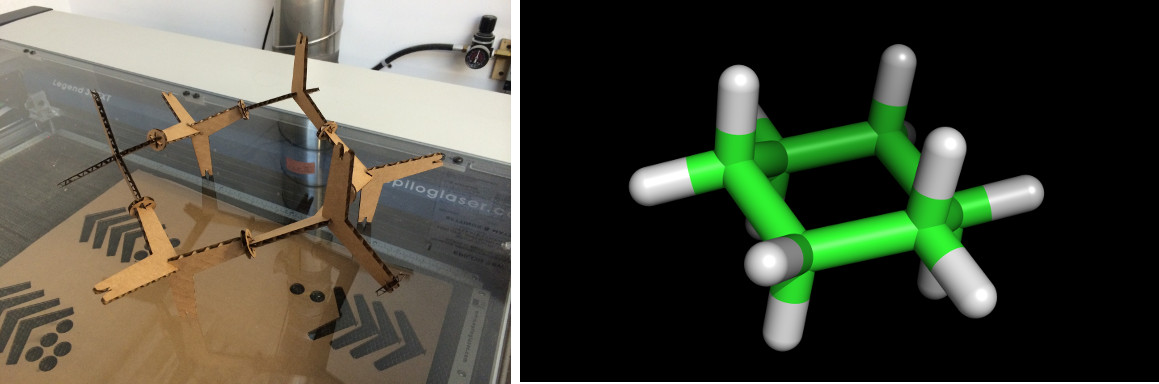
Revision 2 assembly - Cyclohexane revealed
This time around I received a tip from a classmate that Inkscape could export to Rhino readable .dxf. Notably in the Inkscape export dialog I had to check "ROBO-Master type of spline output" otherwise Rhino wouldn't correctly get all the shapes. I pushed the design to the 75W epilog laser cutter using the print dialog with default settings (50 Speed, 50 Power, 2500 Hz). This cut the cardboard in one pass, however the size was smaller than I expected, but still workable. I went back to Inkscape and scaled everything up 25%, but the laser cutter still cut the same size, at which point I decided to just go with the size the laser cutter was defaulting to. I also ran into the issue that if hit print in Rhino when the isometric projection was selected, Rhino would print your design with everything slanted, an amusing albeit unhelpful feature. After putting all the pieces together I had a geometrically correct cardboard cyclohexane molecule.
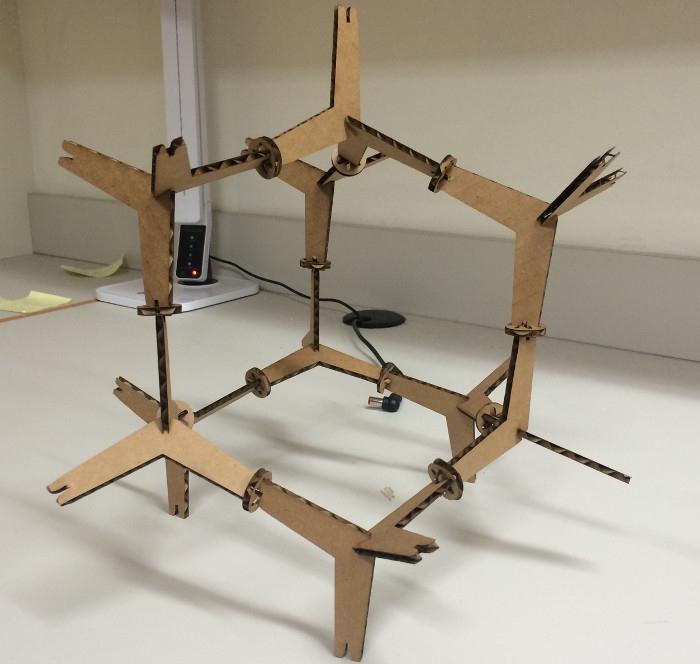
Revision 2+ assembly - Admantane
Apparently this molecule is called adamantane. Looks neat!