Concept - The Internet of other things
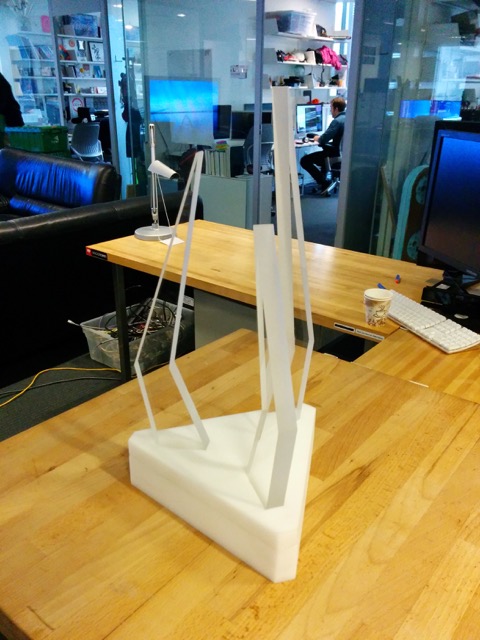
The internet of things is all around us and each day another object gets an IP. However, most of these things are existing utilities. I set out to build something else, maybe art, that is also an internet connected thing. The Burning Bush started out as an attempt to create a futuristic illuminating object that delivers prophecies. I haven’t yet figured out how to fabricate prophecies so instead I decided it will received commands from the internet and will change it’s illumination accordingly.
Design - Take what you can
I’ve decided to base my general design on scrap I found in the MIT Media Lab instead of going out and buying stuff. These two main materials were :
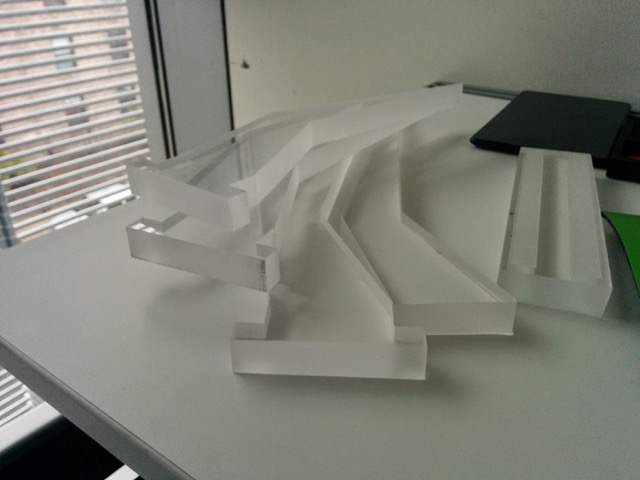
- 3/4” transparent acrylic sheets for the branches. This material serves as an excellent diffuser for led lights.
- 3/4” white unidentified plastic (probably derlin or nylon) for the base.

The Design was done in solidworks. The design process was loosely based on Matt Carney’s “master driven design” paradigm and was comprised of these stages:
- Create a master part that holds all 2d sketches of the different parts and Parametrize dimensions using linked variables.
- Create all features in that same part as different bodies.
- Derive all these features into different parts.
- Create an assembly with all the parts and mate them accordingly. This process allows for easy changes in dimensions which trickles down to all different parts and the assembly.
Branches
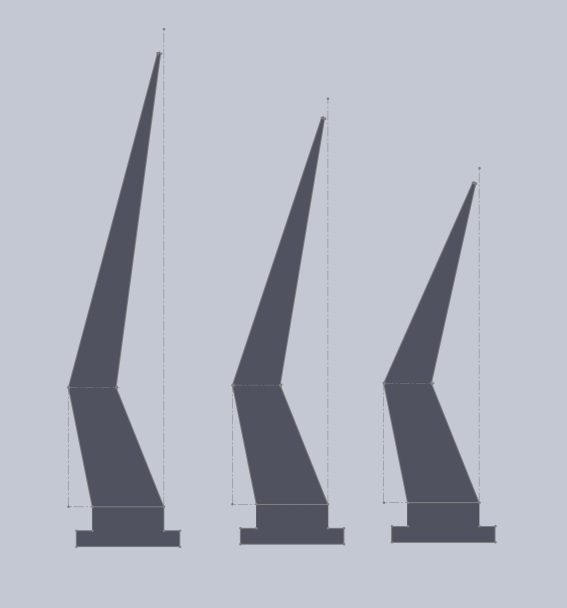 Cutting the branches was perhaps the most frustrating task in this process. I wanted to cut the acrylic in a way that keeps the transparent face intact so that it doesn’t show the light while leaving the edges with smooth milky texture that diffuses the light.
I’ll start from the end. The best method I found is using the waterjet cutter set to brittle and adding a laminating material on the bottom (an OSB sheet in my case). The waterjet cuts beautifully, fast, doesn’t harm the material’s face and leaves a unified and smooth milky edge which serves as a great diffuser without further sanding.
NOTE: without the laminating material the brittle acrylic suffers from many fractures on the bottom face to the water’s backlash. TRUST ME, I KNOW!
Another option which I attempted was laser cutting. I used the epilog laser cutter with the extreme settings of:
- Speed: 2%
- Power: 100%
- Frequency: 5000Hz
This works. However, due to the extreme heat created by these settings it’s not uncommon for the material to deform along the edge, especially in detailed areas of the cut. I also tried using less brutal settings and make more than 1 pass. This also work but the multiple cuts are visible along the edge.
Laser cutting also creates clear cuts which are not good if your purpose is to diffuse light. This requires sanding THE edges. I found the sand blaster to be a delightful sanding experience.
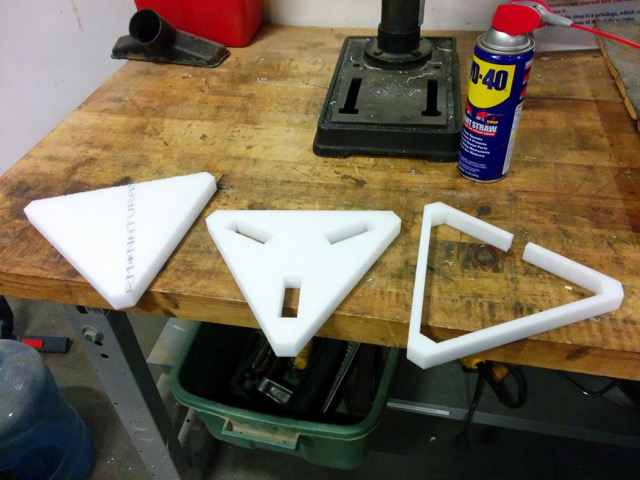
Base
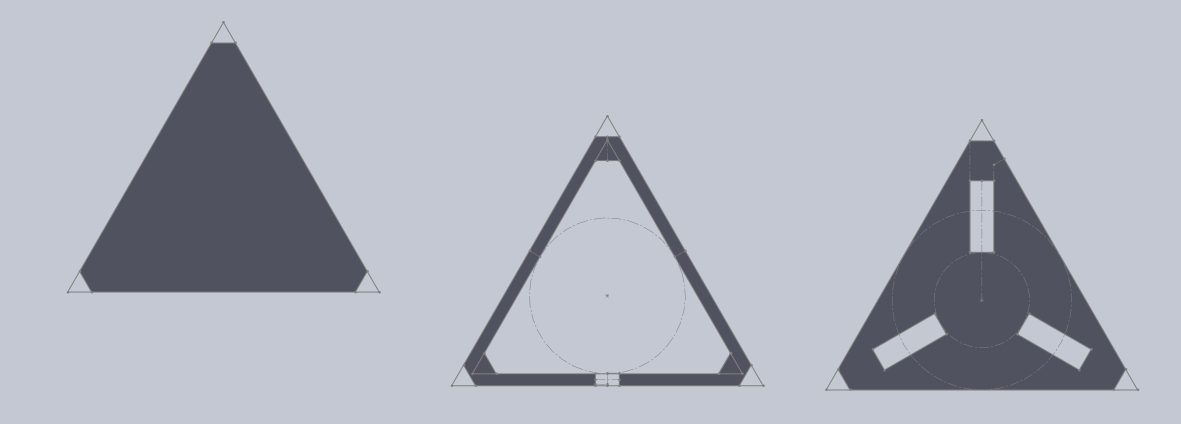 My original plan was to use the shopbot for cutting the base. Having inner 90 degree angles in the base, that would mean creating “micky mouse” style cuts which I don’t really like. After my bad experience with cutting thick materials in the laser cutter I went straight to the waterjet.
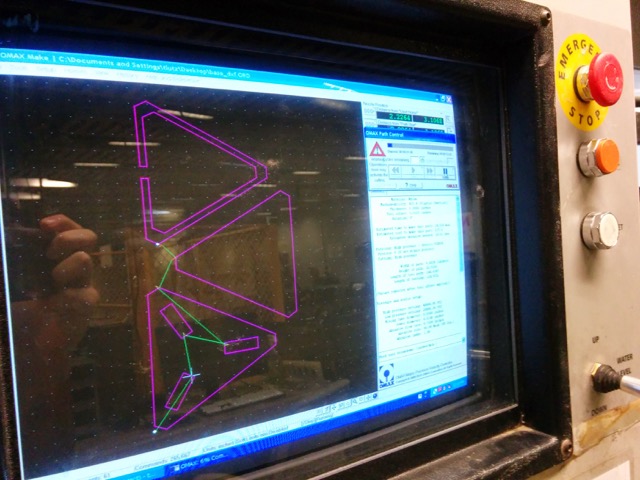 The waterjet performed beautifully. However, It didn’t work on the first try due to the material not lying flat on the bed. NOTE: Always make sure the material you’re cutting is flat and properly weighed down or the cuts will not be as straight as they can be.
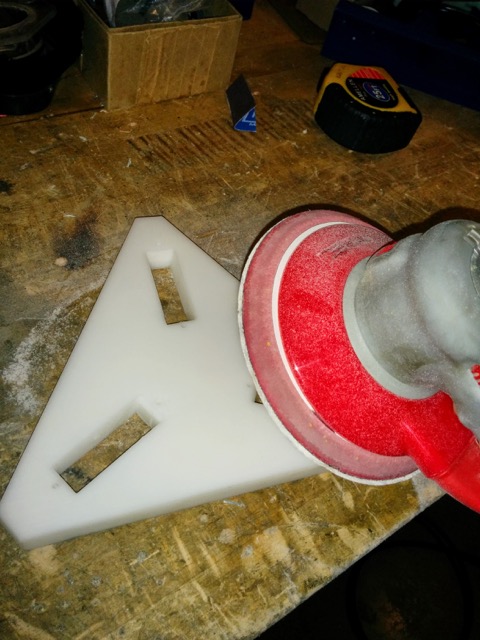
I finished with the orbital sander to get a nice matte finish.
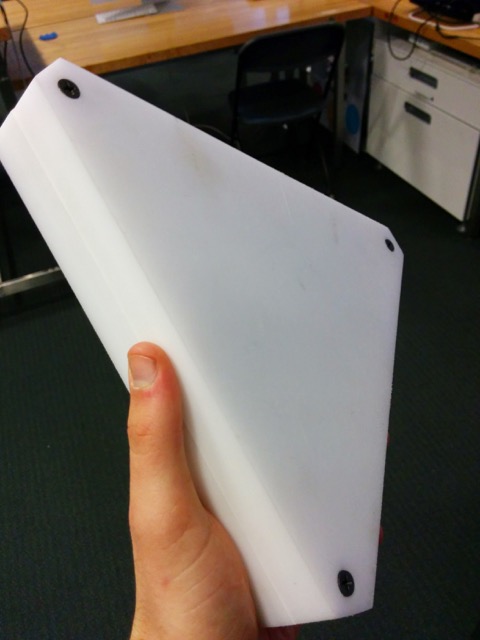
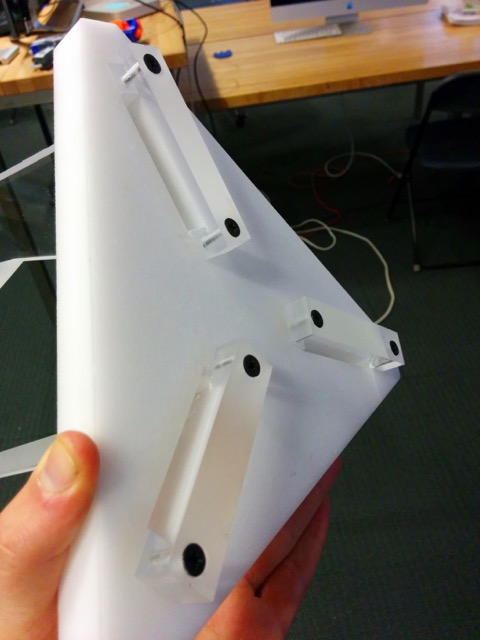
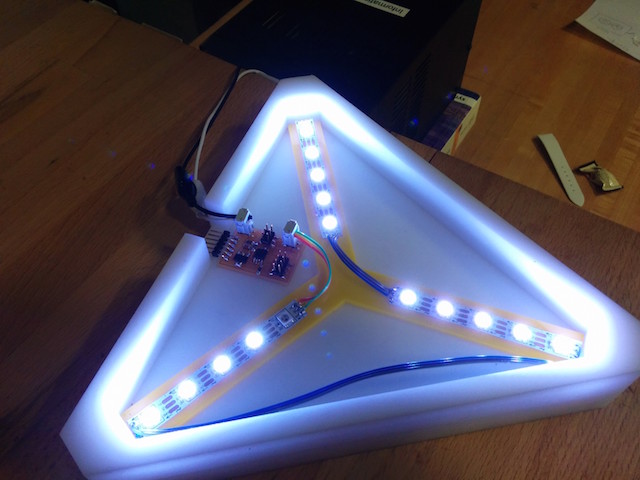
Assembly
Due to the tightness of my design some clamping and filing was needed to get things together. Also, I used screws instead of glue for the sake of modularity.
Electronics Design
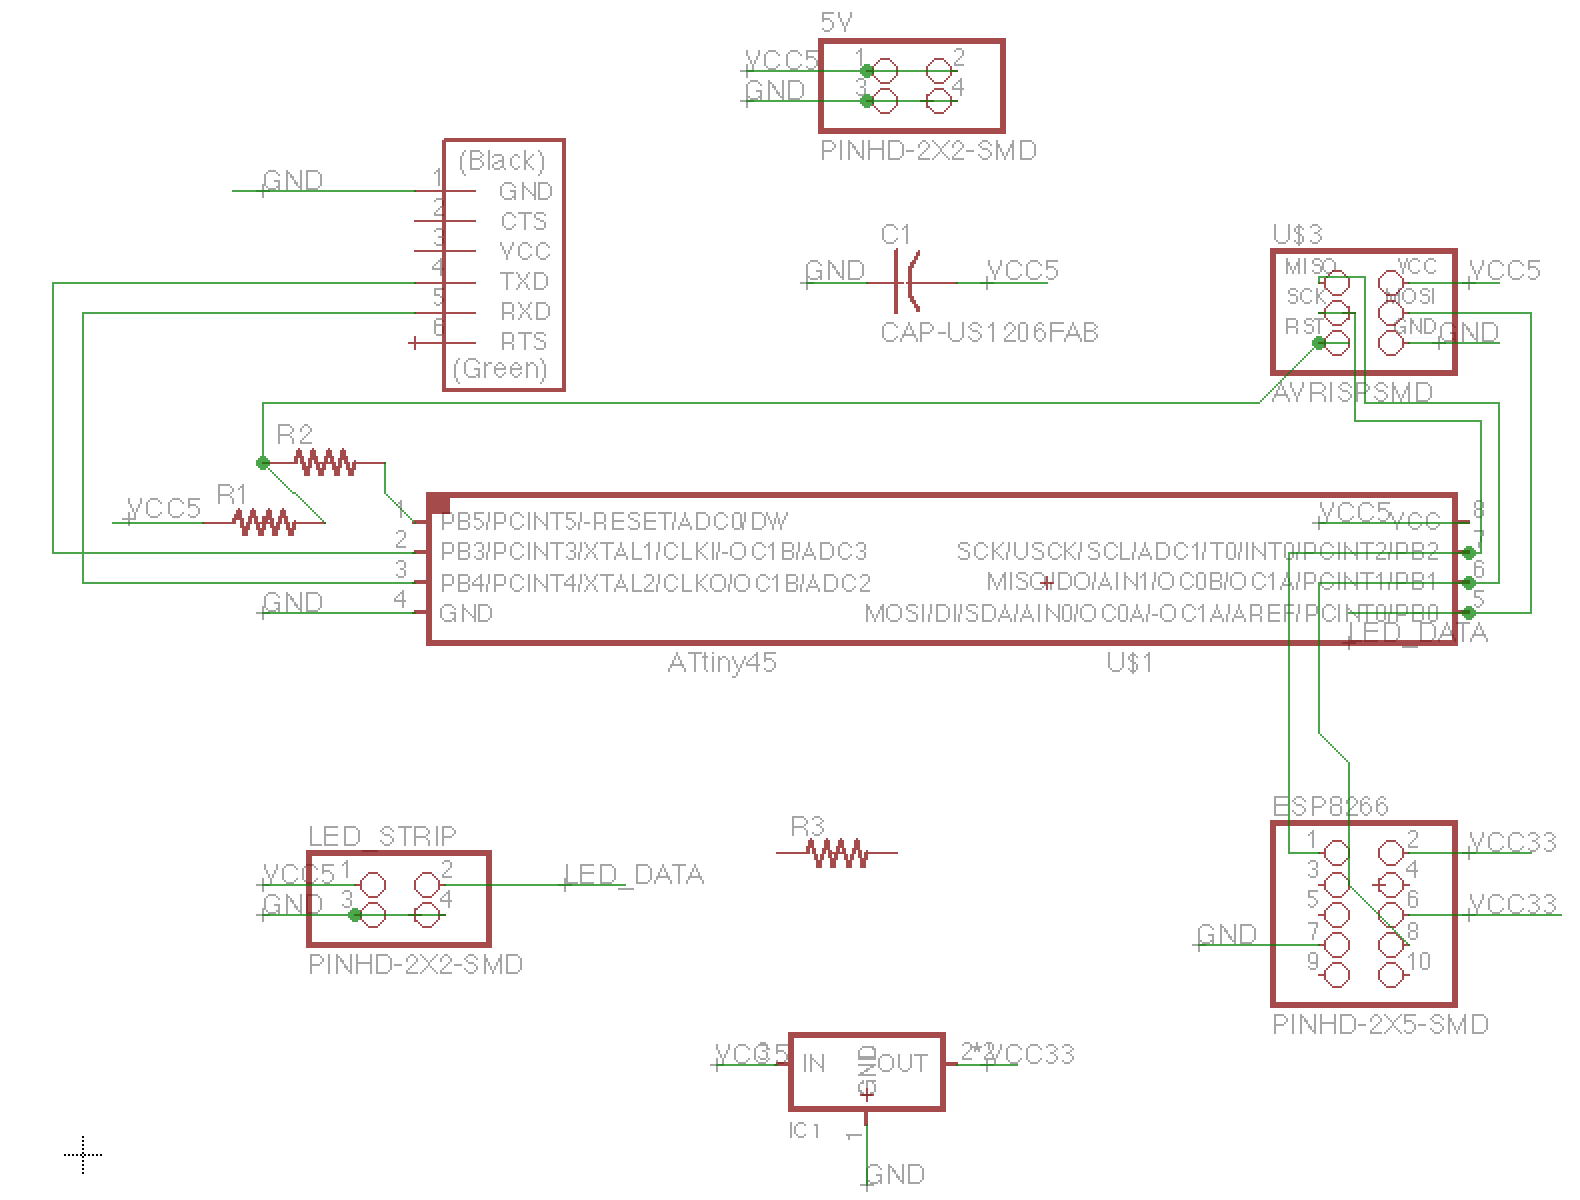
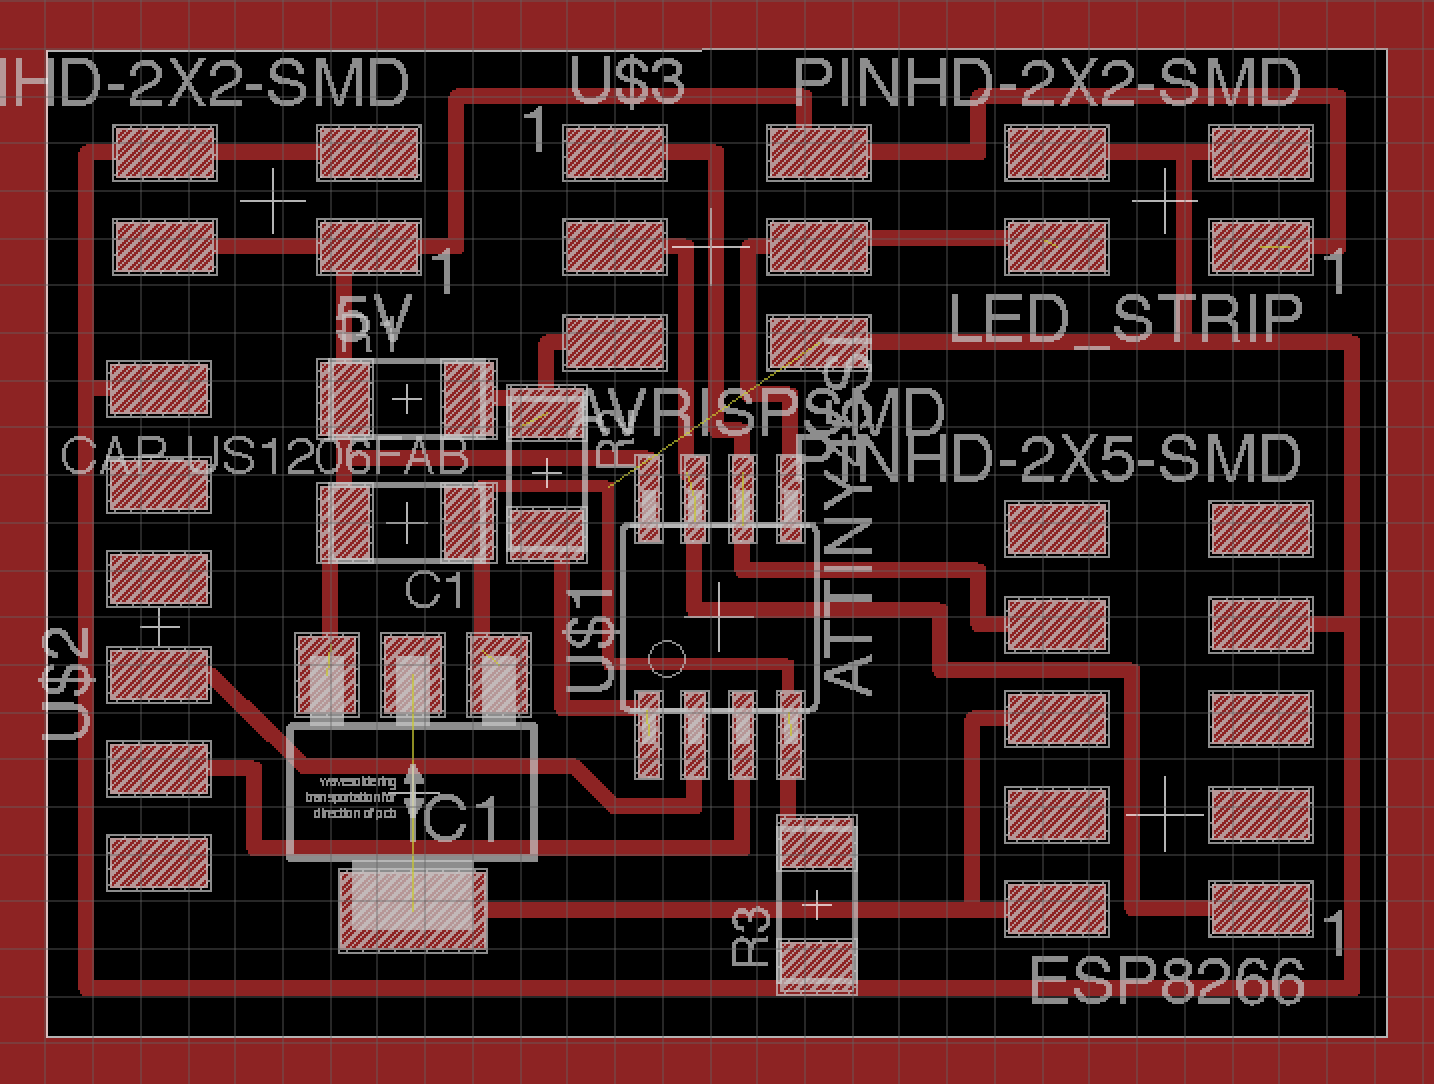
My electronics design was driven by these needs:
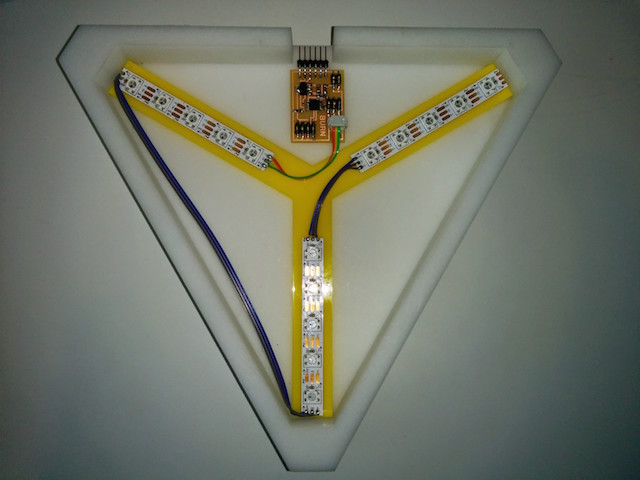
- Light. drive a neopixel led strip of 15 pixels.
- WiFi. connect and serve http request using the ESP8266 wifi serial module
- Debugging. Over FTDI.
NOTE: Due to time constraints I later on ditched the ESP8266 WiFi module in favor of a node.js proxy server running on the FTDI connected computer
As a minimalist at heart, I based my board on the small AtTiny45 chip. (A decision which will later prove problematic)
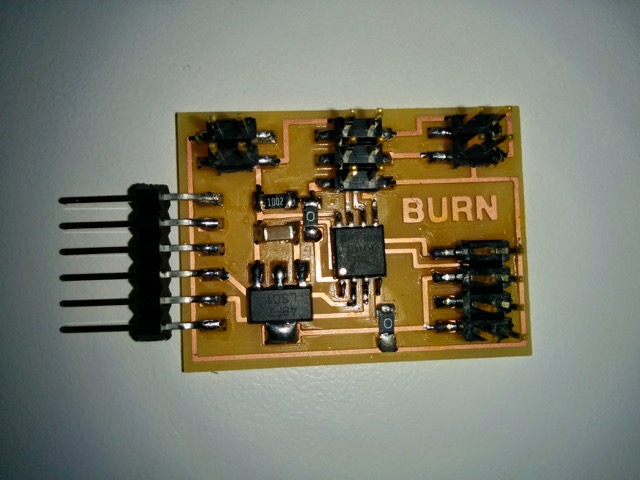
Board Programming
I used arduino for programming and followed this tutorial to get started. Having decided to use both the SoftwareSerial and Neopixel libraries I immediately found out that the 45’s 4k of memory wasn’t enough (by about 100 bytes). What would I do in the middle of the night with this problem? simple, find someone with an AtTiny85!
Thanks to Felix from Tangible Media I was soon equipped with the Tiny85 which has 8k of memory and the exact same pinout as the attiny45.
The arduion sketch:
#include <Adafruit_NeoPixel.h>
#include <SoftwareSerial.h>
#include <HSBColor.h>

Adafruit_NeoPixel strip = Adafruit_NeoPixel(15, 0, NEO_GRB + NEO_KHZ800);
SoftwareSerial serial(3, 4); // RX, TX

int hue;
void setup(){
  strip.begin();
  strip.show(); // Initialize all pixels to 'off'
  serial.begin(9600);
  serial.println("ready");
  hue = 240;
}

void loop(){
  if (serial.available()){
    hue = serial.read();
    serial.println(hue);
  }
  pulse(hue, 6);
}


void updateWithHsb(int h, int s, int b){
  int rgb[3];
  int i;
  H2R_HSBtoRGB(h, s, b, rgb);
  for(i=strip.numPixels(); i>0; i--) {
    strip.setPixelColor(i, (uint8_t)rgb[0], (uint8_t)rgb[1], (uint8_t)rgb[2]);
  }
  strip.show();
}

void pulse(int hue, int wait){
  int i;
  for (i=0; i<500; i++) {
    int sat = 100*(1-pow(cos(i*PI/500),2));
    updateWithHsb(hue, sat, 99);
    delay(wait);
  }
}
The code is fairly simple: receive a single byte from the serial port representing a hue value and then transition saturation values in a sinusoidal function until a different hue is received.
Application Programming
I used node.js as a proxy between the serial port and socketio connections. My updated serial-to-socketio code can be found here: https://github.com/tomerweller/serial-to-socketio.
The specific client in this case is an html color palette - when the user clicks on a color, the hue value is sent to the server using socket.io and then to the board using serial over ftdi connection.
Of course, any application can open a socketio socket to the burning bush and control it, from weather apps to notification manager and (one day) prophecy generators.
Conclusion
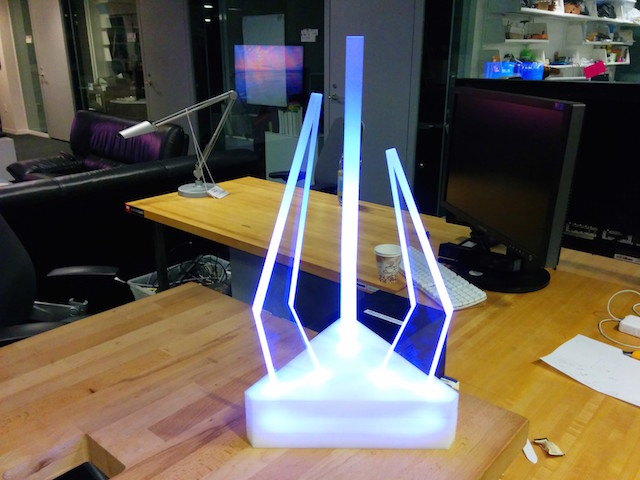
Looking at my goals, This project has been a success. I created a physical object that matches my vision and made it respond to online events. More than that, I used multiple techniques and tools that up until 3 months ago were not even related to my skill set.
I’m still interested in putting in the WiFi module for the sake of the independence of the burning bush. I feel that having a computer connected to it beats the purpose of the object.