Molding + Casting
This week, the assignment was to design a mold, machine it, and cast something in it. I got interested in the ability of a single mold to cast multiple parts. I wondered if there was a simple way to use the same series of molds to cast a variety of forms.
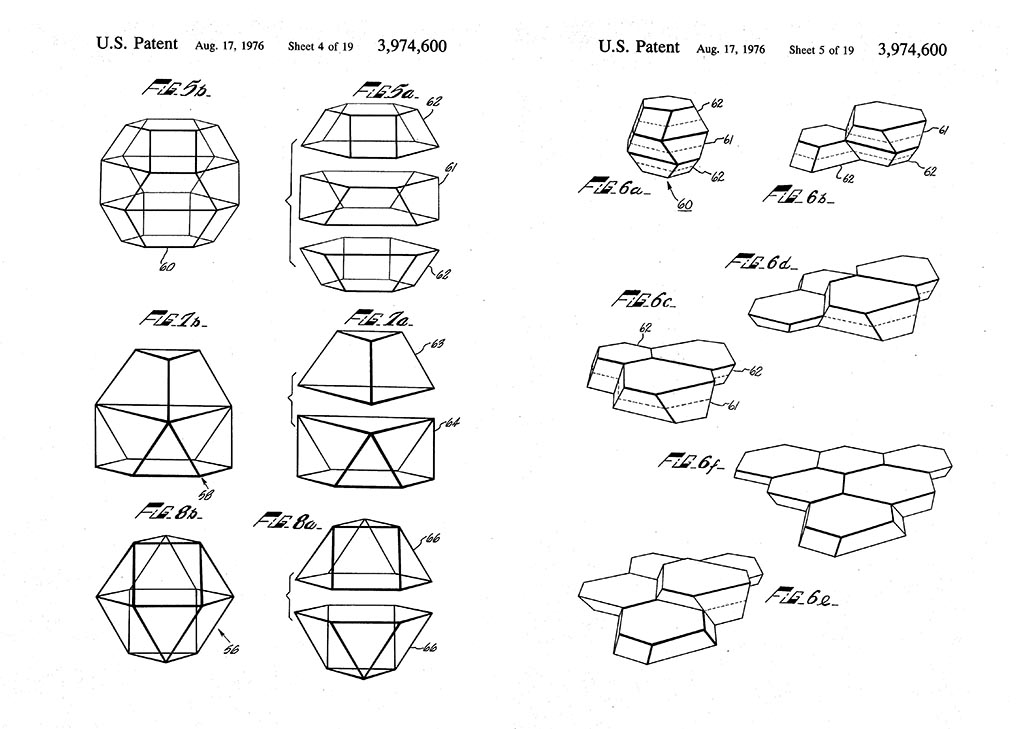
I came across some patent drawings for Peter Pearce’s “Min-a-Max” construction system while working on another project. Some of the geometries he was dealing with seemed like they would work well with the molding + casting process. I chose to use a truncated octahedron as my base geometry + then scaled it in the z dimension to better fit the dimensions of the stock we were using.
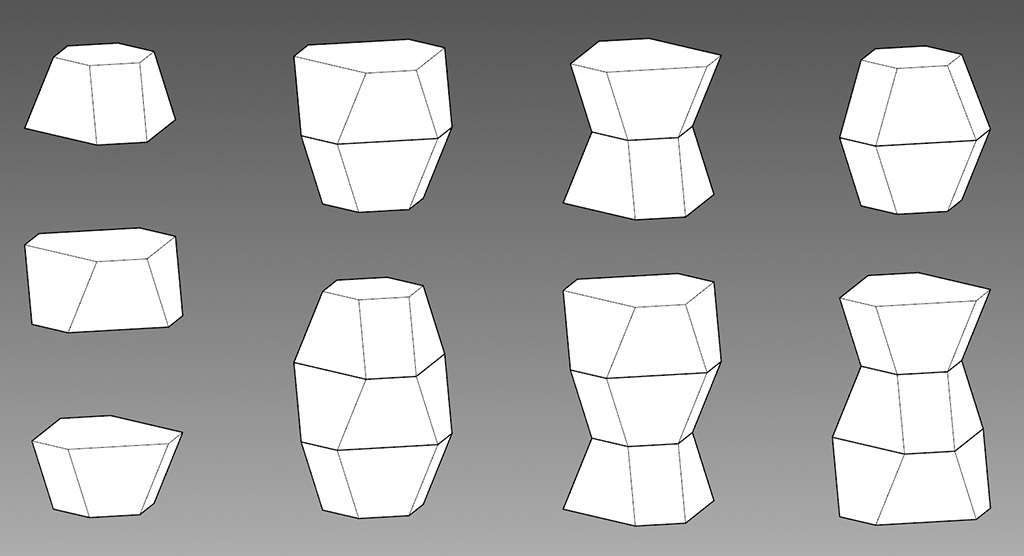
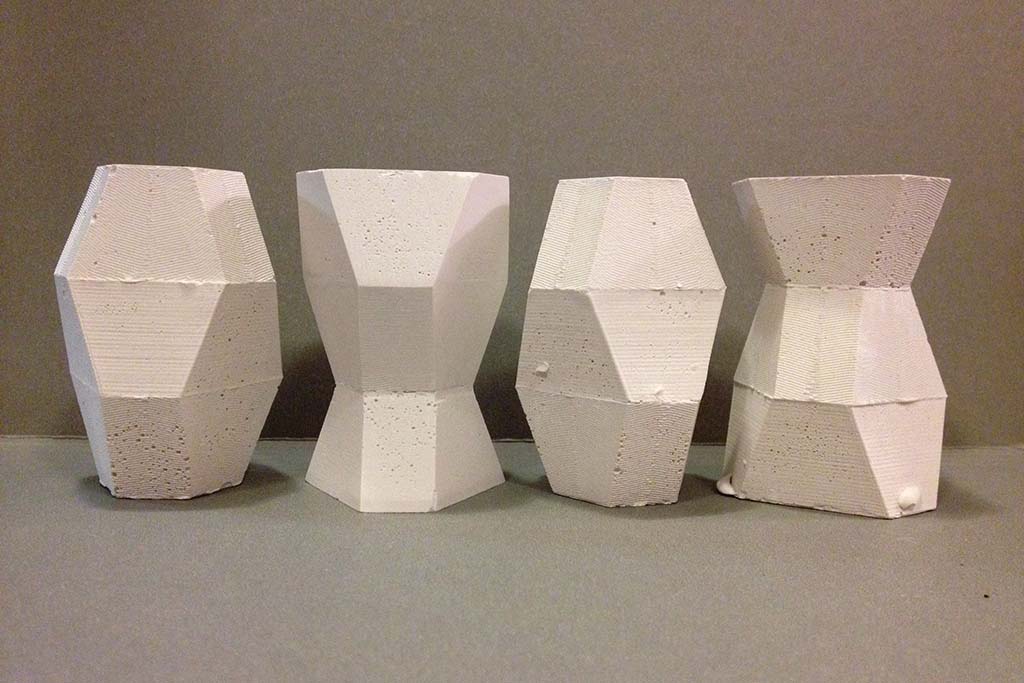
I decided to make three molds – 1 for the middle + 2 of the same mold for the top and bottom. By combining 2 or 3 of the molds in different ways, I could get 6 unique shapes.
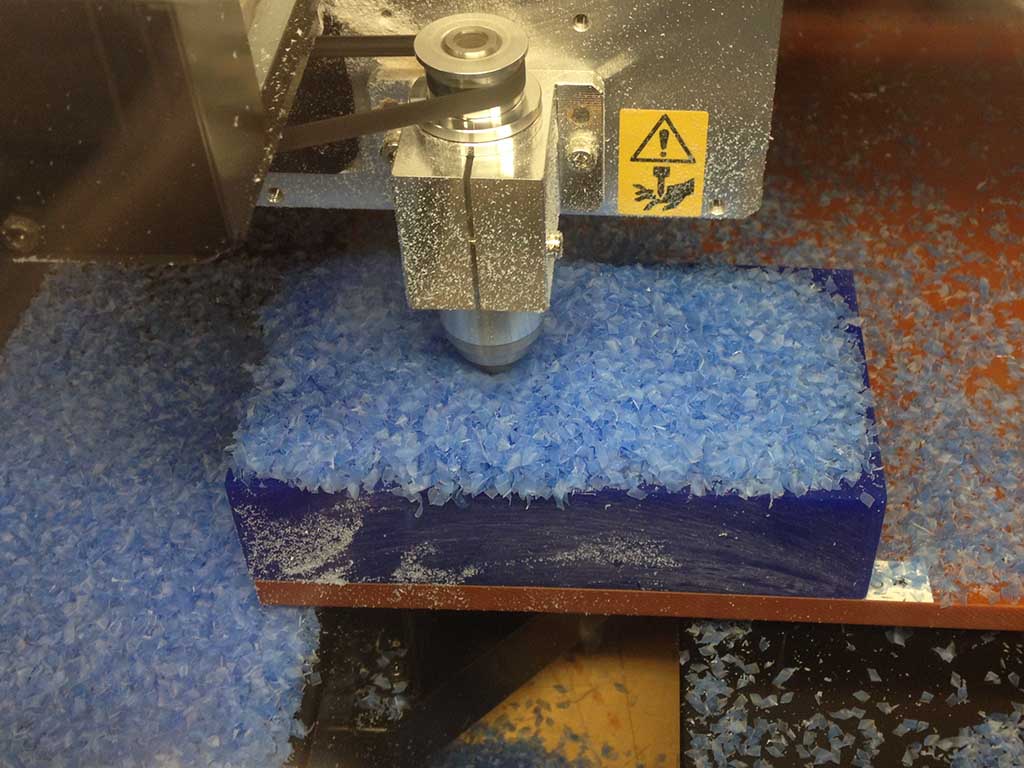
I fabricated the wax portion of my molds using the Roland MDX-40 in the Harvard GSD wood shop. There’s no vacuum system + the mill door has to be closed when it is operating, which can make it difficult to track how a job is running – especially when milling deep pockets. I set up my files in Mastercam, used a flat ¼” endmill for the roughing and finishing operations. I used a .1” stepover + stepdown for the roughing passes + a .01” stepover + .02” stepdown for the surface finish pass.
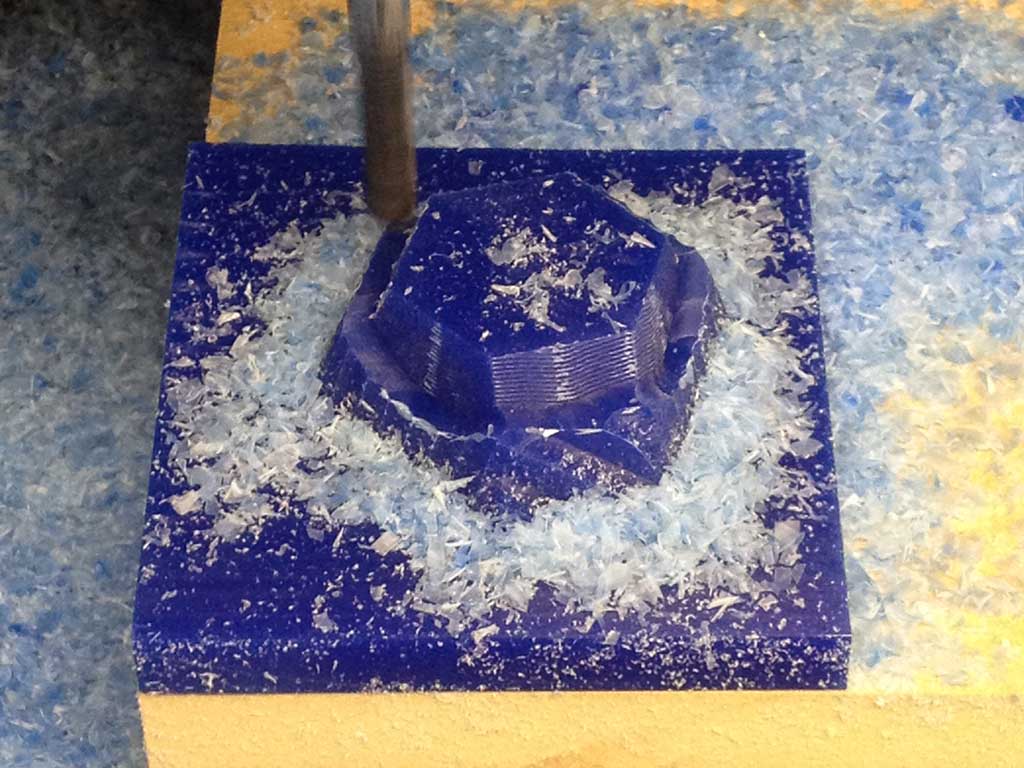
The other part of the wax mold about halfway through the surface finish pass.
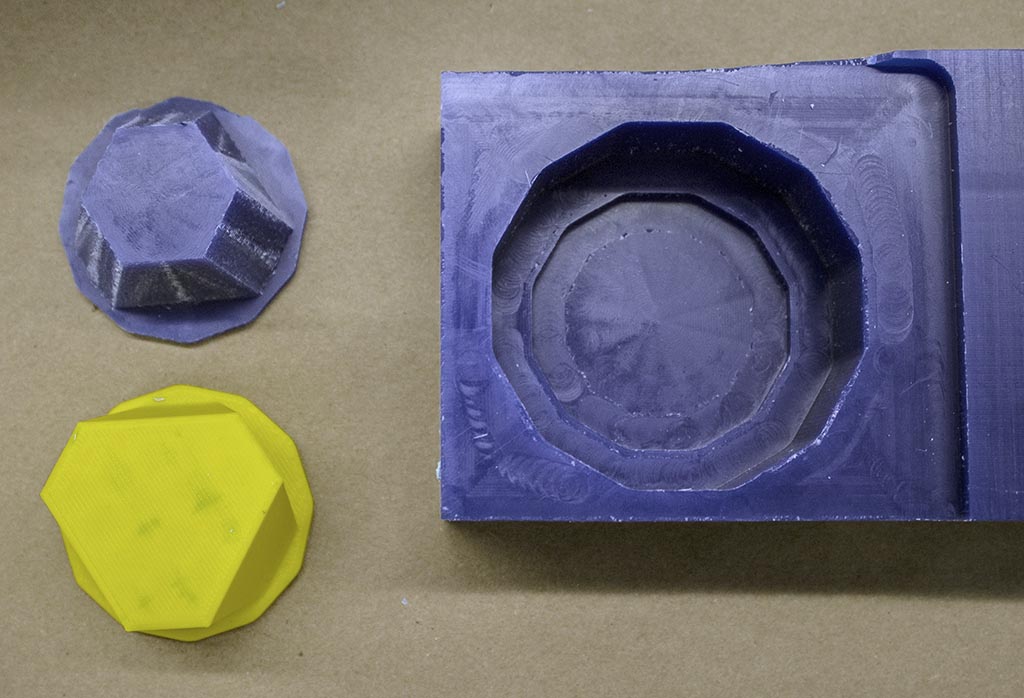
I 3d printed the mold for the middle section of my octahedron as there wasn’t a way to make it how I wanted to without having undercuts. I decided to make a modular system for the molds as well - both the 3d printed mold + the milled wax fit into the same negative form.
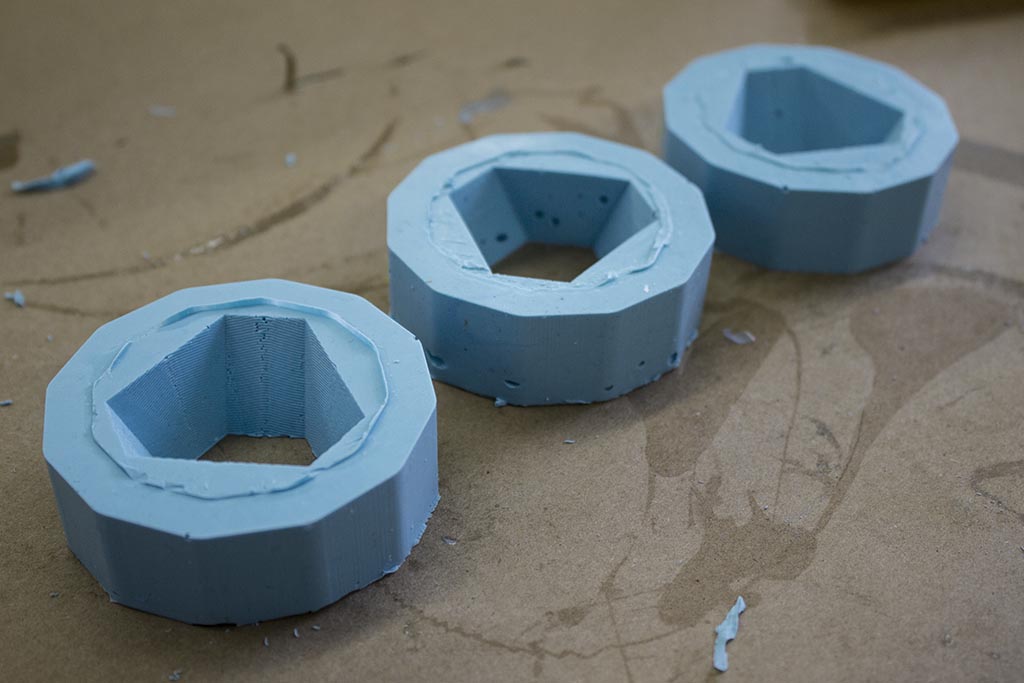
My 3 molds. I don’t have any documentation of the OOMOO pouring and mixing process as it was pretty messy. As for the OOMOO process in general: make sure to mix it well + pour it very slowly to avoid air bubbles. I used older OOMOO for my first couple molds and it was a lot more viscous/difficult to mix and pour.
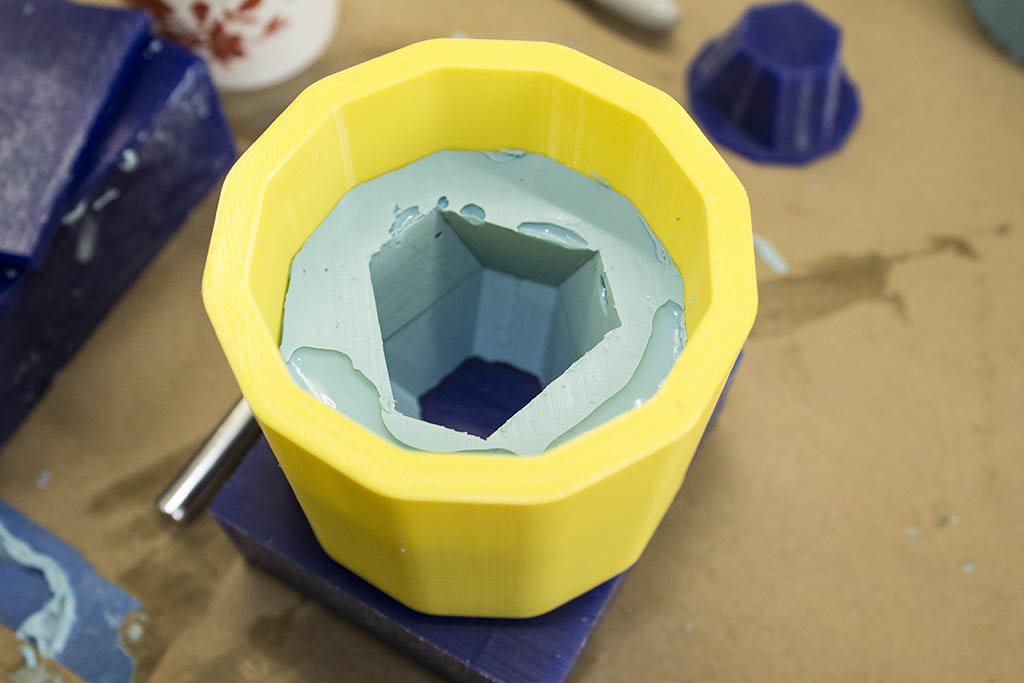
Since the geometry of my mold-making process made it difficult to produce any kind of registration holes, I 3d printed an outer ring to control the orientation of the molds. It isn't perfect, but the edges got pretty close.
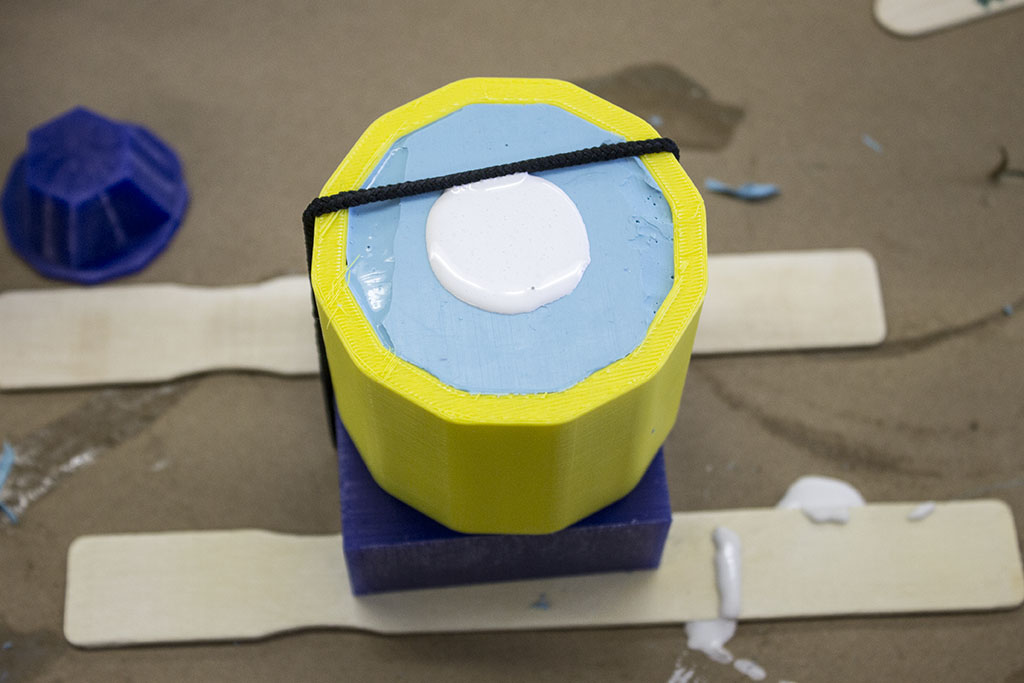
Since I wasn't pouring much material + already had the 3d printed compression ring around my forms, I didn't need much to clamp my molds together - just a rubber band. I used Drystone to pour my positive forms as it's supposedly a little stronger/chip resistant than Hydrostone.