Composites
This week the assignment was to design + make a 3D mold and produce a fiber composite part in it. I've done a little bit of work with composites before and wanted to use this assignment as an opportunity to figure out what kind of curvature I could reasonably achieve with the layup processes I was comfortable with. Also, I needed a something to put my keys + spare change in. Composites are a great way to fabricate non-developable surfaces, but they still have a certain degree of geometric limitation.
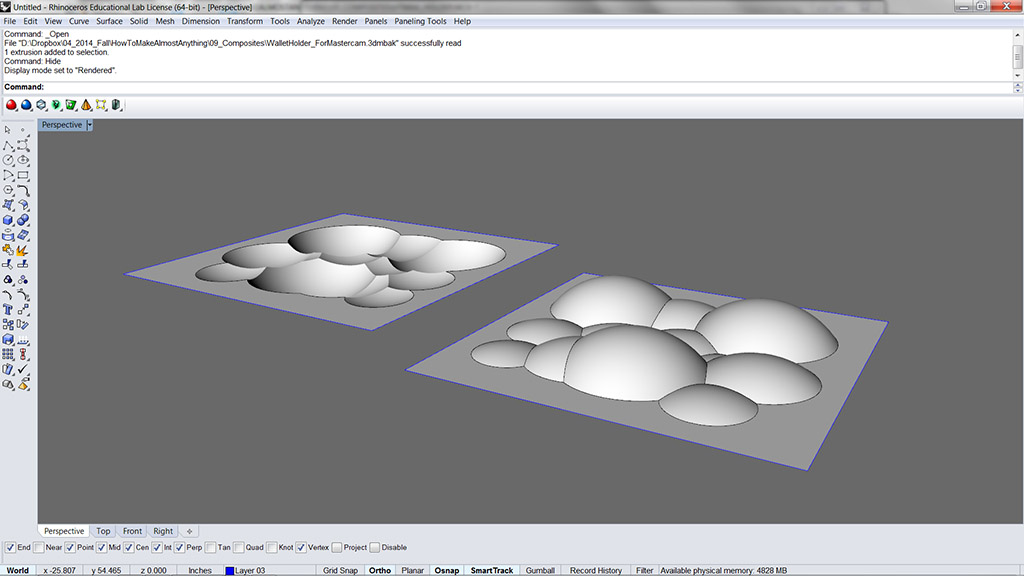
I made a thing in Rhino. It's about 9" square and 1.25" tall. I moved a sphere up and down in the z axis to make different sizes of depressions. I rotated the part 180 degrees with the goal of making two molds and doing some empirical testing to figure out if it is easier to mold a concave or convex surface.

I brought it into Mastercam, set up the toolpaths, etc. Roughing, Flat Surfacing, 3D Surfacing, A couple contour passes to clean up interior corners, and a final contour cutout. For the 3D part, I used a 1/4" ball endmill with a .01" stepover.

The finished tooling.
I covered my tooling in some non-perforated release film available at the GSD so that my composite parts wouldn't stick to it. I was careful to cover all 6 sides of the mold so that even if resin found its way to areas I didn't want it, I would still be able to release the parts.
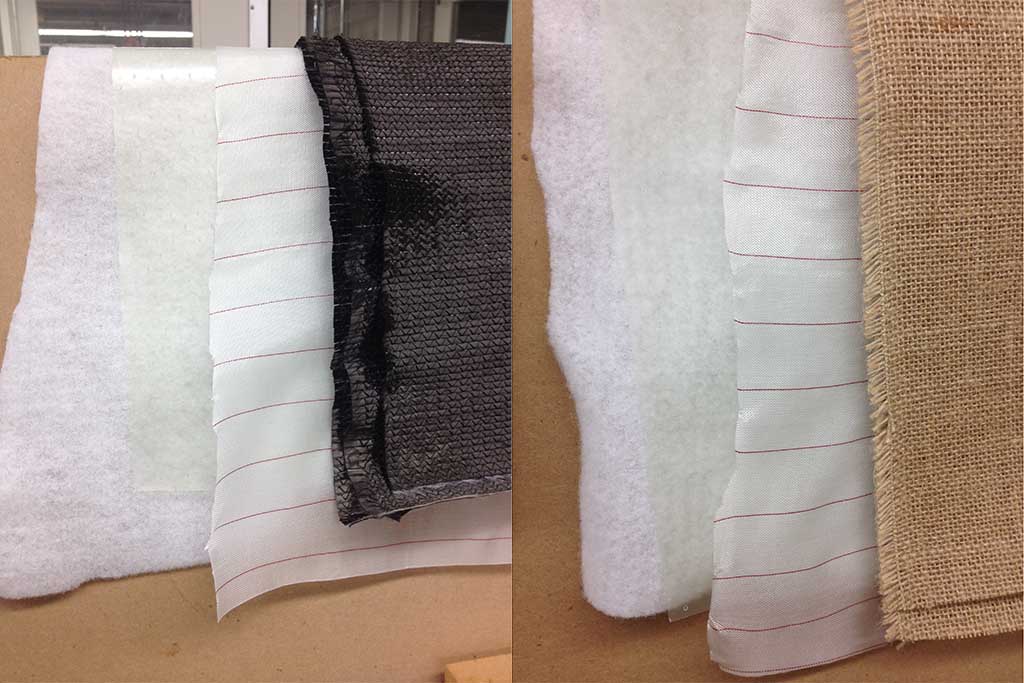
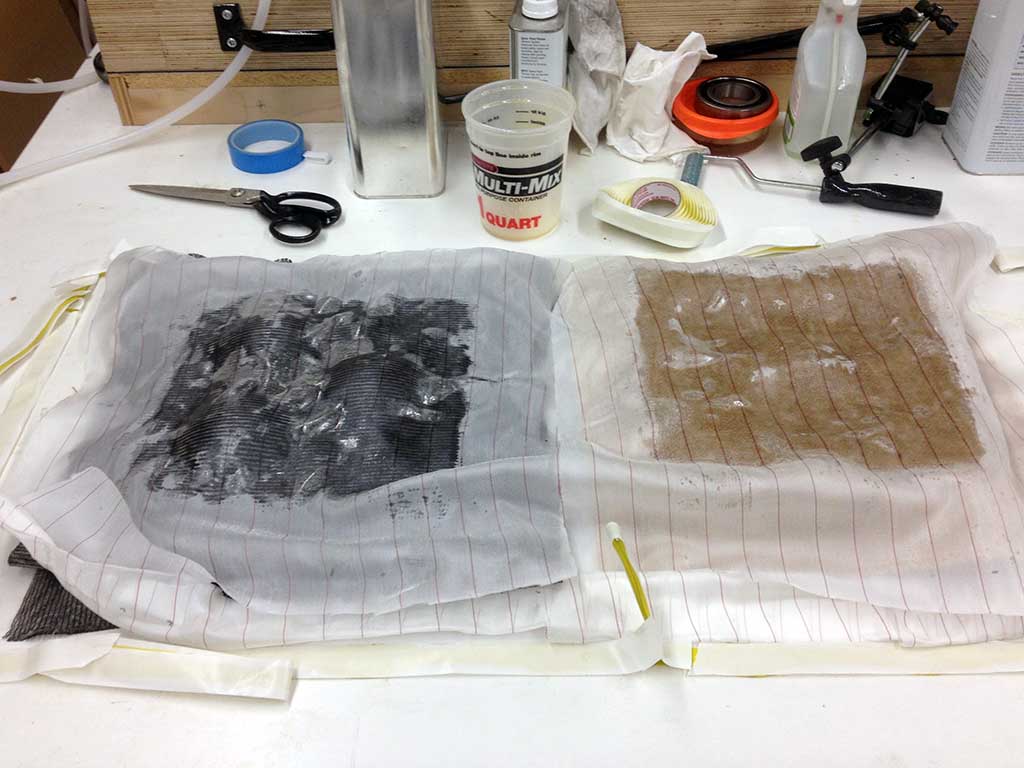
I used two different layups. I find its best to lay out process materials way ahead of time in the order in which they will be placed on the mold surface. The layup on the left (working from the release film covered tooling outwards) - non-perforated release film, (2) layers unidirectional carbon fiber (left over from another project), peelply, perforated release film, breather. On the right, I replace the carbon with two layers of burlap. I used the two different layups to check how each would respond/conform to my doubly curved tooling.
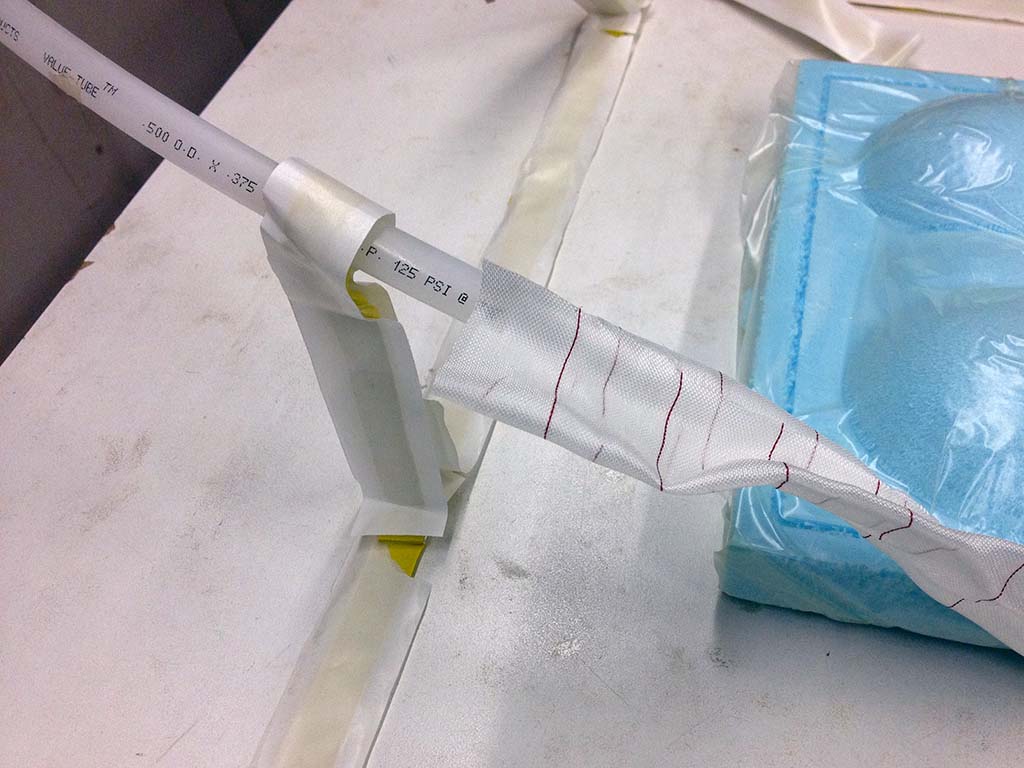
I set up my molds on a table using mastic tape and a vacuum. I made a bunch of darts in the tape to ensure I had enough vacuum bag to accomodate for surface curvature, etc. Here's a shot of how I integrated the vacuum line into the setup. The peelply on the perforated portion of the vacuum line is to keep it from puncturing the vacuum bag. I put a light coating of spray adhesive on it before wrapping it aroudnd the tube so it stayed in place.
Wetting out the molds. I used West Systems 205 Epoxy and Hardener which has a ~8hr cure time at room temperature.
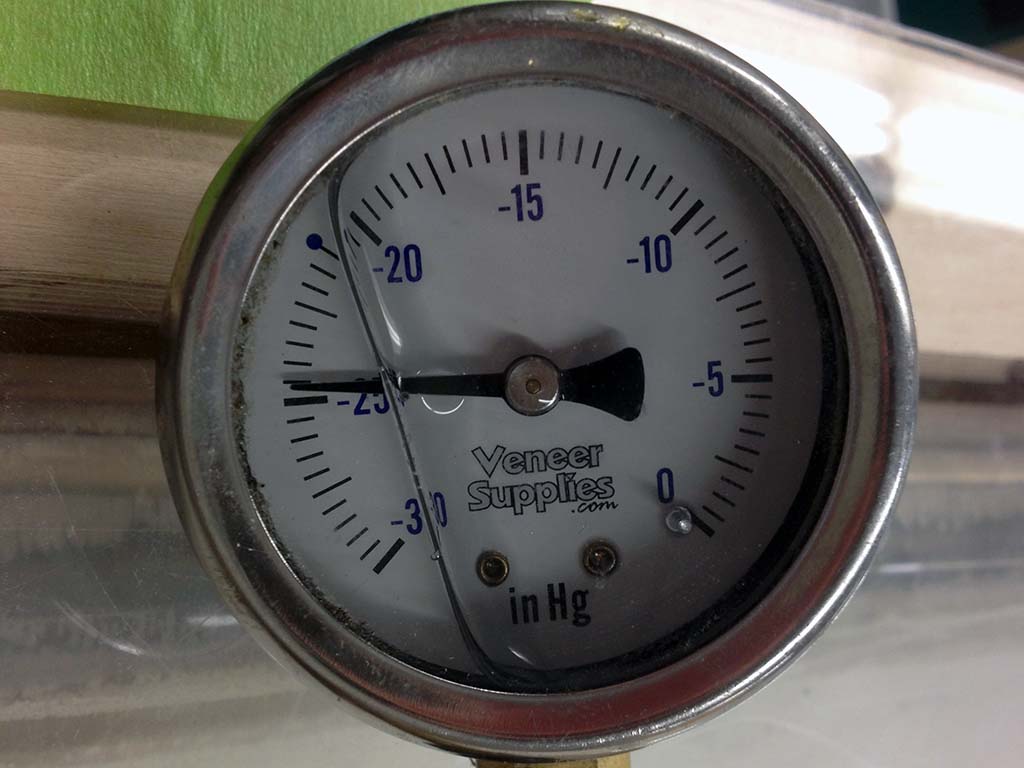
I got my vacuum sealed well enough to hold -24psi for a few hours.
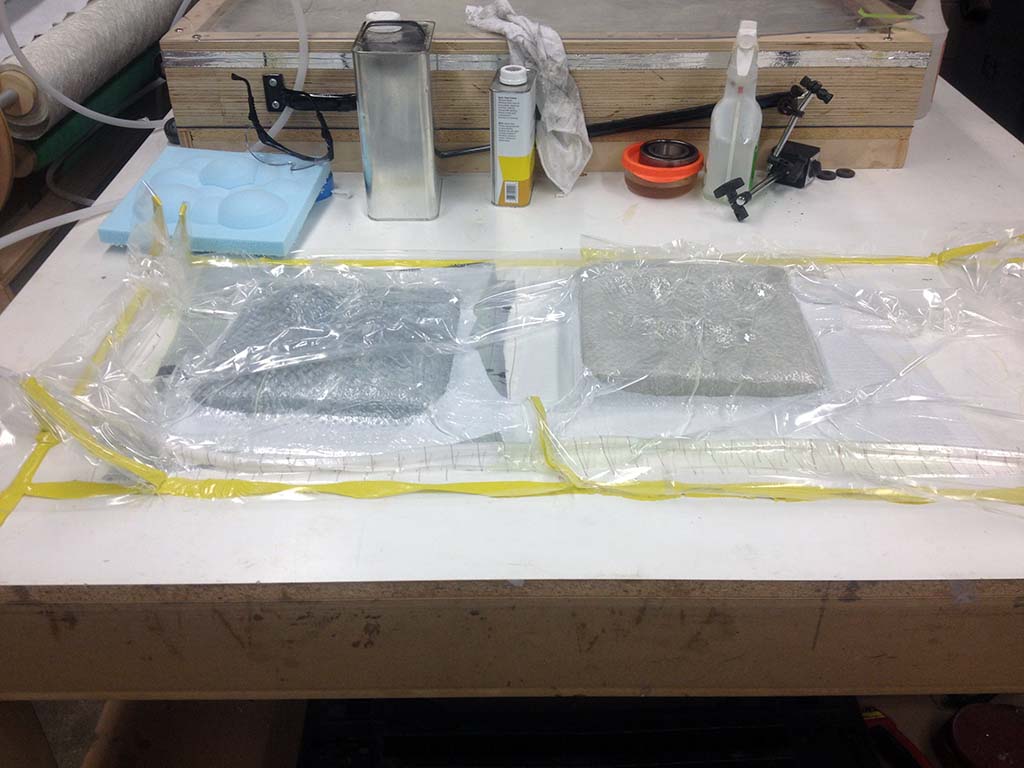
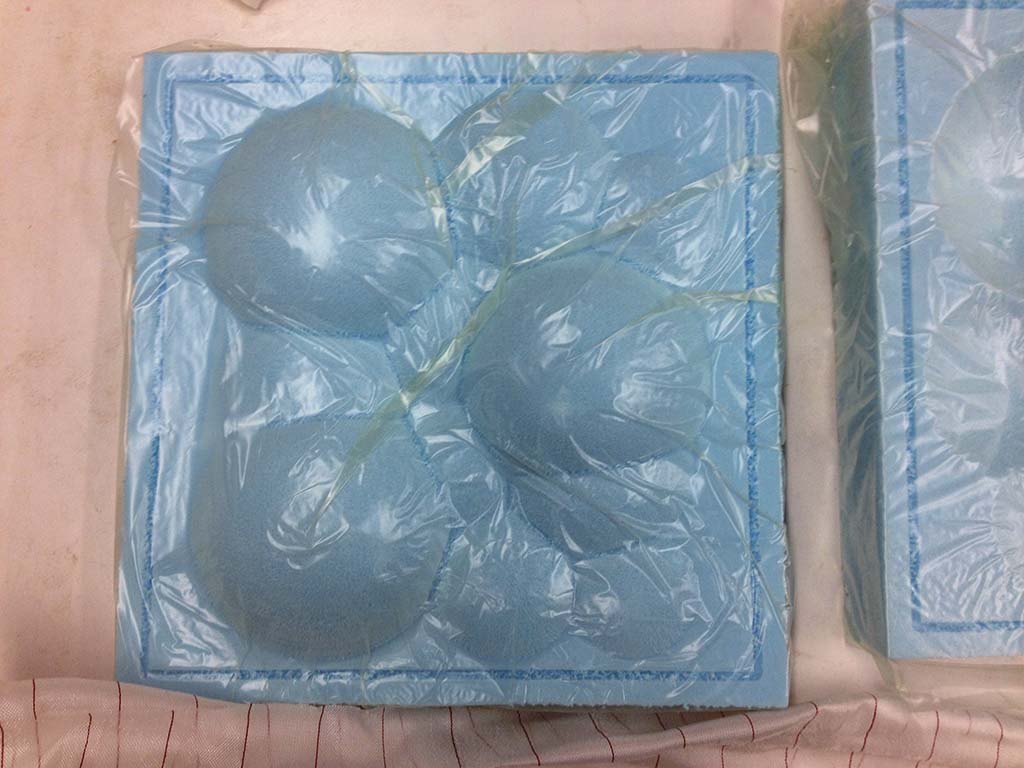
Parts under vacuum. You can see the excess resin soaking through the breather.
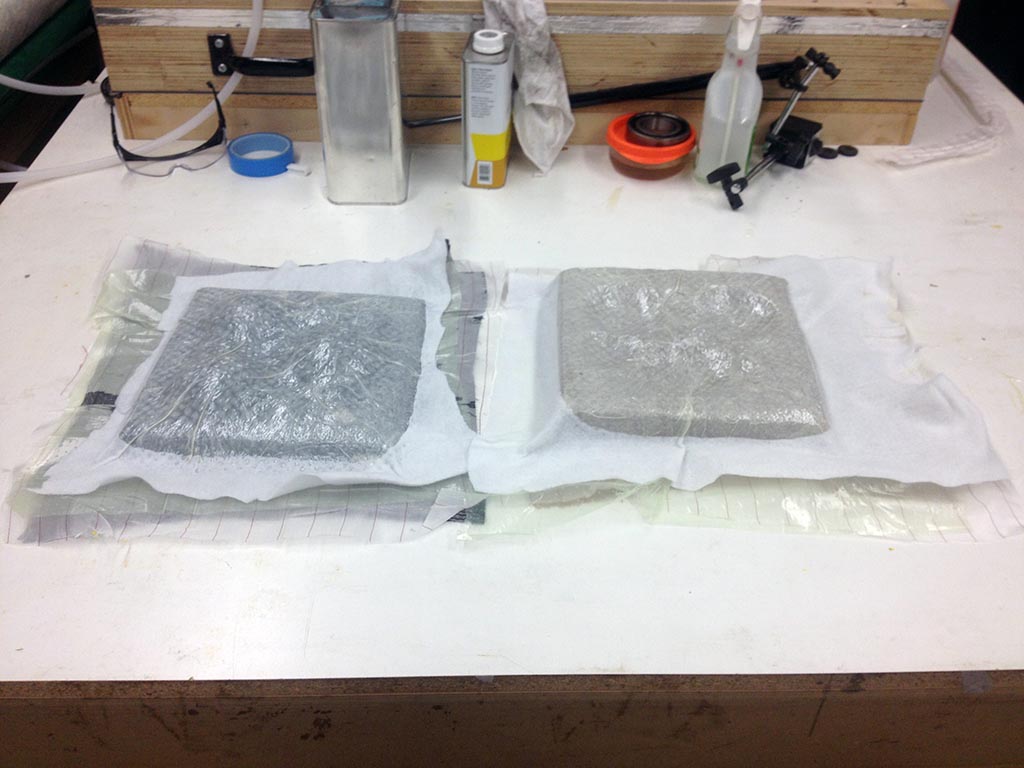
Vacuum removed.
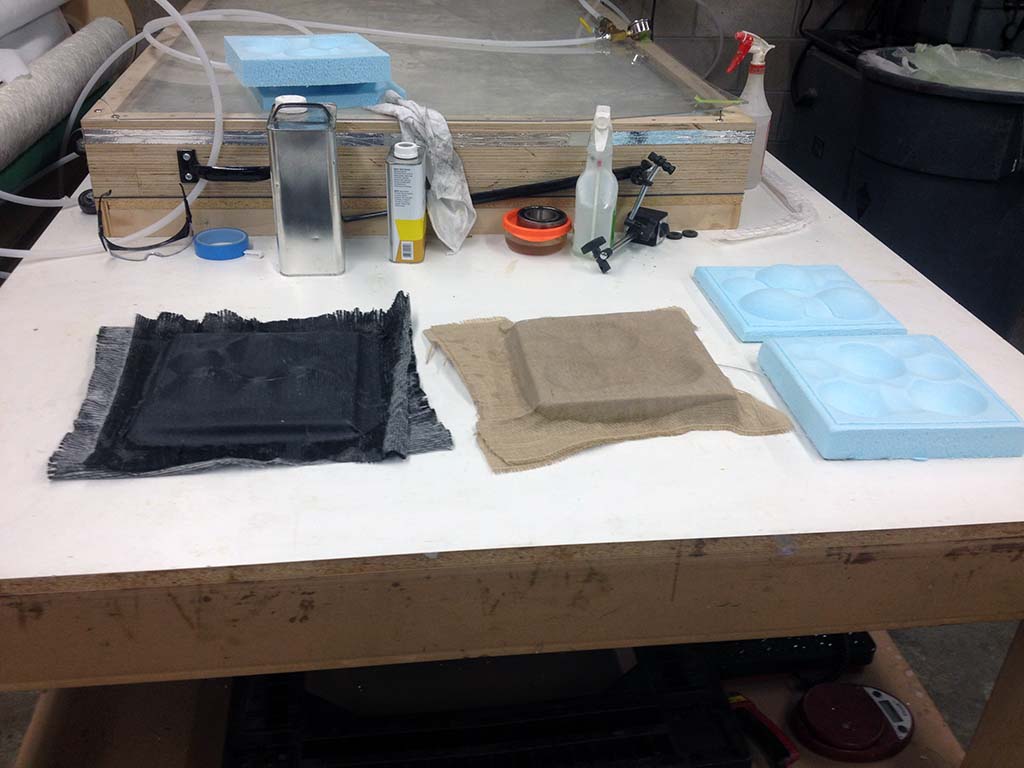
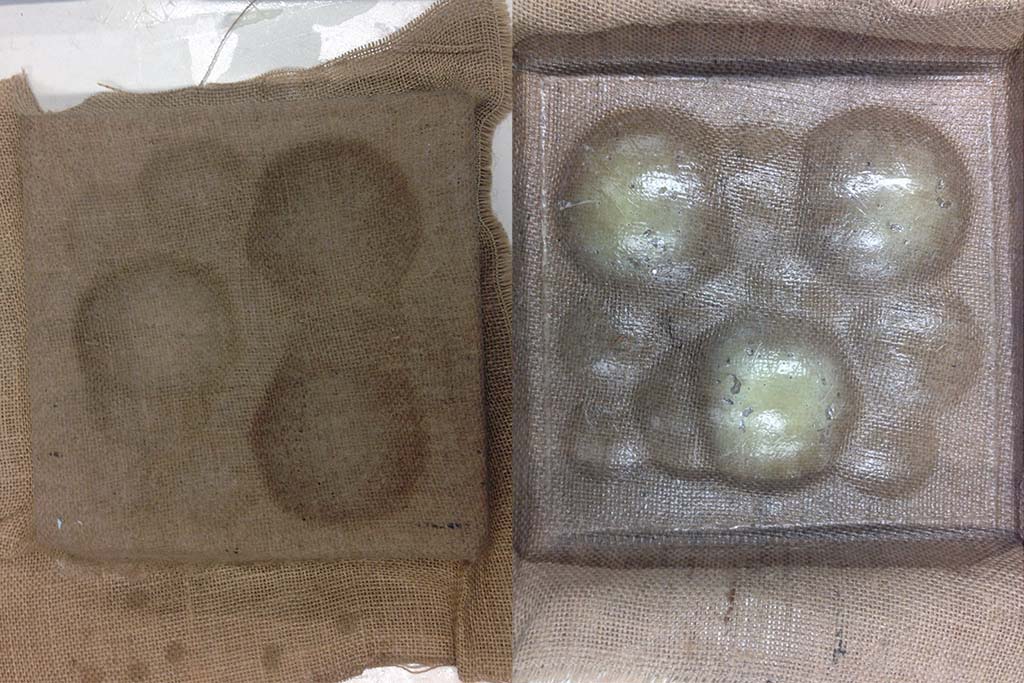
Using the right process materials meant that it was really easy to remove the breather, perforated release film + peelply. Here's what I was left with once the process materials came off.

I unfortunately got a lot of bridging in the areas with more severe curvature. You can see where the vacuum didn't suck all the way down on the right hand image.