Skillsets used: All the skills. But actually though, programming, laser cutter, electronics, hot glue gun, working as a team, etc. It's a great way to end the semester next to final projects.
Goal: Make a machine that can paint.
The process flow of our project:
So first step was to divvy up tasks. We have a big section of people and not too much difference in tasks, so a lot of people were paired off to handle each area:
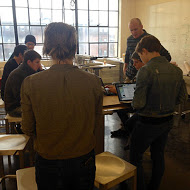
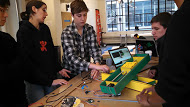
The team seemed enthusiastic from the get go.
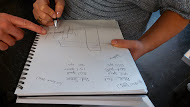
Paper and pencil in hand and after some conversations we decided what design to pursue.
So again, for this week we decided that we would be making a machine that handles painting. We were following instructions to replicate a machine designed by James Coleman and Nadya Peek (instructions found here). Also you should definitely check this out. It's FAB on steroids and a project that one of the members of our section had the privilege of seeing in action a couple of years ago: http://vimeo.com/45911972
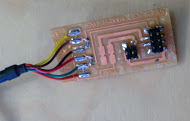
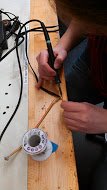
We soldered the power source. In our current setup the power is rotated 90 degrees from normal set up.
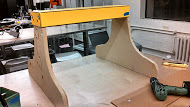
An image of the assembly would have simplified things. It was important to ask James for assembly instructions as some nuances can make the difference between re-starting the laser cutting job. Made supports/legs for the xy to stand on Glued xy together.
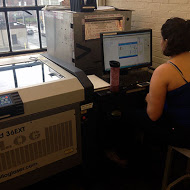

Dealing with Code...everyone's favorite thing to do. It's the bane of some peoples' existence, but fortunately for us we have some west sectioners who are fantastic at it. We have posted all of our code into a folder under the projects directory for our section. I would encourage anyone who is curious to go by and have a look! Anyway moving on...for this week we needed to be able to run two things on our laptops to actually run the machine: pySerial and Gestalt. PySerial is one of many special python plugs that give extra features to a python user, and this one functions as a library allowing serial communication control. Gestalt is a framework that augments a user's ability to create new automated tools. It's a great tool that allows people to rapidly construct controllers for automated fab machines. Here's a link to full documentations. It's a part of Iilan Moyer's thesis. Note that a link posted above in the inspiration section is video showing how awesome Ilan (and Nadya) are. One important note about Gestalt is that On Mac OS X there is already a system library called gestalt. As a workaround this week, do the following if you are a mac user: In the shell you're going to use to run your gestalt virtual machine, you're going to temporarily point to our gestalt instead of system gestalt. On an OSX computer running python 2.7. this worked: export PYTHONPATH=/Library/Python/2.7/site-packages

We designed a side piece to support the top stage in Solidworks. We cut it out on the shopbot from particle board.
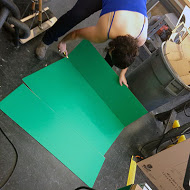
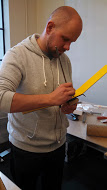
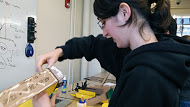
The team assembling....
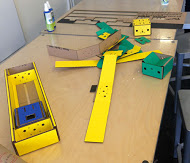
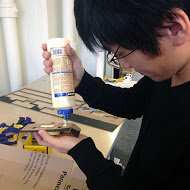
One axis was glued to the other to construct the machine. Accidentally made one axis stuck, and had to remove shafts to pry the box from the wall and unstick. Yellow axis had loose bolts on the extruder container wall - James helpfully tightened them and glued the walls together so the entire box moves as a unit (the walls weren’t well connected) The motor for the yellow axis gets noticably hot for some reason -- disconnect from power if not using the machine to avoid problems .
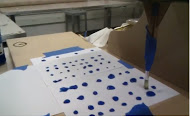
We position paint on a canvas and set the brush to go through it. We found that the largest paintable images would be about 20x20 cm. Since the motor system doesn't store absolute values you have to move the paintbrush to the origin and begin from there.StippleGen is the tool we downloaded. It creates a one-line path of any image you feed it.
Getting a path from an image 1. Open StippleGen, upload image 2. Click Calculate TSP to make the path 3. Modify White cutoff to change the threshold for where paths should go through 4. Can decrease min dot size and dot size range to display smaller dots and view the path more clearly 5. Click Save TSP Path and save as .svg file (can be opened in Inkscape to view path, but do not need to do that) 6. Open saved file in a text editor and remove the parts that are not of points (all the stuff at the top of the file, and the last couple lines). Resave as a .txt file Operating machine 1. Put paintbrush_xy_crosspf.py in the examples/htmaa folder. Open it. 2. Change portName (ex: “COM6” in Windows, “/dev/tty.xxxx” in Mac) in initInterfaces at top 3. Change file looked at by readPath to txt file from above 4. Run in terminal: python paintbrush_xy_crosspf.py 5. Zero to the corner (image is rescaled to fit entire working area, so want to give it space). Hit enter to start.