Week 10: Input Devices
listening for echoes
The Assignment
add an input device to a microcontroller
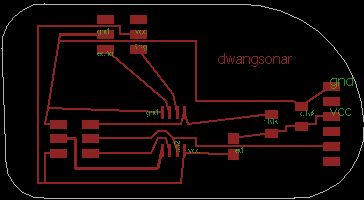
The Circuit Design
still learning to use Eagle well
This week was another doozey. It seems I'm still trying balance becoming competent in three problem areas: how circuits are designed to accomodate different components, how to competently stuff the board with those components, and then how to navigate the programming of the board.
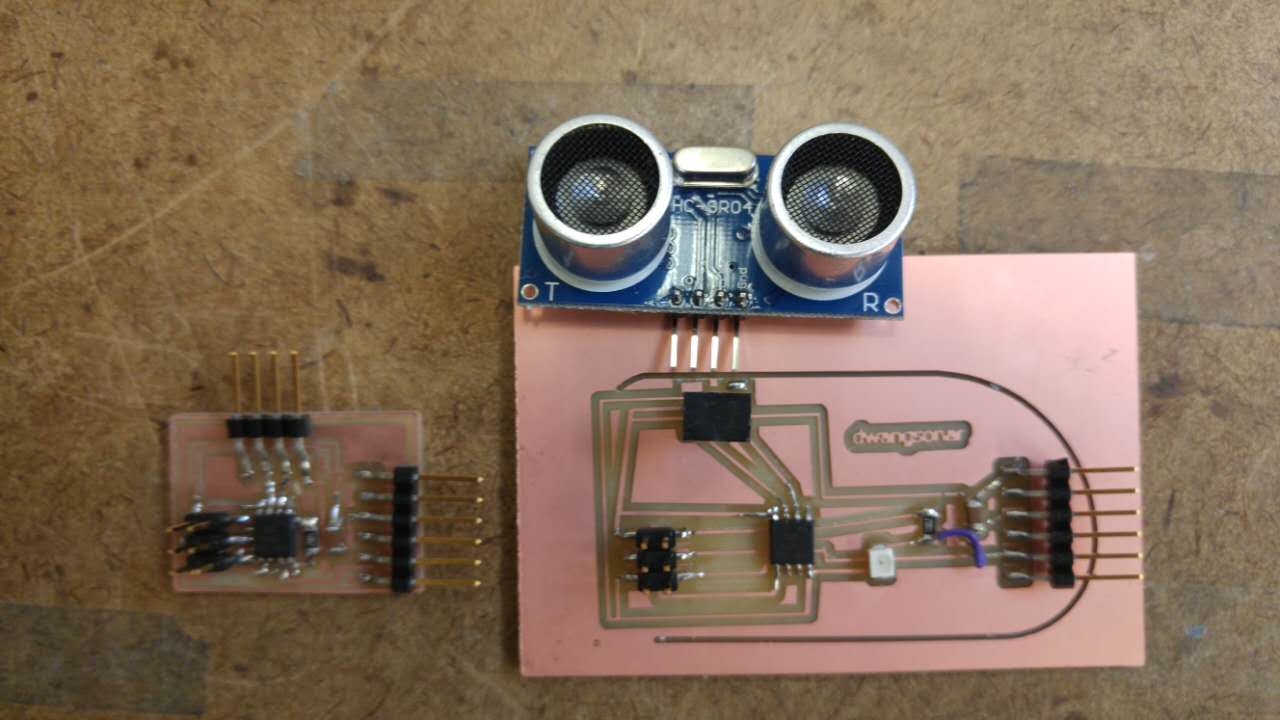
I decided to try measure distance using sonar. The component is actually very simple. Two pins power the component, one pin triggers an ultransonic sound which bounces back to another pin that recieves the echo and calculates the distance based on the speed of sound.
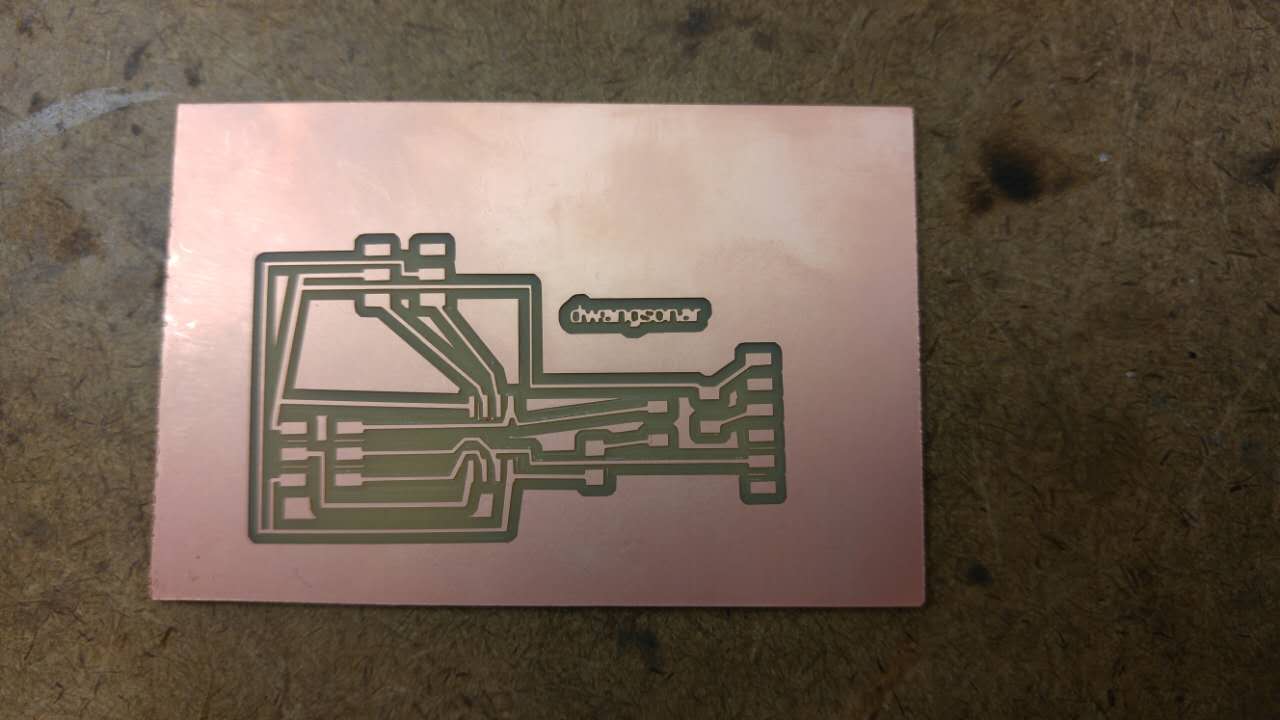
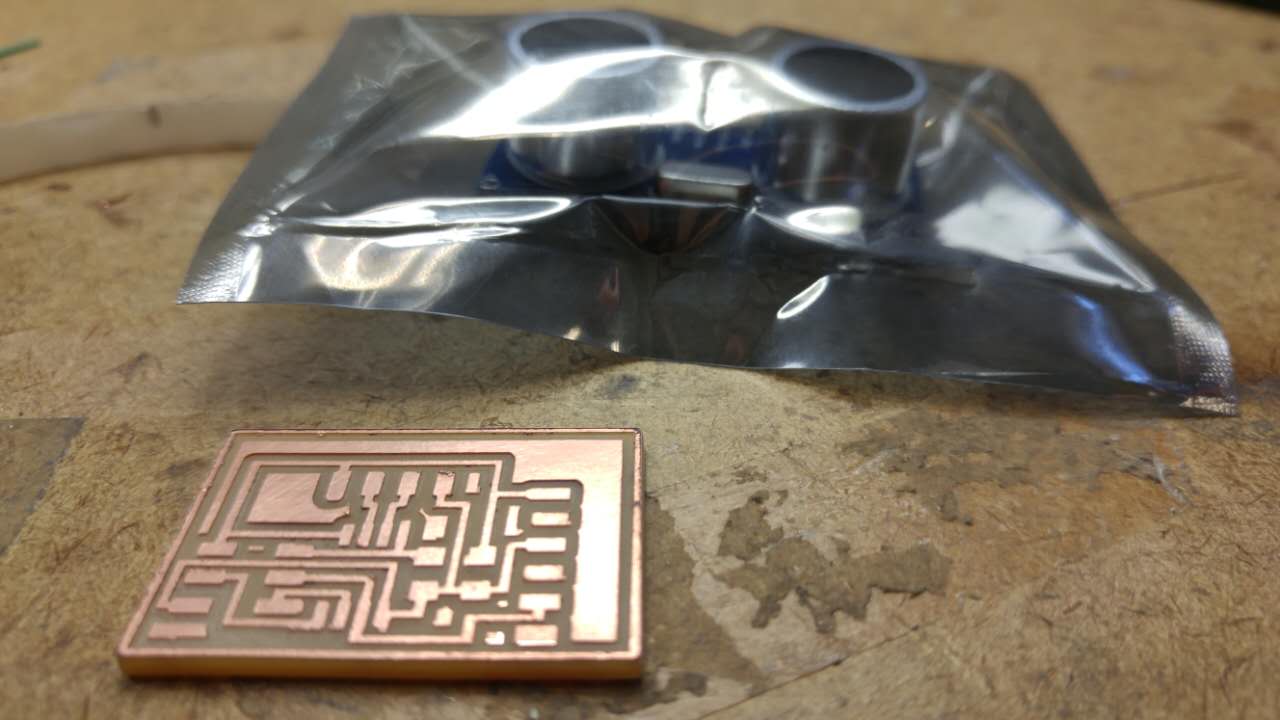
Using the base model that Niel provided, I designed a similar board that simply added a LED light. I cut it out without all the mishaps of PCB milling from previous weeks which was a huge relief.
Cutting out and programming
where's the component?
I cut out the traces for the board, but something was off when I tried to cut the traces out of the board. So I decided to leave it as it and try to program it.
Unfortunately, the HC-SR04 was not in the workshop, so I could fully install everything but I had planned to have the component plug it rather than soldering it on so I tried my hand at programming it. Now I pretty only try to program using the workshop computer which has the atmel programmer set up and ready to use on the Linux system. I've wasted far too much time trying to get the boatloaders to work on the FabISP using Windows or trying to intall ubuntu on my laptop to no avail. There's simply not enough time to set up my own equipment to program these boards. Plus, pretty much all of the boards need the 1 FTDI-USB cable that Microcenter doesn't even stock for purchase.
And....
New board
new life
I cut out the standard sonar board, and that same day the HC-SR04 arrived in the workshop!
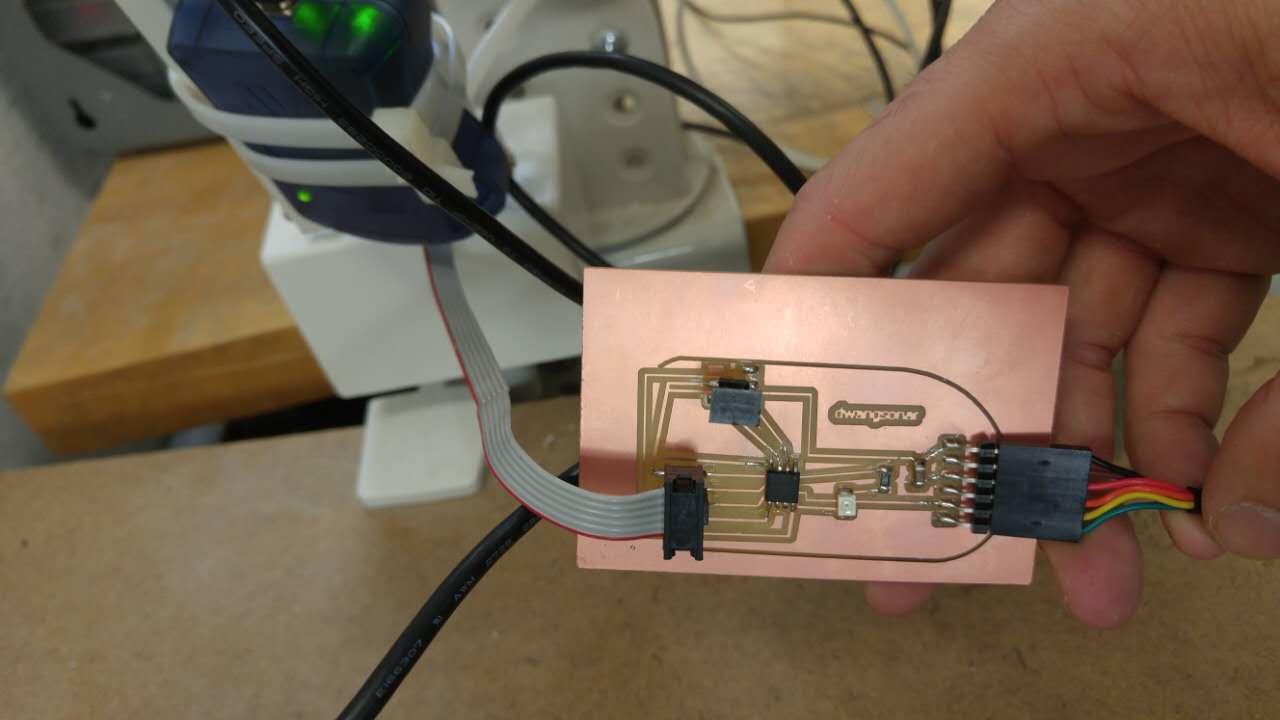
I stuffed the board, and I got ready to program. However, upon arriving at the workshop the programming computer was broken to the point where it wouldn't boot. I tried taking the AVRISP to another Linux console and installed the drivers, but I couldn't get the terminal to find the device when programming. So, I went home for the Thanksgiving holiday with the mission to try it first thing when I came back.
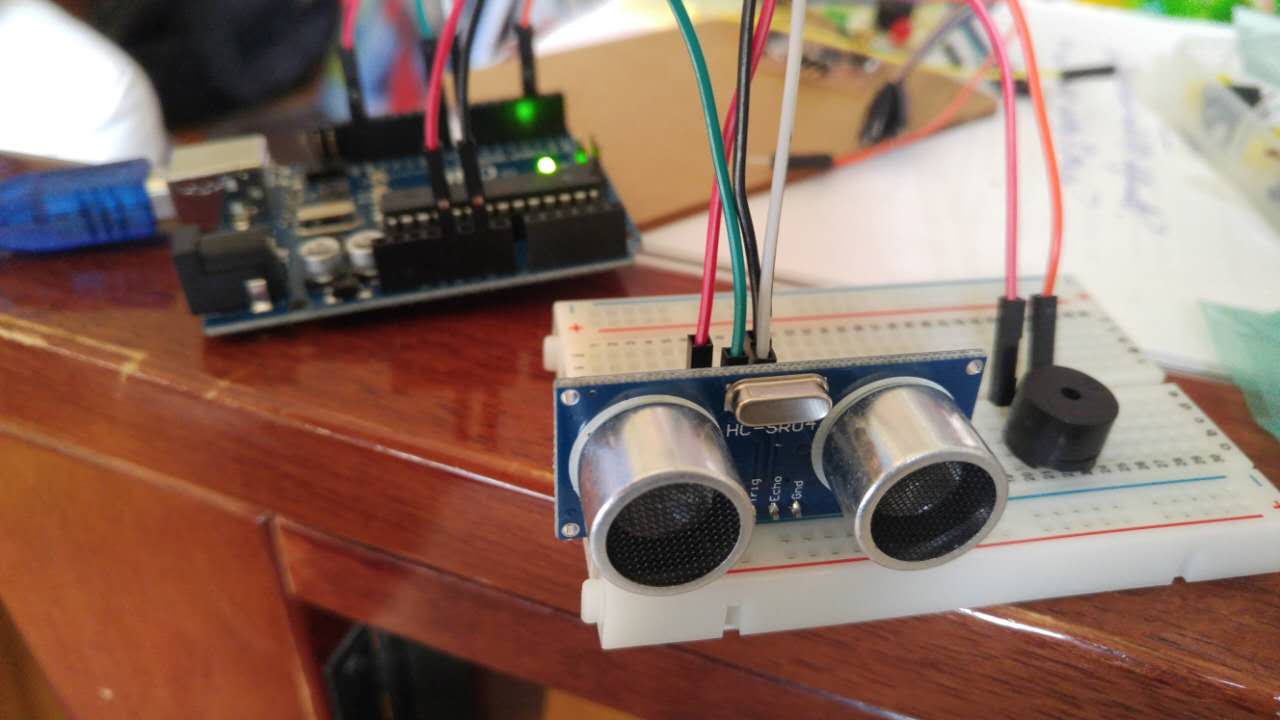
In the meantime, I was excited to try out the sonar component so I decided to bring it home and try it on the arduino uno board I bought last week to learn how to program.
Arduino time
finally something that works!
I know it sounds pathetic, but I finally got the sonar component to work using the arduino uno board! It's a great feeling even though it's at half-victory at best.
There are several tutorials online for how to set up the circuit. I used this one first, and then I started to play around with it. I programmed the board to play the first part of the Star Wars theme when anything gets within 20CM of it. This was cool, and took me through some coding basics that were really helpful. I know I wrote this before, but the programming-challenged in this course, I have found it super useful to start with Arduino. I know it doesn't really get into the real "making" ethos of this course but it is much less frustrating.
WELDING
hot stuff
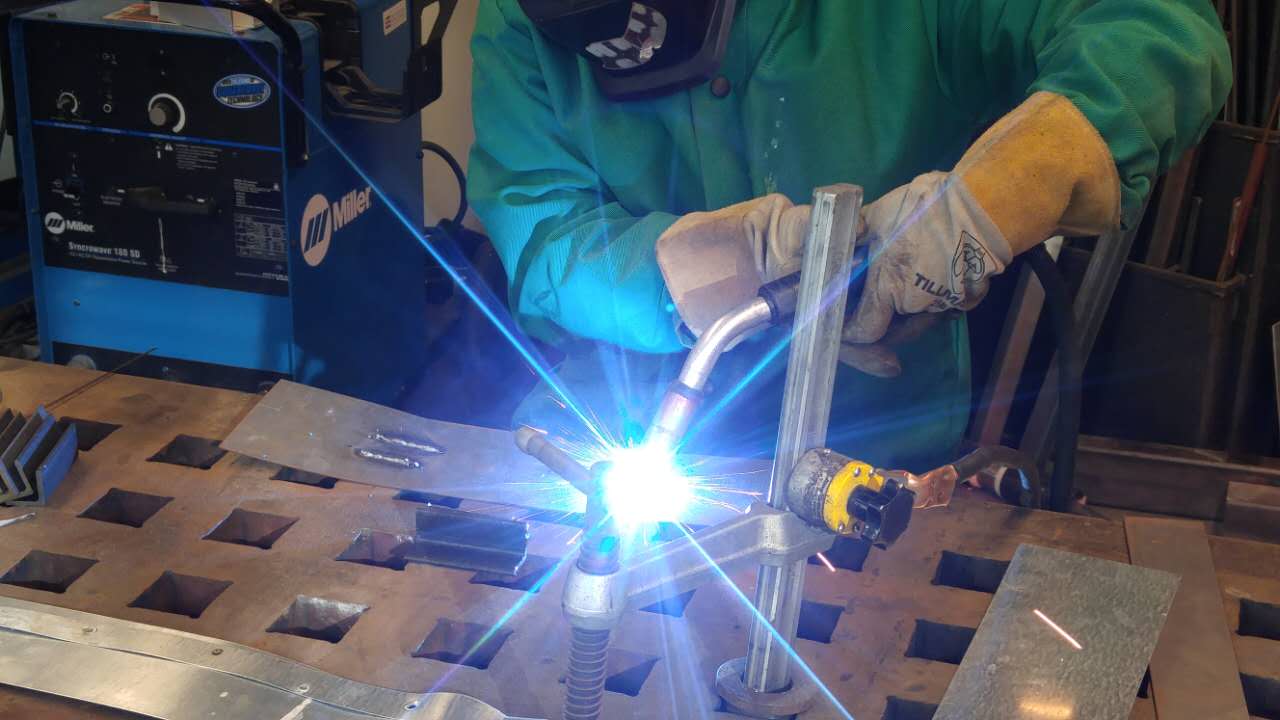
We had an excellent tutorial on welding over the past two weeks. It was well-organized, efficient, and hands-on. They showed us four kinds of welding and let us try our hand at making a quick weld.
I have to say some times the tutorial sessions can be frustrating because there are too many people, the TAs are busy so don't have much time to prepare, and the learning objectives aren't too clear. This tutorial however went through a lot in just 45 minutes and gave everyone a chance to try it out which is rare. This is probably because there were sign-up lists to limit the number of people and the instructor was very patient and had a very clear set of goals and ways of communicating those goals to us.
I only wish our assignments had more to do with this tutorial!
CUTTING
water and sand
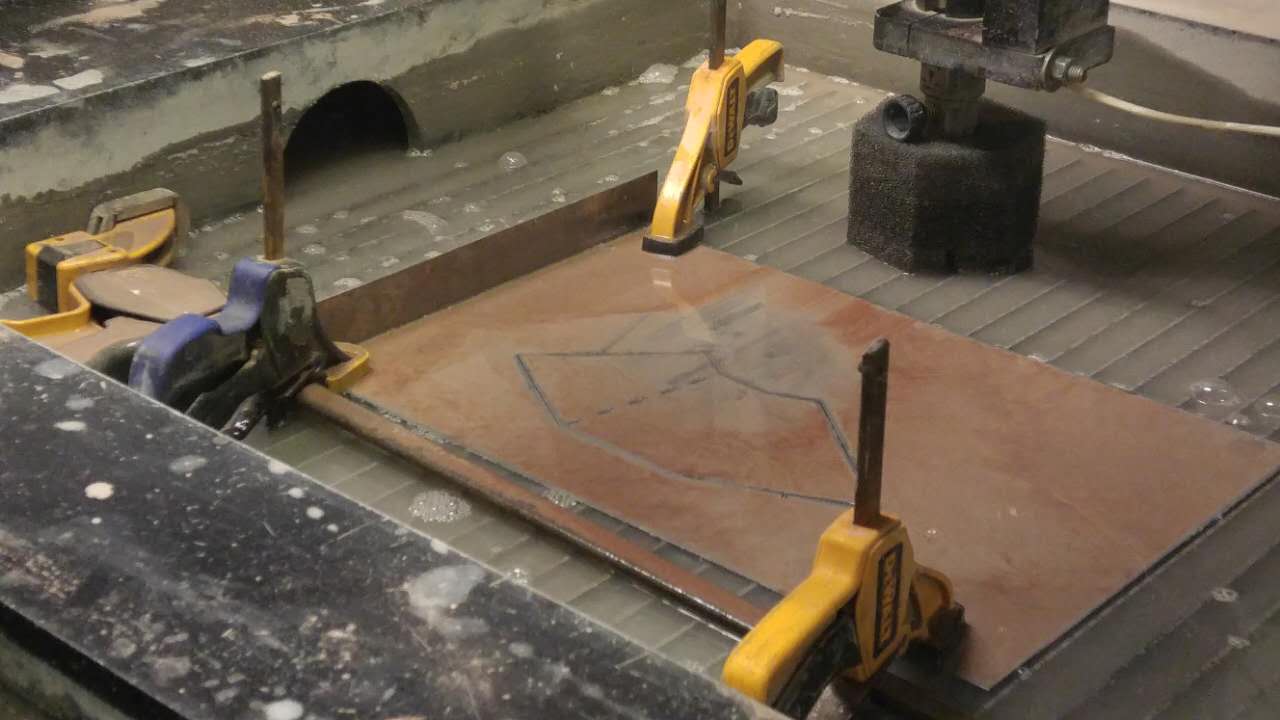
Matt took us through a well-organized recitation on how to work with sheet metal. He first designed an object on Solidworks and then we cut it out using a waterjet machine (which we haven't worked with yet). It was super helpful to see this done, and he was a pretty good, methodical instructor.
The kind of cutting is pretty fascinating. It uses 30k-40kpsi of water pressure mixed with a fine sand, and it essentially blasts out the shape from a piece of aluminum or steel that you feed the machine. Prett amazing stuff.
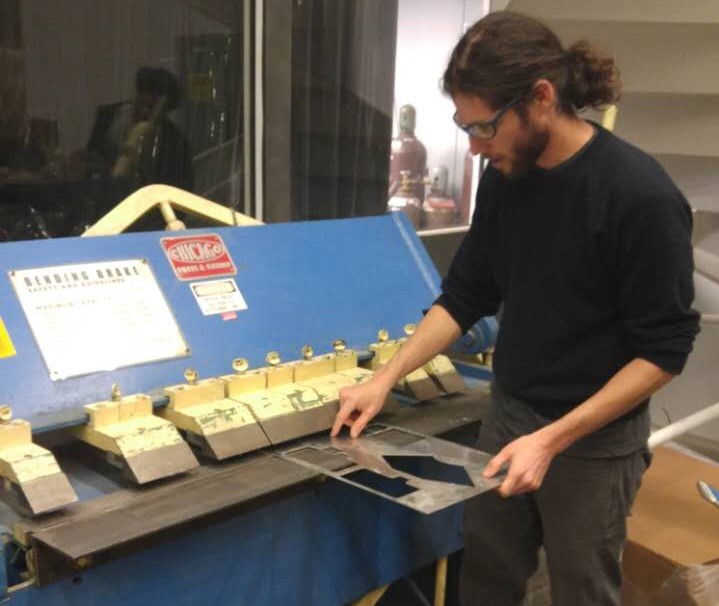
BENDING
sheet metal
After cutting out a piece of sheet metal, Matt showed us how the metal can be bent with two machines. The cool part about bending sheet metal is that it actually increases the stiffness of the material.
As Matt pointed out, you begin to see sheet metal everywhere after you're aware of it. Again, it would have been really cool to have an assignment more focused on bending sheet metal this semester.