Week 3: Circuit Board Soldering
small and steady wins the race
The Assignment
program a programmer
Began wading into unfamiliar waters this week with electricity. Luckily, this week is less about creating our own thing and more about learning the techniques. That said there was a lot to learn.
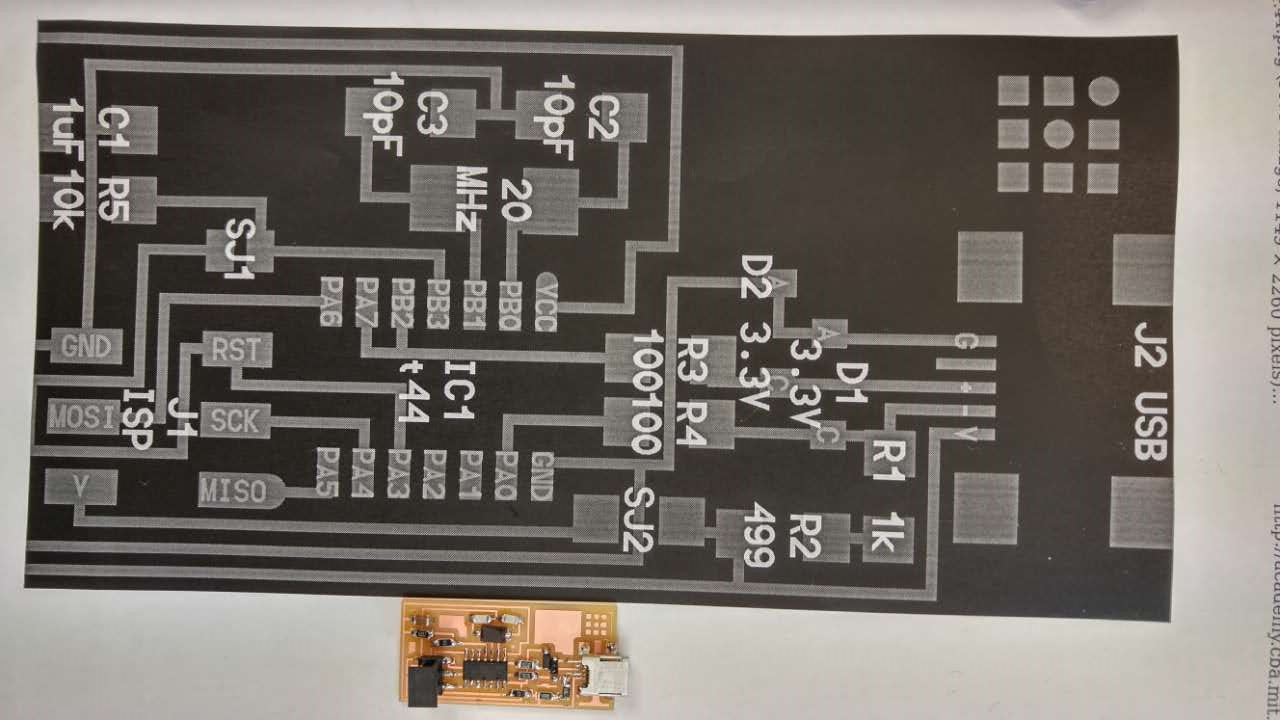
Our assignment is relatively simple: 1) cut a pre-designed circuit board using a milling machine, 2) solder on components according to the design, 3) program the circuit board with an existing firmware package. So far, it's not so important that we understand what we're making as much as how to make it. I wonder if this is how low-wage factory workers feel...
The introduction to circuit boards (as well as our training on how to test electric equipment) left me with a bunch of takeways and questions
- Boards can be made many different ways to different effects. Bendable boards using epoxy and copper were particularily interestingn to me.
- A basic understanding of high school physics is neccessary to know what why you're soldering certain components where. Otherwise, just follow the diagram.
- Making circuit boards is more a task than an art.
- After learning how to make the circuit board, how might I design one?
With these thoughts in mind, I added more to my running list of foundational things I want to learn because of this class.
One Machine, Many People
MIT students work a lot
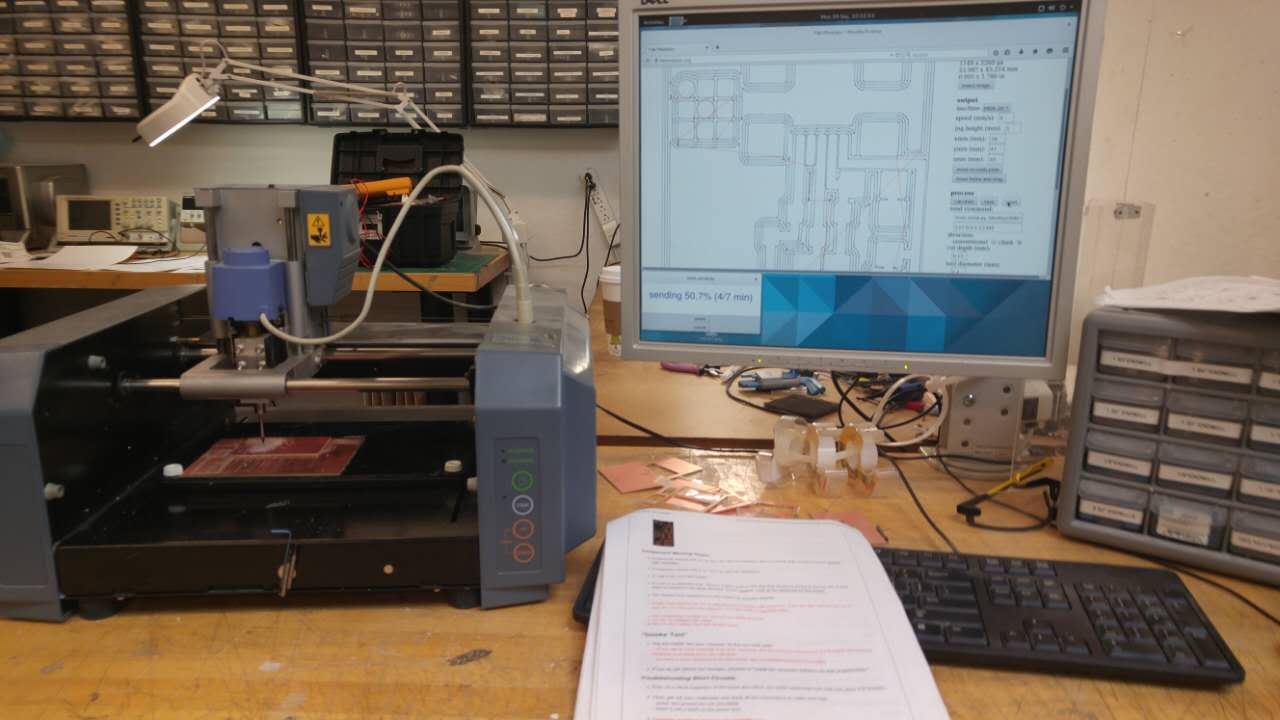
The biggest challenge for me was finding a time when the milling machine wasn't being used! I visited the workshop 4 times (morning, afternoon, night, weekend) and each time there were people using the machine. Perhaps it was just bad luck...
I finally came across the empty machine on my fifth visit...maybe we should set up a reservation system...
Milling
rough ends make nasty copper
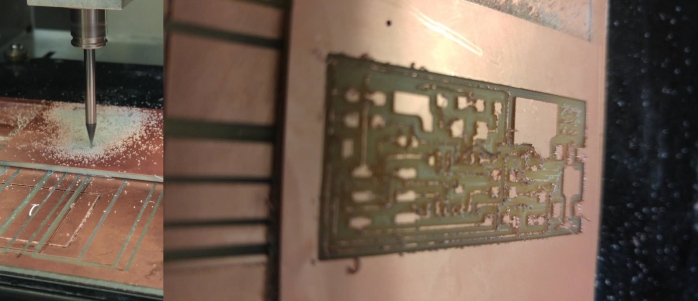
When I finally got to the milling machine, I found there was only one 1/64 endbit left. This really small flute is used to cut away the copper coat on top of the board and leave traces to direct the current to the various components through the board.
I popped in the 1/64 endbit and milled away. Very simple to do really: tape on your copper board, insert endbit,set the origin, readjust endbit, load the trace png on the fabmodule, and hit go!
Unfortunately, this endbit had seen better days after having so many people use it, and the blunt end just tore up the board (left).
Stuffing
don't drink coffee before
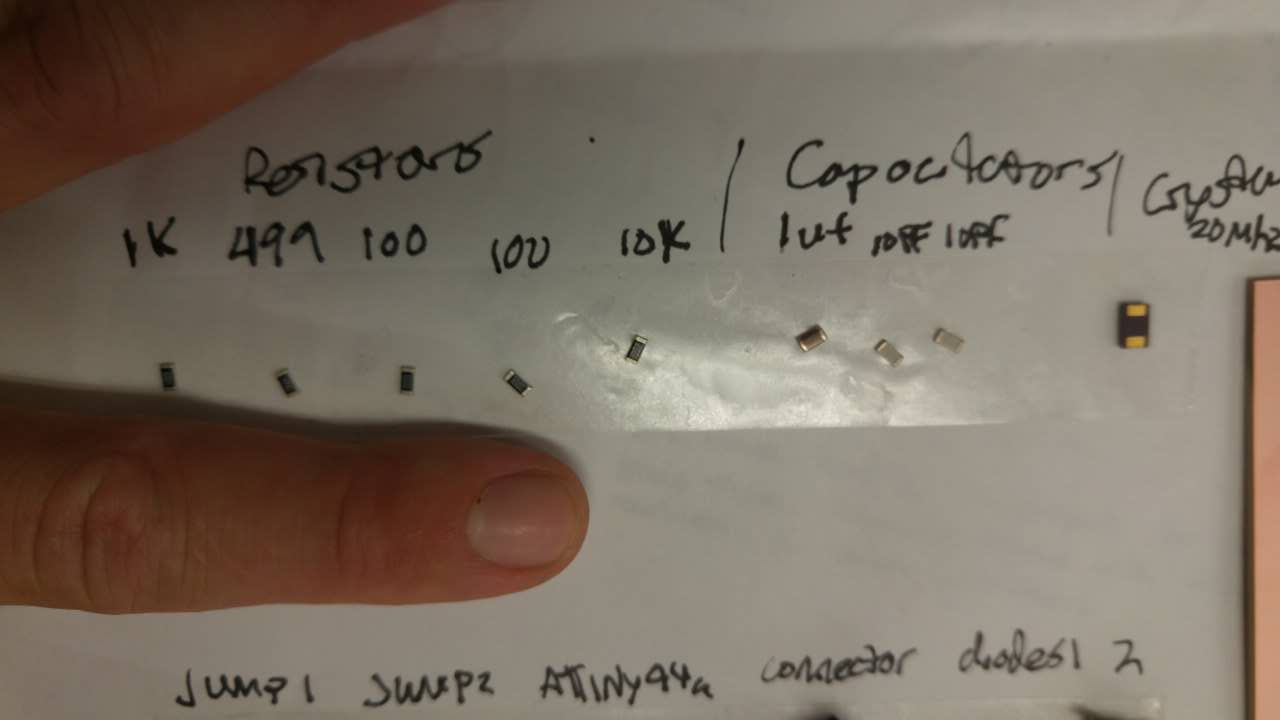
Luckily a fellow classmate, Ron, who had cut an extra board that was exquisite offered me his. So rather then chasing down a new endbit, I began with stuffing.
There were several components to collect, and they're all SO SMALL! It helped to tape them to a sheet of paper to keep track of them. I spent a little time reading about what each component does, but I still am not too sure how they work together on the board.
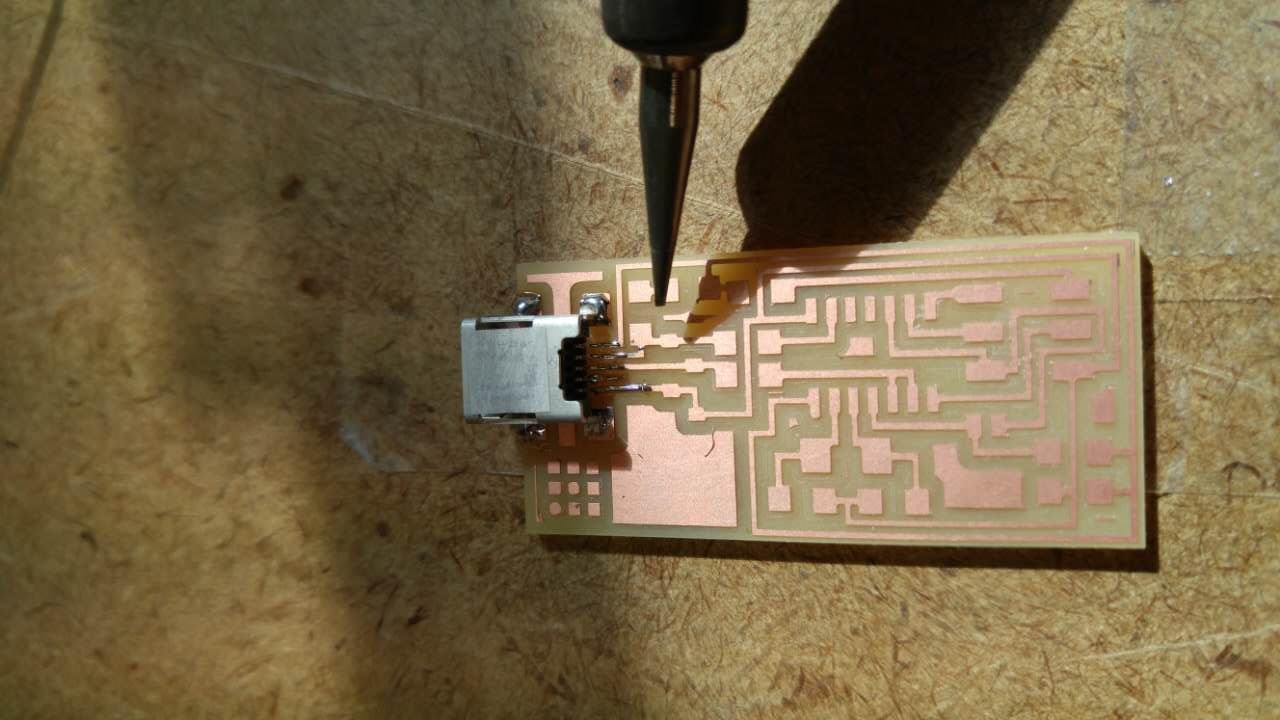
Soldering
deep breaths and focused eyes
Then it was simply sitting with a hot soldering iron and dripping solder onto incredibly tiny areas to make all the components stick to the board. Tweezers, flux, steady finger, and patience.
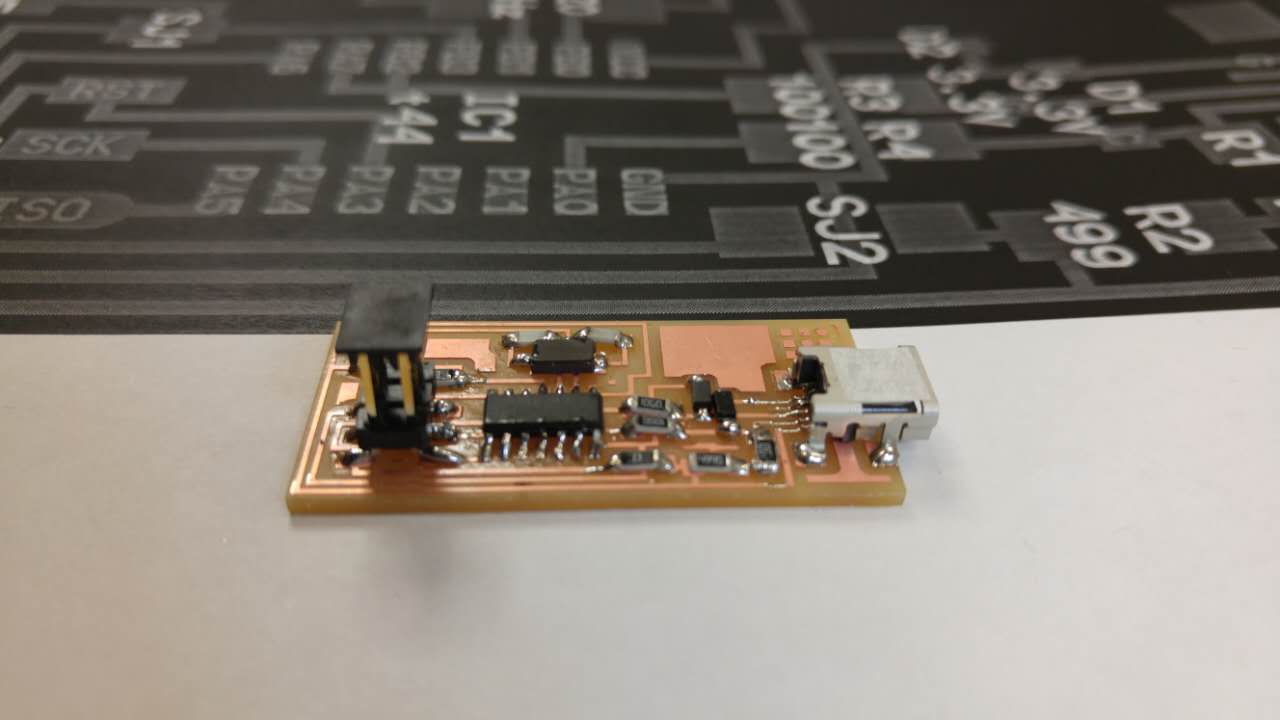
Plug it in!
green light is good
Everything went surprisingly smoothly. After soldering on the components, I washed the board, dried it, plugged it in, and the light went green! I then programmed the board according to the tutorial, stuck it into my laptop, and it popped up in my Device Manager as FabISP!
I still have no idea how to use this device, but that will come! I enjoyed learning the skill of soldering and I'm eager to see how I might be able to design my own boards like other students have done in prior years.