Week 7: Molding and Casting
waiting game....

The Assignment
Use wax and silicon rubber to make your own mold and caste the object in hydrastone
- The Problem: How to get bike tubing to fit to the jig? As I continue to design this jig, I'm looking for a good, cheap way to create adapters that can lock the headtube and BB in place. Previously we've used aluminum but we've needed to get other people to do it for us which is expensive.
- The Solution: If we had a few adapter molds, we would be able to do it on our own for dirt cheap!
- Time Investment: 8 hours (1 hour CAD, 3 hours trying to find an opening on the machines, 2 hours machining wax, 1 hour minutes casting oomoo mold, 1 hour casting hydrastone )

Designing the object
Getting jiggy with it...
Designing the adapters was the really easy part. I already new the dimensions needed for a snug fit for a standard headtube, so it was simply a matter of stacking a few cylinders on top of each other and subtracting a hole for the bolt to secure the adpater onto the jig.
I actually already had a CAD file for our original adapter design (which was machined out of aluminum), but it was about 20mm too tall for the milling machine to cut. In other words, I wouldn't have been able to cut deep enough to make the original jig adapter.

Arrived at workshop to find machine embarking on 370-minute journey. Needless to say, I didn't hang around.
The Waiting Game
one machine + many people... not fun
As with every week, there was a line to use the machine needed to complete the task which creates a huge bottleneck. I admit that because I was away during the weekend I probably missed out on prime time to use the milling machine, but even with this knowledge, it was pretty frustrating to have a design ready to go and always have the machine in use for hours at a time.
After getting pretty discouraged with each visit and finding a line of people waiting each time, I decided that perhaps I should just use the 3D printer to print my mold rather than mill the hard wax. At the very least, I would be able to move onto the next steps and hopefully get the project done in time for class.

3D Print a Mold
Quick and easy
There was no line for the MakerBot, so I quickly edited my STL to include some walls and set it off to work.
After class, I arrived to find a beautiful mold awaiting me and it was ready to be filled with liquir silicone rubber.
Snagging the modela
Wax on, wax off
I returned later in the day, and the modela was not in use, but it was not working... sigh.
I went to another class, and then went back and it was working and free! But then it stopped working because some jerry-rigged instrument hadn't been wedged into the right place...
Finally, the thingy was wedged into the guts of the machine somewhere, and the machine kicked to life. I glued on a wax block, uploaded my STL (which I had doctored again to reduce cut time), switched the units of from inches to mm, and sent it to work... It took only 20 minutes to cut out my mold.


Rough Results
but it'll work...
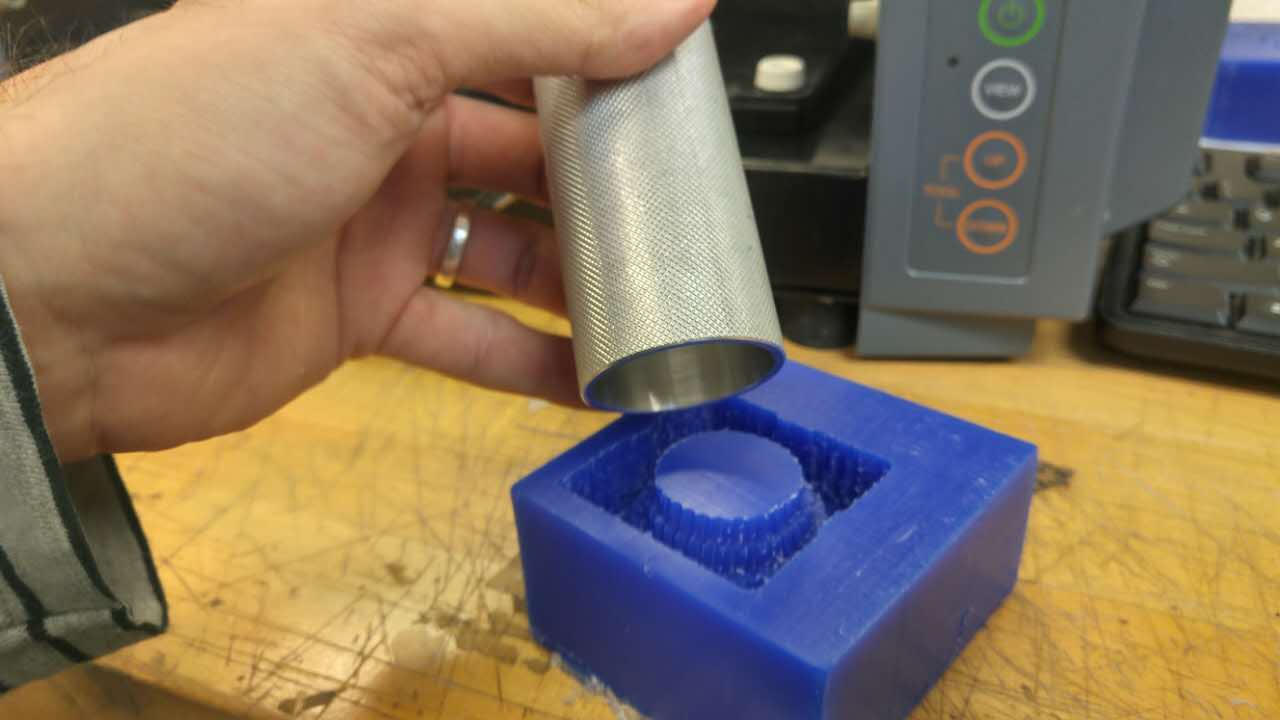
After doing a finish cut on the modela, the final mold looked pretty miserable. Rather than nice round cylinders, I had a bunch of jagged gears sitting on top of each other. But, in terms of the function I needed (a secure fit that held the head tube in place) I was still ok.
The series of photos on the left show that the head tube fits on just fine and is nice and snug.


Silicone Rubber
Pour, mix, and wait
With two molds in hand, I was ready to pour the oomoo. Unfortunately, the only oomoo left takes 6 hours to cure, so after a quick mix and pour, I had went home to write up this web page and hope that it would be done in the morning.
I'm also worried about removing the silicone rubber from the mold, so I left stirring sticks in the conconction to help me remove it after being cured. We'll see how it comes out tomorrow.

Demold
Yank and pull
I arrived the next morning to find the oomoo fully solidified. I was glad that I left the mixing sticks in the 3D printing mold because it was a bit difficult to pull out the silicone rubber. But everything ended up coming out intact!

Cast
Mix it like pancake batter
I rushed to pour a cast. Since I had two molds, I decided to try out both Hydrastone and Drystone. After mixing, I felt like the Drystone wasn't nearly thick enough. After harkening back to Niel's discussion in class about achieving a yogurty consistency, I decided to freestyle it and see if I could just make it like I make pancake batter. I poured it into the mold and left for class. I'll pick up the casts right before class if they survive.


Final Results
See left