design & fabricate a bone conduction circuit
Alright! The general idea was to get a sound signal through a female audio header, amplify it, put it out through a bone conduction transducer!

First I started replicating an existing circuit design I found here
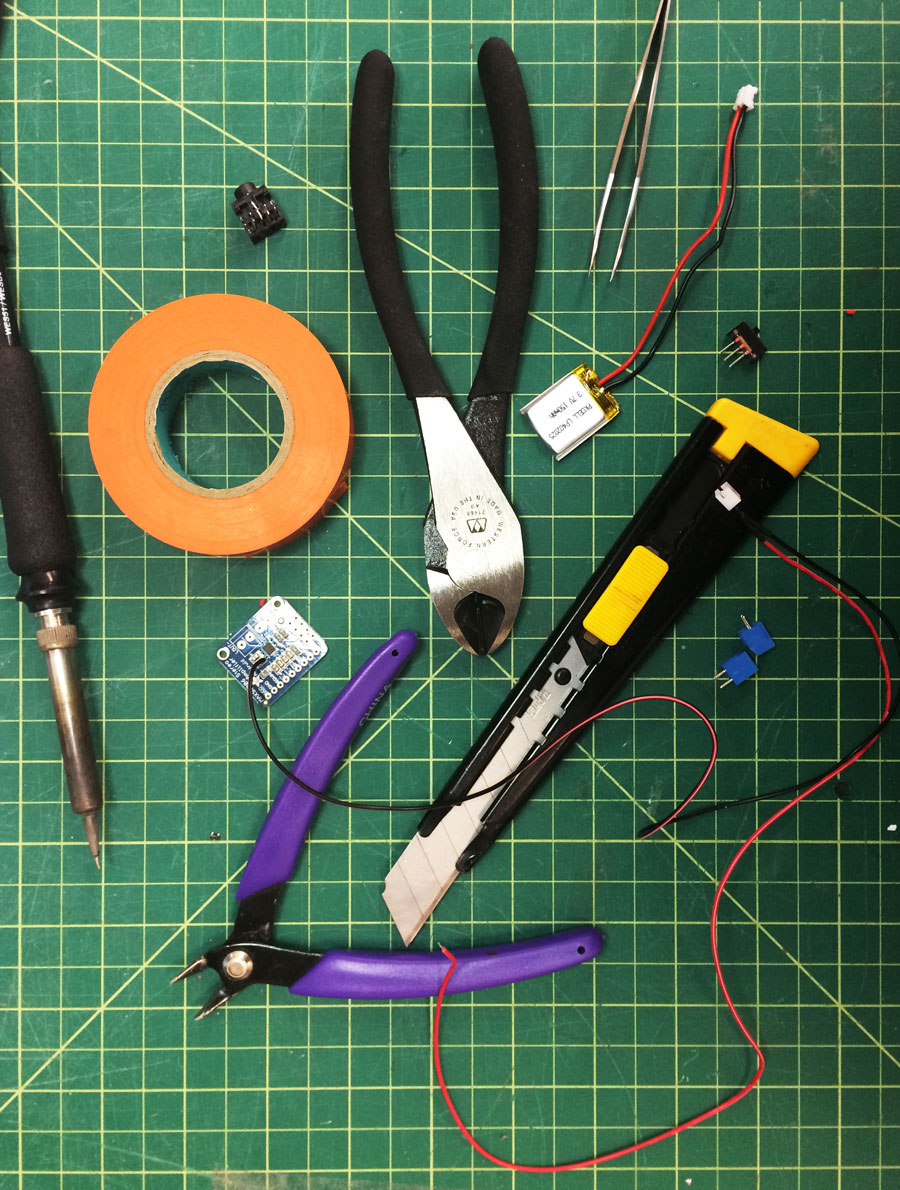
I was especially interested in the bone conduction effect; would it be really possible to hear sounds not through my ears but my through my skull?! Thus, for the sake of concentrating on the bone conduction effect + figuring out the structure of an amplifier based on an example, I have ordered this amplifier from Adafruit. I was also planning on ordering a bone consuction transducer, however it was not in the stock. After a quick google search, I've found out that a piezo crystal can be used instead of a bone conduction transducer. The effect might not be as powerful, but it seemed as a good temporary option until I find the actual bone conduction transducer piece. It is possible to make one by yourself, since it's neither rocket science, nor magic: A single string passing across an electromagnetic field generated by two cones holding both end of the string. As string vibrates, it hits to a metal disk to get its vibration amplified.
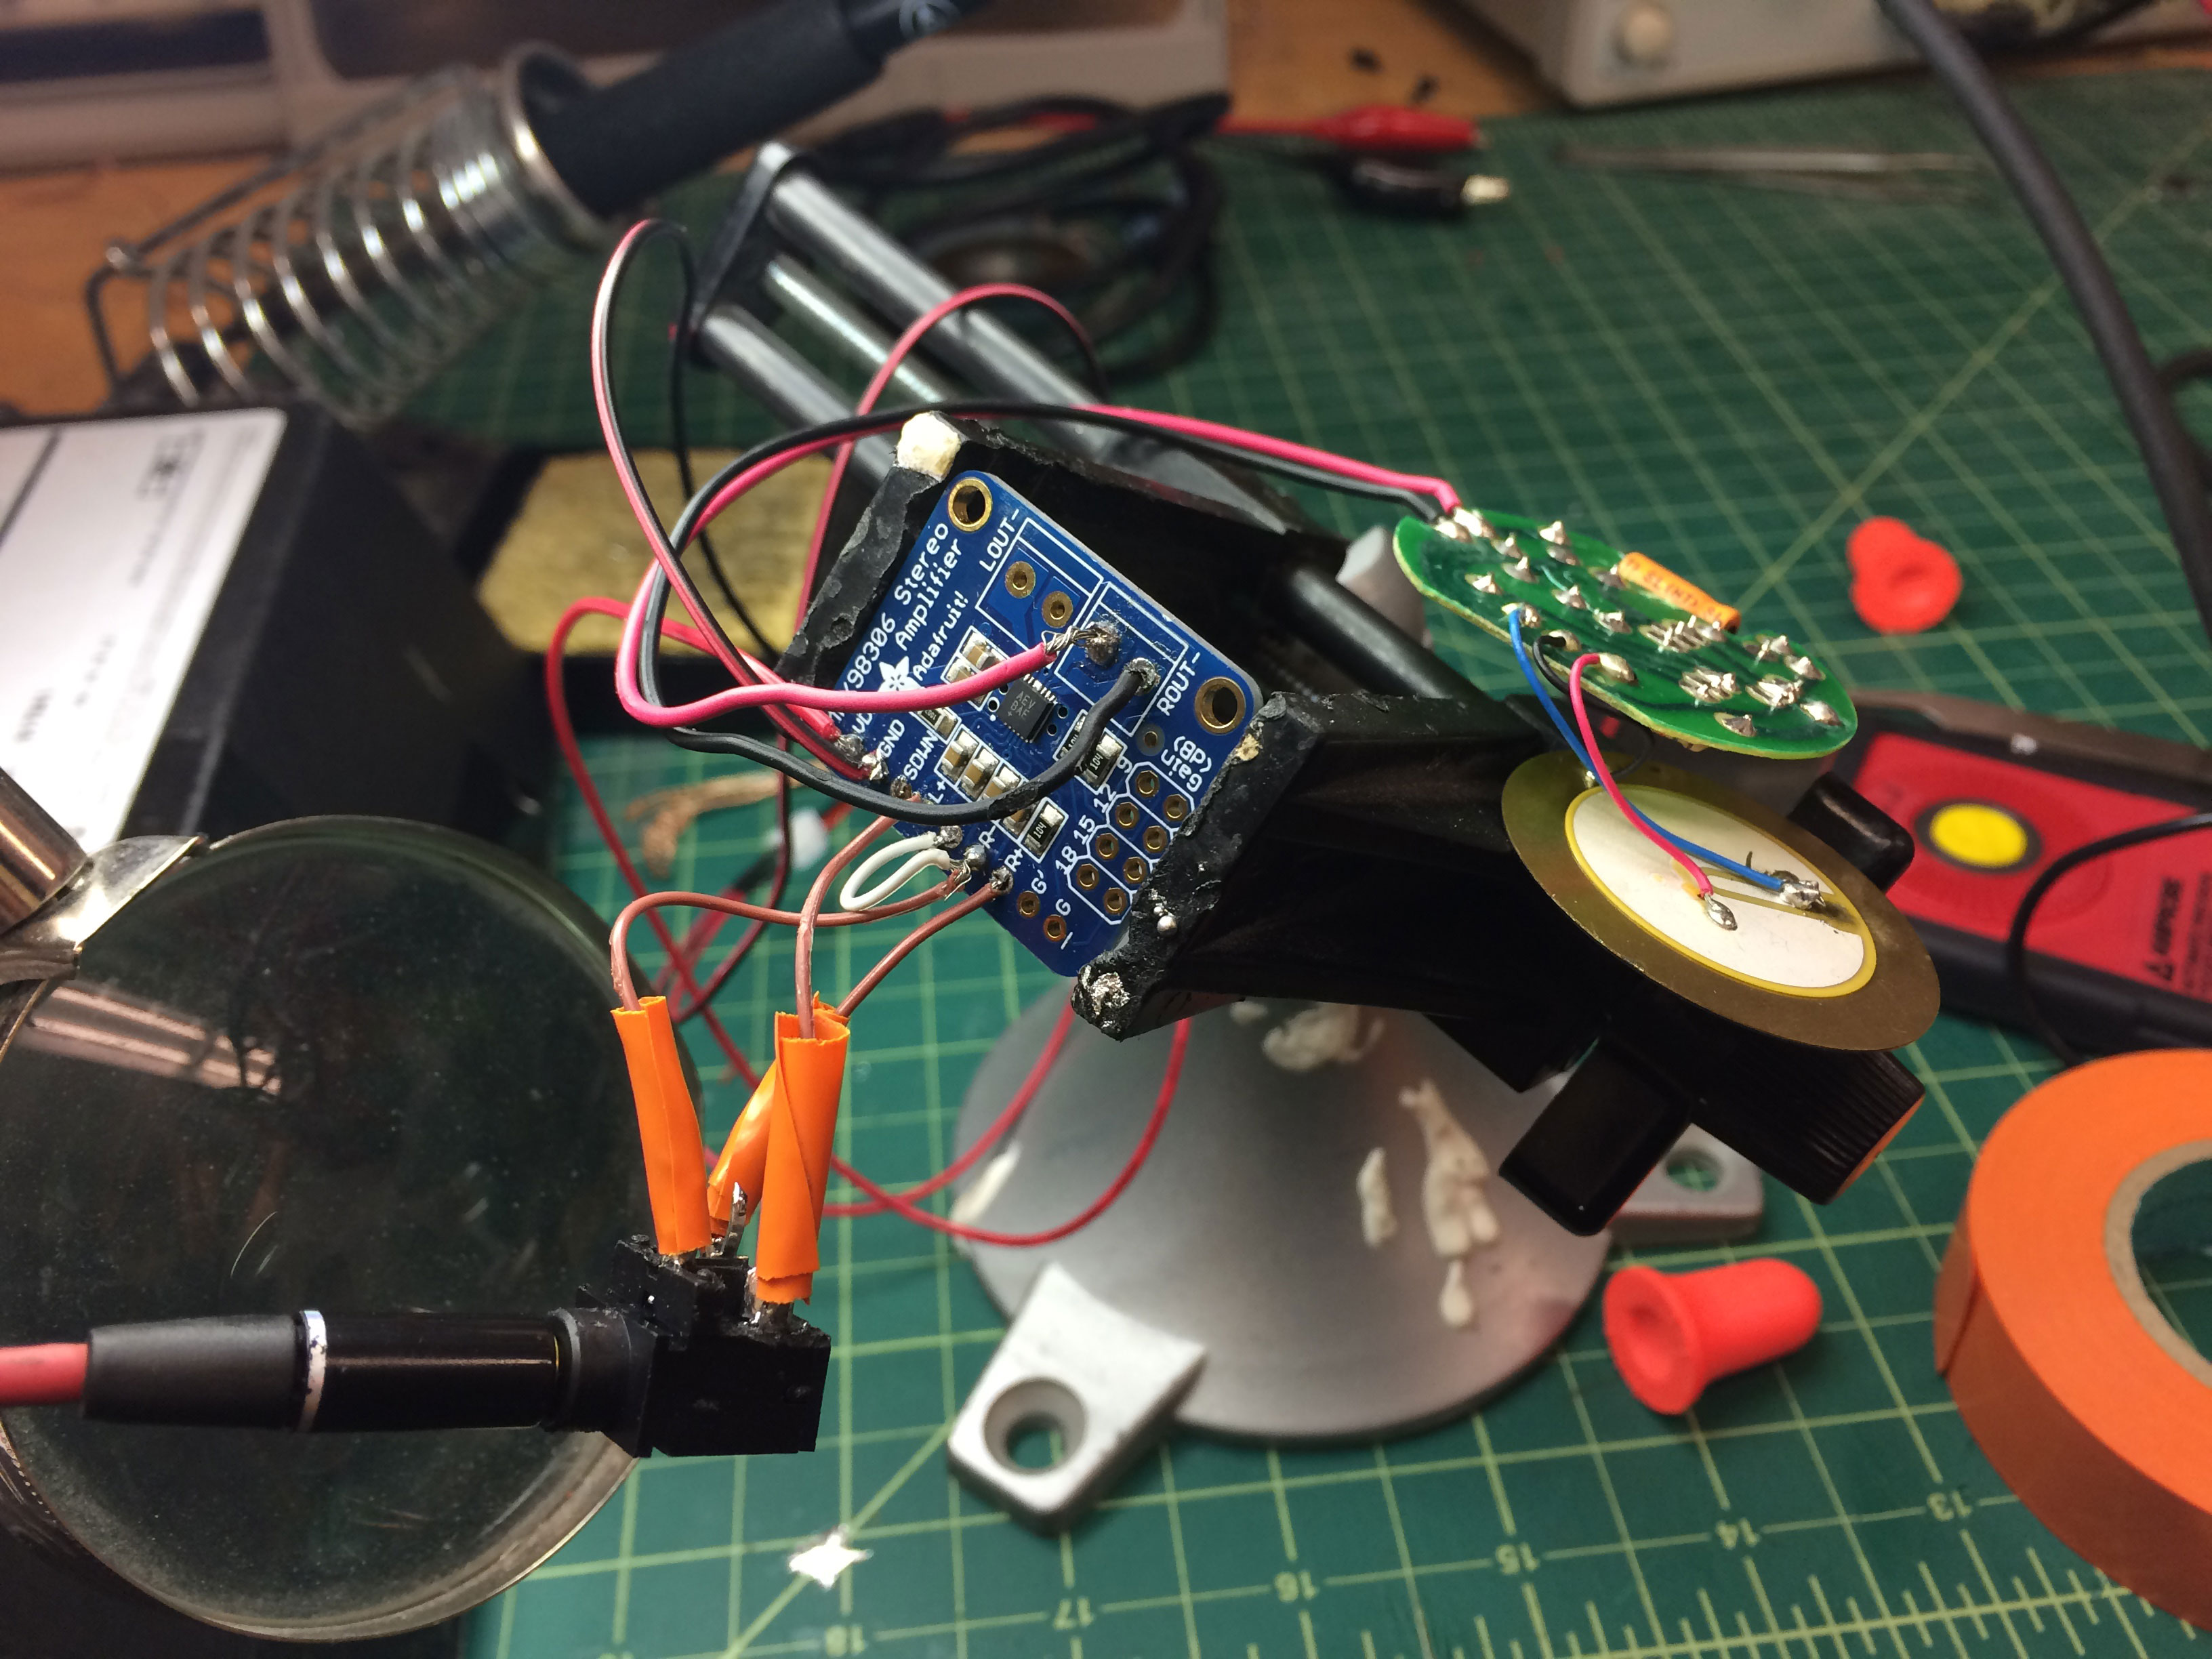
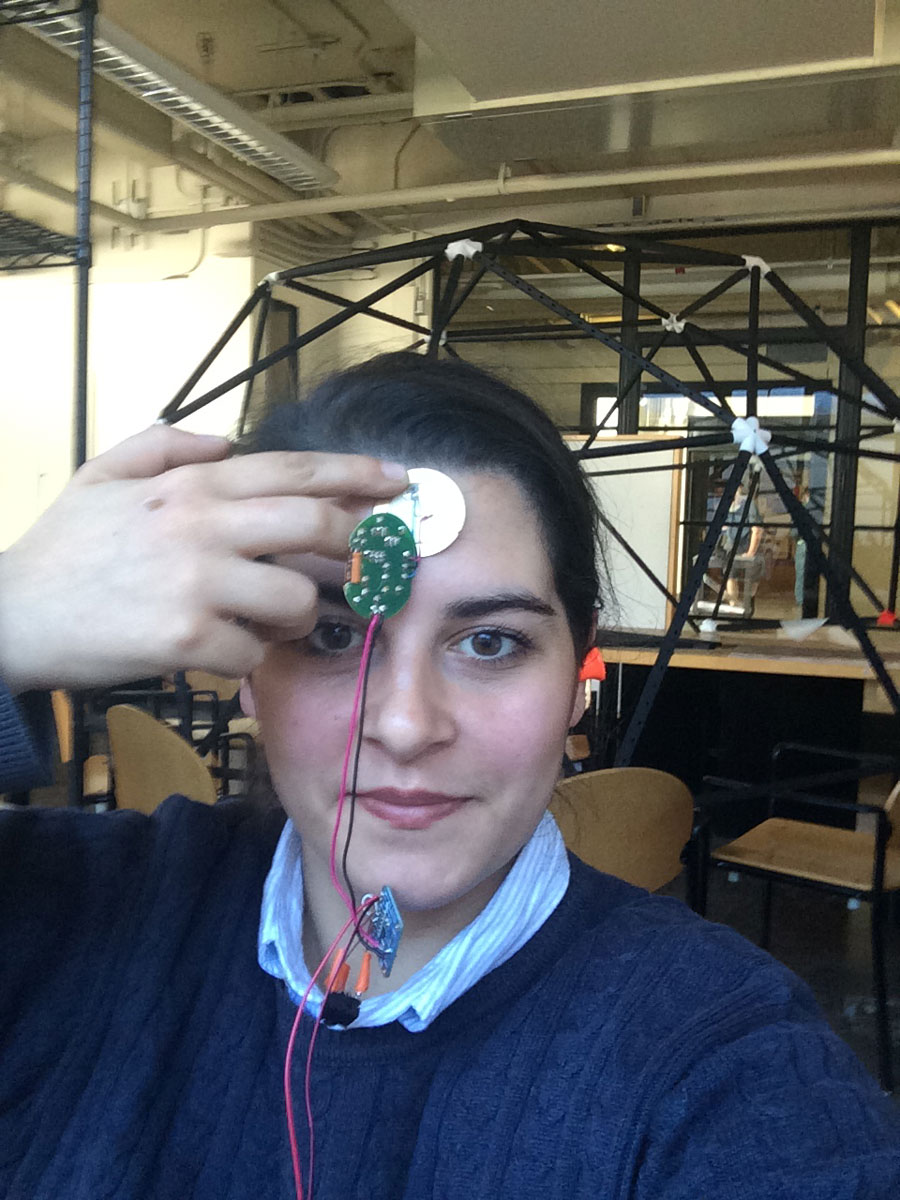
this is how it looked when I connected a audio jack and a lithium battery into the amplifier along with the piezo crystal.When I first got it to work, I was really excited even though the sound quality was not great. It's simple to use: plug your ears and push the piezo pad to your skull, you can listen to any audio file in this way!
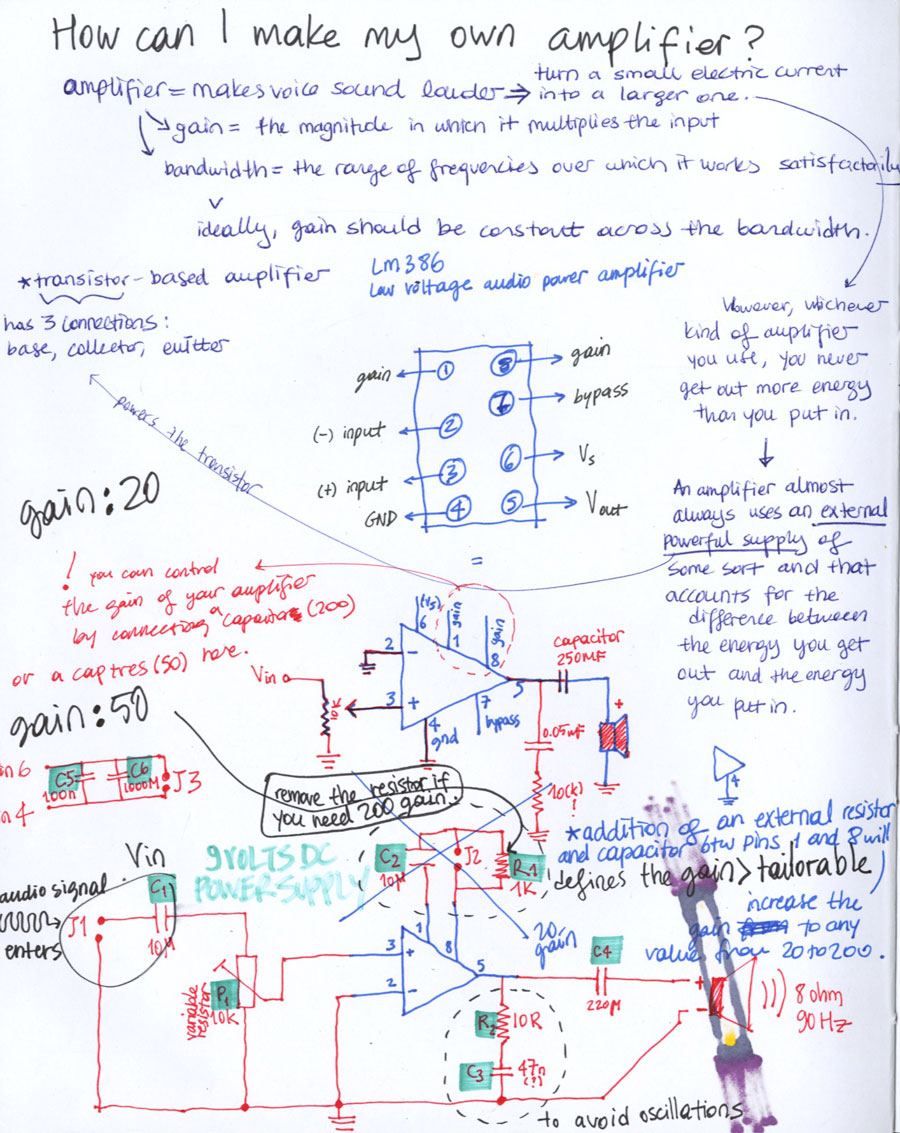
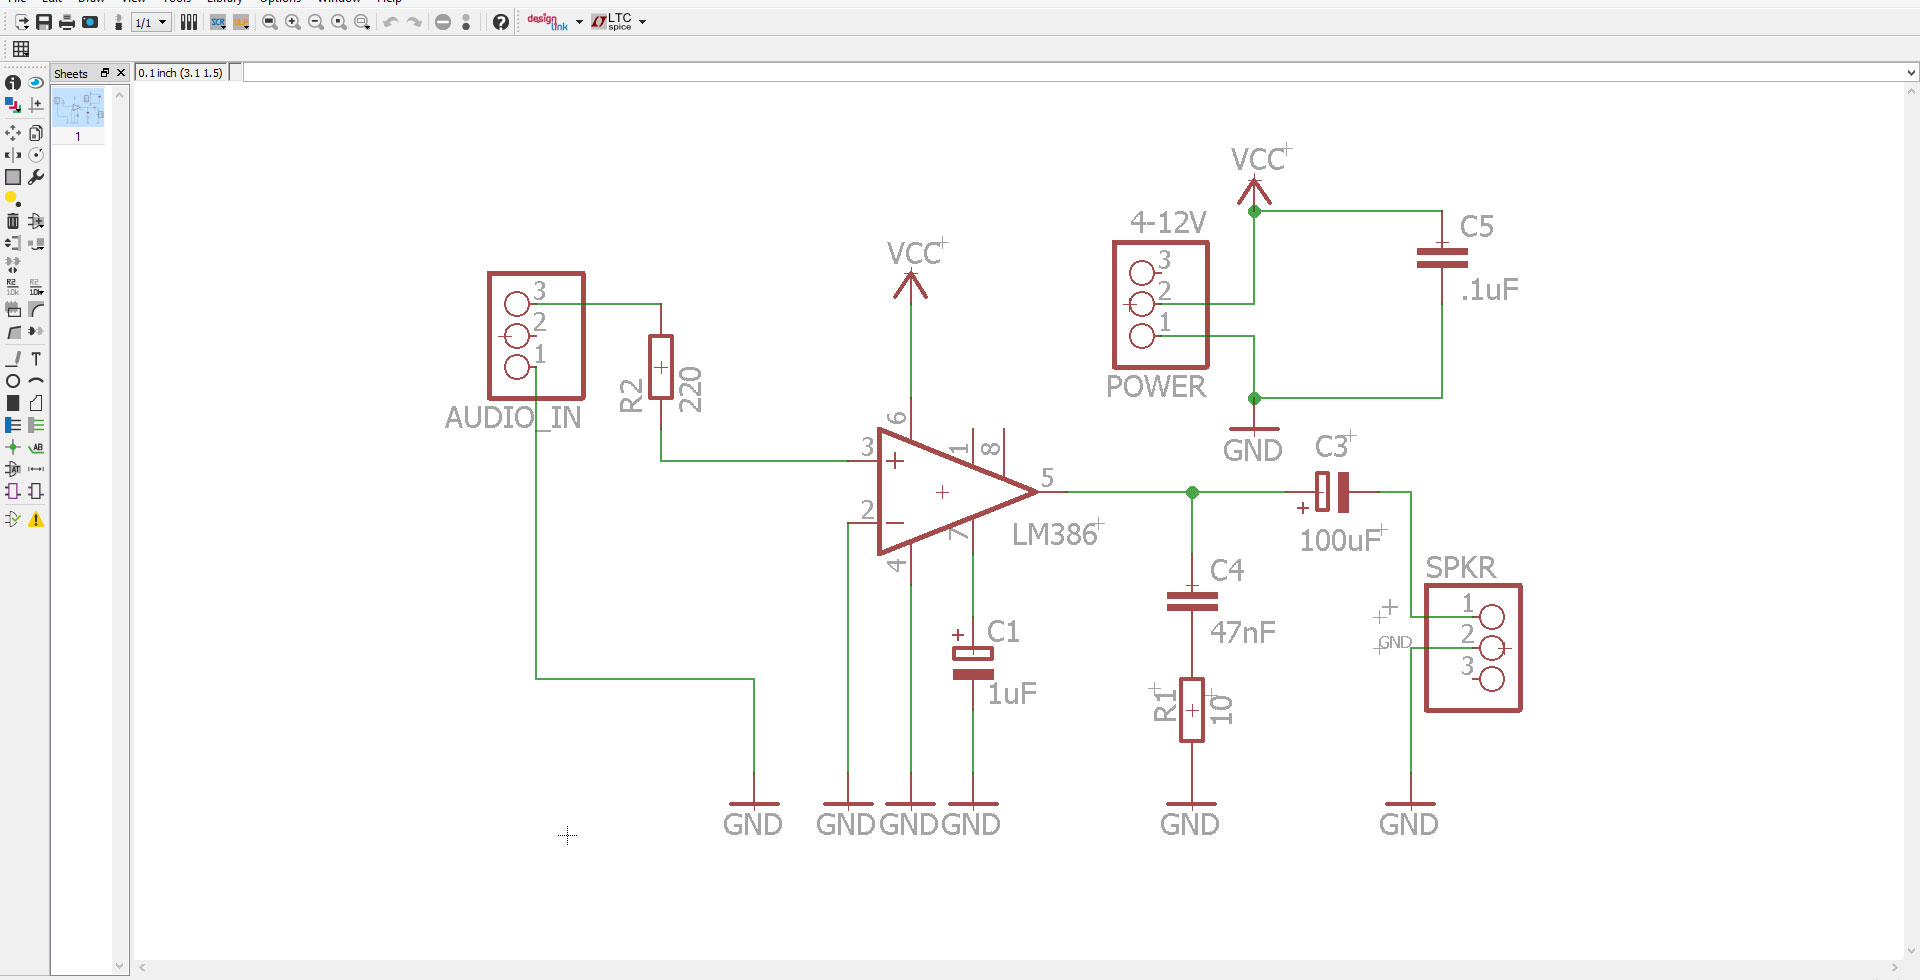
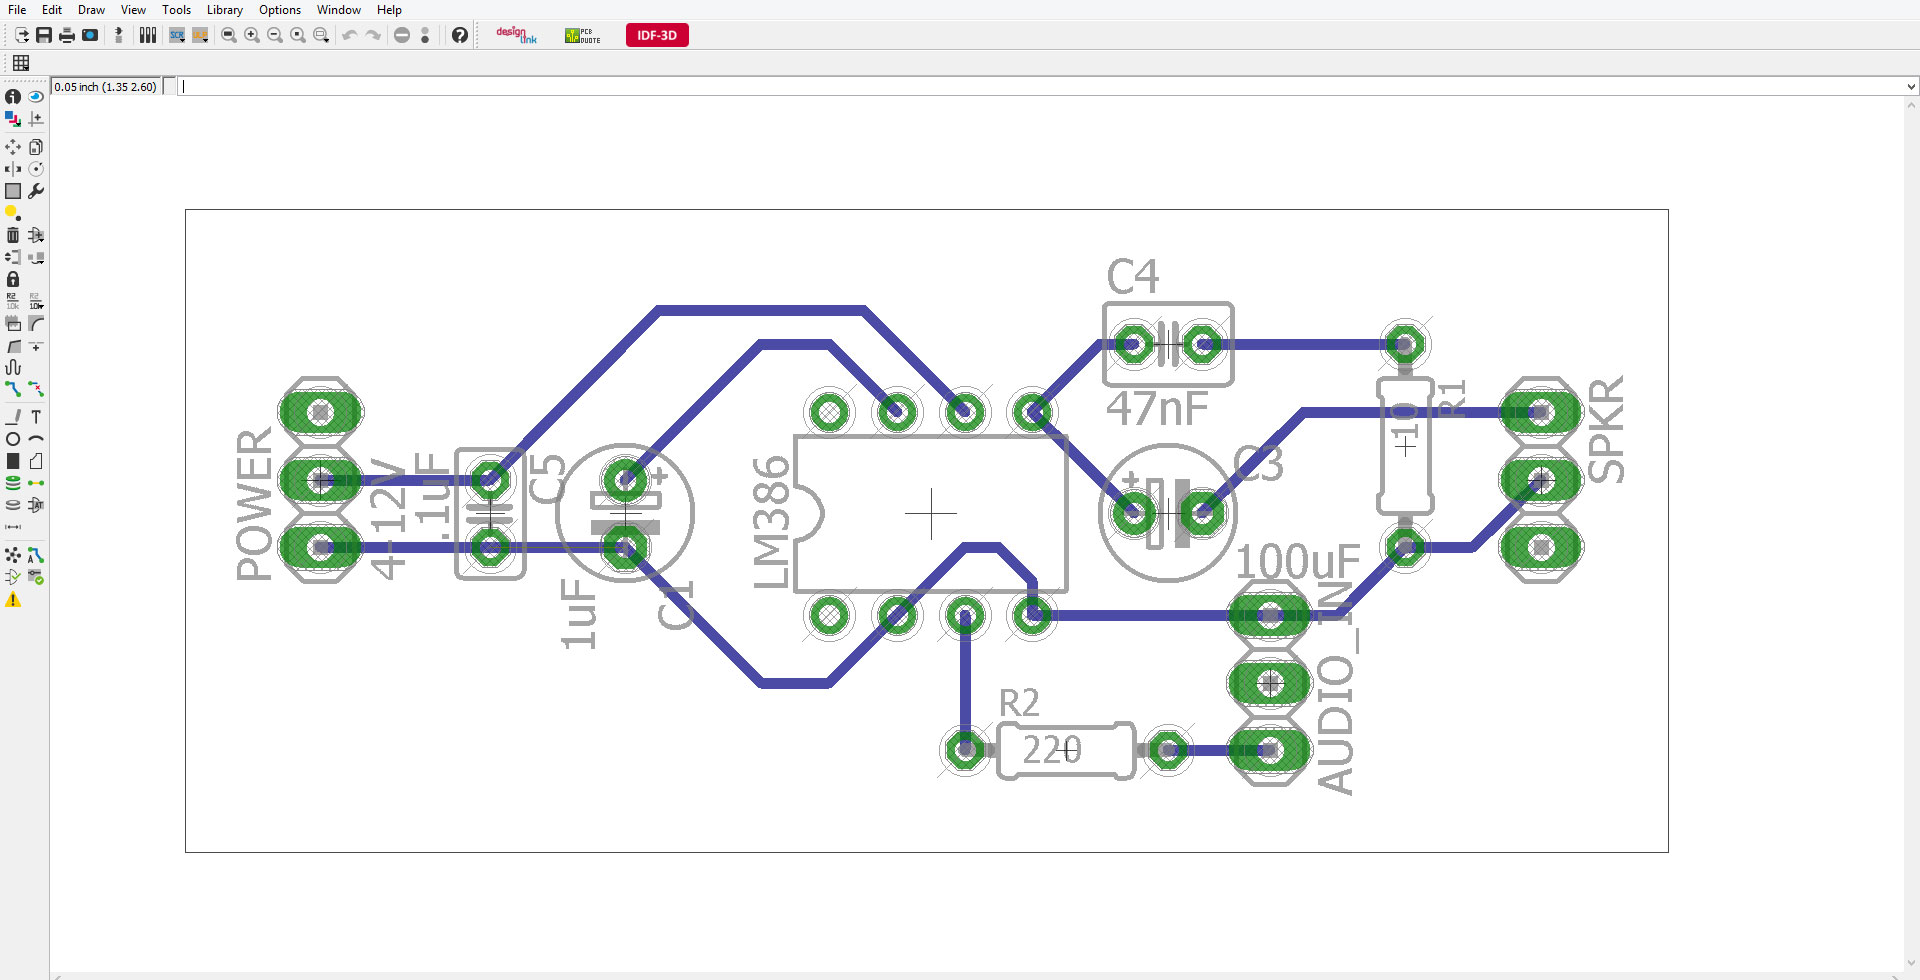
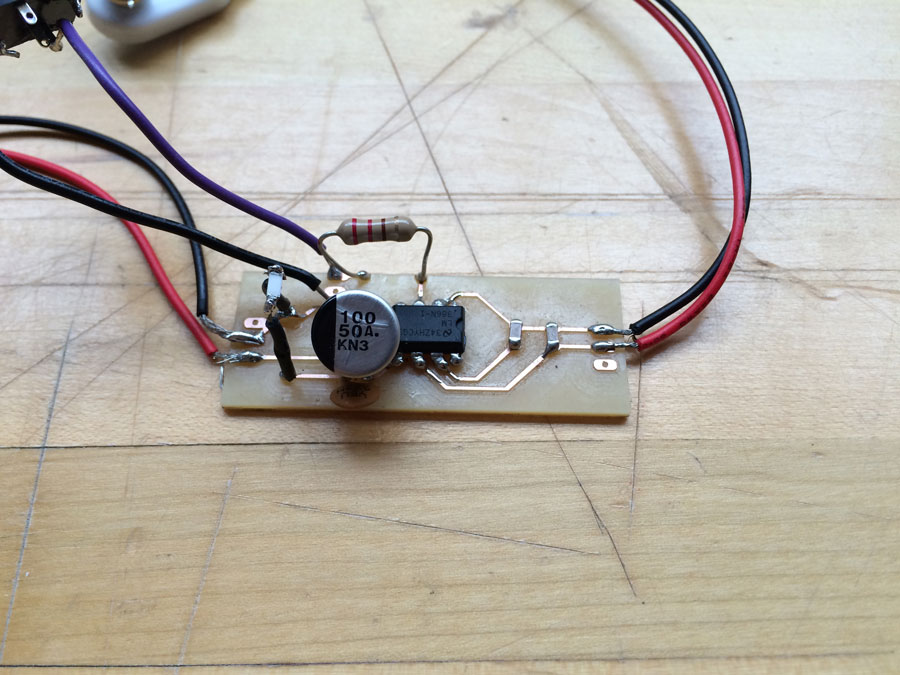
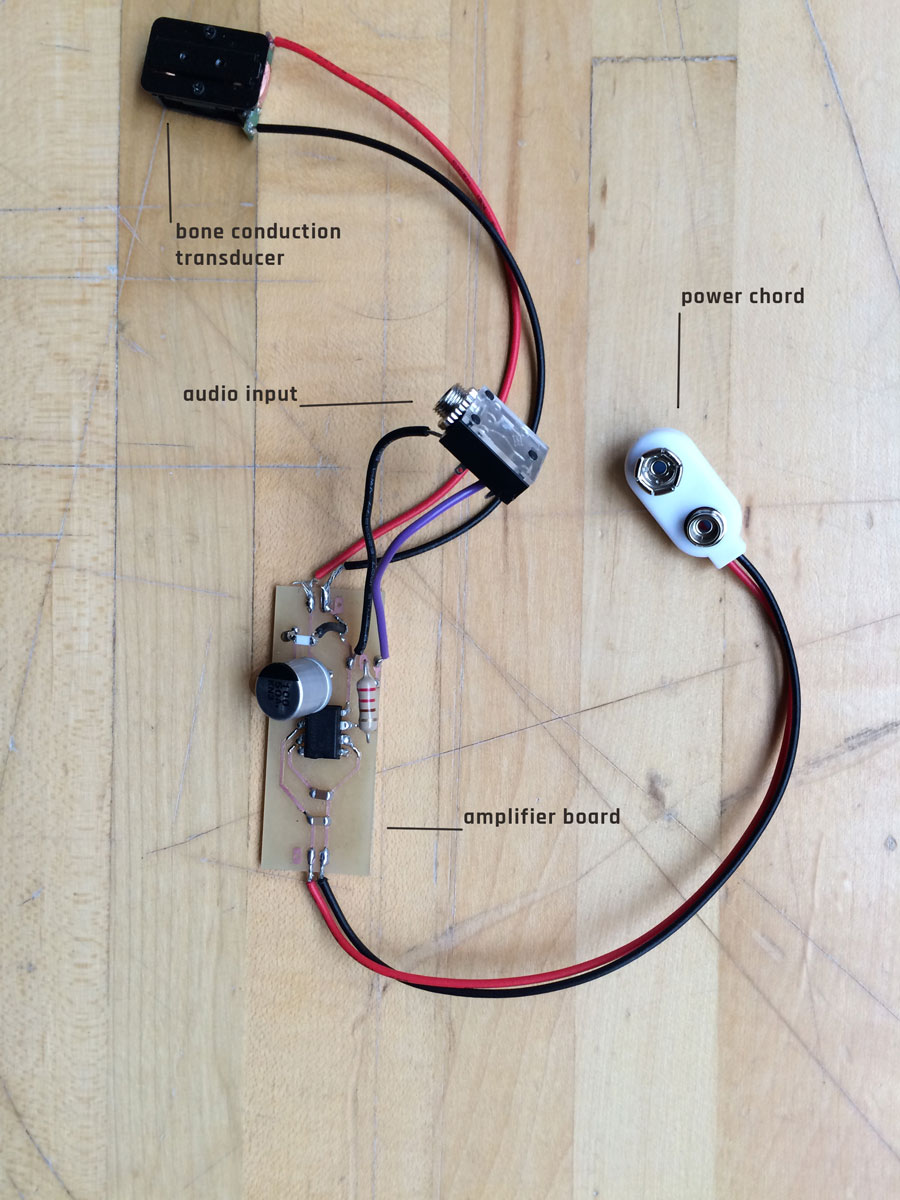
after achieving to create the bone conduction effect, I have decided to design my own amplifier. I have educated myself on how amplifiers work and designed the following scheme on eagle:

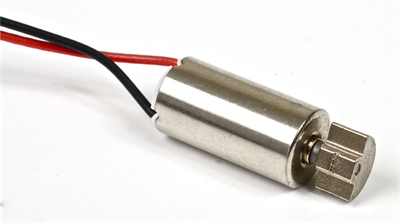
H-bridge vibration motor
Since for my final project, besides bone conduction, I would like translate sound via a vibration plate, I decided to dive into the world of vibration motors!
Best place to start was Neil's H-bridge motor circuit
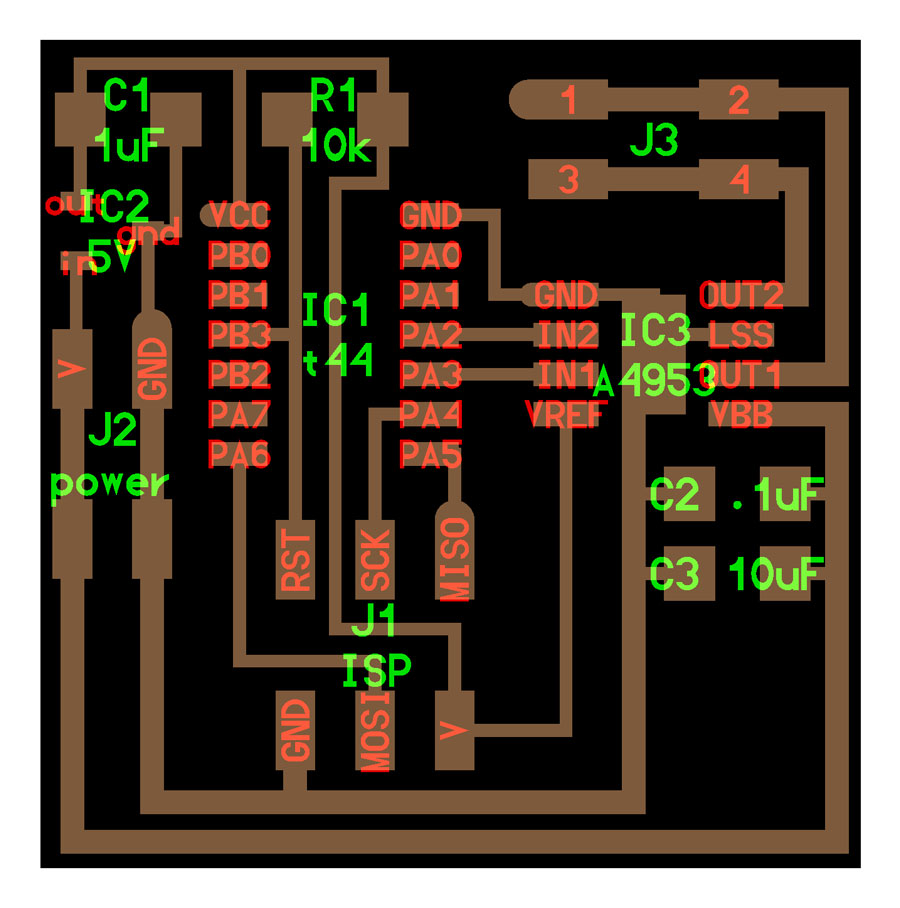
after milling+populating the board according to the schematic above:
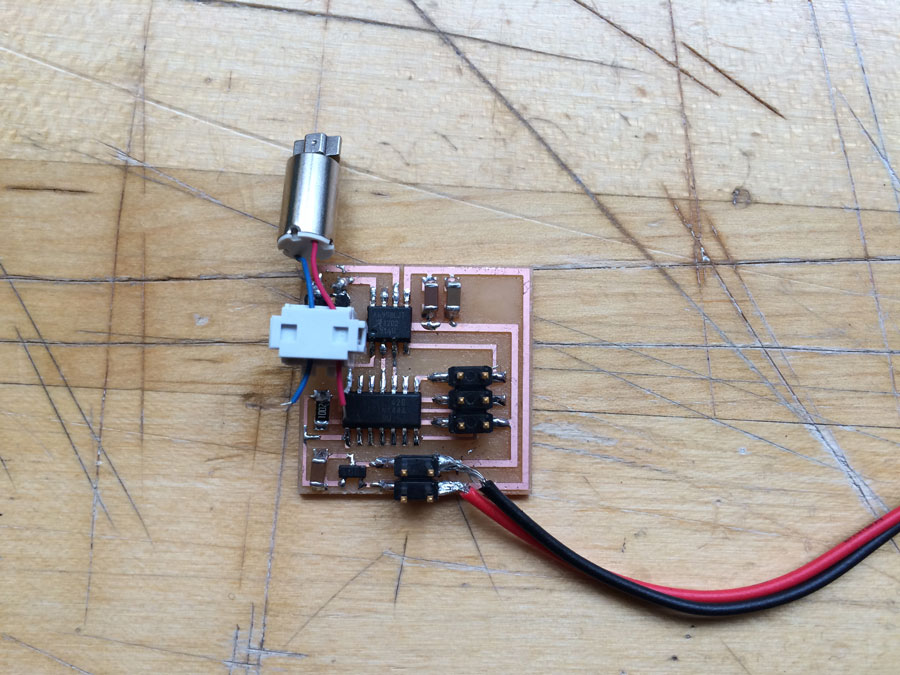
when plugged into avr isp to be programmed:

after seeing the green light, it was time to flash the microcontroller: