Week 7
Molding & Casting... Something BIG??
I think I went a little overboard this week-- I have had a lot of experience with casting, especially in plaster and Rockite, so this week, I really wanted to push the limits and try something to cast at a scale that I have never worked at before.
So, this week, I made a table.
Modeling and Onsrud
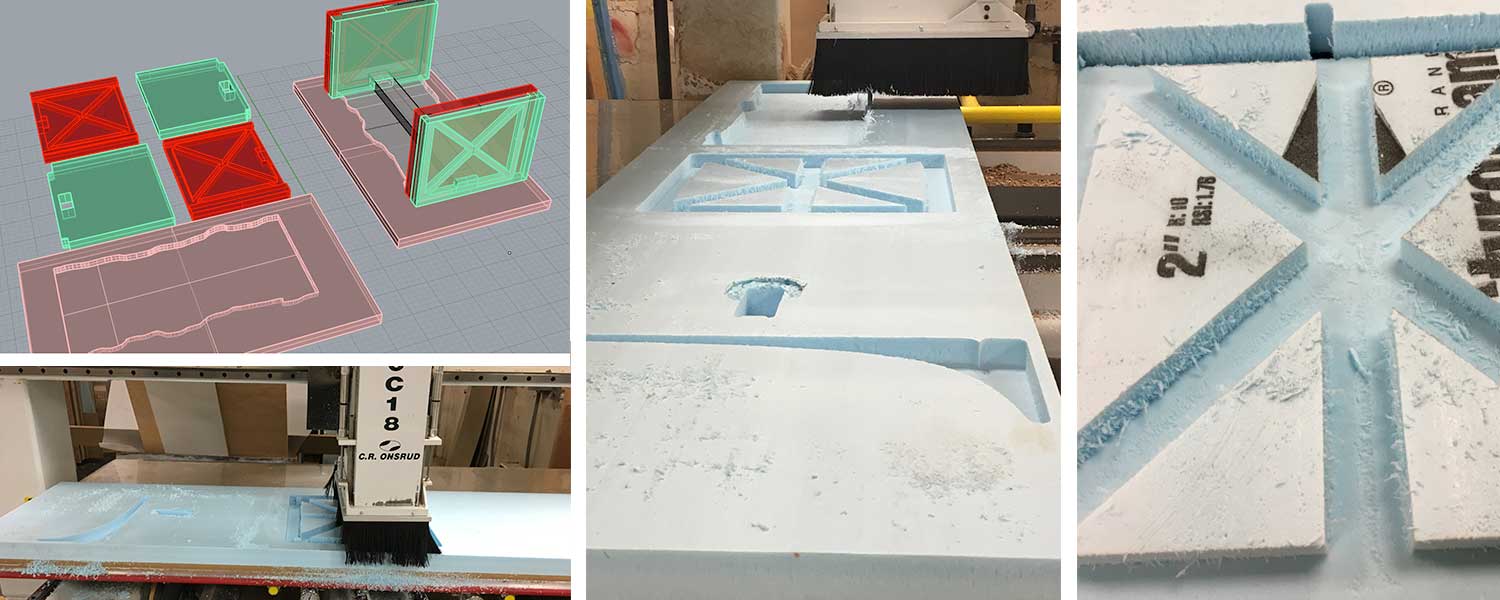
I started with a design for the table in Rhino. I did a simple model that is based on a previous (never realized) conceptual design of a table with a landscape milled into the top. However, I did not think that was going to work with a 3/4" thick table. So, I translated that design into a coffee table with the landscape border. This worked out well; it also gave the top a slant outwards that would allow for easy demolding. I initially made a 5 piece mold (table top, 2 per side leg), but to make it more structural, I added another piece to the leg to give it a T cross-section as you will see later. The formwork was made by putting 2" thick boxes around the geometry and using boolean commands.
This week, I also got a lot more comfortable with MasterCam and the Onsrud. Using a 3/8" endmill, I milled the foam formwork. I realized that I didn't set "Check Surfaces," so the leg was thicker than I had planned. This turned out to not be too bad of a thing, but I did learn how to do this for the future.
I then sanded the foam with 350 grit sandpaper to clear the bits and hopefully get a better finish. The more post-processing on the foam, the better the surfaces!
Post-Processing
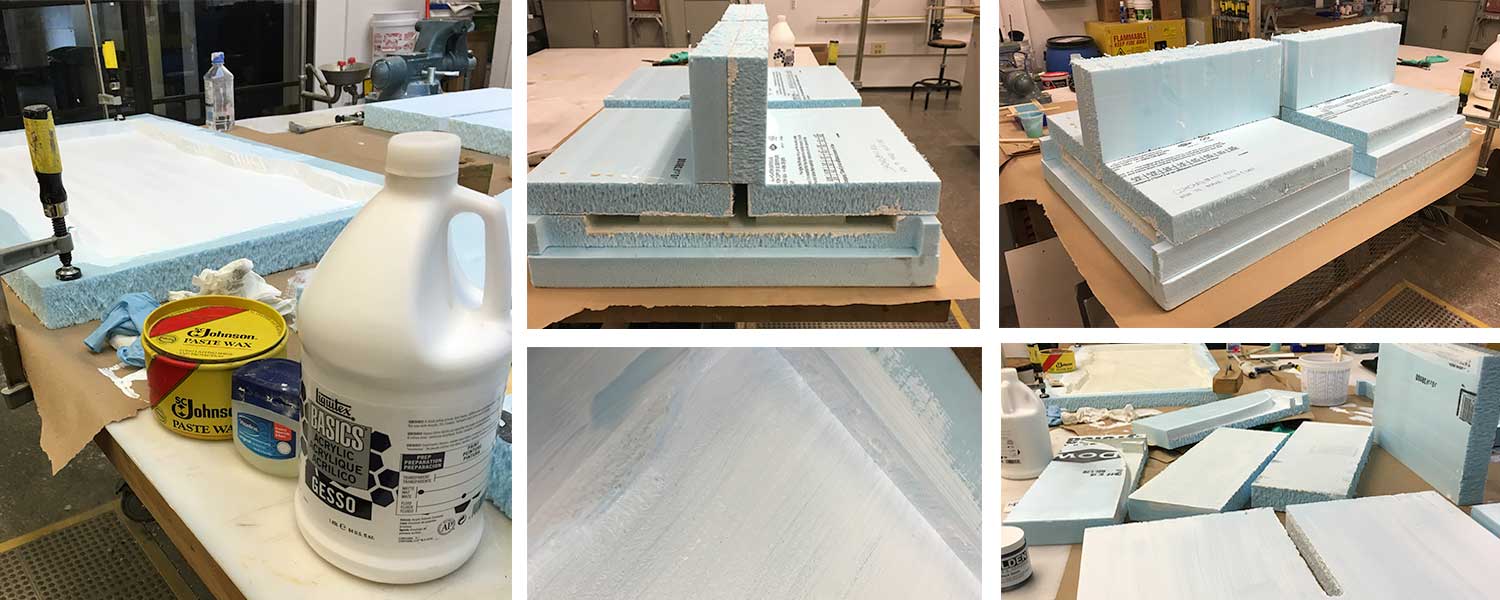
This table was very experimental for me, as I had never used foam as formwork. I knew I needed to seal the foam and add a release agent-- with some advice from fellow HTMakers and TAs, I ended up using gesso (to seal the foam) and Paste Wax (as a release agent and also to further smooth the surfaces.
I prepared all the surfaces that would come into contact with Rockite, and waited a long, long time (3-ish hours) for everything to dry. I applied the gesso first, waited for it to dry, then applied the wax (all with paintbrushes), and buffed the wax a little to get a better surface.
Chaos ensued. I assembled the pieces to their final configurations and sealed with caulk and tape. More waiting for things to dry.
Fear and Loathing in Casting Rockite
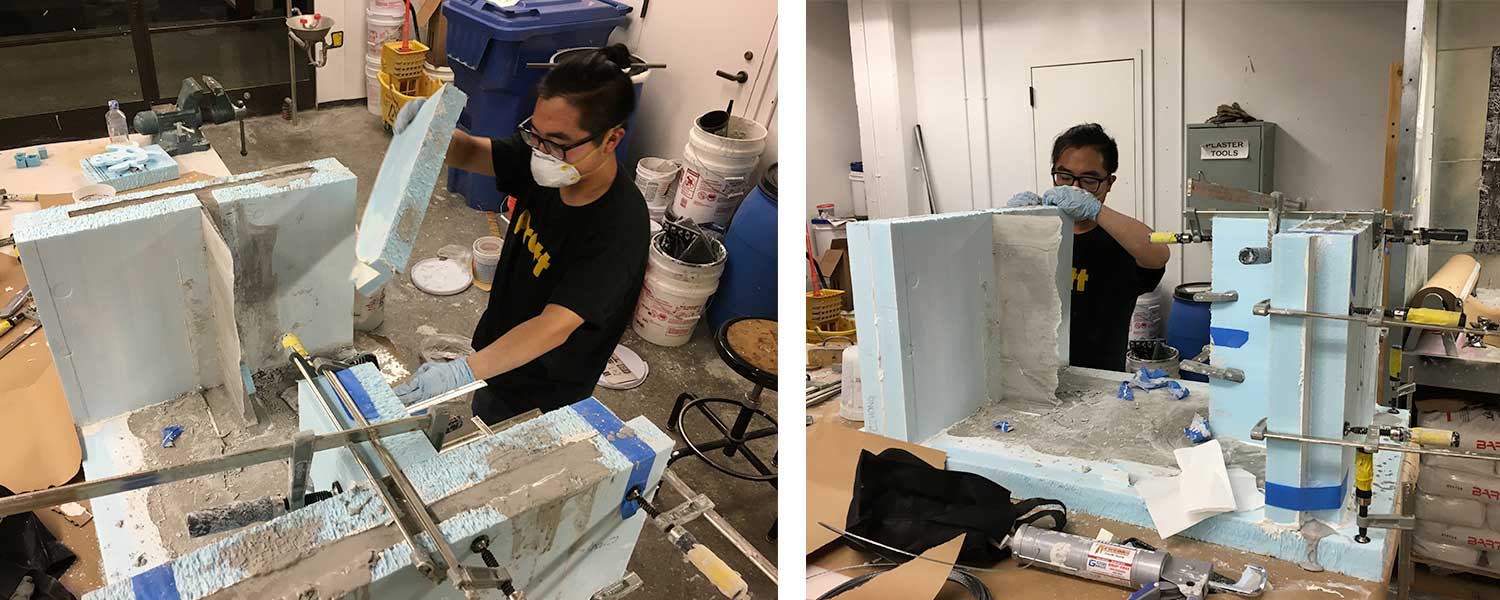
I had to mentally prepare myself to cast about 100 pounds of Rockite-- this consisted of a lot of pacing and making mental notes and disaster prepping (in case of leaks). Lots of notes to remember mixing ratios and a LOT of clamps.
Mixing Ratio: 1 L water to 3 L Rockite
I calculated I needed 20 L of Rockite, which translated to roughly 60-70 lbs of Rockite. However, some buckets set while I tried to fix leaks, so I ended up using about 80 lbs of just Rockite.
For reinforcements, I added Dramix Steel Wire Reinforcements. Unclear if they helped. I like to think they did. I also added L-brackets to where the side legs joined the table top and casted right over that. It seemed to help. I'd like to think they also did. I don't really know if my reinforcements reinforced.
Patching leaks was done by either: (a) duct tape, (b) stuffing paper towels into leaks and hope that the rockite sets and plugs itself, or (c) MORE CLAMPS. Fun stuff.
Then I started demolding.
Demolding
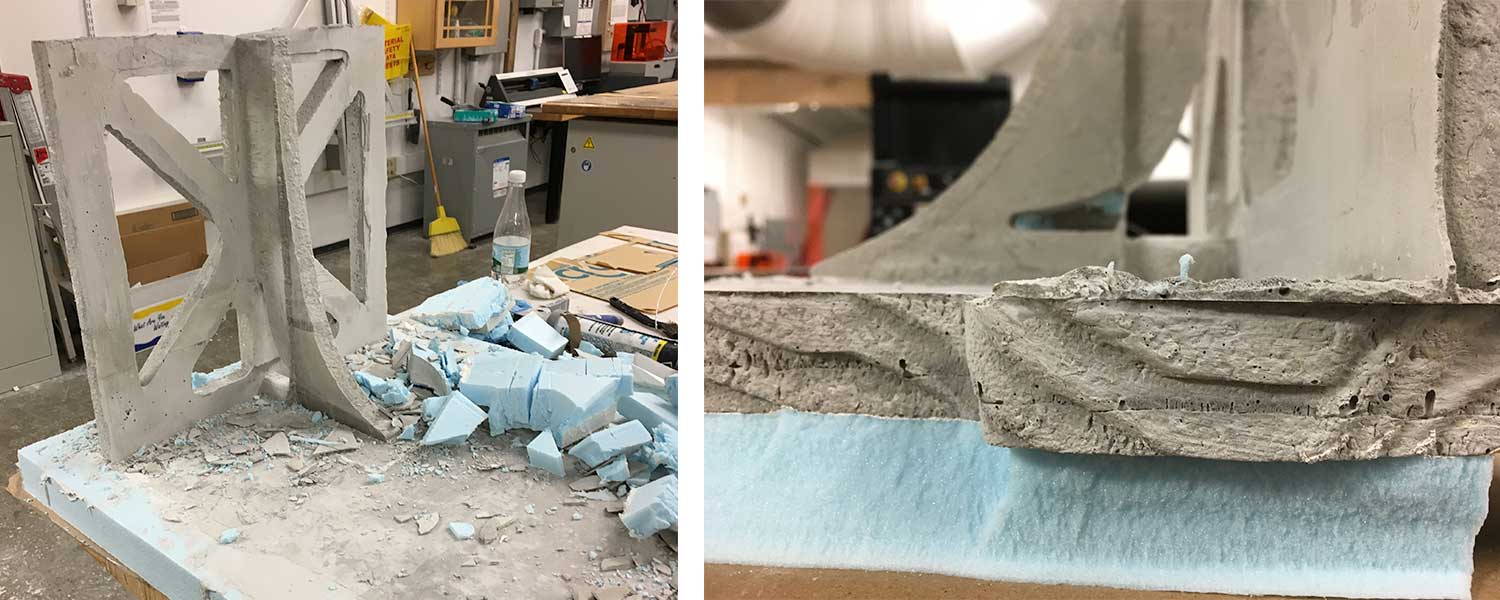
Possibly the most tense part of this whole thing was demolding, because I just had no idea how it would turn out.
I used a combination of an Olfa knife, pliers, and plaster saw. The knife was to cut the foam into smaller pieces, the pliers to pull the foam out from tight spaces (such as the triangles in the legs), and the saw to cut the thin sheets that formed over the triangles (this happened because the two foam pieces were not exactly tight; it created a ~1/16" - 1/8" layer over the triangles that were pretty easy to punch out).
The table top was surprisingly easy to demold; all I had to do was push the table so that the foam hung off the edge of the table and push down to break the foam off. Because the edge of the cast table leaned inwards, the foam came right off and there was little resistance. I cleaned up some of the surfaces, vacuumed the shop before the final reveal.
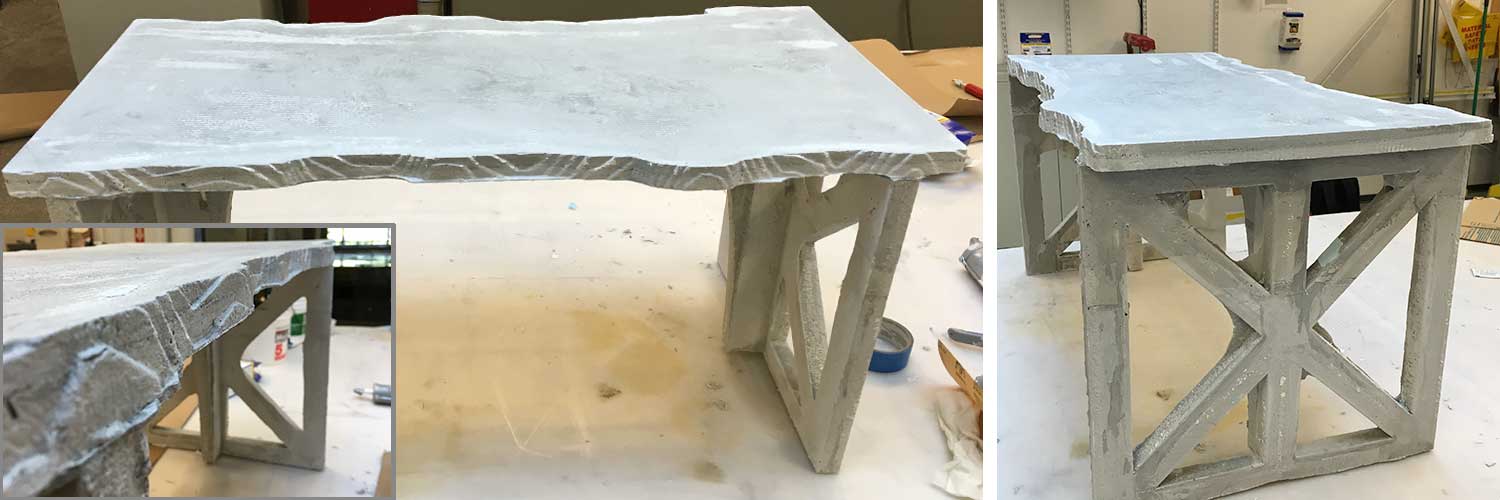
Final Product
There was an amazing sense of euphoria when the final product came together. It stood (surprising!!) and it was pretty sturdy. I think I want to do tests before using it as an actual table (I hope no one tries to sit on it...)
I didn't have time to finish completely, but this is now a very much usable coffee table. I want to leave the imperfections and the surface texture of the table, but I do want to seal it so that it doesn't yellow. I just have to figure out how to transport it...
This was an amazing week, and it was very much worth the time, energy, and money! I think this week, I was able to learn a lot about the Onsrud, about foam, and casting techniques. I want to do this more! I think Rockite is a really great material to work with and has some really amazing properties.
Summary
- Materials & Cost: Rockite (100 lbs - $160), Foam (two 2" x 8' x 2' - $60), Gesso (.5 gallon - $20), Dramix Steel Wire Reinforcements (free), L-brackets (free), Caulk (also free, thanks East Campus for so much free stuff!), Tape, Clamps, Wax.
- Time: ~25 hrs in shop, setting up mastercam, milling, sealing, waxing, casting, demolding.
- Size: 36" l, 18" w, 18" h
- Thanks to Liz, Nico, Camille, Chris, Justin, Ines, Jen, Austin, Merav and everyone else who contributed advice/hands/moral support!!!!