Week 9 : Output Devices
Light and Sound
This week’s assignment was to add an output device to a microcontroller board we’ve designed and program it to do something.
Since final assignments deadline is getting closer I’m trying to make things that I can use for my final project as well.
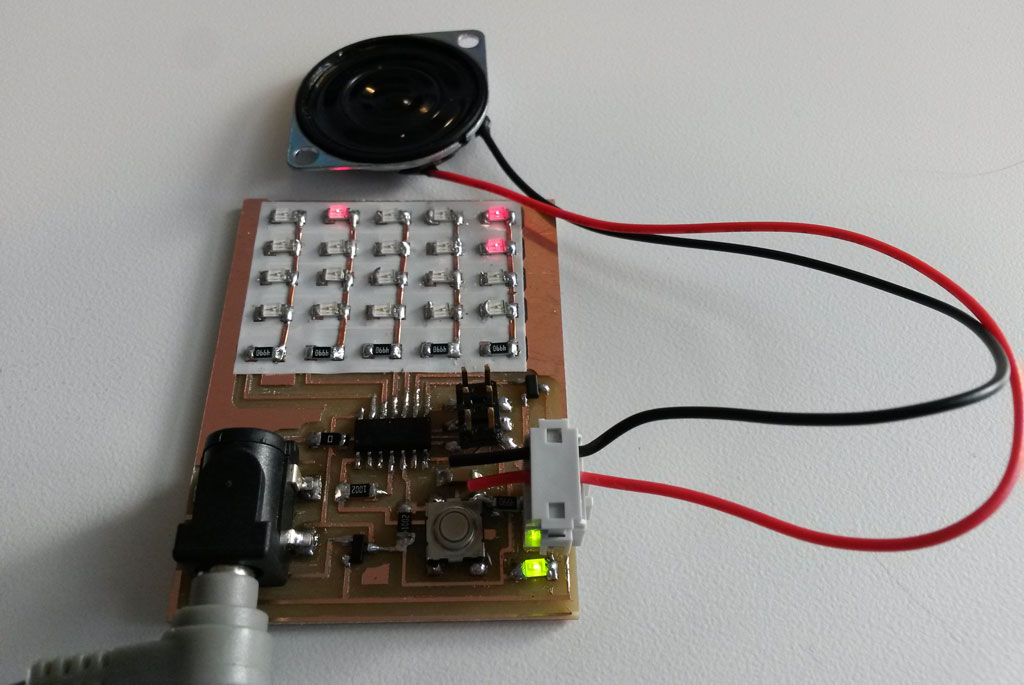
I want my smart helmet to have LEDs on it, that will blink when I turn, and also a speaker inside, to give me directions. So for this week’s assignment I wanted to make a microcontroller board with a speaker and LED Array.
Board Design
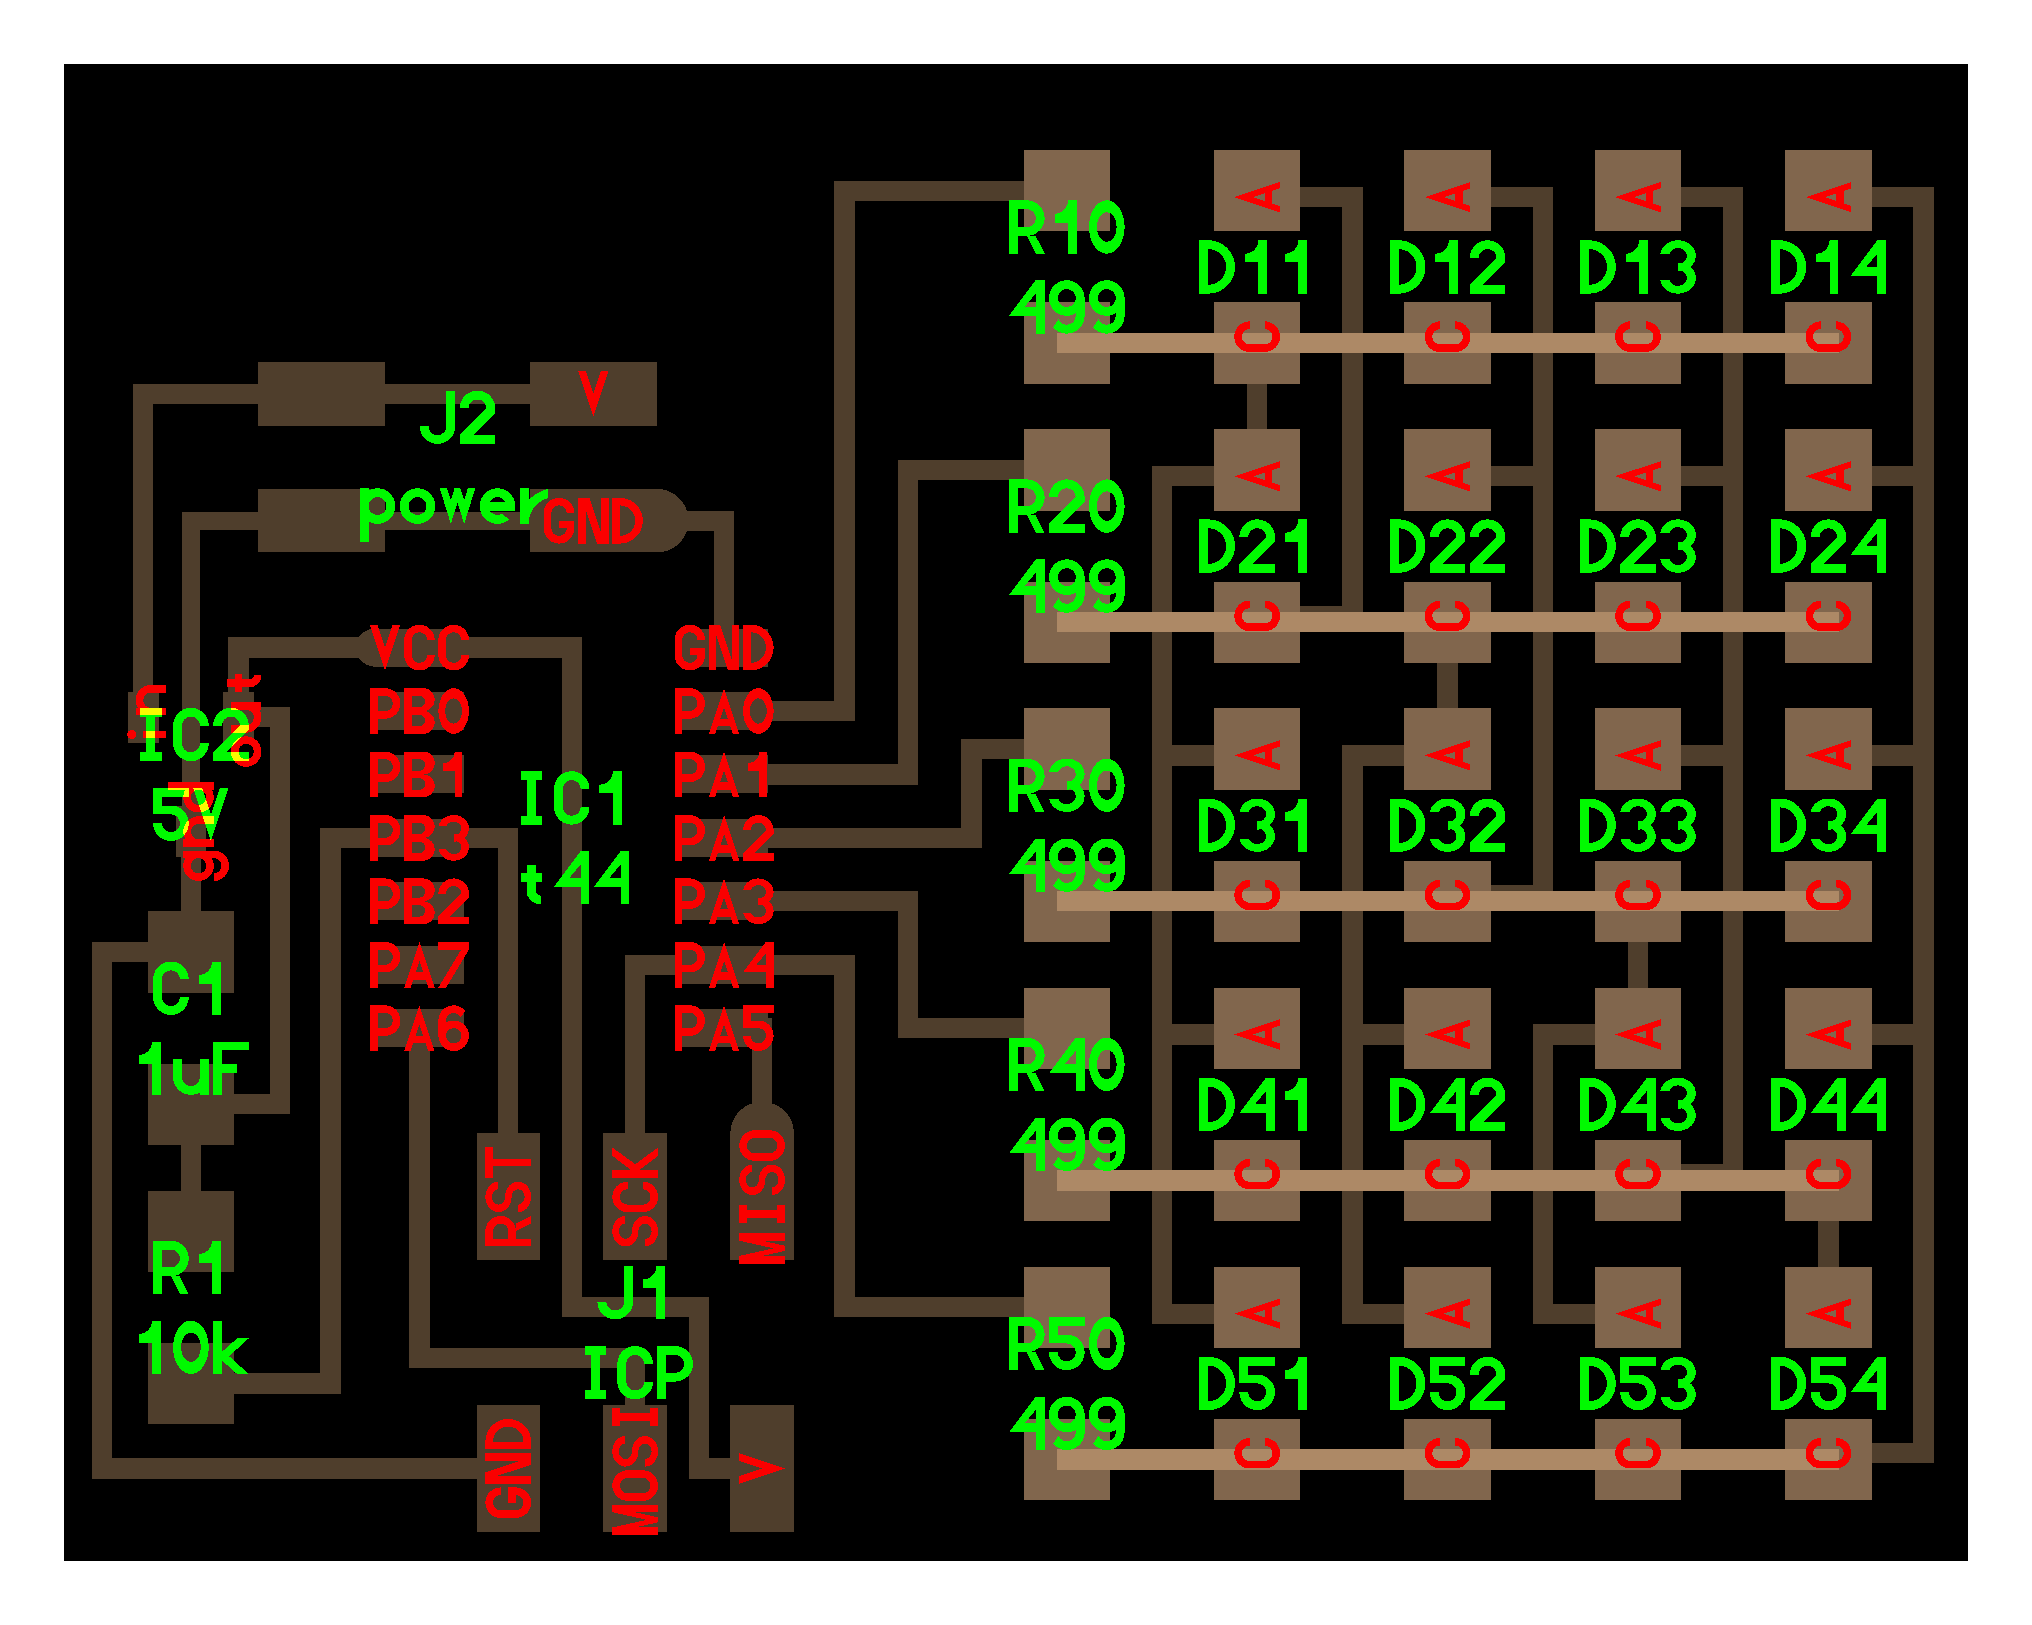
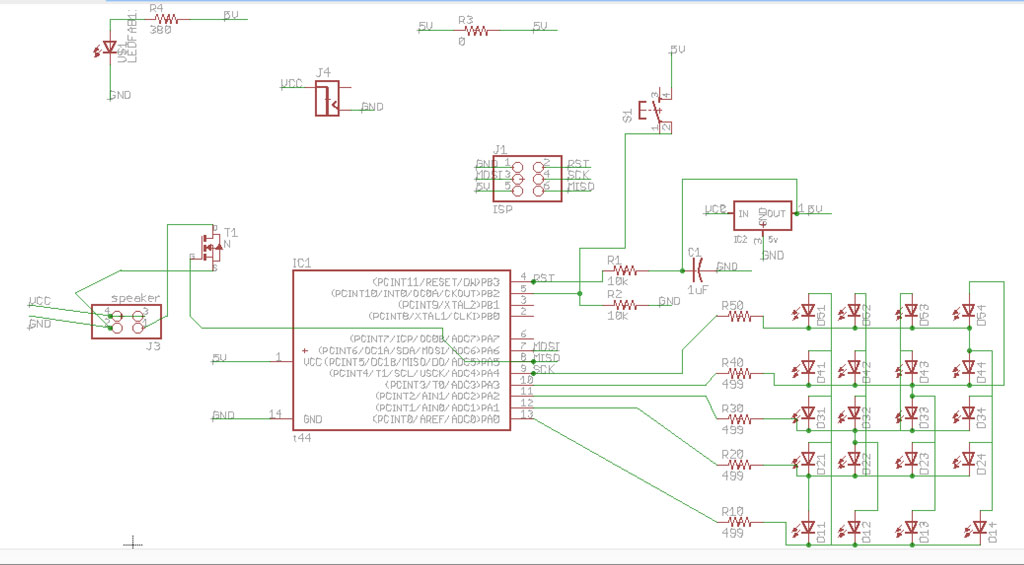
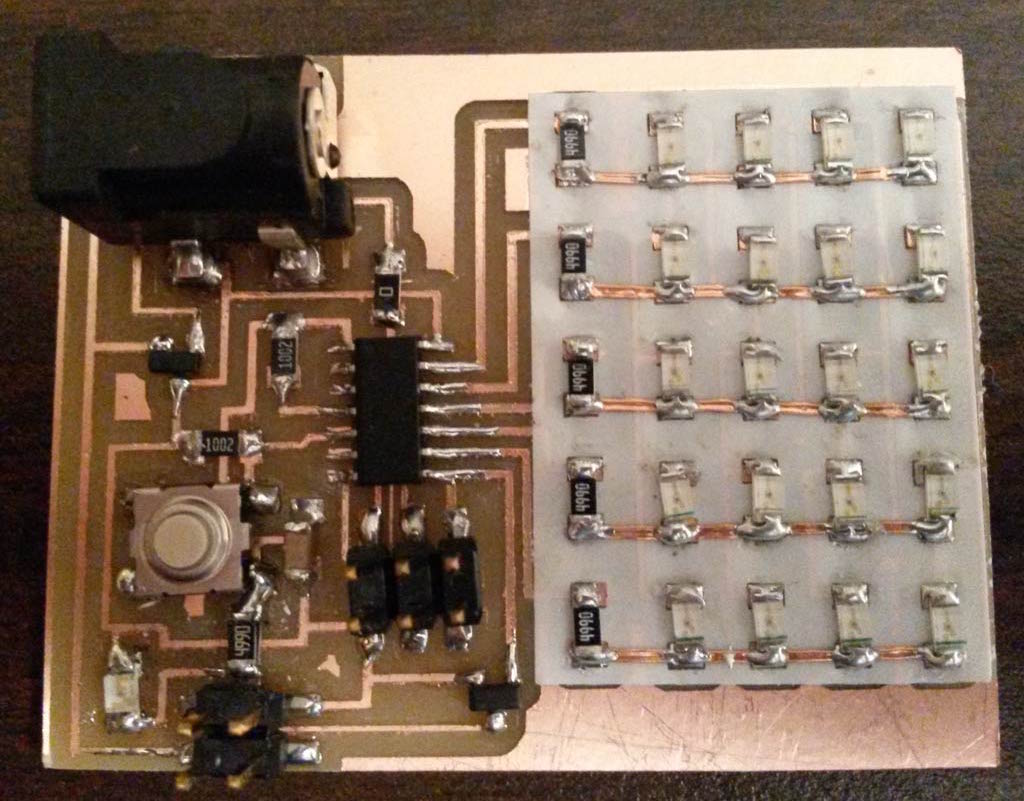
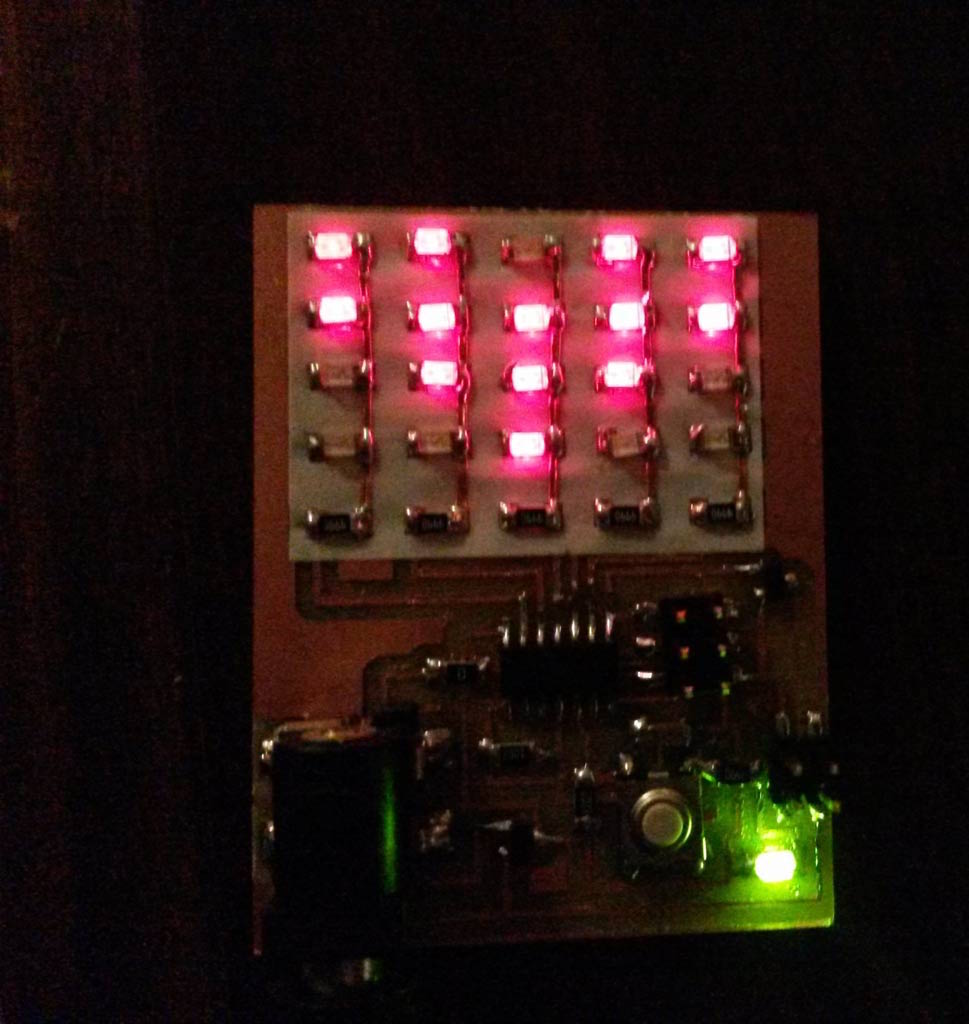
I’ve looked at Neil’s designs for LED array board and a speaker board And combined them to a new board using Eagle. I’ve added a button, a jack for power, and a green LED between VCC and ground that is turned on when the board is connected to power.

All files for making the board can be found here.
The LED Array is done using 20 LEDs and only 5 pins with the great Charlieplexing technique.
Neil is using a nice trick in the LED Array to avoid the use of a lot of resistors and keep the board cleaner -
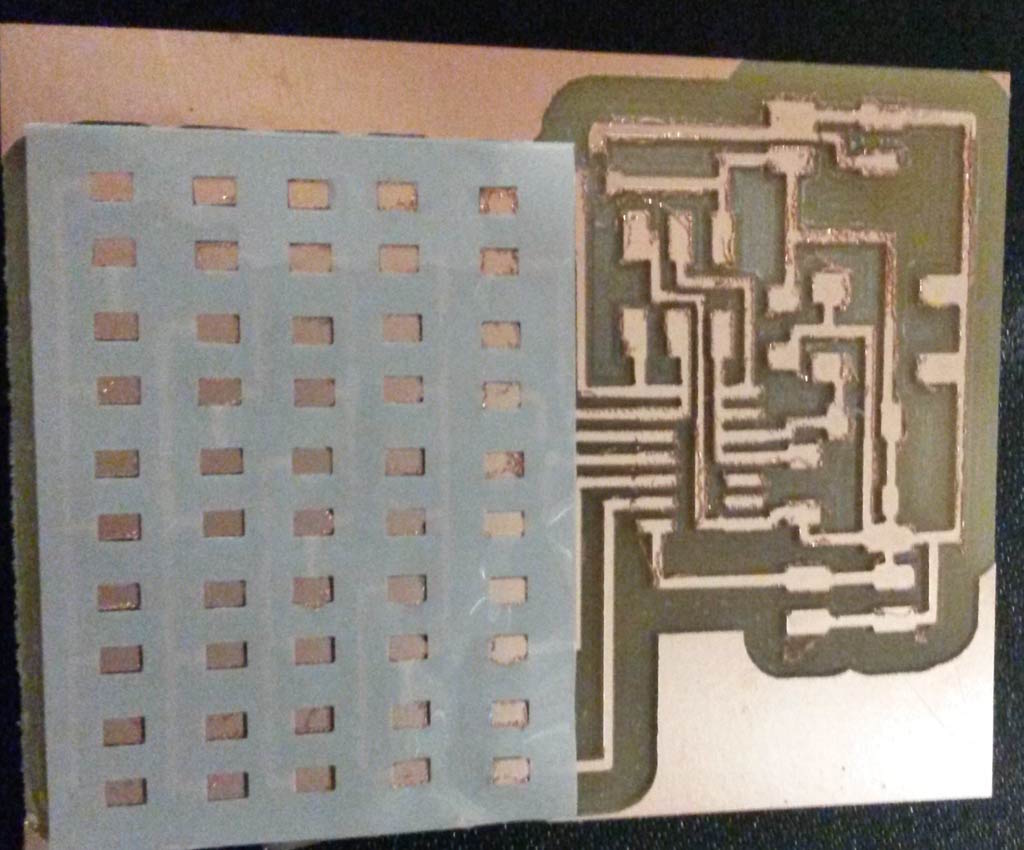
There are 2 layers to the board, and they are separated with a vinyl-cut epoxy film sticker.
For doing this:
You first mill the traces of the board as usual.
Then, you vinyl-cut epoxy film and stick it on top of the board.
The you vinyl-cut coper and stick it on top of the epoxy film.
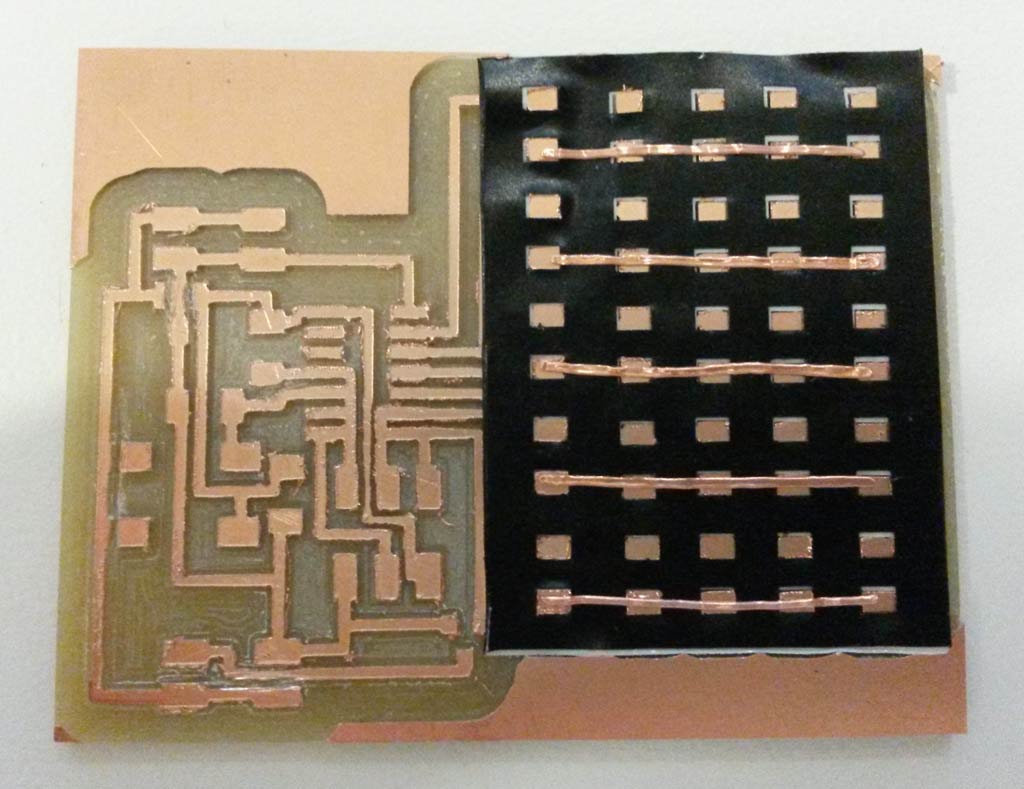
To create the vinyl cutting files in eagle:
The epoxy-film sticker:
When you are done designing the board hit display none tCream
Then go to view-> Layer settings and click on Change. Choose a solid filling for the tCream objects and export as a monochrome with 600 DPI
I then used Photoshop (But any simple paint software will work) to crop and invert the exported image.
Copper traces on top:
The important thing to remember here is that the vinyl cutter resolution is not the same as the milling machine’s. Use thicker lines. The rest is easy, draw the traces on a different layer (I used bottom since I have the free version of Eagle and it only allows 2 layers) and export this layer only. Again, invert and crop in any paint software.
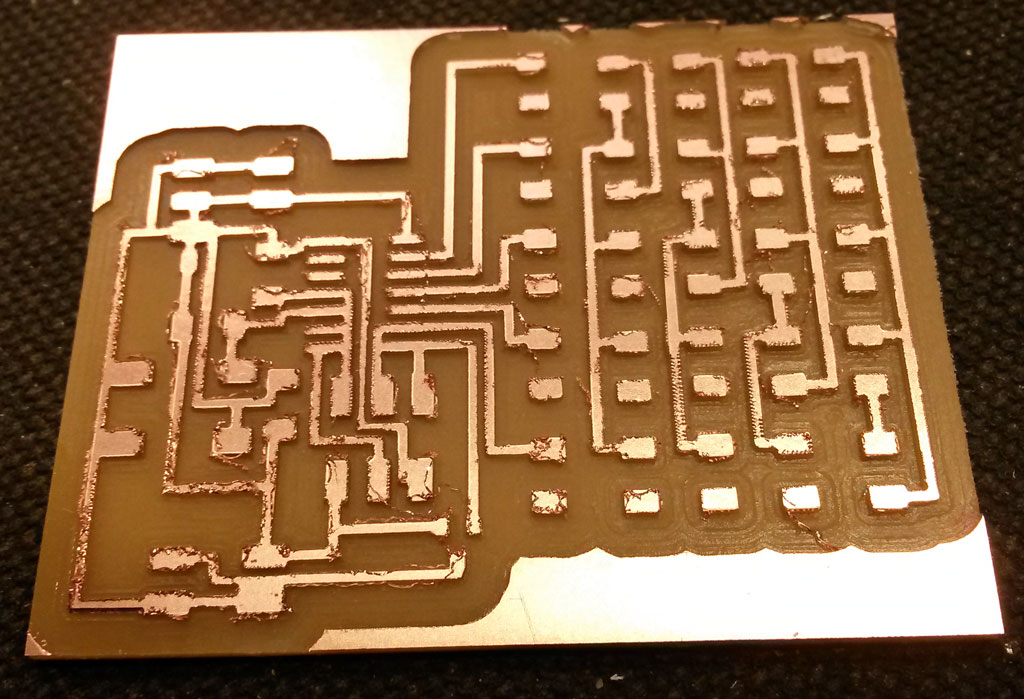
Making the Board
Same process as making boards in the recent weeks. By now I got much better and faster in producing boards :) (And an LED Array requires A LOT of soldering).
(On the first version of my board I added another black vinyl sticker, just for the color, this was a mistake since the vinyl melts under soldering heat.)
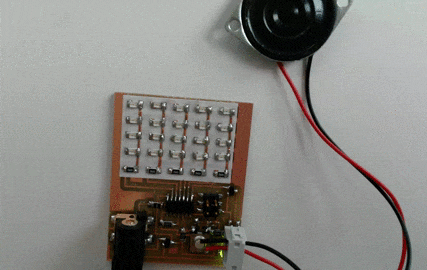
Programming the Board
This is the fun stage of testing and playing around. I first tested that each output device works by uploading Neil’s code. The LED Array was great:
The speaker was not that simple - when first uploading Neil’s code nothing happened.
(I suspected this was related to the fact the I used an Atitny 44 while Neil used Attiny 45 but did not succeed in debugging this, The code did compile and uploaded successfully to my board, now I’m thinking this was a power issue and I should test this again with a different power supply).
I then tried using Arduino Tone() library, but still, I heard nothing out of the speaker.
After some reading around the web, I found leah buechley’s code for getting sound from a LilyPad and this magically worked.
This was still not stable and the speaker would sometimes just click when I pressed to button. That issue eventually resolved by replacing the power supply to higher current (1 amp instead of 0.2). Next time I should add a resistor to the speaker to solve that.
Then I had a lot of fun playing different 8 bit tunes I found online and composed my self, and lighting the LED’s in different shapes
Eventually, I experimented with combining the light and sound output - I’ve created random lights that are show with each note of the annoying sound being played :)
My code is a combination of Leah’s sound_code and Neil’s hello.array.44.2 And it uses “pitches.h” from the Arduino Tone() Library. Get it here