3D Scanning and Printing
Celestial Feat
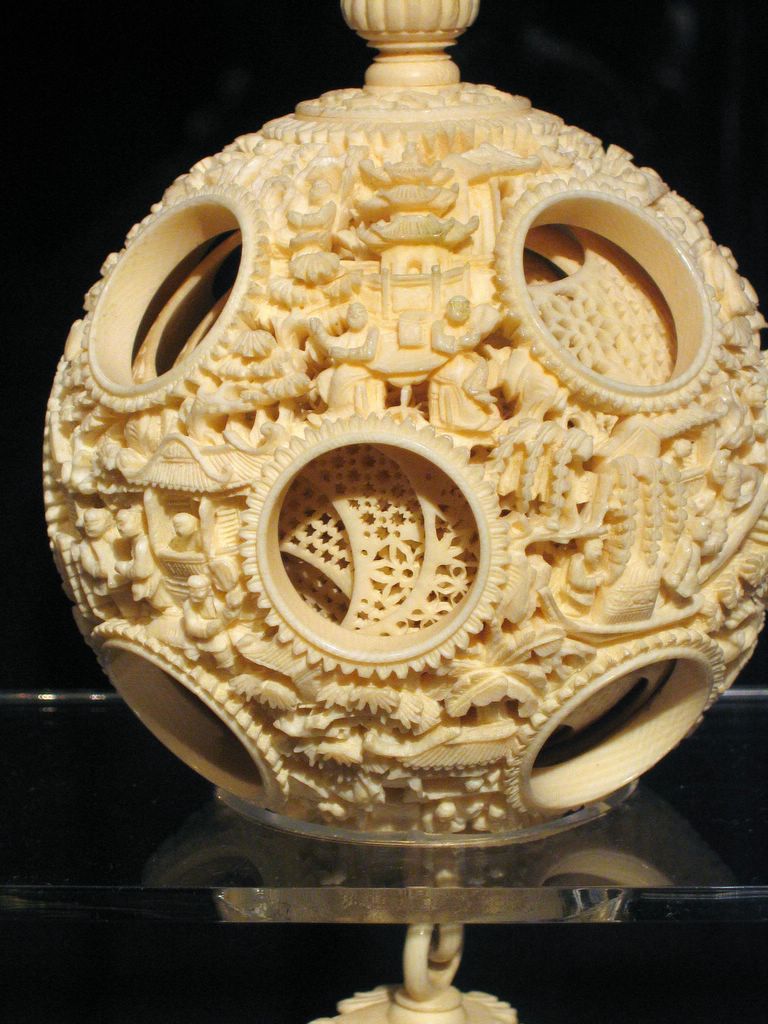
During a visit at the National Palace Museum in Taipei I discovered the art piece Celestial Feat (仙工). It’s an intricate ball with 21 concentric layers carved out of ivory. I thought to carve this out (i.e. make substractively) was a wonder and served as inspiration for my assignment.
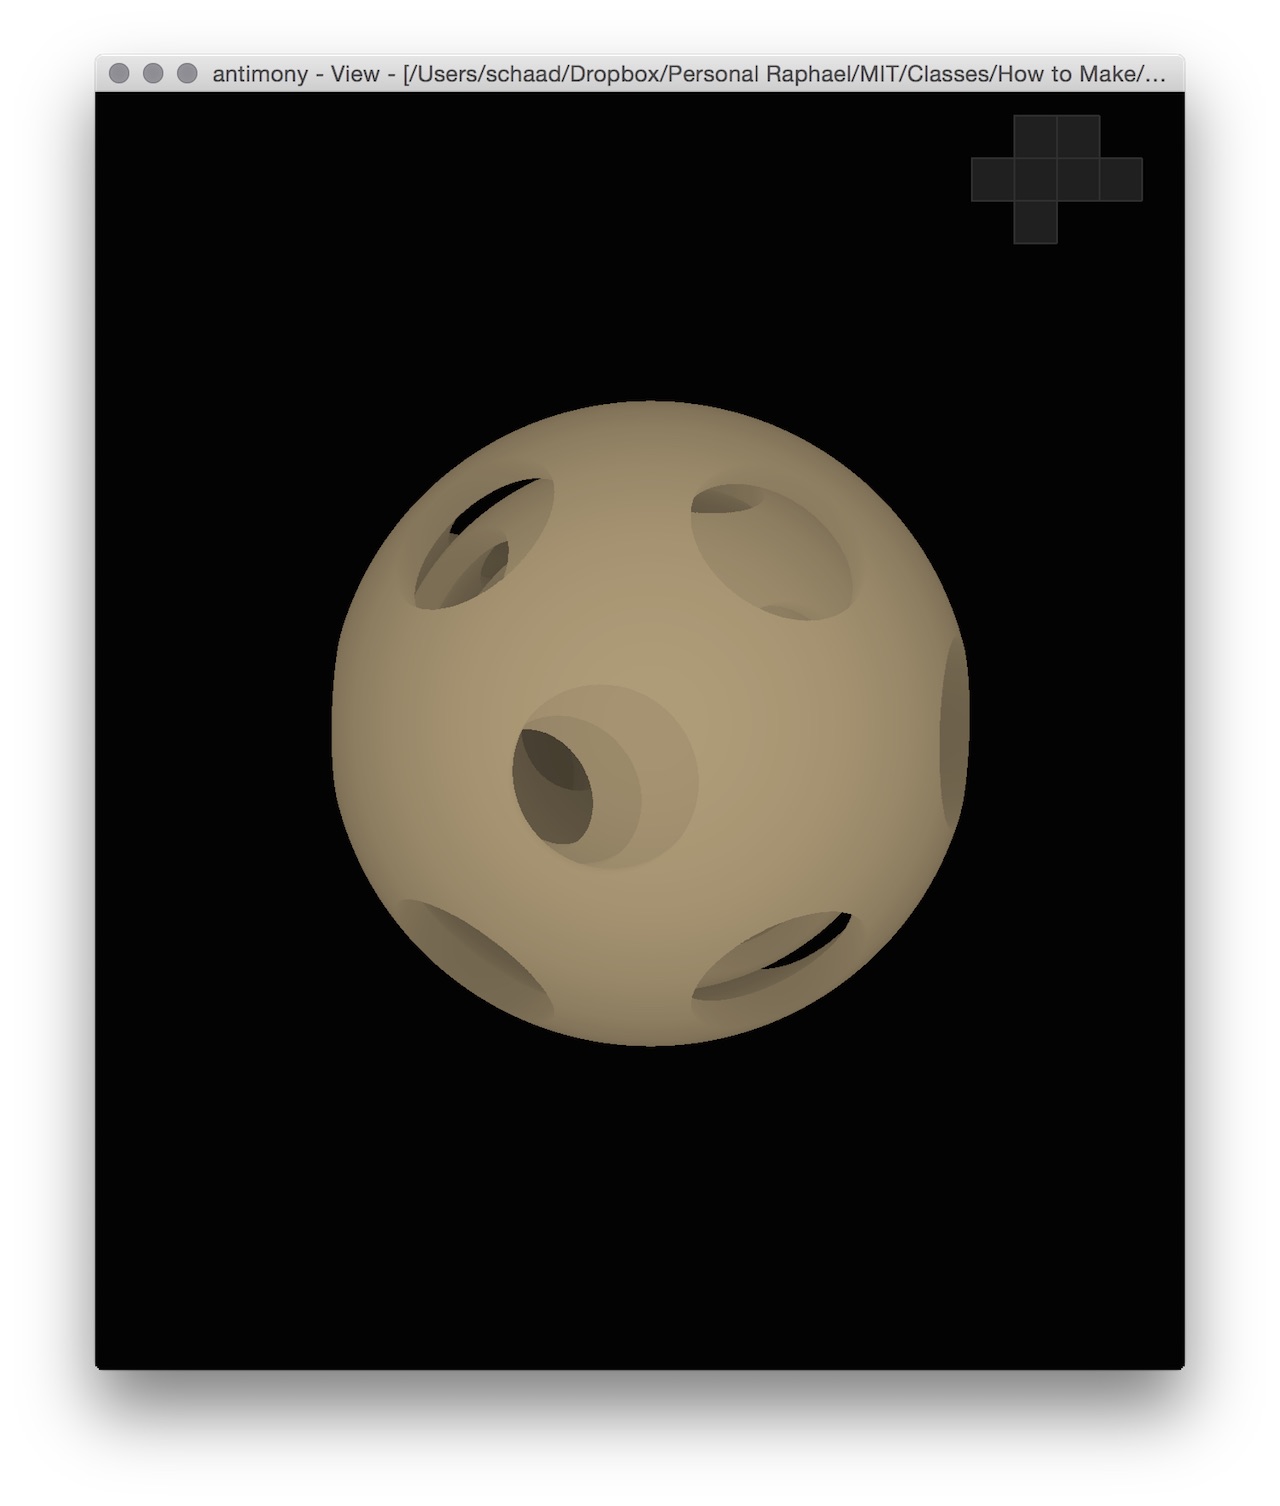
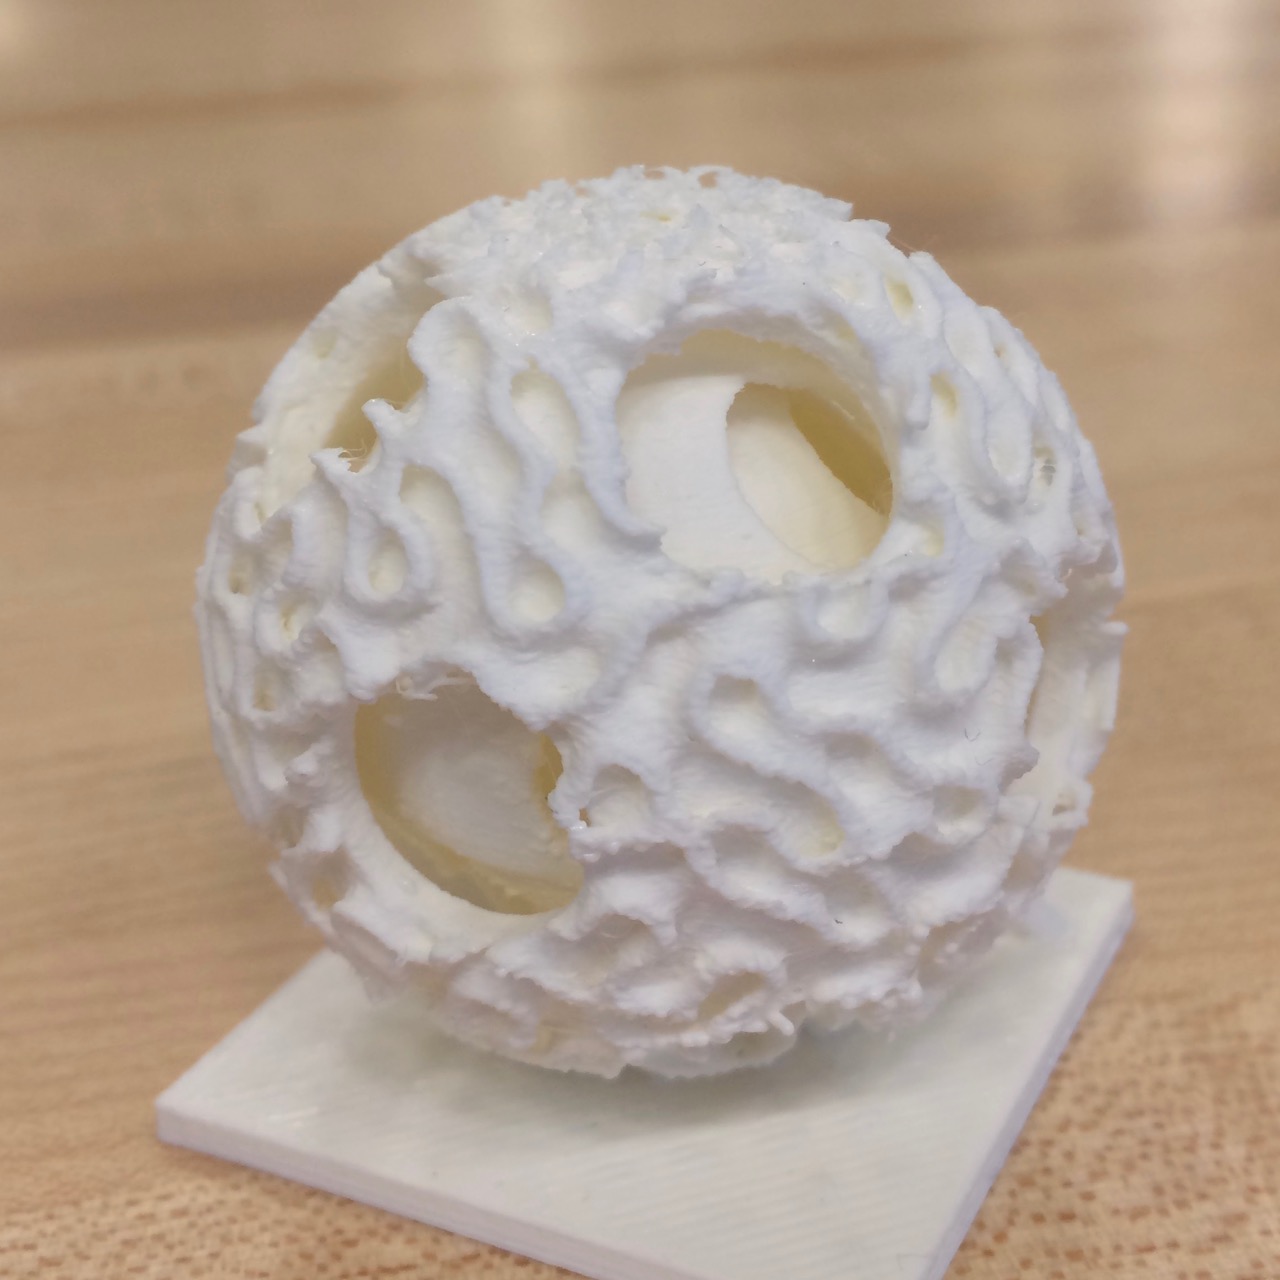
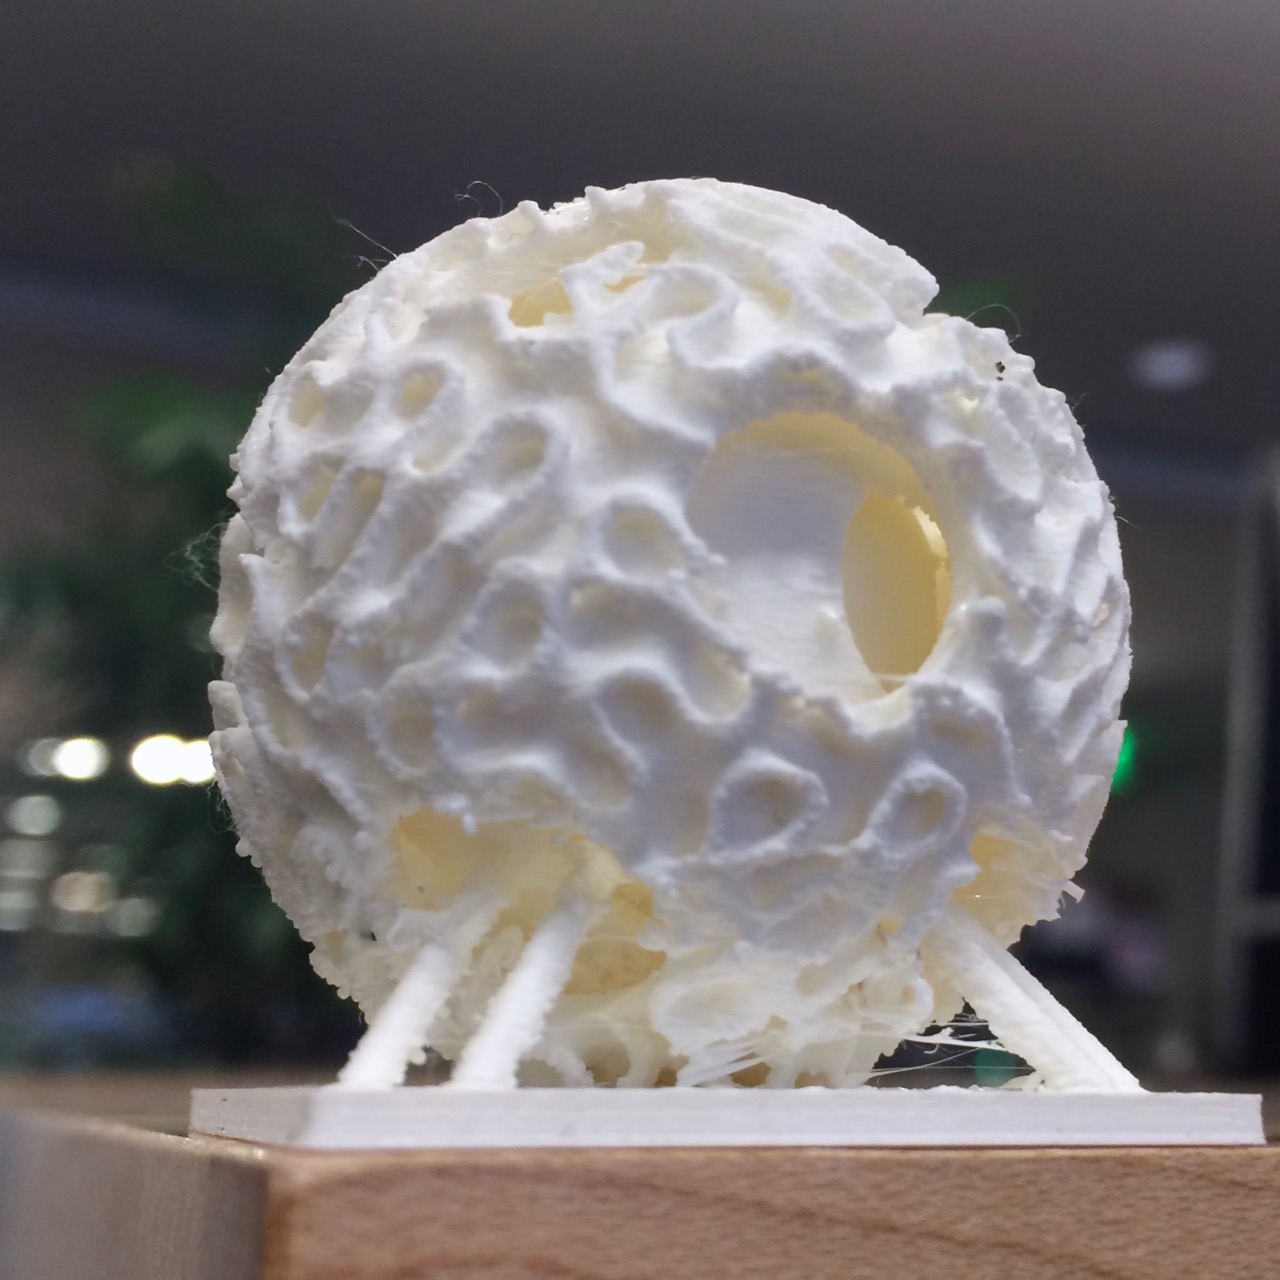
Approximating intricate details on outermost sphere of ivory ball by cutting a sphere from the complex stock Antimony volume Gyroid, a trick I saw Albert Chen doing with a Schwarz Diamond.
Incorporating custom supports in the design (and consequently turning automatic generation of supports off during toolpathing) was the only way I was able to successfully print these complex nested shapes.
Puzzle Star Cube
While backpacking through northern Thailand I bought a bamboo wood puzzle from an artisan.
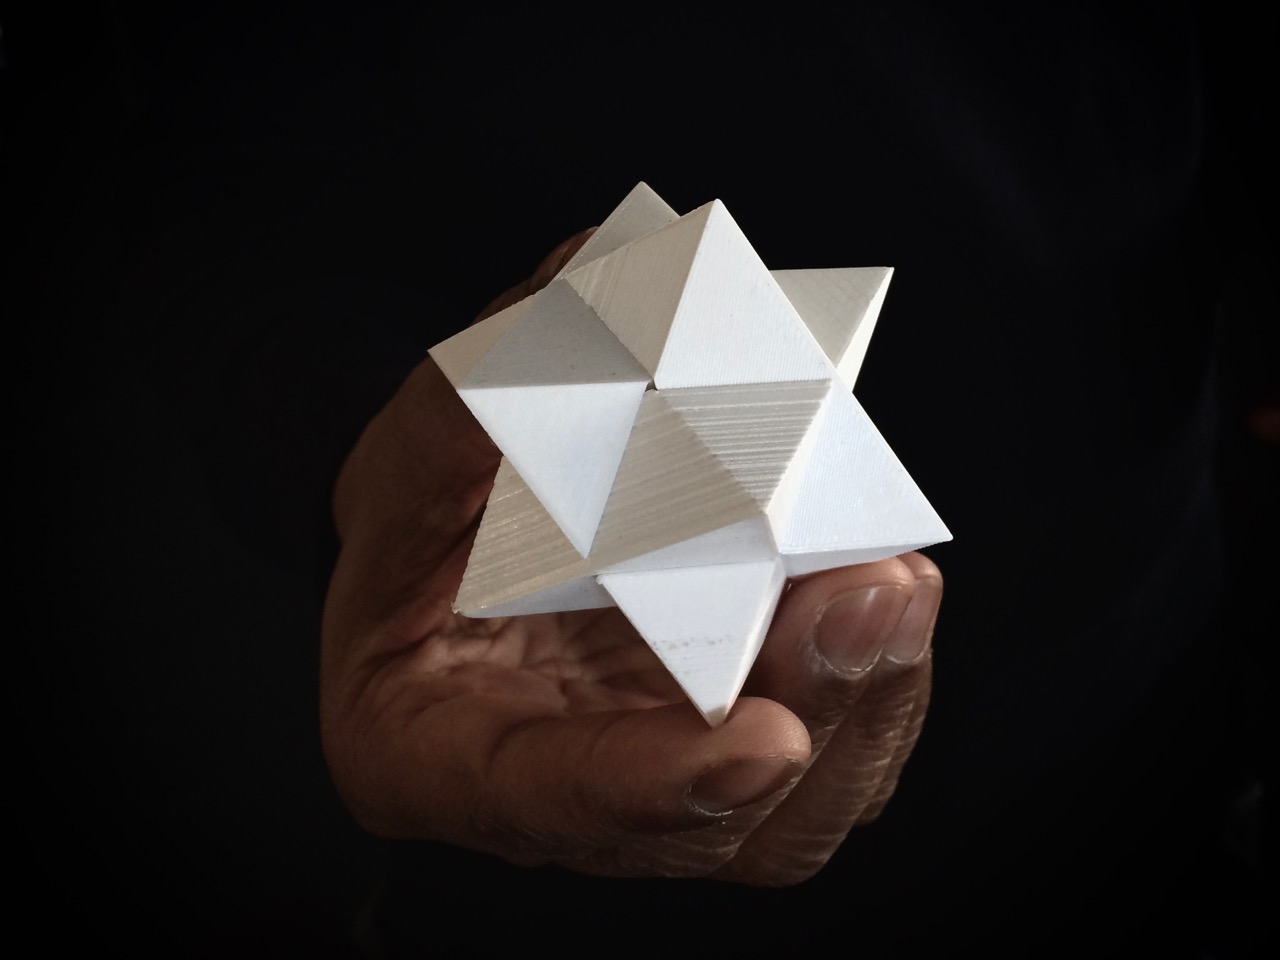
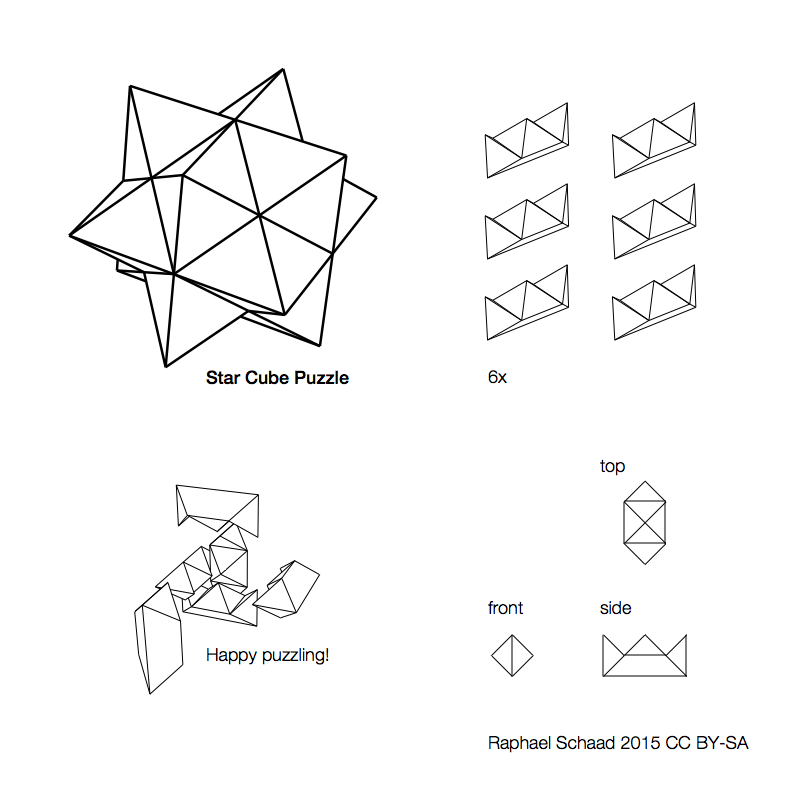
Make your own by fabricating (3D printing, CNC milling, casting, …) this part (.obj) 6x.
3D Printers in the Shop
Currently we have two well working Ultimakers 2. They can print without support structures. If they print support structures, they are printed with the same material. Then we have two bigger machines from Stratasys (Dimension Elite in the corner and Objet Eden260VS by the door) that always print support structures and do so with a different material that then gets removed with WaterWorks detergent in the Stratasys ultrasonic cleaner, which is located next to the electronics shop. To print on those we email an .stl to Tom (3dprint@cba.mit.edu). We also have a Form 1 but resin printers are messy and it’s currently not working.
Meshes should be more or less watertight, printers will usually be graceful about slightly open meshes though.
Characterizing a 3D Printer
It’s good to characterize a machine by printing a piece that is designed to test:
- How sharp can an edge be (without it ripping off)?
- How thin can a wall be (Dan says 2mm is good)?
- How close can we get a moving part to pass through a fixed part?
- How much overhang can we get without supports?
- How much does a 45° overhang end up curving, especially at the base?
- Feature size: what dimensions do we actually get back (e.g. see Amandaʼs test piece)?
Cura for Ultimaker
- Because we already know the Ultimaker 2 machines, I could start with the recommended settings (Dan made a test print).
- I used Cura on the Windows workstation (fab/fab) to translate my model into printing instructions (.gcode) and transfer them to the Ultimaker 2 with an SD card.
- Place the object close to the Ultimaker sign, which translates to the back of the physical platform. The reason for this is that itʼs closer to the printing arm and leads to more accurate prints.
- (in quickprint mode) “Fast print”: if the machine is new and well calibrated then this mode is significantly faster, almost the same quality (surface slightly rougher and canʼt go below ~0.5mm resolution), and in a few cases even created better results with overhangs.
- (in quickprint mode) Print support structure: does it algorithmically, sometimes itʼs better to design them manually.
- Tools > Print one at a time: this completes one object all the way to the top before moving on to the next one and is recommended when thereʼs enough space and no object is too tall because it leads to better results.
- Scale and exporting: 1 unit in Antimony results in 1mm in Cura (without any post-import scaling). The resolution of the export does not change that relationship (it’s usually best to leave the default settings of 58 voxels per unit [63 ✕ 63 ✕ 63]). For my piece I used 1 as a base unit for the radius of the sphere in Antimony and made the wall a 10th of the radius. Since I wanted the recommended wall thickness of 2mm I had to scale my model in Cura to a size of 40mm (2mm ✕ 10 for radius ✕ 2 for diameter).
Printing Material
PLA is the easiest and warps the least due to its low extrusion temperature. It also has great adherence and doesn’t require glue stick on the platform. For CPE and ABS applying some glue with a moist paper towel to the platform can be beneficial. I couldn’t find what CPE stands for, but it seems UM internal lingo and was formerly known as U-PET.
Filament comparions guides by MatterHackers and Nick Lievendag.
Outlook
- Spoon or mug (because I need both) but FDM prints might leak and prints from the big machine might not be food safe.
- Replicate nano blocks and build something cool out of parts.
- Leonardo da Vinci illustration for Luca Pacioliʼs 1509 book De Divina Proportione (The Divine Proportion). Also see: List of Wenninger polyhedron models
- Ball and socket joint
Portrait
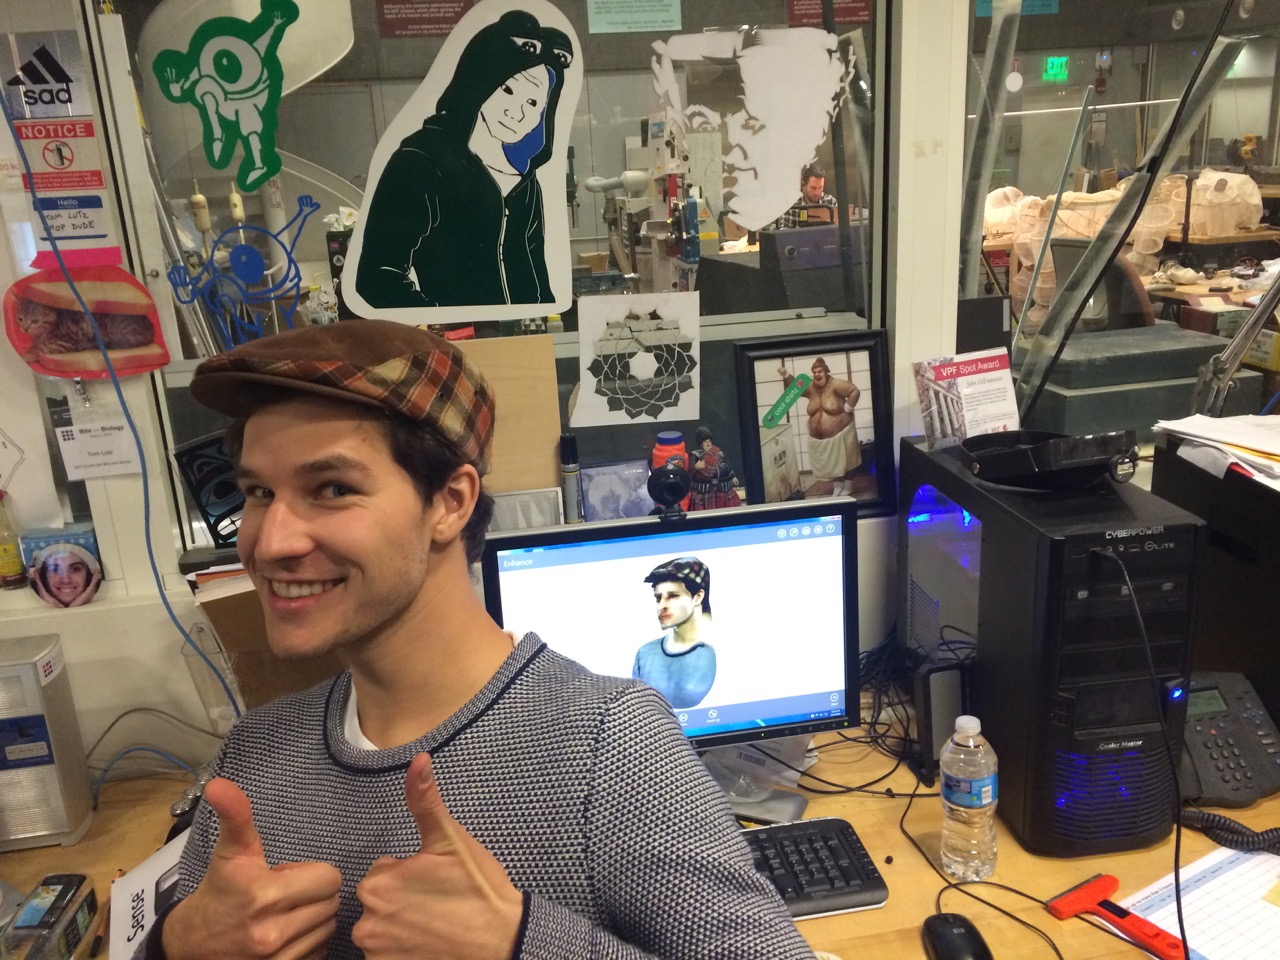
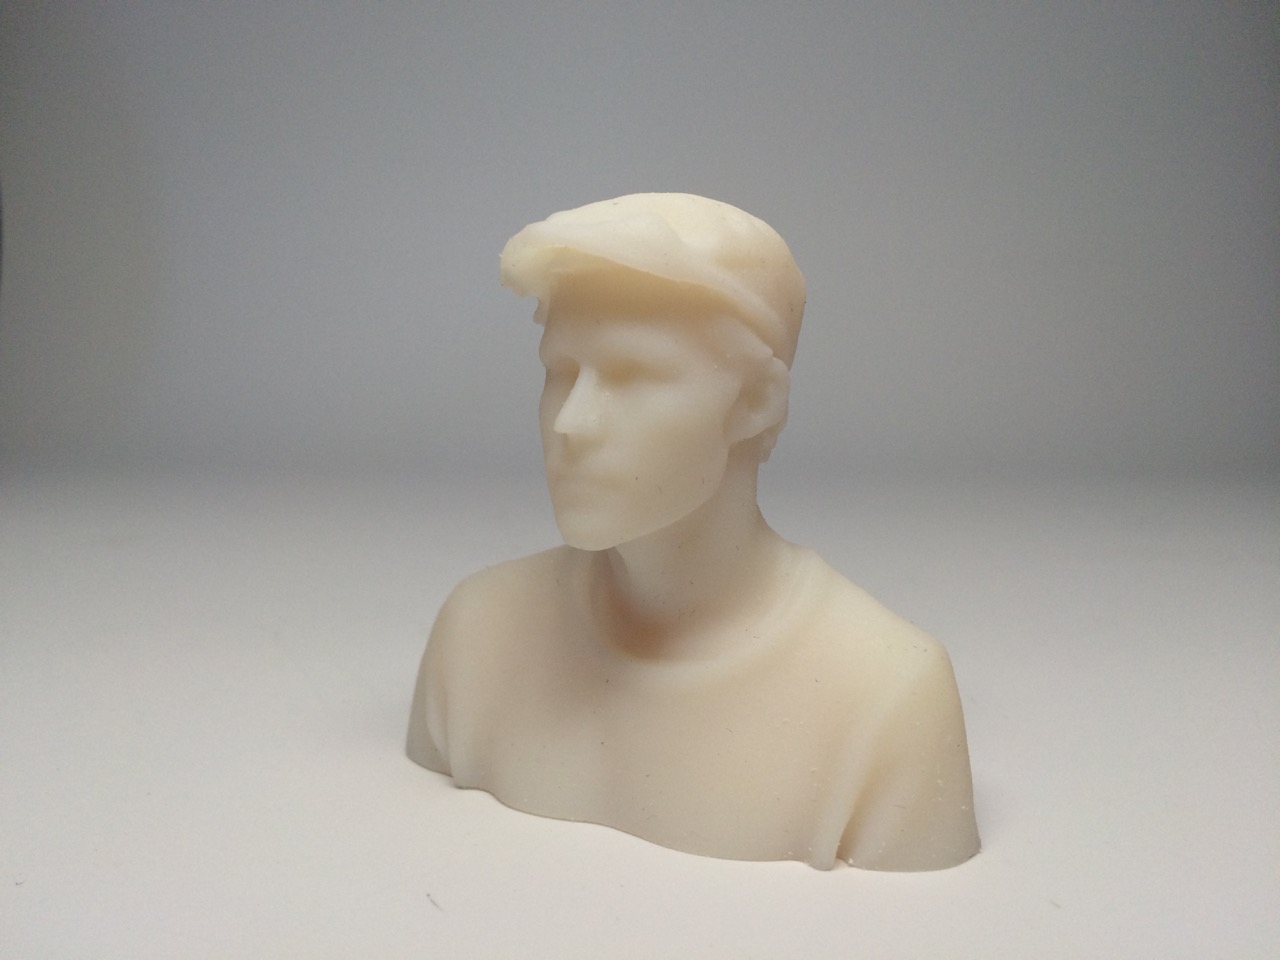
I asked Eric to scan a portrait of me with the Sense connected to the Windows workstation (MAS863/FabClass15). It often lost tracking and the resuling model was bad. I then mounted the Sense on a selfie stick and turned myself on a rotating chair. I asked Ali to adjust the height and angle of the Sense while I was doing three consecuitive turns. The resulting scan was better.
I used the cut, fill, and retouch tool in the scanning software to improve the model.
I exported the model as .obj, .ply, and .stl.
To view the model on my Mac, I first tried the free Autodesk FBX Review from the Mac App Store. Unfortunately it didnʼt display the color.
We also have the stationary NextEngine 3D scanner hooked to another Windows workstation (MAS863/FabClass15) with the software ScanStudio. This scanner might be better for small objects.
123D Catch
This photogrammetry iPhone app creates impressive results. The viewer to embed models in websites is poor (design, interactivity, initial viewport) and there’s better solutions for that (see Sketchfab below). Update 2018: All of 123D has been discontinued in 2017 and I can’t retrieve my public 123D profile with viewable and downloadable models of my scans. Catch became a feature of ReCap Pro (formerly known as Memento) called ReCap Photo, the software is paid and Windows only, and there is no free or standalone photogrammetry solution from Autodesk anymore. New, untested alternatives might be Trnio and Qlone.
When capturing the scene it’s counterintuitively better to not have a flat white background but instead have a background with texture. If you think about it some more it makes sense. Just like a computer mouse, there needs to be background information to track.
I imported the resulting models in a newly created Sketchfab account, a platform that allows me to share 3D models for others to download and to view via an embeddable 3D model viewer. When exporting textured models from Rhino, you need to import the .mtl (material) file alongside the .obj (geometry) to Sketchfab. Rhino also exports a .png texture file, which must be uploaded additionally in Sketchfab under Materials > Diffuse > Texture > Manage Textures > Import Texture. Rhino materials that don’t have a texture such as translucent plexiglas or glossy white plastic can be approximated well with Sketchfab’s material and light settings. Here’s my public Sketchfab profile.
Portrait 3D Scan, using the Sense 3D scanner
Portrait 3D Scan (of the 3D printed Portrait), using the 123D Catch iPhone app
Design Recitation
There’s a lot of implicit design in this class. Justin A. Lavallee and Nathan Melenbrink offer approaching the class with a design process and/or design crits (critiques) in a studio environment.